Язык программирования Rust
авторы: Steve Klabnik, Carol Nichols и Chris Krycho при участии сообщества Rust
Эта версия текста предполагает, что вы используете Rust 1.90.0 (выпущенный
18.09.2025) или более позднюю версию с edition = "2024" в файле
Cargo.toml всех проектов для настройки их в соответствии с идиомами
редакции Rust 2024. Инструкции по установке или обновлению Rust см. в разделе
«Установка» главы 1, а информацию о редакциях Rust —
в Приложении E.
HTML-версия доступна онлайн по адресу
https://doc.rust-lang.org/stable/book/
а также офлайн при установке Rust через rustup; выполните rustup doc --book, чтобы открыть книгу.
Также доступны несколько переводов, подготовленных сообществом.
Этот текст доступен в печатном формате и формате электронных книг от No Starch Press.
🚨 Хотите получить более интерактивный опыт обучения? Попробуйте другую версию Rust Book, в которой доступны: тесты, подсветка, визуализации и многое другое: https://rust-book.cs.brown.edu
Предисловие
Язык программирования Rust прошёл большой путь за сравнительно короткое время: от создания и становления в небольшом, только зарождавшемся сообществе энтузиастов до статуса одного из самых любимых и востребованных языков программирования в мире. Оглядываясь назад, можно сказать, что мощь и потенциал Rust неизбежно должны были привлечь внимание и позволить языку занять место в системном программировании.
Но вовсе не было предопределено, что интерес к Rust и инновации вокруг него вырастут до мирового масштаба, проникнут в сообщества открытого ПО и станут катализатором широкого внедрения языка в разных отраслях.
Сегодня легко указать на впечатляющие возможности Rust, чтобы объяснить этот взрыв интереса и распространения. Кто не хочет получить безопасность памяти, высокую производительность, дружелюбный компилятор, отличный набор инструментов и множество других преимуществ? Rust, который вы видите сегодня, объединяет многолетние исследования в области системного программирования с практической мудростью активного и увлечённого сообщества.
Этот язык был спроектирован осознанно и создан с большим вниманием к деталям, предоставляя разработчикам инструмент, который облегчает написание безопасного, быстрого и надёжного кода.
Но по-настоящему особенным Rust делает его стремление помогать вам, пользователю, достигать своих целей. Это язык, который помогает вам добиться успеха, а идея дать пользователю больше возможностей проходит через основу сообщества, которое создаёт, поддерживает и продвигает этот язык. Со времени предыдущего издания этой авторитетной книги Rust ещё сильнее развился и стал по-настоящему глобальным языком, которому доверяют.
Проект Rust теперь надёжно поддерживается Rust Foundation, которая также инвестирует в ключевые инициативы, обеспечивающие безопасность, стабильность и устойчивое развитие Rust.
Это издание The Rust Programming Language представляет собой масштабное обновление: оно отражает эволюцию языка за прошедшие годы и содержит новую ценную информацию. Однако это не просто руководство по синтаксису и библиотекам — это приглашение стать частью сообщества, которое ценит качество, производительность и продуманный дизайн.
Независимо от того, являетесь ли вы опытным разработчиком, который впервые хочет познакомиться с Rust, или опытным Rustacean, стремящимся улучшить свои навыки, в этом издании найдётся что-то полезное для каждого.
Путь Rust всегда строился на сотрудничестве, обучении и постоянных улучшениях. Рост языка и его экосистемы напрямую отражает активное и разнообразное сообщество, стоящее за ним. Вклад тысяч разработчиков — от создателей ядра языка до обычных участников — делает Rust настолько уникальным и мощным инструментом. Взяв в руки эту книгу, вы не просто изучаете новый язык программирования — вы становитесь частью движения, цель которого — сделать программное обеспечение лучше, безопаснее и приятнее в работе.
Добро пожаловать в сообщество Rust!
- Bec Rumbul, исполнительный директор Rust Foundation
Введение
Примечание: Это издание книги идентично книге The Rust Programming Language, доступной в печатном формате и в формате электронной книги от No Starch Press.
Добро пожаловать в The Rust Programming Language — вводную книгу по Rust. Язык программирования Rust помогает писать более быстрое и надёжное программное обеспечение. Высокоуровневое удобство разработки и низкоуровневый контроль часто противоречат друг другу при проектировании языков программирования; Rust бросает вызов этому противоречию. За счёт баланса между мощными техническими возможностями и качественным опытом разработки Rust даёт вам возможность контролировать низкоуровневые детали (например, использование памяти) без всех сложностей, которые традиционно связаны с таким уровнем контроля.
Для кого предназначен Rust
Rust идеально подходит многим людям по самым разным причинам. Рассмотрим несколько наиболее важных групп.
Команды разработчиков
Rust показывает себя как продуктивный инструмент для совместной работы больших команд разработчиков с разным уровнем знаний в области системного программирования. Низкоуровневый код подвержен различным трудноуловимым ошибкам, которые в большинстве других языков можно обнаружить только с помощью обширного тестирования и тщательного анализа кода опытными разработчиками. В Rust компилятор выполняет роль своеобразного контролёра, отказываясь компилировать код с подобными труднообнаружимыми ошибками, включая ошибки конкурентности. Работая совместно с компилятором, команда может сосредоточить своё время на логике программы вместо поиска ошибок.
Rust также приносит в мир системного программирования современные инструменты разработки:
- Cargo — встроенный менеджер зависимостей и инструмент сборки — делает добавление, компиляцию и управление зависимостями простыми и единообразными для всей экосистемы Rust.
- Инструмент форматирования
rustfmtобеспечивает единый стиль написания кода для всех разработчиков. - Rust Language Server обеспечивает интеграцию со средами разработки (IDE), предоставляя автодополнение кода и встроенные сообщения об ошибках.
Используя эти и другие инструменты экосистемы Rust, разработчики могут оставаться продуктивными при написании системного кода.
Студенты
Rust подходит студентам и всем, кто заинтересован в изучении системных концепций. Используя Rust, многие люди познакомились с такими темами, как разработка операционных систем. Сообщество очень дружелюбно и охотно отвечает на вопросы студентов. Благодаря таким инициативам, как эта книга, команда Rust стремится сделать системные концепции более доступными для большего числа людей, особенно для тех, кто только начинает знакомство с программированием.
Компании
Сотни компаний — как крупных, так и небольших — используют Rust в производственной среде для самых разных задач, включая инструменты командной строки, веб-сервисы, DevOps-инструменты, встроенные устройства, анализ и транскодирование аудио и видео, криптовалюты, биоинформатику, поисковые системы, приложения Интернета вещей (IoT), машинное обучение и даже значительные части веб-браузера Firefox.
Разработчики открытого исходного кода
Rust предназначен для людей, которые хотят развивать язык программирования Rust, сообщество, инструменты разработки и библиотеки. Мы будем рады вашему участию в развитии языка Rust.
Люди, которые ценят скорость и стабильность
Rust предназначен для людей, которым важны скорость и стабильность языка. Под скоростью мы подразумеваем как скорость выполнения кода Rust, так и скорость, с которой Rust позволяет создавать программы. Проверки компилятора Rust обеспечивают стабильность при добавлении новых возможностей и рефакторинге. Это противопоставляется хрупкому устаревшему коду в языках без подобных проверок, который разработчики часто опасаются изменять. Стремясь к созданию абстракций с нулевой стоимостью (zero-cost abstractions) — высокоуровневых возможностей, которые компилируются в низкоуровневый код с той же скоростью, что и написанный вручную, — Rust стремится сделать безопасный код также и быстрым.
Rust также стремится поддерживать множество других пользователей; здесь перечислены лишь некоторые из наиболее значимых групп. В целом главная цель Rust — устранить компромиссы, которые программисты были вынуждены принимать десятилетиями, предоставляя безопасность и продуктивность, скорость и удобство разработки (ergonomics). Попробуйте Rust и посмотрите, подходят ли вам предлагаемые им решения.
Для кого предназначена эта книга
Эта книга предполагает, что вы уже писали код на каком-либо другом языке программирования, однако не делает предположений о том, на каком именно. Мы постарались сделать материал доступным для людей с самым разным опытом в программировании. Мы не уделяем много времени объяснению того, что такое программирование и как о нём думать. Если вы совсем новичок в программировании, вам лучше подойдёт книга, специально предназначенная для знакомства с основами программирования.
Как использовать эту книгу
В целом эта книга предполагает, что вы читаете её последовательно — от начала до конца. Более поздние главы опираются на концепции, представленные в ранних главах, а ранние главы могут не углубляться в детали определённой темы, возвращаясь к ней позднее.
В этой книге вы встретите два типа глав: концептуальные главы и главы, посвящённые проектам. В концептуальных главах вы будете изучать отдельные аспекты Rust. В главах, посвящённых проектам, мы будем вместе создавать небольшие программы, применяя всё, что вы уже изучили. Главы 2, 12 и 21 относятся к проектным главам; остальные являются концептуальными.
Глава 1 объясняет, как установить Rust, как написать программу «Привет, мир!», а также как использовать Cargo — менеджер пакетов и инструмент сборки Rust. Глава 2 представляет собой практическое введение в написание программ на Rust, в котором вы создадите игру по угадыванию числа. Здесь мы рассматриваем концепции на высоком уровне, а в последующих главах будут представлены дополнительные подробности. Если вы хотите сразу приступить к практике, то Глава 2 — подходящее место. Если же вы относитесь к числу особенно внимательных учащихся и предпочитаете изучить каждую деталь перед переходом к следующему материалу, вы можете пропустить Главу 2 и сразу перейти к Главе 3, которая рассматривает возможности Rust, похожие на возможности других языков программирования; после этого вы сможете вернуться к Главе 2, когда захотите поработать над проектом, применяя изученные детали.
В Главе 4 вы познакомитесь с системой владения (ownership) Rust.
Глава 5 рассматривает структуры и методы. Глава 6 посвящена
перечислениям, выражениям match, а также конструкциям управления потоком
if let и let...else. Вы будете использовать структуры и перечисления
для создания собственных типов.
В Главе 7 вы познакомитесь с системой модулей Rust и правилами приватности для организации вашего кода и его публичного интерфейса программирования приложений (API). Глава 8 рассматривает некоторые распространённые структуры данных коллекций, предоставляемые стандартной библиотекой: векторы, строки и HashMap. Глава 9 исследует философию и подходы Rust к обработке ошибок.
Глава 10 подробно рассматривает дженерики (generics), трейты и времена
жизни (lifetimes), которые дают возможность определять код, применимый сразу
к нескольким типам. Глава 11 полностью посвящена тестированию, которое,
даже при наличии гарантий безопасности Rust, остаётся необходимым для
обеспечения корректности логики программы. В Главе 12 мы создадим
собственную реализацию части функциональности инструмента командной строки
grep, который выполняет поиск текста внутри файлов. Для этого мы будем
использовать многие концепции, обсуждавшиеся в предыдущих главах.
Глава 13 рассматривает замыкания и итераторы — возможности Rust, пришедшие из функциональных языков программирования. В Главе 14 мы более подробно изучим Cargo и обсудим лучшие практики распространения ваших библиотек. Глава 15 рассматривает умные указатели, предоставляемые стандартной библиотекой, а также трейты, обеспечивающие их функциональность.
В Главе 16 мы рассмотрим различные модели конкурентного программирования
и поговорим о том, как Rust помогает бесстрашно работать с несколькими
потоками. В Главе 17 мы продолжим эту тему, изучив синтаксис async и
await в Rust, а также задачи (tasks), Future и потоки (streams), вместе с
лёгкой моделью конкурентности, которую они предоставляют.
Глава 18 рассматривает, как идиомы Rust соотносятся с принципами объектно-ориентированного программирования, с которыми вы, возможно, уже знакомы. Глава 19 представляет собой справочник по шаблонам и сопоставлению с шаблонами (pattern matching) — мощным способам выражения идей в программах на Rust. Глава 20 содержит набор продвинутых тем, включая unsafe Rust, макросы и дополнительные сведения о временах жизни, трейтах, типах, функциях и замыканиях.
В Главе 21 мы завершим проект, реализовав низкоуровневый многопоточный веб-сервер!
Наконец, несколько приложений содержат полезную справочную информацию о языке. Приложение A посвящено ключевым словам Rust, Приложение B — операторам и символам Rust, Приложение C — автоматически выводимым трейтам, предоставляемым стандартной библиотекой, Приложение D содержит некоторые полезные инструменты разработки, а Приложение E объясняет редакции Rust. В Приложении F вы сможете найти переводы книги, а в Приложении G мы рассмотрим, как создаётся Rust и что представляет собой nightly Rust.
Не существует неправильного способа читать эту книгу: если хотите перейти вперёд — переходите! Возможно, вам придётся вернуться к предыдущим главам, если что-то вызовет затруднения. Но делайте так, как удобнее именно вам.
Важной частью изучения Rust является умение читать сообщения об ошибках, которые выводит компилятор: именно они будут направлять вас к рабочему коду. Поэтому мы приведём множество примеров, которые не компилируются, вместе с сообщениями об ошибках, которые компилятор покажет в каждом случае. Помните, что если вы введёте и запустите случайный пример, он может не скомпилироваться! Обязательно читайте окружающий текст, чтобы понять, предназначен ли пример для демонстрации ошибки. В большинстве ситуаций мы покажем правильную версию кода, который не компилируется. Ferris также поможет вам отличить код, который не должен работать:
| Ferris | Значение |
|---|---|
 | Этот код не компилируется! |
 | Этот код вызывает панику (panic!)! |
 | Этот код не даёт ожидаемого поведения. |
В большинстве случаев мы будем показывать правильную версию кода, который не компилируется.
Исходный код
Исходные файлы, на основе которых генерируется эта книга, доступны на GitHub.
Начало работы
Давайте начнём ваше путешествие в Rust!
Предстоит узнать многое, но каждое путешествие с чего-то начинается.
В этой главе мы обсудим:
- установку Rust на Linux, macOS и Windows;
- написание программы,
которая выводит
Hello, world!; - использование
cargo, менеджера пакетов и системы сборки Rust.
Установка
Установка
Первый шаг — установить Rust.
Мы загрузим Rust с помощью rustup —
инструмента командной строки
для управления версиями Rust
и связанными инструментами.
Для загрузки потребуется подключение
к интернету.
Примечание: если по какой-либо причине вы предпочитаете не использовать
rustup, см. страницу Другие способы установки Rust, где доступны дополнительные варианты.
Следующие шаги установят последнюю стабильную версию компилятора Rust. Гарантии стабильности Rust обеспечивают, что все примеры из книги, которые компилируются, будут продолжать компилироваться и с более новыми версиями Rust.
Вывод может немного отличаться между версиями, потому что Rust часто улучшает сообщения об ошибках и предупреждения.
Иными словами, любая более новая стабильная версия Rust, установленная с помощью этих шагов, должна работать с материалом этой книги так, как ожидается.
Обозначения командной строки
В этой главе и далее по всей книге мы будем показывать команды, используемые в терминале.
Строки, которые нужно вводить в терминале,
начинаются с $.
Сам символ $ вводить не нужно:
это приглашение командной строки,
показывающее начало каждой команды.
Строки, которые не начинаются с $,
обычно показывают вывод
предыдущей команды.
Кроме того,
в примерах, специфичных для PowerShell,
вместо $ будет использоваться >.
Установка rustup на Linux или macOS
Если вы используете Linux или macOS, откройте терминал и введите следующую команду:
$ curl --proto '=https' --tlsv1.2 https://sh.rustup.rs -sSf | sh
Эта команда загрузит скрипт
и запустит установку инструмента rustup,
который установит последнюю
стабильную версию Rust.
Возможно, вам будет предложено
ввести пароль.
Если установка прошла успешно, появится следующая строка:
Rust is installed now. Great!
Вам также понадобится компоновщик (linker) — программа, которую Rust использует, чтобы объединить результаты компиляции в один файл. Скорее всего, он у вас уже есть.
Если вы получите ошибки компоновщика, нужно установить C-компилятор, который обычно включает компоновщик. C-компилятор также полезен потому, что некоторые распространённые пакеты Rust зависят от C-кода и требуют C-компилятор.
На macOS C-компилятор можно получить, выполнив:
$ xcode-select --install
Пользователям Linux обычно следует установить GCC или Clang в соответствии с документацией своего дистрибутива.
Например, если вы используете Ubuntu,
можно установить пакет build-essential.
Установка rustup на Windows
На Windows перейдите по адресу https://www.rust-lang.org/tools/install и следуйте инструкциям по установке Rust.
На одном из этапов установки вам будет предложено установить Visual Studio. Она предоставляет компоновщик и нативные библиотеки, необходимые для компиляции программ.
Если вам нужна дополнительная помощь с этим шагом, см. https://rust-lang.github.io/rustup/installation/windows-msvc.html.
В остальной части книги используются команды, которые работают как в cmd.exe, так и в PowerShell.
Если будут конкретные различия, мы объясним, что использовать.
Устранение неполадок
Чтобы проверить, правильно ли установлен Rust, откройте командную оболочку и введите эту строку:
$ rustc --version
Вы должны увидеть номер версии, хеш коммита и дату коммита последней выпущенной стабильной версии в следующем формате:
rustc x.y.z (abcabcabc yyyy-mm-dd)
Если вы видите эту информацию, Rust установлен успешно!
Если вы не видите эту информацию,
проверьте,
что Rust находится в системной переменной
%PATH%,
как показано ниже.
В Windows CMD используйте:
> echo %PATH%
В PowerShell используйте:
> echo $env:Path
В Linux и macOS используйте:
$ echo $PATH
Если всё указано правильно, но Rust всё ещё не работает, есть несколько мест, где можно получить помощь.
Узнайте, как связаться с другими Rustaceans (так мы в шутку называем себя), на странице сообщества.
Обновление и удаление
После установки Rust через rustup
обновиться до новой выпущенной версии
легко.
В командной оболочке выполните следующий скрипт обновления:
$ rustup update
Чтобы удалить Rust и rustup,
выполните следующий скрипт удаления
из командной оболочки:
$ rustup self uninstall
Чтение локальной документации
Установка Rust также включает локальную копию документации, чтобы её можно было читать офлайн.
Выполните rustup doc,
чтобы открыть локальную документацию
в браузере.
Каждый раз, когда тип или функция предоставляются стандартной библиотекой, а вы не уверены, что они делают или как их использовать, обращайтесь к документации интерфейса программирования приложений (API)!
Использование текстовых редакторов и IDE
Эта книга не предполагает, какие инструменты вы используете для написания Rust-кода.
Почти любой текстовый редактор справится с этой задачей!
Однако многие текстовые редакторы и интегрированные среды разработки (IDE) имеют встроенную поддержку Rust.
Достаточно актуальный список многих редакторов и IDE всегда можно найти на странице инструментов на сайте Rust.
Работа с этой книгой офлайн
В нескольких примерах мы будем использовать пакеты Rust за пределами стандартной библиотеки.
Чтобы пройти эти примеры, вам потребуется либо подключение к интернету, либо заранее загруженные зависимости.
Чтобы заранее загрузить зависимости, можно выполнить следующие команды.
Позже мы подробно объясним,
что такое cargo
и что делает каждая из этих команд.
$ cargo new get-dependencies
$ cd get-dependencies
$ cargo add rand@0.10.1 trpl@0.2.0
Это закеширует загрузки этих пакетов, поэтому позже вам не понадобится скачивать их снова.
После выполнения этой команды
папку get-dependencies
сохранять не нужно.
Если вы выполнили эту команду,
можно использовать флаг --offline
со всеми командами cargo
в оставшейся части книги,
чтобы использовать эти закешированные версии,
а не пытаться обращаться к сети.
Привет, мир!
Привет, мир!
Теперь, когда вы установили Rust, пришло время написать свою первую программу
на Rust. При изучении нового языка существует традиция начинать с небольшой
программы, которая выводит на экран текст Hello, world!, поэтому мы сделаем
то же самое!
Примечание: Эта книга предполагает базовое знакомство с командной строкой. Rust не предъявляет особых требований к редактору, инструментам или месту, где будет находиться ваш код, поэтому, если вы предпочитаете использовать IDE вместо командной строки, можете свободно использовать свою любимую IDE. Многие IDE уже имеют определённую степень поддержки Rust; подробности смотрите в документации вашей IDE. Команда Rust сосредоточила внимание на обеспечении качественной поддержки IDE через
rust-analyzer. Подробнее смотрите в Приложении D.
Настройка каталога проекта
Для начала создадим каталог для хранения вашего Rust-кода. Для Rust не имеет значения, где расположен код, но для упражнений и проектов из этой книги мы рекомендуем создать каталог projects в вашем домашнем каталоге и хранить там все свои проекты.
Откройте терминал и введите следующие команды, чтобы создать каталог projects и каталог для проекта «Hello, world!» внутри каталога projects.
Для Linux, macOS и PowerShell в Windows введите следующее:
$ mkdir ~/projects
$ cd ~/projects
$ mkdir hello_world
$ cd hello_world
Для Windows CMD введите:
> mkdir "%USERPROFILE%\projects"
> cd /d "%USERPROFILE%\projects"
> mkdir hello_world
> cd hello_world
Основы программы на Rust
Теперь создайте новый исходный файл и назовите его main.rs. Файлы Rust всегда имеют расширение .rs. Если в имени файла используется более одного слова, общепринято разделять их символом подчёркивания. Например, используйте hello_world.rs, а не helloworld.rs.
Теперь откройте только что созданный файл main.rs и введите код из листинга 1-1.
fn main() {
    println!("Hello, world!");
}Hello, world!Сохраните файл и вернитесь в окно терминала, находясь в каталоге ~/projects/hello_world. В Linux или macOS введите следующие команды для компиляции и запуска файла:
$ rustc main.rs
$ ./main
Hello, world!
В Windows вместо ./main используйте команду .\main:
> rustc main.rs
> .\main
Hello, world!
Независимо от используемой операционной системы, в терминале должна появиться
строка Hello, world!. Если этот вывод не появился, вернитесь к разделу
«Устранение неполадок» в разделе установки,
чтобы узнать способы получения помощи.
Если Hello, world! успешно вывелось, поздравляем! Вы официально написали
программу на Rust. Это делает вас программистом Rust — добро пожаловать!
Анатомия программы на Rust
Давайте подробно разберём программу «Hello, world!». Вот первая часть:
fn main() {

}
Эти строки определяют функцию с именем main. Функция main является
особенной: именно она всегда выполняется первой в каждой исполняемой программе
на Rust. Здесь первая строка объявляет функцию с именем main, которая не
имеет параметров и ничего не возвращает. Если бы параметры были, они
располагались бы внутри круглых скобок (()).
Тело функции заключено в {}. Rust требует использовать фигурные скобки для
тел всех функций. Хорошим стилем считается размещение открывающей фигурной
скобки на той же строке, что и объявление функции, оставляя между ними один
пробел.
Примечание: Если вы хотите придерживаться единого стиля во всех проектах Rust, вы можете использовать инструмент автоматического форматирования
rustfmt, который форматирует код в определённом стиле (подробнее оrustfmtсм. в Приложении D). Команда Rust включает этот инструмент в стандартную поставку Rust, как иrustc, поэтому он уже должен быть установлен на вашем компьютере!
Тело функции main содержит следующий код:
#![allow(unused)]
fn main() {
println!("Hello, world!");
}
Эта строка выполняет всю работу в нашей маленькой программе: она выводит текст на экран. Здесь следует обратить внимание на три важных детали.
Во-первых, println! вызывает макрос Rust. Если бы вызывалась функция, запись
выглядела бы как println (без !). Макросы Rust представляют собой способ
написания кода, который генерирует код для расширения синтаксиса Rust, и мы
рассмотрим их подробнее в Главе 20. Сейчас вам
достаточно знать, что использование ! означает вызов макроса вместо обычной
функции и что макросы не всегда подчиняются тем же правилам, что и функции.
Во-вторых, обратите внимание на строку "Hello, world!". Мы передаём эту
строку в качестве аргумента для println!, и строка выводится на экран.
В-третьих, мы завершаем строку точкой с запятой (;), которая показывает,
что текущее выражение завершено и следующее готово к началу выполнения.
Большинство строк кода Rust заканчиваются точкой с запятой.
Компиляция и выполнение
Вы только что запустили вновь созданную программу, поэтому давайте рассмотрим каждый шаг этого процесса.
Перед запуском программы на Rust её необходимо скомпилировать с помощью
компилятора Rust, введя команду rustc и передав ей имя исходного файла:
$ rustc main.rs
Если у вас есть опыт работы с C или C++, вы заметите сходство с gcc
или clang. После успешной компиляции Rust создаёт исполняемый бинарный
файл.
В Linux, macOS и PowerShell в Windows вы можете увидеть исполняемый файл,
выполнив в оболочке команду ls:
$ ls
main  main.rs
В Linux и macOS вы увидите два файла. В PowerShell на Windows вы увидите те же три файла, что и при использовании CMD. В CMD на Windows нужно выполнить следующую команду:
> dir /B %= параметр /B указывает выводить только имена файлов =%
main.exe
main.pdb
main.rs
Это показывает исходный файл кода с расширением .rs, исполняемый файл (main.exe в Windows и main на всех остальных платформах), а также, при использовании Windows, файл с отладочной информацией с расширением .pdb. После этого вы запускаете файл main или main.exe следующим образом:
$ ./main # или .\main в Windows
Если файл main.rs содержит программу «Hello, world!», эта команда выведет
Hello, world! в ваш терминал.
Если вы больше знакомы с динамическими языками, такими как Ruby, Python или JavaScript, вы, возможно, не привыкли к тому, что компиляция и выполнение программы являются отдельными шагами. Rust является языком с предварительной компиляцией (ahead-of-time compiled), что означает, что вы можете скомпилировать программу и передать исполняемый файл другому человеку, и он сможет запустить её даже без установленного Rust. Если вы передадите кому-либо файл .rb, .py или .js, у него должна быть установлена соответствующая реализация Ruby, Python или JavaScript. Но в этих языках обычно требуется только одна команда для компиляции и запуска программы. В проектировании языков всё является компромиссом.
Использование только rustc подходит для простых программ, однако по мере
роста проекта вам потребуется управлять различными параметрами и упростить
совместное использование кода. Далее мы познакомим вас с инструментом Cargo,
который поможет создавать реальные приложения на Rust.
Привет, Cargo!
Привет, Cargo!
Cargo — это система сборки и менеджер пакетов Rust. Большинство Rustacean используют этот инструмент для управления своими проектами на Rust, поскольку Cargo берёт на себя множество задач, таких как сборка вашего кода, загрузка библиотек, от которых зависит код, и сборка этих библиотек. (Библиотеки, которые требуются вашему коду, называются зависимостями.)
Простейшие программы Rust, подобные той, что мы писали до этого, не имеют зависимостей. Если бы мы создавали проект «Hello, world!» с использованием Cargo, использовалась бы только часть Cargo, отвечающая за сборку кода. Однако по мере написания более сложных программ вы начнёте добавлять зависимости, и если проект изначально создан с использованием Cargo, добавление зависимостей будет значительно проще.
Поскольку подавляющее большинство проектов Rust использует Cargo, оставшаяся часть этой книги предполагает, что вы также используете Cargo. Cargo устанавливается вместе с Rust, если вы использовали официальные установщики, описанные в разделе «Установка». Если вы устанавливали Rust другим способом, проверьте наличие Cargo, выполнив в терминале следующую команду:
$ cargo --version
Если вы видите номер версии, значит Cargo установлен! Если появляется ошибка,
например command not found, обратитесь к документации используемого метода
установки, чтобы узнать, как установить Cargo отдельно.
Создание проекта с помощью Cargo
Давайте создадим новый проект с использованием Cargo и посмотрим, чем он отличается от нашего первоначального проекта «Hello, world!». Вернитесь в каталог projects (или туда, где вы решили хранить код). Затем в любой операционной системе выполните:
$ cargo new hello_cargo
$ cd hello_cargo
Первая команда создаёт новый каталог и проект с именем hello_cargo. Мы назвали проект hello_cargo, а Cargo создаёт свои файлы в каталоге с таким же именем.
Перейдите в каталог hello_cargo и выведите список файлов. Вы увидите, что Cargo сгенерировал два файла и один каталог: файл Cargo.toml и каталог src, содержащий файл main.rs.
Cargo также инициализировал новый Git-репозиторий вместе с файлом
.gitignore. Git-файлы не будут созданы, если cargo new выполняется
внутри уже существующего Git-репозитория; это поведение можно изменить,
используя cargo new --vcs=git.
Примечание: Git является распространённой системой контроля версий. Вы можете изменить
cargo new, чтобы использовать другую систему контроля версий или не использовать её вовсе, применяя флаг--vcs. Выполнитеcargo new --help, чтобы увидеть доступные параметры.
Откройте Cargo.toml в предпочитаемом вами текстовом редакторе. Он должен выглядеть примерно так, как показано в листинге 1-2.
[package]
name = "hello_cargo"
version = "0.1.0"
edition = "2024"

[dependencies]
cargo newЭтот файл использует формат TOML (Tom’s Obvious, Minimal Language), который является форматом конфигурации Cargo.
Первая строка [package] представляет собой заголовок секции, указывающий,
что последующие параметры относятся к настройке пакета. По мере добавления
новой информации в этот файл мы будем добавлять и другие секции.
Следующие три строки задают информацию конфигурации, необходимую Cargo для
компиляции программы: имя, версию и используемую редакцию Rust. О ключе
edition мы поговорим в Приложении E.
Последняя строка [dependencies] обозначает начало секции, в которой
перечисляются зависимости проекта. В Rust пакеты кода называются
крейтами (crates). Для данного проекта нам не понадобятся дополнительные
крейты, однако они понадобятся нам в первом проекте Главы 2, поэтому мы
вернёмся к этой секции позже.
Теперь откройте src/main.rs и посмотрите его содержимое:
Имя файла: src/main.rs
fn main() {
    println!("Hello, world!");
}
Cargo сгенерировал для вас программу «Hello, world!», точно такую же, как мы написали в листинге 1-1! Пока различия между нашим проектом и проектом, созданным Cargo, заключаются в том, что Cargo поместил код в каталог src, а в корневом каталоге находится конфигурационный файл Cargo.toml.
Cargo предполагает, что исходные файлы находятся внутри каталога src. Каталог верхнего уровня проекта предназначен только для файлов README, лицензионной информации, файлов конфигурации и всего остального, что не относится непосредственно к коду. Использование Cargo помогает организовать проекты: для каждой вещи существует своё место, и всё находится на своих местах.
Если вы начали проект без использования Cargo, как мы делали с проектом
«Hello, world!», вы можете преобразовать его в проект Cargo. Переместите код
проекта в каталог src и создайте соответствующий файл Cargo.toml.
Один из простых способов получить этот файл — выполнить cargo init,
который создаст его автоматически.
Сборка и запуск проекта Cargo
Теперь посмотрим, чем отличается сборка и запуск программы «Hello, world!» с использованием Cargo. Из каталога hello_cargo соберите проект, выполнив следующую команду:
$ cargo build
   Compiling hello_cargo v0.1.0 (file:///projects/hello_cargo)
    Finished dev [unoptimized + debuginfo] target(s) in 2.85 secs
Эта команда создаёт исполняемый файл в каталоге target/debug/hello_cargo (или target\debug\hello_cargo.exe в Windows), а не в текущем каталоге. Поскольку по умолчанию выполняется сборка в режиме отладки (debug build), Cargo помещает бинарный файл в каталог с именем debug. Вы можете запустить исполняемый файл следующей командой:
$ ./target/debug/hello_cargo # или .\target\debug\hello_cargo.exe в Windows
Hello, world!
Если всё прошло успешно, в терминале должна появиться строка
Hello, world!. Первый запуск cargo build также заставляет Cargo создать
новый файл верхнего уровня: Cargo.lock. Этот файл отслеживает точные версии
зависимостей вашего проекта. В данном проекте нет зависимостей, поэтому файл
содержит совсем немного информации. Вам никогда не придётся изменять этот
файл вручную; Cargo управляет его содержимым самостоятельно.
Мы только что собрали проект с помощью cargo build и запустили его через
./target/debug/hello_cargo, но также можно использовать cargo run,
чтобы выполнить компиляцию и запуск исполняемого файла одной командой:
$ cargo run
    Finished dev [unoptimized + debuginfo] target(s) in 0.0 secs
     Running `target/debug/hello_cargo`
Hello, world!
Использование cargo run удобнее, чем необходимость помнить про запуск
cargo build, а затем указывать полный путь к бинарному файлу, поэтому
большинство разработчиков используют именно cargo run.
Обратите внимание, что на этот раз мы не увидели вывода, сообщающего,
что Cargo компилирует hello_cargo. Cargo определил, что файлы не изменились,
поэтому не выполнял повторную сборку, а просто запустил бинарный файл.
Если бы исходный код был изменён, Cargo пересобрал бы проект перед запуском,
и вы увидели бы следующий вывод:
$ cargo run
   Compiling hello_cargo v0.1.0 (file:///projects/hello_cargo)
    Finished dev [unoptimized + debuginfo] target(s) in 0.33 secs
     Running `target/debug/hello_cargo`
Hello, world!
Cargo также предоставляет команду cargo check. Эта команда быстро проверяет,
что код компилируется, но не создаёт исполняемый файл:
$ cargo check
   Checking hello_cargo v0.1.0 (file:///projects/hello_cargo)
    Finished dev [unoptimized + debuginfo] target(s) in 0.32 secs
Почему вам может не понадобиться исполняемый файл? Часто cargo check
работает значительно быстрее, чем cargo build, потому что пропускает этап
создания исполняемого файла. Если вы постоянно проверяете свою работу во время
написания кода, использование cargo check ускорит процесс получения
информации о том, продолжает ли ваш проект успешно компилироваться! Поэтому
многие Rustacean периодически запускают cargo check во время написания
программы, чтобы убедиться, что она по-прежнему компилируется. Затем, когда
исполняемый файл уже нужен, они запускают cargo build.
Подведём итог тому, что мы узнали о Cargo:
- Мы можем создать проект с помощью
cargo new. - Мы можем собрать проект с помощью
cargo build. - Мы можем собрать и запустить проект одним действием с помощью
cargo run. - Мы можем проверить проект на наличие ошибок без создания бинарного файла,
используя
cargo check. - Вместо сохранения результатов сборки в том же каталоге, где находится код, Cargo сохраняет их в каталоге target/debug.
Дополнительным преимуществом использования Cargo является то, что команды остаются одинаковыми независимо от используемой операционной системы. Поэтому с этого момента мы больше не будем приводить отдельные инструкции для Linux и macOS по сравнению с Windows.
Сборка для выпуска
Когда ваш проект наконец будет готов к выпуску, вы можете использовать
cargo build --release, чтобы выполнить компиляцию с оптимизациями.
Эта команда создаст исполняемый файл в каталоге target/release,
а не target/debug. Оптимизации позволяют вашему Rust-коду работать
быстрее, но их включение увеличивает время компиляции программы. Именно
поэтому существуют два различных профиля: один для разработки, когда
необходимы быстрые и частые пересборки, и другой для сборки финальной
версии программы, которую вы предоставите пользователю и которую не придётся
постоянно пересобирать, но которая должна работать максимально быстро.
Если вы измеряете производительность кода, обязательно используйте
cargo build --release и выполняйте тестирование с исполняемым файлом
из каталога target/release.
Использование соглашений Cargo
Для простых проектов Cargo не предоставляет значительных преимуществ по
сравнению с использованием только rustc, но по мере усложнения программ
его ценность становится очевидной. Когда программы начинают состоять из
нескольких файлов или требуют зависимостей, намного проще позволить Cargo
управлять процессом сборки.
Несмотря на то что проект hello_cargo является простым, он уже использует
большую часть реальных инструментов, с которыми вы будете работать на
протяжении всего пути изучения Rust. Более того, для работы с любыми
существующими проектами вы можете использовать следующие команды, чтобы
получить код через Git, перейти в каталог проекта и выполнить сборку:
$ git clone example.org/someproject
$ cd someproject
$ cargo build
Для получения дополнительной информации о Cargo ознакомьтесь с его документацией.
Итоги
Вы уже сделали отличный старт в изучении Rust! В этой главе вы узнали, как:
- установить последнюю стабильную версию Rust с помощью
rustup; - обновить Rust до новой версии;
- открыть локально установленную документацию;
- написать и запустить программу «Hello, world!» напрямую с использованием
rustc; - создать и запустить новый проект, используя соглашения Cargo.
Сейчас хороший момент для создания более серьёзной программы, чтобы привыкнуть к чтению и написанию Rust-кода. Поэтому в Главе 2 мы создадим программу «Угадай число». Если же вы предпочитаете сначала изучить работу основных концепций программирования в Rust, перейдите к Главе 3, а затем вернитесь к Главе 2.
Программирование игры «Угадай число»
Давайте погрузимся в Rust через практический проект! Эта глава познакомит вас
с несколькими распространёнными концепциями Rust, показывая, как использовать
их в реальной программе. Вы познакомитесь с let, match, методами,
связанными функциями, внешними крейтами и многим другим! В следующих главах мы
изучим эти идеи более подробно. В этой главе вы просто познакомитесь с
основами на практике.
Мы реализуем классическую задачу для начинающих программистов: игру «Угадай число». Вот как она работает: программа генерирует случайное целое число от 1 до 100. Затем она предлагает игроку ввести предположение. После ввода программа сообщает, является ли число слишком маленьким или слишком большим. Если число угадано правильно, игра выведет поздравительное сообщение и завершится.
Создание нового проекта
Чтобы подготовить новый проект, перейдите в каталог projects, который вы создали в Главе 1, и создайте новый проект с помощью Cargo следующим образом:
$ cargo new guessing_game
$ cd guessing_game
Первая команда cargo new принимает имя проекта (guessing_game) в качестве
первого аргумента. Вторая команда переходит в каталог нового проекта.
Посмотрите на созданный файл Cargo.toml:
Имя файла: Cargo.toml
[package]
name = "guessing_game"
version = "0.1.0"
edition = "2024"

[dependencies]
Как вы уже видели в Главе 1, cargo new генерирует программу
«Hello, world!» для вас. Посмотрите содержимое файла src/main.rs:
Имя файла: src/main.rs
fn main() {
    println!("Hello, world!");
}
Теперь скомпилируем и запустим программу «Hello, world!» за один шаг с
помощью команды cargo run:
$ cargo run
   Compiling guessing_game v0.1.0 (file:///projects/guessing_game)
    Finished `dev` profile [unoptimized + debuginfo] target(s) in 0.08s
     Running `target/debug/guessing_game`
Hello, world!
Команда run удобна, когда необходимо быстро выполнять итерации над
проектом, как мы будем делать в этой игре, оперативно проверяя каждый
результат перед переходом к следующему этапу.
Снова откройте файл src/main.rs. Весь код этой главы вы будете писать внутри этого файла.
Обработка предположения
Первая часть программы игры «Угадай число» будет запрашивать пользовательский ввод, обрабатывать его и проверять, соответствует ли он ожидаемому формату. Для начала мы позволим игроку вводить своё предположение. Введите код из листинга 2-1 в файл src/main.rs.
use std::io;

fn main() {
    println!("Guess the number!");

    println!("Please input your guess.");

    let mut guess = String::new();

    io::stdin()
        .read_line(&mut guess)
        .expect("Failed to read line");

    println!("You guessed: {guess}");
}Этот код содержит много информации, поэтому давайте разберём его построчно.
Чтобы получать ввод пользователя и затем выводить результат, нам необходимо
добавить в область видимости библиотеку ввода-вывода io. Библиотека io
поставляется со стандартной библиотекой, известной как std:
use std::io;

fn main() {
    println!("Guess the number!");

    println!("Please input your guess.");

    let mut guess = String::new();

    io::stdin()
        .read_line(&mut guess)
        .expect("Failed to read line");

    println!("You guessed: {guess}");
}
По умолчанию Rust имеет набор элементов стандартной библиотеки, которые автоматически добавляются в область видимости каждой программы. Этот набор называется prelude, и вы можете посмотреть его содержимое в документации стандартной библиотеки.
Если нужный вам тип отсутствует в prelude, его необходимо явно добавить в
область видимости с помощью инструкции use. Использование библиотеки
std::io предоставляет множество полезных возможностей, включая получение
ввода пользователя.
Как вы уже видели в Главе 1, функция main является точкой входа в
программу:
use std::io;

fn main() {
    println!("Guess the number!");

    println!("Please input your guess.");

    let mut guess = String::new();

    io::stdin()
        .read_line(&mut guess)
        .expect("Failed to read line");

    println!("You guessed: {guess}");
}
Синтаксис fn объявляет новую функцию; круглые скобки () означают
отсутствие параметров; а фигурная скобка { начинает тело функции.
Как вы также узнали в Главе 1, println! — это макрос, выводящий строку
на экран:
use std::io;

fn main() {
    println!("Guess the number!");

    println!("Please input your guess.");

    let mut guess = String::new();

    io::stdin()
        .read_line(&mut guess)
        .expect("Failed to read line");

    println!("You guessed: {guess}");
}
Этот код выводит приглашение, сообщающее о сути игры и предлагающее пользователю ввести значение.
Сохранение значений с помощью переменных
Теперь создадим переменную для хранения пользовательского ввода:
use std::io;

fn main() {
    println!("Guess the number!");

    println!("Please input your guess.");

    let mut guess = String::new();

    io::stdin()
        .read_line(&mut guess)
        .expect("Failed to read line");

    println!("You guessed: {guess}");
}
Теперь программа становится интереснее! В этой небольшой строке происходит
многое. Мы используем инструкцию let для создания переменной. Вот ещё один
пример:
let apples = 5;Эта строка создаёт новую переменную с именем apples и связывает её со
значением 5. В Rust переменные по умолчанию неизменяемы, то есть после
присвоения значения оно больше не может изменяться. Мы подробно
рассмотрим эту концепцию в разделе
«Переменные и изменяемость»
Главы 3. Чтобы сделать переменную изменяемой, перед её именем добавляется
mut:
let apples = 5; // неизменяемая
let mut bananas = 5; // изменяемая
Примечание: Синтаксис
//начинает комментарий, который продолжается до конца строки. Rust игнорирует всё, что находится внутри комментариев. Более подробно комментарии рассматриваются в Главе 3.
Возвращаясь к программе игры «Угадай число», теперь вы знаете, что
let mut guess создаёт изменяемую переменную с именем guess. Знак
равенства (=) сообщает Rust, что мы хотим прямо сейчас связать переменную
с каким-либо значением. Справа от знака равенства находится значение,
с которым связывается guess: результат вызова String::new — функции,
возвращающей новый экземпляр String.
String представляет собой строковый тип,
предоставляемый стандартной библиотекой; это расширяемый фрагмент текста
в кодировке UTF-8.
Синтаксис :: в строке ::new показывает, что new является связанной
функцией (associated function) типа String. Связанная функция — это
функция, реализованная для определённого типа, в данном случае String.
Функция new создаёт новую пустую строку. Вы встретите функцию new
у многих типов, потому что это распространённое имя для функции, создающей
новое значение.
В полном виде строка let mut guess = String::new(); создаёт изменяемую
переменную, которая сейчас связана с новым пустым экземпляром String.
Уф!
Получение пользовательского ввода
Напомним, что в первой строке программы мы подключили функциональность
ввода-вывода из стандартной библиотеки с помощью use std::io;.
Теперь вызовем функцию stdin из модуля io, которая позволит работать
с пользовательским вводом:
use std::io;

fn main() {
    println!("Guess the number!");

    println!("Please input your guess.");

    let mut guess = String::new();

    io::stdin()
        .read_line(&mut guess)
        .expect("Failed to read line");

    println!("You guessed: {guess}");
}
Если бы мы не импортировали модуль io с помощью use std::io; в начале
программы, мы всё равно могли бы использовать эту функцию, записав вызов
следующим образом: std::io::stdin. Функция stdin возвращает экземпляр
std::io::Stdin — типа, представляющего дескриптор
стандартного ввода вашего терминала.
Затем строка .read_line(&mut guess) вызывает метод
read_line для дескриптора стандартного ввода,
чтобы получить ввод от пользователя. Мы также передаём &mut guess
в качестве аргумента в read_line, чтобы сообщить, в какую строку нужно
сохранить пользовательский ввод. Полная задача read_line состоит в том,
чтобы взять всё, что пользователь вводит через стандартный ввод, и добавить
это в строку (не перезаписывая её содержимое), поэтому мы передаём эту строку
в качестве аргумента. Строковый аргумент должен быть изменяемым, чтобы метод
мог изменять его содержимое.
Символ & показывает, что аргумент является ссылкой (reference), которая
даёт возможность нескольким частям кода получать доступ к одному и тому же
участку данных без необходимости многократного копирования этих данных
в память. Ссылки являются довольно сложной возможностью, и одно из главных
преимуществ Rust заключается в том, насколько безопасно и удобно они
используются. Для завершения этой программы вам пока не нужно знать все
подробности. Сейчас достаточно помнить, что, как и переменные, ссылки
по умолчанию являются неизменяемыми. Поэтому необходимо писать
&mut guess, а не &guess, чтобы сделать ссылку изменяемой.
(Глава 4 объясняет ссылки более подробно.)
Обработка возможных ошибок с помощью Result
Мы всё ещё работаем с этой строкой кода. Сейчас мы обсуждаем третью строку текста, но обратите внимание, что она всё ещё является частью одной логической строки кода. Следующая часть выглядит так:
use std::io;

fn main() {
    println!("Guess the number!");

    println!("Please input your guess.");

    let mut guess = String::new();

    io::stdin()
        .read_line(&mut guess)
        .expect("Failed to read line");

    println!("You guessed: {guess}");
}
Мы могли бы записать этот код следующим образом:
io::stdin().read_line(&mut guess).expect("Failed to read line");Однако одну длинную строку трудно читать, поэтому её лучше разделить.
Часто полезно добавлять переносы строк и дополнительные пробелы, чтобы
разбивать длинные конструкции при использовании синтаксиса
.method_name(). Теперь рассмотрим, что именно делает эта строка.
Как упоминалось ранее, read_line помещает всё, что вводит пользователь,
в переданную строку, но также возвращает значение Result.
Result представляет собой перечисление, часто
называемое enum, то есть тип, который может находиться в одном из нескольких
возможных состояний. Каждое возможное состояние называется вариантом.
В Главе 6 перечисления будут рассмотрены более
подробно. Назначение типов Result состоит в кодировании информации
об обработке ошибок.
Вариантами Result являются Ok и Err. Вариант Ok указывает,
что операция завершилась успешно, и содержит успешно полученное значение.
Вариант Err означает, что операция завершилась неудачей, и содержит
информацию о том, как или почему произошла ошибка.
Значения типа Result, как и значения любого другого типа, имеют
определённые для них методы. Экземпляр Result имеет
метод expect, который можно вызвать.
Если данный экземпляр Result содержит значение Err, expect
приведёт к аварийному завершению программы и отобразит сообщение,
переданное ему в качестве аргумента. Если метод read_line
возвращает Err, скорее всего, ошибка возникла на уровне операционной
системы.
Если же данный экземпляр Result содержит значение Ok, expect
извлечёт значение, находящееся внутри Ok, и вернёт только его,
чтобы вы могли использовать его дальше. В данном случае этим значением
является количество байтов, введённых пользователем.
Если не вызвать expect, программа скомпилируется, но вы получите
предупреждение:
$ cargo build
   Compiling guessing_game v0.1.0 (file:///projects/guessing_game)
warning: unused `Result` that must be used
  --> src/main.rs:10:5
   |
10 |     io::stdin().read_line(&mut guess);
   |     ^^^^^^^^^^^^^^^^^^^^^^^^^^^^^^^^^
   |
   = note: this `Result` may be an `Err` variant, which should be handled
   = note: `#[warn(unused_must_use)]` on by default
help: use `let _ = ...` to ignore the resulting value
   |
10 |     let _ = io::stdin().read_line(&mut guess);
   |     +++++++

warning: `guessing_game` (bin "guessing_game") generated 1 warning
    Finished `dev` profile [unoptimized + debuginfo] target(s) in 0.59s
Rust предупреждает вас, что значение Result, возвращённое
read_line, не было использовано, а значит программа не обработала
возможную ошибку.
Правильным способом устранения такого предупреждения является написание
кода обработки ошибок, но в нашем случае при возникновении проблемы
мы просто хотим аварийно завершить программу, поэтому используем
expect. О восстановлении после ошибок вы узнаете в
Главе 9.
Вывод значений с использованием заполнителей println!
Помимо закрывающей фигурной скобки остаётся обсудить ещё только одну строку кода:
use std::io;

fn main() {
    println!("Guess the number!");

    println!("Please input your guess.");

    let mut guess = String::new();

    io::stdin()
        .read_line(&mut guess)
        .expect("Failed to read line");

    println!("You guessed: {guess}");
}
Эта строка выводит строку, которая теперь содержит пользовательский ввод.
Набор фигурных скобок {} представляет собой заполнитель: воспринимайте
{} как маленькие клешни краба, удерживающие значение на месте. При выводе
значения переменной имя переменной можно поместить внутрь фигурных скобок.
При выводе результата вычисления выражения используйте пустые фигурные
скобки в строке форматирования, а затем после строки форматирования через
запятую укажите список выражений для вывода, по одному для каждого
заполнителя, в том же порядке. Вывод значения переменной и результата
выражения в одном вызове println! будет выглядеть следующим образом:
#![allow(unused)]
fn main() {
let x = 5;
let y = 10;

println!("x = {x} and y + 2 = {}", y + 2);
}
Этот код выведет x = 5 and y + 2 = 12.
Проверка первой части
Давайте протестируем первую часть игры «Угадай число». Запустите её с
помощью cargo run:
$ cargo run
   Compiling guessing_game v0.1.0 (file:///projects/guessing_game)
    Finished `dev` profile [unoptimized + debuginfo] target(s) in 6.44s
     Running `target/debug/guessing_game`
Guess the number!
Please input your guess.
6
You guessed: 6
На этом этапе первая часть игры завершена: мы получаем ввод с клавиатуры и затем выводим его обратно.
Генерация секретного числа
Теперь необходимо сгенерировать секретное число, которое пользователь будет
пытаться угадать. Секретное число должно быть разным при каждом запуске,
чтобы играть было интересно больше одного раза. Мы будем использовать
случайное число от 1 до 100, чтобы игра не была слишком сложной. В стандартной
библиотеке Rust пока отсутствует встроенная функциональность генерации
случайных чисел. Однако команда Rust предоставляет для этого
крейт rand.
Расширение функциональности с помощью крейта
Напомним, что крейт представляет собой набор файлов исходного кода Rust.
Проект, который мы создаём, является бинарным крейтом, то есть исполняемой
программой. Крейт rand является библиотечным крейтом, который содержит код,
предназначенный для использования в других программах и не может выполняться
самостоятельно.
Именно при работе с внешними крейтами Cargo проявляет свои сильные стороны.
Прежде чем писать код, использующий rand, необходимо изменить файл
Cargo.toml, добавив крейт rand как зависимость. Откройте этот файл
и добавьте следующую строку в конец, ниже заголовка секции
[dependencies], который Cargo создал автоматически. Убедитесь, что
указываете rand точно так же, как показано здесь, включая номер версии,
иначе примеры кода из этого руководства могут не работать:
Имя файла: Cargo.toml
[dependencies]
rand = "0.8.5"
В файле Cargo.toml всё, что находится после заголовка, относится к данной
секции до тех пор, пока не начинается следующая секция. В [dependencies]
вы сообщаете Cargo, от каких внешних крейтов зависит ваш проект и какие
версии этих крейтов вам необходимы.
В данном случае мы указываем крейт rand со спецификатором семантической
версии 0.8.5. Cargo понимает
семантическое версионирование
(часто называемое SemVer), которое является стандартом записи номеров
версий. Спецификатор 0.8.5 на самом деле является сокращением для
^0.8.5, что означает любую версию не ниже 0.8.5, но меньше 0.9.0.
Cargo считает, что эти версии имеют публичный API, совместимый с версией
0.8.5, и данная спецификация гарантирует получение последнего исправительного
выпуска, который по-прежнему будет компилироваться с кодом этой главы. Для
любой версии 0.9.0 или выше не гарантируется сохранение того же API, который
используется в следующих примерах.
Теперь, не изменяя код, соберём проект, как показано в листинге 2-2.
$ cargo build
  Updating crates.io index
   Locking 15 packages to latest Rust 1.85.0 compatible versions
    Adding rand v0.8.5 (available: v0.9.0)
 Compiling proc-macro2 v1.0.93
 Compiling unicode-ident v1.0.17
 Compiling libc v0.2.170
 Compiling cfg-if v1.0.0
 Compiling byteorder v1.5.0
 Compiling getrandom v0.2.15
 Compiling rand_core v0.6.4
 Compiling quote v1.0.38
 Compiling syn v2.0.98
 Compiling zerocopy-derive v0.7.35
 Compiling zerocopy v0.7.35
 Compiling ppv-lite86 v0.2.20
 Compiling rand_chacha v0.3.1
 Compiling rand v0.8.5
 Compiling guessing_game v0.1.0 (file:///projects/guessing_game)
  Finished `dev` profile [unoptimized + debuginfo] target(s) in 2.48s
cargo build после добавления крейта rand в качестве зависимостиВы можете увидеть другие номера версий (но они всё равно будут совместимы с кодом благодаря SemVer), другие строки (в зависимости от операционной системы), а также иной порядок строк.
Когда мы добавляем внешнюю зависимость, Cargo получает из реестра последние версии всего, что необходимо этой зависимости. Реестр представляет собой копию данных с Crates.io, где участники экосистемы Rust публикуют свои проекты с открытым исходным кодом для использования другими разработчиками.
После обновления реестра Cargo проверяет секцию [dependencies] и загружает
все перечисленные крейты, которые ещё не были загружены. В данном случае,
несмотря на то что мы указали только rand, Cargo также загрузил другие
крейты, необходимые rand для работы. После загрузки крейтов Rust
компилирует их, а затем компилирует сам проект с уже доступными
зависимостями.
Если вы сразу снова выполните cargo build, не внося изменений, вы не
увидите никакого вывода, кроме строки Finished. Cargo знает, что зависимости
уже были загружены и скомпилированы, а вы ничего не изменили в файле
Cargo.toml. Cargo также знает, что вы не изменяли код, поэтому повторная
компиляция тоже не требуется. Не имея задач для выполнения, он просто
завершает работу.
Если вы откроете файл src/main.rs, внесёте небольшое изменение, сохраните его и снова выполните сборку, вы увидите только две строки вывода:
$ cargo build
   Compiling guessing_game v0.1.0 (file:///projects/guessing_game)
    Finished `dev` profile [unoptimized + debuginfo] target(s) in 0.13s
Эти строки показывают, что Cargo обновляет сборку только с учётом вашего небольшого изменения файла src/main.rs. Зависимости не изменялись, поэтому Cargo знает, что может повторно использовать уже загруженные и скомпилированные данные.
Обеспечение воспроизводимых сборок с помощью файла Cargo.lock
Cargo имеет механизм, который гарантирует, что вы или любой другой человек
сможете каждый раз пересобирать один и тот же артефакт: Cargo будет
использовать только те версии зависимостей, которые были определены, пока вы
явно не укажете иное. Например, предположим, что на следующей неделе выходит
версия 0.8.6 крейта rand, содержащая важное исправление ошибки, но также
включающая регрессию, которая ломает ваш код. Для решения этой проблемы Rust
создаёт файл Cargo.lock при первом запуске cargo build, поэтому теперь
в каталоге guessing_game появляется этот файл.
Когда вы собираете проект впервые, Cargo определяет все версии зависимостей,
которые удовлетворяют указанным условиям, а затем записывает их в файл
Cargo.lock. При последующих сборках Cargo обнаружит существование
Cargo.lock и будет использовать указанные там версии вместо повторного
поиска подходящих вариантов. Это позволяет автоматически получать
воспроизводимые сборки. Иными словами, благодаря файлу Cargo.lock
ваш проект останется на версии 0.8.5, пока вы явно не выполните обновление.
Обновление крейта для получения новой версии
Когда вы действительно захотите обновить крейт, Cargo предоставляет
команду update, которая игнорирует файл Cargo.lock и определяет самые
новые версии, соответствующие ограничениям в Cargo.toml. Затем Cargo
запишет эти версии в файл Cargo.lock. В остальных случаях Cargo по
умолчанию будет искать только версии выше 0.8.5, но ниже 0.9.0.
Если крейт rand выпустил две новые версии 0.8.6 и 0.999.0, вы увидите
следующее после выполнения cargo update:
$ cargo update
    Updating crates.io index
     Locking 1 package to latest Rust 1.85.0 compatible version
    Updating rand v0.8.5 -> v0.8.6 (available: v0.999.0)
Cargo проигнорирует выпуск 0.999.0. В этот момент вы также заметите
изменение в файле Cargo.lock, указывающее, что используемая версия
крейта rand теперь 0.8.6. Чтобы использовать rand версии 0.999.0
или любую версию серии 0.999._x_, потребуется изменить файл
Cargo.toml следующим образом (на самом деле не выполняйте это изменение,
поскольку дальнейшие примеры предполагают использование rand версии 0.8):
[dependencies]
rand = "0.999.0"
При следующем запуске cargo build Cargo обновит реестр доступных крейтов
и заново проверит требования к rand согласно новой версии, которую вы
указали.
О Cargo и его экосистеме можно рассказать гораздо больше, и мы поговорим об этом в Главе 14, но пока этого достаточно. Cargo значительно упрощает повторное использование библиотек, поэтому участники сообщества Rust могут создавать небольшие проекты, собранные из множества пакетов.
Генерация случайного числа
Теперь начнём использовать rand для генерации числа, которое нужно
угадать. Следующим шагом будет обновление файла src/main.rs, как показано
в листинге 2-3.
use std::io;

use rand::Rng;

fn main() {
    println!("Guess the number!");

    let secret_number = rand::thread_rng().gen_range(1..=100);

    println!("The secret number is: {secret_number}");

    println!("Please input your guess.");

    let mut guess = String::new();

    io::stdin()
        .read_line(&mut guess)
        .expect("Failed to read line");

    println!("You guessed: {guess}");
}Сначала мы добавляем строку use rand::Rng;. Трейт Rng определяет методы,
которые реализуют генераторы случайных чисел, и этот трейт должен находиться
в области видимости, чтобы мы могли использовать его методы. Глава 10
рассматривает трейты более подробно.
Далее мы добавляем две строки в середину программы. В первой строке
вызывается функция rand::thread_rng, которая предоставляет конкретный
генератор случайных чисел, который мы будем использовать: генератор,
локальный для текущего потока выполнения и инициализируемый операционной
системой.
Затем мы вызываем метод gen_range у генератора случайных чисел. Этот метод
определён трейтом Rng, который мы добавили в область видимости с помощью
инструкции use rand::Rng;. Метод gen_range принимает выражение диапазона
в качестве аргумента и генерирует случайное число внутри этого диапазона.
Используемое здесь выражение диапазона имеет вид
start..=end и включает как нижнюю, так и верхнюю границы, поэтому для
получения числа от 1 до 100 необходимо указать 1..=100.
Примечание: Невозможно просто заранее знать, какие трейты необходимо использовать и какие методы или функции следует вызывать из конкретного крейта, поэтому каждый крейт сопровождается документацией с инструкциями по использованию. Ещё одна полезная возможность Cargo состоит в том, что команда
cargo doc --openлокально создаёт документацию для всех ваших зависимостей и открывает её в браузере. Например, если вам интересно изучить другие возможности крейтаrand, выполните командуcargo doc --openи выберитеrandна боковой панели слева.
Вторая новая строка выводит секретное число. Это удобно во время разработки, поскольку позволяет проверять работу программы, но перед финальной версией мы удалим эту строку. Игра становится слишком простой, если программа сразу после запуска выводит правильный ответ!
Попробуйте запустить программу несколько раз:
$ cargo run
   Compiling guessing_game v0.1.0 (file:///projects/guessing_game)
    Finished `dev` profile [unoptimized + debuginfo] target(s) in 0.02s
     Running `target/debug/guessing_game`
Guess the number!
The secret number is: 7
Please input your guess.
4
You guessed: 4

$ cargo run
    Finished `dev` profile [unoptimized + debuginfo] target(s) in 0.02s
     Running `target/debug/guessing_game`
Guess the number!
The secret number is: 83
Please input your guess.
5
You guessed: 5
Вы должны получать разные случайные числа, и все они должны находиться в диапазоне от 1 до 100. Отличная работа!
Сравнение предположения с секретным числом
Теперь, когда у нас есть пользовательский ввод и случайное число, мы можем сравнить их.
Этот этап показан в листинге 2-4. Обратите внимание, что этот код пока ещё не будет компилироваться, и сейчас мы объясним почему.
use std::cmp::Ordering;
use std::io;

use rand::Rng;

fn main() {
    // --snip--
    println!("Guess the number!");

    let secret_number = rand::thread_rng().gen_range(1..=100);

    println!("The secret number is: {secret_number}");

    println!("Please input your guess.");

    let mut guess = String::new();

    io::stdin()
        .read_line(&mut guess)
        .expect("Failed to read line");

    println!("You guessed: {guess}");

    match guess.cmp(&secret_number) {
        Ordering::Less => println!("Too small!"),
        Ordering::Greater => println!("Too big!"),
        Ordering::Equal => println!("You win!"),
    }
}Сначала мы добавляем ещё одну инструкцию use, помещая в область видимости
тип std::cmp::Ordering из стандартной библиотеки. Тип Ordering также
является перечислением (enum) и содержит варианты Less, Greater и
Equal. Это три возможных результата, которые могут возникнуть при
сравнении двух значений.
Затем мы добавляем пять новых строк в нижнюю часть программы, использующих
тип Ordering. Метод cmp сравнивает два значения и может быть вызван для
любого типа, который поддерживает сравнение. Он принимает ссылку на значение,
с которым необходимо выполнить сравнение. В данном случае происходит
сравнение guess и secret_number. Затем метод возвращает вариант
перечисления Ordering, которое мы импортировали с помощью инструкции
use.
Мы используем выражение match, чтобы определить,
что делать дальше, основываясь на том, какой вариант Ordering был
возвращён вызовом cmp для значений guess и secret_number.
Выражение match состоит из ветвей (arms). Каждая ветвь включает
шаблон (pattern), с которым производится сопоставление, и код, который
будет выполнен, если значение, переданное в match, соответствует этому
шаблону. Rust берёт значение, переданное в match, и по очереди проверяет
каждый шаблон ветвей. Шаблоны и конструкция match являются мощными
возможностями Rust: они позволяют выразить различные ситуации, которые могут
возникнуть в программе, и гарантируют, что все они будут обработаны. Эти
возможности подробно рассматриваются соответственно в Главе 6 и Главе 19.
Разберём пример использования выражения match. Предположим, пользователь
ввёл 50, а случайно сгенерированное секретное число равно 38.
Когда код сравнивает 50 и 38, метод cmp возвращает
Ordering::Greater, потому что 50 больше 38. Выражение match
получает значение Ordering::Greater и начинает проверять шаблоны
ветвей. Сначала проверяется шаблон первой ветви — Ordering::Less.
Так как Ordering::Greater не совпадает с Ordering::Less, код этой
ветви игнорируется и выполняется переход к следующей.
Шаблон следующей ветви — Ordering::Greater, который совпадает со
значением Ordering::Greater! Поэтому будет выполнен связанный с этой
ветвью код, который выведет на экран Too big!. После первого успешного
совпадения выполнение выражения match завершается, поэтому в данном случае
последняя ветвь даже не будет проверяться.
Однако код из листинга 2-4 пока не компилируется. Давайте попробуем:
$ cargo build
   Compiling libc v0.2.86
   Compiling getrandom v0.2.2
   Compiling cfg-if v1.0.0
   Compiling ppv-lite86 v0.2.10
   Compiling rand_core v0.6.2
   Compiling rand_chacha v0.3.0
   Compiling rand v0.8.5
   Compiling guessing_game v0.1.0 (file:///projects/guessing_game)
error[E0308]: mismatched types
  --> src/main.rs:23:21
   |
23 |     match guess.cmp(&secret_number) {
   |                 --- ^^^^^^^^^^^^^^ expected `&String`, found `&{integer}`
   |                 |
   |                 arguments to this method are incorrect
   |
   = note: expected reference `&String`
              found reference `&{integer}`
note: method defined here
  --> /rustc/1159e78c4747b02ef996e55082b704c09b970588/library/core/src/cmp.rs:979:8

For more information about this error, try `rustc --explain E0308`.
error: could not compile `guessing_game` (bin "guessing_game") due to 1 previous error
Основная часть ошибки сообщает о наличии несоответствия типов. Rust
использует строгую статическую систему типов. Однако он также поддерживает
вывод типов. Когда мы написали
let mut guess = String::new(), Rust смог самостоятельно определить, что
guess должен иметь тип String, и нам не пришлось явно указывать тип.
С другой стороны, secret_number является числовым типом. Несколько
числовых типов Rust могут содержать значения от 1 до 100: i32
(32-битное целое число), u32 (беззнаковое 32-битное целое число), i64
(64-битное целое число) и другие. Если не указано иное, Rust использует
тип i32 по умолчанию, поэтому именно такой тип будет у
secret_number, если дополнительная информация не позволит Rust вывести
другой числовой тип. Причина ошибки заключается в том, что Rust не может
сравнивать строку и число.
В конечном итоге нам нужно преобразовать String, которую программа получает
от пользователя, в числовой тип, чтобы можно было сравнить её численно с
секретным числом. Для этого добавим следующую строку в тело функции main:
Имя файла: src/main.rs
use std::cmp::Ordering;
use std::io;

use rand::Rng;

fn main() {
    println!("Guess the number!");

    let secret_number = rand::thread_rng().gen_range(1..=100);

    println!("The secret number is: {secret_number}");

    println!("Please input your guess.");

    // --snip--

    let mut guess = String::new();

    io::stdin()
        .read_line(&mut guess)
        .expect("Failed to read line");

    let guess: u32 = guess.trim().parse().expect("Please type a number!");

    println!("You guessed: {guess}");

    match guess.cmp(&secret_number) {
        Ordering::Less => println!("Too small!"),
        Ordering::Greater => println!("Too big!"),
        Ordering::Equal => println!("You win!"),
    }
}
Строка выглядит следующим образом:
let guess: u32 = guess.trim().parse().expect("Please type a number!");Мы создаём переменную с именем guess. Но подождите, разве в программе уже
нет переменной с именем guess? Есть, но Rust позволяет затенять предыдущее
значение guess новым. Затенение позволяет повторно использовать имя
переменной guess, вместо того чтобы создавать две разные переменные,
например guess_str и guess. Мы рассмотрим это
подробнее в Главе 3, а пока достаточно знать,
что эта возможность часто используется, когда необходимо преобразовать
значение из одного типа в другой.
Мы связываем новую переменную с выражением
guess.trim().parse(). Переменная guess внутри выражения ссылается на
исходную переменную guess, которая содержала введённую строку.
Метод trim для экземпляра String удаляет пробельные символы в начале
и конце строки, что необходимо перед преобразованием строки в u32,
который может содержать только числовые данные.
Пользователь должен нажать Enter, чтобы завершить ввод через
read_line, и это добавляет символ новой строки в строку. Например,
если пользователь вводит 5 и нажимает Enter,
содержимое guess выглядит следующим образом: 5\n. Символ \n обозначает
перевод строки. В Windows при нажатии
Enter добавляется возврат каретки и перевод строки — \r\n.
Метод trim удаляет \n или \r\n, оставляя только 5.
Метод parse для строк преобразует строку
в другой тип. Здесь он используется для преобразования строки в число.
Нам необходимо сообщить Rust, какой именно числовой тип требуется,
используя let guess: u32. Двоеточие (:) после guess
указывает Rust, что далее следует аннотация типа переменной. В Rust есть
несколько встроенных числовых типов; u32, используемый здесь,
представляет собой беззнаковое 32-битное целое число. Это хороший вариант
по умолчанию для небольших положительных чисел. Другие числовые типы будут
рассмотрены в Главе 3.
Кроме того, аннотация u32 в этой программе вместе со сравнением
с secret_number позволяет Rust вывести, что secret_number
также должен иметь тип u32. Теперь сравнение будет выполняться между
двумя значениями одного типа!
Метод parse работает только с символами, которые могут быть логически
преобразованы в число, поэтому он может легко завершиться ошибкой.
Например, если строка содержит A👍%, преобразовать её в число невозможно.
Поскольку метод может завершиться ошибкой, parse, как и read_line,
возвращает тип Result (о котором говорилось ранее в разделе
«Обработка возможных ошибок с помощью Result»).
Мы обработаем этот Result таким же образом, снова используя метод
expect. Если parse возвращает вариант Err типа Result, потому что
не смог преобразовать строку в число, вызов expect аварийно завершит игру
и выведет переданное сообщение. Если parse успешно преобразует строку
в число, он вернёт вариант Ok типа Result, а expect извлечёт
из значения Ok нужное число.
Теперь давайте запустим программу:
$ cargo run
   Compiling guessing_game v0.1.0 (file:///projects/guessing_game)
    Finished `dev` profile [unoptimized + debuginfo] target(s) in 0.26s
     Running `target/debug/guessing_game`
Guess the number!
The secret number is: 58
Please input your guess.
  76
You guessed: 76
Too big!
Отлично! Несмотря на то что перед числом были добавлены пробелы,
программа всё равно смогла определить, что пользователь ввёл 76.
Запустите программу несколько раз, чтобы проверить различное поведение
при разных вариантах ввода: угадайте число правильно, введите число,
которое слишком большое, и число, которое слишком маленькое.
Теперь большая часть игры уже работает, но пользователь может сделать только одну попытку. Исправим это, добавив цикл!
Разрешение нескольких попыток с помощью циклов
Ключевое слово loop создаёт бесконечный цикл. Мы добавим цикл, чтобы
дать пользователю больше попыток угадать число:
Имя файла: src/main.rs
use std::cmp::Ordering;
use std::io;

use rand::Rng;

fn main() {
    println!("Guess the number!");

    let secret_number = rand::thread_rng().gen_range(1..=100);

    // --snip--

    println!("The secret number is: {secret_number}");

    loop {
        println!("Please input your guess.");

        // --snip--


        let mut guess = String::new();

        io::stdin()
            .read_line(&mut guess)
            .expect("Failed to read line");

        let guess: u32 = guess.trim().parse().expect("Please type a number!");

        println!("You guessed: {guess}");

        match guess.cmp(&secret_number) {
            Ordering::Less => println!("Too small!"),
            Ordering::Greater => println!("Too big!"),
            Ordering::Equal => println!("You win!"),
        }
    }
}
Как можно заметить, мы переместили всё, начиная с приглашения ввести число, внутрь цикла. Не забудьте добавить ещё четыре пробела отступа для строк внутри цикла и снова запустите программу. Теперь программа будет бесконечно запрашивать новое предположение, что фактически создаёт новую проблему: похоже, пользователь вообще не может выйти из программы!
Пользователь всегда может прервать выполнение программы сочетанием клавиш
Ctrl-C. Но существует и другой способ выбраться из этого
ненасытного монстра, о котором упоминалось при обсуждении parse
в разделе
«Сравнение предположения с секретным числом»:
если пользователь введёт нечисловое значение, программа завершится с ошибкой.
Мы можем воспользоваться этим, чтобы позволить пользователю выйти:
$ cargo run
   Compiling guessing_game v0.1.0 (file:///projects/guessing_game)
    Finished `dev` profile [unoptimized + debuginfo] target(s) in 0.23s
     Running `target/debug/guessing_game`
Guess the number!
The secret number is: 59
Please input your guess.
45
You guessed: 45
Too small!
Please input your guess.
60
You guessed: 60
Too big!
Please input your guess.
59
You guessed: 59
You win!
Please input your guess.
quit

thread 'main' panicked at src/main.rs:28:47:
Please type a number!: ParseIntError { kind: InvalidDigit }
note: run with `RUST_BACKTRACE=1` environment variable to display a backtrace
Ввод quit завершит игру, но, как можно заметить, то же самое произойдёт
и при вводе любого другого нечислового значения. Мягко говоря, это далеко
не лучший вариант; кроме того, мы хотим, чтобы игра завершалась и тогда,
когда пользователь угадывает правильное число.
Завершение после правильного ответа
Давайте изменим игру так, чтобы она завершалась после победы пользователя,
добавив инструкцию break:
Имя файла: src/main.rs
use std::cmp::Ordering;
use std::io;

use rand::Rng;

fn main() {
    println!("Guess the number!");

    let secret_number = rand::thread_rng().gen_range(1..=100);

    println!("The secret number is: {secret_number}");

    loop {
        println!("Please input your guess.");

        let mut guess = String::new();

        io::stdin()
            .read_line(&mut guess)
            .expect("Failed to read line");

        let guess: u32 = guess.trim().parse().expect("Please type a number!");

        println!("You guessed: {guess}");

        // --snip--

        match guess.cmp(&secret_number) {
            Ordering::Less => println!("Too small!"),
            Ordering::Greater => println!("Too big!"),
            Ordering::Equal => {
                println!("You win!");
                break;
            }
        }
    }
}
Добавление строки break после You win! заставляет программу выйти
из цикла, когда пользователь правильно угадывает секретное число. Выход
из цикла также означает завершение программы, потому что цикл является
последней частью функции main.
Обработка некорректного ввода
Чтобы ещё больше улучшить поведение игры, вместо аварийного завершения
программы при вводе нечислового значения сделаем так, чтобы игра просто
игнорировала такой ввод и позволяла пользователю продолжить угадывать.
Этого можно добиться, изменив строку, где guess преобразуется из
String в u32, как показано в листинге 2-5.
use std::cmp::Ordering;
use std::io;

use rand::Rng;

fn main() {
    println!("Guess the number!");

    let secret_number = rand::thread_rng().gen_range(1..=100);

    println!("The secret number is: {secret_number}");

    loop {
        println!("Please input your guess.");

        let mut guess = String::new();

        // --snip--

        io::stdin()
            .read_line(&mut guess)
            .expect("Failed to read line");

        let guess: u32 = match guess.trim().parse() {
            Ok(num) => num,
            Err(_) => continue,
        };

        println!("You guessed: {guess}");

        // --snip--

        match guess.cmp(&secret_number) {
            Ordering::Less => println!("Too small!"),
            Ordering::Greater => println!("Too big!"),
            Ordering::Equal => {
                println!("You win!");
                break;
            }
        }
    }
}Мы заменяем вызов expect выражением match, переходя от аварийного
завершения программы при ошибке к её обработке. Напомним, что parse
возвращает тип Result, а Result является перечислением, имеющим варианты
Ok и Err. Здесь мы используем выражение match, как ранее делали
с результатом Ordering, полученным из метода cmp.
Если parse успешно преобразует строку в число, он вернёт значение Ok,
содержащее полученное число. Это значение Ok совпадёт с шаблоном первой
ветви, и выражение match просто вернёт значение num, созданное
parse и помещённое внутрь Ok. Это число окажется именно там, где нам
нужно — в новой переменной guess, которую мы создаём.
Если parse не сможет преобразовать строку в число, он вернёт значение
Err, содержащее дополнительную информацию об ошибке. Значение Err
не совпадает с шаблоном Ok(num) первой ветви match, но совпадает
с шаблоном Err(_) во второй ветви. Символ подчёркивания _ является
универсальным шаблоном; в данном примере мы говорим, что хотим обработать
любые значения Err, независимо от того, какие данные они содержат внутри.
Поэтому программа выполнит код второй ветви — continue, который сообщает
программе перейти к следующей итерации цикла loop и снова запросить
предположение. Таким образом, программа фактически игнорирует все ошибки,
которые может вернуть parse.
Теперь программа должна работать так, как ожидается. Давайте проверим:
$ cargo run
   Compiling guessing_game v0.1.0 (file:///projects/guessing_game)
    Finished `dev` profile [unoptimized + debuginfo] target(s) in 0.13s
     Running `target/debug/guessing_game`
Guess the number!
The secret number is: 61
Please input your guess.
10
You guessed: 10
Too small!
Please input your guess.
99
You guessed: 99
Too big!
Please input your guess.
foo
Please input your guess.
61
You guessed: 61
You win!
Отлично! Остался один небольшой финальный штрих, и мы закончим игру
«Угадай число». Напомним, что программа всё ещё выводит секретное число.
Это было удобно для тестирования, но портит игру. Удалим println!,
который выводит секретное число. Листинг 2-6 показывает итоговый код.
use std::cmp::Ordering;
use std::io;

use rand::Rng;

fn main() {
    println!("Guess the number!");

    let secret_number = rand::thread_rng().gen_range(1..=100);

    loop {
        println!("Please input your guess.");

        let mut guess = String::new();

        io::stdin()
            .read_line(&mut guess)
            .expect("Failed to read line");

        let guess: u32 = match guess.trim().parse() {
            Ok(num) => num,
            Err(_) => continue,
        };

        println!("You guessed: {guess}");

        match guess.cmp(&secret_number) {
            Ordering::Less => println!("Too small!"),
            Ordering::Greater => println!("Too big!"),
            Ordering::Equal => {
                println!("You win!");
                break;
            }
        }
    }
}На этом этапе вы успешно создали игру «Угадай число». Поздравляем!
Итоги
Этот проект стал практическим способом познакомить вас со многими новыми
концепциями Rust: let, match, функциями, использованием внешних крейтов
и другими. В следующих главах вы изучите эти концепции подробнее.
Глава 3 рассматривает концепции, которые есть в большинстве языков
программирования, такие как переменные, типы данных и функции, и показывает,
как использовать их в Rust. Глава 4 исследует владение (ownership) —
возможность, которая отличает Rust от других языков. Глава 5 рассматривает
структуры и синтаксис методов, а Глава 6 объясняет, как работают
перечисления.
Распространённые концепции программирования
В этой главе рассматриваются концепции, которые встречаются почти в каждом языке программирования, и то, как они работают в Rust. В своей основе многие языки программирования имеют много общего. Ни одна из концепций, представленных в этой главе, не является уникальной для Rust, но мы обсудим их в контексте Rust и объясним соглашения, связанные с их использованием.
В частности, вы узнаете о переменных, базовых типах, функциях, комментариях и управлении потоком выполнения. Эти основы присутствуют в каждой программе на Rust, и раннее знакомство с ними даст вам прочную базу для дальнейшего изучения.
Ключевые слова
В языке Rust есть набор ключевых слов, зарезервированных только для использования самим языком, как и во многих других языках. Имейте в виду, что эти слова нельзя использовать в качестве имён переменных или функций. Большинство ключевых слов имеют специальные значения, и вы будете использовать их для выполнения различных задач в программах на Rust; несколько ключевых слов сейчас не связаны ни с какой функциональностью, но зарезервированы для возможностей, которые могут быть добавлены в Rust в будущем. Список ключевых слов можно найти в Приложении A.
Переменные и изменяемость
Переменные и изменяемость
Как упоминалось в разделе «Сохранение значений с помощью переменных», по умолчанию переменные неизменяемы. Это один из многих способов, которыми Rust подталкивает вас писать код так, чтобы использовать преимущества безопасности и простой конкурентности, предоставляемые Rust. Однако у вас всё ещё есть возможность сделать переменные изменяемыми. Давайте разберёмся, как и почему Rust поощряет отдавать предпочтение неизменяемости и почему иногда вы можете захотеть от неё отказаться.
Когда переменная неизменяема, после привязки значения к имени это значение
нельзя изменить. Чтобы показать это, создайте в каталоге projects новый
проект с именем variables, используя cargo new variables.
Затем в новом каталоге variables откройте src/main.rs и замените его код следующим кодом, который пока не будет компилироваться:
Имя файла: src/main.rs
fn main() {
    let x = 5;
    println!("The value of x is: {x}");
    x = 6;
    println!("The value of x is: {x}");
}
Сохраните и запустите программу с помощью cargo run. Вы должны получить
сообщение об ошибке, связанной с неизменяемостью, как показано в этом выводе:
$ cargo run
   Compiling variables v0.1.0 (file:///projects/variables)
error[E0384]: cannot assign twice to immutable variable `x`
 --> src/main.rs:4:5
  |
2 |     let x = 5;
  |         - first assignment to `x`
3 |     println!("The value of x is: {x}");
4 |     x = 6;
  |     ^^^^^ cannot assign twice to immutable variable
  |
help: consider making this binding mutable
  |
2 |     let mut x = 5;
  |         +++

For more information about this error, try `rustc --explain E0384`.
error: could not compile `variables` (bin "variables") due to 1 previous error
Этот пример показывает, как компилятор помогает находить ошибки в ваших программах. Ошибки компилятора могут раздражать, но на самом деле они лишь означают, что ваша программа пока не делает безопасно то, что вы хотите; они не означают, что вы плохой программист! Опытные разработчики Rust тоже получают ошибки компилятора.
Вы получили сообщение об ошибке cannot assign twice to immutable variable `x`,
потому что попытались присвоить второе значение неизменяемой переменной x.
Важно получать ошибки времени компиляции, когда мы пытаемся изменить значение, помеченное как неизменяемое, потому что именно такая ситуация может приводить к ошибкам. Если одна часть нашего кода работает исходя из предположения, что значение никогда не изменится, а другая часть кода изменяет это значение, возможно, первая часть кода не сделает то, для чего она была написана. Причину такой ошибки может быть трудно отследить постфактум, особенно когда второй фрагмент кода изменяет значение только иногда. Компилятор Rust гарантирует: если вы указали, что значение не будет меняться, оно действительно не будет меняться, поэтому вам не нужно отслеживать это самостоятельно. Благодаря этому о вашем коде проще рассуждать.
Но изменяемость может быть очень полезной и делать написание кода удобнее.
Хотя переменные по умолчанию неизменяемы, вы можете сделать их изменяемыми,
добавив mut перед именем переменной, как вы делали в
Главе 2. Добавление mut
также передаёт намерение будущим читателям кода, указывая, что другие части
кода будут изменять значение этой переменной.
Например, изменим src/main.rs следующим образом:
Имя файла: src/main.rs
fn main() {
    let mut x = 5;
    println!("The value of x is: {x}");
    x = 6;
    println!("The value of x is: {x}");
}
Когда мы теперь запустим программу, получим следующее:
$ cargo run
   Compiling variables v0.1.0 (file:///projects/variables)
    Finished `dev` profile [unoptimized + debuginfo] target(s) in 0.30s
     Running `target/debug/variables`
The value of x is: 5
The value of x is: 6
Когда используется mut, нам разрешено изменить значение, связанное с x,
с 5 на 6. В конечном счёте решение о том, использовать изменяемость или
нет, остаётся за вами и зависит от того, что вы считаете наиболее понятным
в конкретной ситуации.
Объявление констант
Как и неизменяемые переменные, константы — это значения, связанные с именем, которые нельзя изменять, но между константами и переменными есть несколько различий.
Во-первых, с константами нельзя использовать mut. Константы не просто
неизменяемы по умолчанию — они неизменяемы всегда. Константы объявляются
с помощью ключевого слова const вместо ключевого слова let, и тип значения
должен быть указан явно. Мы рассмотрим типы и аннотации типов в следующем
разделе, «Типы данных», поэтому сейчас не
беспокойтесь о деталях. Просто знайте, что тип всегда нужно указывать.
Константы можно объявлять в любой области видимости, включая глобальную область. Это делает их полезными для значений, о которых должны знать многие части кода.
Последнее отличие состоит в том, что константы можно задавать только константным выражением, а не результатом значения, которое может быть вычислено только во время выполнения.
Вот пример объявления константы:
#![allow(unused)]
fn main() {
const THREE_HOURS_IN_SECONDS: u32 = 60 * 60 * 3;
}
Имя константы — THREE_HOURS_IN_SECONDS, а её значение задаётся как результат
умножения 60 (числа секунд в минуте) на 60 (числа минут в часе) и на 3 (числа
часов, которое мы хотим учитывать в этой программе). Соглашение Rust об
именовании констант предполагает использование только заглавных букв
с подчёркиваниями между словами. Компилятор способен вычислять ограниченный
набор операций во время компиляции, что позволяет записать это значение
способом, который легче понять и проверить, вместо того чтобы присваивать этой
константе значение 10 800. Дополнительную информацию о том, какие операции
можно использовать при объявлении констант, смотрите в разделе Rust Reference
о вычислении констант.
Константы действительны всё время работы программы в пределах той области видимости, в которой они были объявлены. Это свойство делает константы полезными для значений из предметной области вашего приложения, о которых может понадобиться знать нескольким частям программы, например максимальное количество очков, которое разрешено набрать любому игроку, или скорость света.
Именование жёстко заданных значений, используемых по всей программе, как констант помогает передать смысл этих значений будущим сопровождающим кода. Также полезно иметь только одно место в коде, которое нужно будет изменить, если жёстко заданное значение потребуется обновить в будущем.
Затенение
Как вы видели в руководстве по игре «Угадай число» в
Главе 2, можно
объявить новую переменную с тем же именем, что и предыдущая переменная.
Разработчики Rust говорят, что первая переменная затеняется второй: это
означает, что именно вторую переменную компилятор будет видеть, когда вы
используете имя переменной. По сути, вторая переменная перекрывает первую,
забирая на себя все использования имени переменной до тех пор, пока либо она
сама не будет затенена, либо не завершится область видимости. Мы можем
затенить переменную, используя то же имя переменной и снова применив ключевое
слово let, как показано ниже:
Имя файла: src/main.rs
fn main() {
    let x = 5;

    let x = x + 1;

    {
        let x = x * 2;
        println!("The value of x in the inner scope is: {x}");
    }

    println!("The value of x is: {x}");
}
Сначала эта программа связывает x со значением 5. Затем она создаёт новую
переменную x, повторяя let x =, берёт исходное значение и прибавляет 1,
так что значение x становится равным 6. Затем во внутренней области
видимости, созданной фигурными скобками, третий оператор let также затеняет
x и создаёт новую переменную, умножая предыдущее значение на 2, чтобы
получить значение x, равное 12. Когда эта область видимости завершается,
внутреннее затенение заканчивается, и x снова становится равным 6. Когда
мы запустим эту программу, она выведет следующее:
$ cargo run
   Compiling variables v0.1.0 (file:///projects/variables)
    Finished `dev` profile [unoptimized + debuginfo] target(s) in 0.31s
     Running `target/debug/variables`
The value of x in the inner scope is: 12
The value of x is: 6
Затенение отличается от пометки переменной как mut, потому что мы получим
ошибку времени компиляции, если случайно попытаемся присвоить этой переменной
новое значение без использования ключевого слова let. Используя let, мы
можем выполнить несколько преобразований значения, но после завершения этих
преобразований переменная будет неизменяемой.
Другое различие между mut и затенением состоит в том, что, поскольку при
повторном использовании ключевого слова let мы фактически создаём новую
переменную, мы можем изменить тип значения, но повторно использовать то же имя.
Например, предположим, что наша программа просит пользователя показать,
сколько пробелов он хочет вставить между некоторым текстом, введя символы
пробела, а затем мы хотим сохранить этот ввод как число:
fn main() {
    let spaces = "   ";
    let spaces = spaces.len();
}
Первая переменная spaces имеет строковый тип, а вторая переменная spaces —
числовой тип. Таким образом, затенение избавляет нас от необходимости
придумывать разные имена, такие как spaces_str и spaces_num; вместо этого
мы можем повторно использовать более простое имя spaces. Однако если мы
попытаемся использовать для этого mut, как показано здесь, то получим ошибку
времени компиляции:
fn main() {
    let mut spaces = "   ";
    spaces = spaces.len();
}
Ошибка говорит, что нам не разрешено изменять тип переменной:
$ cargo run
   Compiling variables v0.1.0 (file:///projects/variables)
error[E0308]: mismatched types
 --> src/main.rs:3:14
  |
2 |     let mut spaces = "   ";
  |                      ----- expected due to this value
3 |     spaces = spaces.len();
  |              ^^^^^^^^^^^^ expected `&str`, found `usize`

For more information about this error, try `rustc --explain E0308`.
error: could not compile `variables` (bin "variables") due to 1 previous error
Теперь, когда мы разобрались, как работают переменные, давайте рассмотрим другие типы данных, которые они могут иметь.
Типы данных
Типы данных
Каждое значение в Rust имеет определённый тип данных, который сообщает Rust, какой именно вид данных указан, чтобы язык знал, как с этими данными работать. Мы рассмотрим две группы типов данных: скалярные и составные.
Помните, что Rust — статически типизированный язык: это означает, что он
должен знать типы всех переменных во время компиляции. Обычно компилятор может
вывести, какой тип мы хотим использовать, на основании значения и того, как мы
его используем. В случаях, когда возможно несколько типов, например когда
в разделе «Сравнение предположения с секретным
числом» Главы 2 мы
преобразовывали String в числовой тип с помощью parse, необходимо добавить
аннотацию типа, например так:
#![allow(unused)]
fn main() {
let guess: u32 = "42".parse().expect("Not a number!");
}
Если мы не добавим аннотацию типа : u32, показанную в предыдущем коде, Rust
выведет следующую ошибку. Она означает, что компилятору требуется от нас больше
информации, чтобы понять, какой тип мы хотим использовать:
$ cargo build
   Compiling no_type_annotations v0.1.0 (file:///projects/no_type_annotations)
error[E0284]: type annotations needed
 --> src/main.rs:2:9
  |
2 |     let guess = "42".parse().expect("Not a number!");
  |         ^^^^^        ----- type must be known at this point
  |
  = note: cannot satisfy `<_ as FromStr>::Err == _`
help: consider giving `guess` an explicit type
  |
2 |     let guess: /* Type */ = "42".parse().expect("Not a number!");
  |              ++++++++++++

For more information about this error, try `rustc --explain E0284`.
error: could not compile `no_type_annotations` (bin "no_type_annotations") due to 1 previous error
Для других типов данных вы будете видеть другие аннотации типов.
Скалярные типы
Скалярный тип представляет одно значение. В Rust есть четыре основных скалярных типа: целые числа, числа с плавающей точкой, логические значения и символы. Возможно, они уже знакомы вам по другим языкам программирования. Давайте посмотрим, как они работают в Rust.
Целочисленные типы
Целое число — это число без дробной части. В Главе 2 мы использовали один
целочисленный тип, u32. Это объявление типа указывает, что связанное с ним
значение должно быть беззнаковым целым числом (знаковые целочисленные типы
начинаются с i, а не с u), занимающим 32 бита памяти. В таблице 3-1
показаны встроенные целочисленные типы Rust. Мы можем использовать любой из
этих вариантов, чтобы объявить тип целочисленного значения.
Таблица 3-1: Целочисленные типы в Rust
| Длина | Знаковый | Беззнаковый |
|---|---|---|
| 8 бит | i8 | u8 |
| 16 бит | i16 | u16 |
| 32 бита | i32 | u32 |
| 64 бита | i64 | u64 |
| 128 бит | i128 | u128 |
| Зависит от архитектуры | isize | usize |
Каждый вариант может быть знаковым или беззнаковым и имеет явно заданный размер. Знаковый и беззнаковый означают, может ли число быть отрицательным: другими словами, должен ли у числа быть знак (знаковое) или оно всегда будет только положительным и поэтому может быть представлено без знака (беззнаковое). Это похоже на запись чисел на бумаге: когда знак важен, число записывают со знаком плюс или минус; но когда можно безопасно считать число положительным, его записывают без знака. Знаковые числа хранятся с помощью представления в дополнительном коде.
Каждый знаковый вариант может хранить числа от −(2n − 1) до
2n − 1 − 1 включительно, где n — количество бит, используемых
этим вариантом. Например, i8 может хранить числа от −(27) до
27 − 1, то есть от −128 до 127. Беззнаковые варианты могут хранить
числа от 0 до 2n − 1, поэтому u8 может хранить числа от 0 до
28 − 1, то есть от 0 до 255.
Кроме того, типы isize и usize зависят от архитектуры компьютера, на
котором выполняется ваша программа: 64 бита на 64-битной архитектуре и 32 бита
на 32-битной архитектуре.
Целочисленные литералы можно записывать в любой из форм, показанных в таблице
3-2. Обратите внимание, что числовые литералы, которые могут относиться
к нескольким числовым типам, допускают суффикс типа, например 57u8, чтобы
указать тип. Числовые литералы также могут использовать _ как визуальный
разделитель, чтобы число было легче читать, например 1_000, что будет иметь
то же значение, как если бы вы указали 1000.
Таблица 3-2: Целочисленные литералы в Rust
| Числовые литералы | Пример |
|---|---|
| Десятичный | 98_222 |
| Шестнадцатеричный | 0xff |
| Восьмеричный | 0o77 |
| Двоичный | 0b1111_0000 |
Байт (только u8) | b'A' |
Как же понять, какой целочисленный тип использовать? Если вы не уверены,
значения Rust по умолчанию обычно являются хорошей отправной точкой:
целочисленные типы по умолчанию имеют тип i32. Основная ситуация, в которой
вы будете использовать isize или usize, — индексирование какой-либо
коллекции.
Целочисленное переполнение
Допустим, у вас есть переменная типа u8, которая может хранить значения от
0 до 255. Если вы попытаетесь изменить переменную на значение вне этого
диапазона, например 256, произойдёт целочисленное переполнение, которое
может привести к одному из двух вариантов поведения. При компиляции в режиме
отладки Rust включает проверки целочисленного переполнения, из-за которых
ваша программа вызовет panic во время выполнения, если такое поведение
произойдёт. Rust использует термин panic, когда программа завершается
с ошибкой; мы подробнее обсудим panic в разделе «Неустранимые ошибки с
panic!» Главы 9.
При компиляции в режиме выпуска с флагом --release Rust не включает
проверки целочисленного переполнения, вызывающие panic. Вместо этого, если
происходит переполнение, Rust выполняет циклическое переполнение
в дополнительном коде. Если кратко, значения больше максимального значения,
которое может хранить тип, «оборачиваются» к минимальному значению, которое
может хранить этот тип. В случае u8 значение 256 становится 0, значение
257 становится 1 и так далее. Программа не вызовет panic, но переменная
получит значение, которое, вероятно, отличается от ожидаемого. Полагаться
на поведение циклического переполнения считается ошибкой.
Чтобы явно обработать возможность переполнения, можно использовать следующие семейства методов, предоставляемые стандартной библиотекой для примитивных числовых типов:
- Выполнять циклическое переполнение во всех режимах с помощью методов
wrapping_*, напримерwrapping_add. - Возвращать значение
Noneпри переполнении с помощью методовchecked_*. - Возвращать значение и логический признак наличия переполнения с помощью
методов
overflowing_*. - Насыщать до минимального или максимального значения с помощью методов
saturating_*.
Типы с плавающей точкой
В Rust также есть два примитивных типа для чисел с плавающей точкой, то есть
чисел с десятичной точкой. Типы Rust с плавающей точкой — f32 и f64,
размером 32 и 64 бита соответственно. Тип по умолчанию — f64, потому что на
современных процессорах он примерно такой же быстрый, как f32, но способен
обеспечить большую точность. Все типы с плавающей точкой являются знаковыми.
Вот пример, показывающий числа с плавающей точкой в действии:
Имя файла: src/main.rs
fn main() {
    let x = 2.0; // f64

    let y: f32 = 3.0; // f32
}
Числа с плавающей точкой представлены в соответствии со стандартом IEEE-754.
Числовые операции
Rust поддерживает базовые математические операции, которые вы ожидаете для
всех числовых типов: сложение, вычитание, умножение, деление и остаток.
Целочисленное деление отбрасывает дробную часть в сторону нуля до ближайшего
целого числа. Следующий код показывает, как использовать каждую числовую
операцию в инструкции let:
Имя файла: src/main.rs
fn main() {
    // addition
    let sum = 5 + 10;

    // subtraction
    let difference = 95.5 - 4.3;

    // multiplication
    let product = 4 * 30;

    // division
    let quotient = 56.7 / 32.2;
    let truncated = -5 / 3; // Results in -1

    // remainder
    let remainder = 43 % 5;
}
Каждое выражение в этих инструкциях использует математический оператор и вычисляется в одно значение, которое затем связывается с переменной. Приложение B содержит список всех операторов, предоставляемых Rust.
Логический тип
Как и в большинстве других языков программирования, логический тип в Rust
имеет два возможных значения: true и false. Логические значения занимают
один байт. Логический тип в Rust обозначается как bool. Например:
Имя файла: src/main.rs
fn main() {
    let t = true;

    let f: bool = false; // with explicit type annotation
}
Основной способ использовать логические значения — условные конструкции,
например выражение if. Мы рассмотрим, как выражения if работают в Rust,
в разделе «Управление потоком выполнения».
Символьный тип
Тип char в Rust — самый примитивный алфавитный тип языка. Вот несколько
примеров объявления значений char:
Имя файла: src/main.rs
fn main() {
    let c = 'z';
    let z: char = 'ℤ'; // with explicit type annotation
    let heart_eyed_cat = '😻';
}
Обратите внимание, что литералы char задаются одинарными кавычками, в
отличие от строковых литералов, которые используют двойные кавычки. Тип char
в Rust занимает 4 байта и представляет скалярное значение Unicode. Это
означает, что он может представлять намного больше, чем только ASCII. Буквы
с диакритическими знаками; китайские, японские и корейские символы; эмодзи;
и пробелы нулевой ширины — всё это допустимые значения char в Rust.
Скалярные значения Unicode находятся в диапазонах от U+0000 до U+D7FF
и от U+E000 до U+10FFFF включительно. Однако «символ» на самом деле не
является понятием Unicode, поэтому ваше человеческое представление о том, что
такое «символ», может не совпадать с тем, чем является char в Rust. Мы
подробно обсудим эту тему в разделе «Хранение текста в кодировке UTF-8
с помощью строк» Главы 8.
Составные типы
Составные типы могут объединять несколько значений в один тип. В Rust есть два примитивных составных типа: кортежи и массивы.
Тип кортежа
Кортеж — это общий способ сгруппировать несколько значений разных типов в один составной тип. Кортежи имеют фиксированную длину: после объявления они не могут увеличиваться или уменьшаться в размере.
Мы создаём кортеж, записывая внутри круглых скобок список значений, разделённых запятыми. Каждая позиция в кортеже имеет тип, и типы разных значений в кортеже не обязаны совпадать. В этом примере мы добавили необязательные аннотации типов:
Имя файла: src/main.rs
fn main() {
    let tup: (i32, f64, u8) = (500, 6.4, 1);
}
Переменная tup связывается со всем кортежем, потому что кортеж считается
одним составным элементом. Чтобы получить отдельные значения из кортежа, можно
использовать сопоставление с шаблоном и деструктурировать значение кортежа,
например так:
Имя файла: src/main.rs
fn main() {
    let tup = (500, 6.4, 1);

    let (x, y, z) = tup;

    println!("The value of y is: {y}");
}
Сначала эта программа создаёт кортеж и связывает его с переменной tup.
Затем она использует шаблон с let, чтобы взять tup и превратить его в три
отдельные переменные: x, y и z. Это называется деструктурированием,
потому что оно разбивает один кортеж на три части. В конце программа выводит
значение y, равное 6.4.
Мы также можем обращаться к элементу кортежа напрямую, используя точку (.),
за которой следует индекс значения, к которому мы хотим обратиться. Например:
Имя файла: src/main.rs
fn main() {
    let x: (i32, f64, u8) = (500, 6.4, 1);

    let five_hundred = x.0;

    let six_point_four = x.1;

    let one = x.2;
}
Эта программа создаёт кортеж x, а затем обращается к каждому элементу
кортежа по соответствующему индексу. Как и в большинстве языков
программирования, первый индекс в кортеже равен 0.
Кортеж без каких-либо значений имеет специальное имя — unit (единичное
значение). И это значение, и соответствующий ему тип записываются как ()
и представляют пустое значение или пустой возвращаемый тип. Выражения неявно
возвращают значение unit, если не возвращают никакого другого значения.
Тип массива
Другой способ получить коллекцию из нескольких значений — использовать массив. В отличие от кортежа, каждый элемент массива должен иметь один и тот же тип. В отличие от массивов в некоторых других языках, массивы в Rust имеют фиксированную длину.
Значения в массиве записываются внутри квадратных скобок в виде списка, разделённого запятыми:
Имя файла: src/main.rs
fn main() {
    let a = [1, 2, 3, 4, 5];
}
Массивы полезны, когда вы хотите, чтобы ваши данные размещались в стеке, как и другие типы, которые мы уже видели, а не в куче (подробнее стек и кучу мы обсудим в Главе 4), или когда вы хотите гарантировать, что у вас всегда будет фиксированное количество элементов. Однако массив не так гибок, как тип вектора. Вектор — похожий тип коллекции, предоставляемый стандартной библиотекой, которому разрешено увеличиваться или уменьшаться в размере, потому что его содержимое находится в куче. Если вы не уверены, использовать массив или вектор, скорее всего, вам следует использовать вектор. Глава 8 рассматривает векторы подробнее.
Однако массивы полезнее, когда вы знаете, что количество элементов не должно изменяться. Например, если бы вы использовали в программе названия месяцев, вы, вероятно, использовали бы массив, а не вектор, потому что знаете, что он всегда будет содержать 12 элементов:
#![allow(unused)]
fn main() {
let months = ["January", "February", "March", "April", "May", "June", "July",
              "August", "September", "October", "November", "December"];
}
Тип массива записывается с использованием квадратных скобок, типа каждого элемента, точки с запятой, а затем количества элементов в массиве, например так:
#![allow(unused)]
fn main() {
let a: [i32; 5] = [1, 2, 3, 4, 5];
}
Здесь i32 — тип каждого элемента. После точки с запятой число 5 указывает,
что массив содержит пять элементов.
Вы также можете инициализировать массив так, чтобы каждый его элемент содержал одно и то же значение: для этого нужно указать начальное значение, затем точку с запятой, а затем длину массива в квадратных скобках, как показано здесь:
#![allow(unused)]
fn main() {
let a = [3; 5];
}
Массив с именем a будет содержать 5 элементов, и все они изначально будут
установлены в значение 3. Это то же самое, что записать
let a = [3, 3, 3, 3, 3];, но более кратко.
Доступ к элементам массива
Массив — это единый участок памяти известного фиксированного размера, который может быть размещён в стеке. К элементам массива можно обращаться с помощью индексирования, например так:
Имя файла: src/main.rs
fn main() {
    let a = [1, 2, 3, 4, 5];

    let first = a[0];
    let second = a[1];
}
В этом примере переменная с именем first получит значение 1, потому что
это значение находится в массиве по индексу [0]. Переменная с именем
second получит значение 2 из индекса [1] в массиве.
Недопустимый доступ к элементу массива
Посмотрим, что произойдёт, если попытаться обратиться к элементу массива, который находится за пределами массива. Допустим, вы запускаете этот код, похожий на игру «Угадай число» из Главы 2, чтобы получить индекс массива от пользователя:
Имя файла: src/main.rs
use std::io;

fn main() {
    let a = [1, 2, 3, 4, 5];

    println!("Please enter an array index.");

    let mut index = String::new();

    io::stdin()
        .read_line(&mut index)
        .expect("Failed to read line");

    let index: usize = index
        .trim()
        .parse()
        .expect("Index entered was not a number");

    let element = a[index];

    println!("The value of the element at index {index} is: {element}");
}
Этот код успешно компилируется. Если вы запустите его с помощью cargo run
и введёте 0, 1, 2, 3 или 4, программа выведет соответствующее
значение по этому индексу в массиве. Если вместо этого вы введёте число за
пределами массива, например 10, то увидите примерно такой вывод:
thread 'main' panicked at src/main.rs:19:19:
index out of bounds: the len is 5 but the index is 10
note: run with `RUST_BACKTRACE=1` environment variable to display a backtrace
Программа завершилась ошибкой времени выполнения в момент использования
недопустимого значения в операции индексирования. Она вышла с сообщением об
ошибке и не выполнила последнюю инструкцию println!. Когда вы пытаетесь
обратиться к элементу с помощью индексирования, Rust проверяет, что указанный
индекс меньше длины массива. Если индекс больше длины или равен ей, Rust
вызовет panic. Эта проверка должна происходить во время выполнения, особенно
в данном случае, потому что компилятор не может заранее знать, какое значение
пользователь введёт, когда позже запустит код.
Это пример принципов безопасности памяти Rust в действии. Во многих низкоуровневых языках такая проверка не выполняется, и при передаче неправильного индекса может произойти доступ к недопустимой памяти. Rust защищает вас от такого рода ошибок, немедленно завершая программу вместо того, чтобы разрешить доступ к памяти и продолжить выполнение. В Главе 9 подробнее рассматривается обработка ошибок в Rust и то, как писать читаемый безопасный код, который не вызывает panic и не допускает доступа к недопустимой памяти.
Функции
Функции
Функции широко распространены в коде на Rust. Вы уже видели одну из самых
важных функций языка: функцию main, которая является точкой входа во многие
программы. Вы также видели ключевое слово fn, позволяющее объявлять новые
функции.
В коде Rust для имён функций и переменных по соглашению используется snake case: все буквы строчные, а слова разделяются подчёркиваниями. Вот программа, содержащая пример определения функции:
Имя файла: src/main.rs
fn main() {
    println!("Hello, world!");

    another_function();
}

fn another_function() {
    println!("Another function.");
}
Функция в Rust определяется с помощью fn, за которым следует имя функции
и пара круглых скобок. Фигурные скобки сообщают компилятору, где начинается
и заканчивается тело функции.
Мы можем вызвать любую определённую нами функцию, указав её имя, за которым
следует пара круглых скобок. Поскольку another_function определена
в программе, её можно вызвать внутри функции main. Обратите внимание, что
в исходном коде мы определили another_function после функции main; мы
могли бы определить её и раньше. Rust не важно, где именно вы определяете
функции, важно лишь, чтобы они были определены где-то в области видимости,
доступной вызывающему коду.
Давайте создадим новый бинарный проект с именем functions, чтобы подробнее
изучить функции. Поместите пример с another_function в src/main.rs
и запустите его. Вы должны увидеть следующий вывод:
$ cargo run
   Compiling functions v0.1.0 (file:///projects/functions)
    Finished `dev` profile [unoptimized + debuginfo] target(s) in 0.28s
     Running `target/debug/functions`
Hello, world!
Another function.
Строки выполняются в том порядке, в котором они расположены в функции main.
Сначала выводится сообщение «Hello, world!», затем вызывается
another_function и выводится её сообщение.
Параметры
Мы можем определять функции с параметрами — специальными переменными, которые являются частью сигнатуры функции. Когда у функции есть параметры, вы можете передать ей конкретные значения для этих параметров. Технически конкретные значения называются аргументами, но в обычной речи люди часто используют слова параметр и аргумент взаимозаменяемо как для переменных в определении функции, так и для конкретных значений, передаваемых при вызове функции.
В этой версии another_function мы добавим параметр:
Имя файла: src/main.rs
fn main() {
    another_function(5);
}

fn another_function(x: i32) {
    println!("The value of x is: {x}");
}
Попробуйте запустить эту программу; вы должны получить следующий вывод:
$ cargo run
   Compiling functions v0.1.0 (file:///projects/functions)
    Finished `dev` profile [unoptimized + debuginfo] target(s) in 1.21s
     Running `target/debug/functions`
The value of x is: 5
В объявлении another_function есть один параметр с именем x. Тип x
указан как i32. Когда мы передаём 5 в another_function, макрос
println! помещает 5 в то место строки форматирования, где находилась пара
фигурных скобок с x.
В сигнатурах функций вы должны объявлять тип каждого параметра. Это осознанное решение в дизайне Rust: требование аннотаций типов в определениях функций означает, что компилятору почти никогда не нужно, чтобы вы указывали их в других местах кода, чтобы понять, какой тип вы имеете в виду. Кроме того, компилятор способен выдавать более полезные сообщения об ошибках, если знает, какие типы ожидает функция.
При определении нескольких параметров разделяйте объявления параметров запятыми, например так:
Имя файла: src/main.rs
fn main() {
    print_labeled_measurement(5, 'h');
}

fn print_labeled_measurement(value: i32, unit_label: char) {
    println!("The measurement is: {value}{unit_label}");
}
В этом примере создаётся функция с именем print_labeled_measurement
с двумя параметрами. Первый параметр называется value и имеет тип i32.
Второй называется unit_label и имеет тип char. Затем функция выводит
текст, содержащий и value, и unit_label.
Давайте попробуем запустить этот код. Замените программу, которая сейчас
находится в файле src/main.rs вашего проекта functions, предыдущим
примером и запустите её с помощью cargo run:
$ cargo run
   Compiling functions v0.1.0 (file:///projects/functions)
    Finished `dev` profile [unoptimized + debuginfo] target(s) in 0.31s
     Running `target/debug/functions`
The measurement is: 5h
Поскольку мы вызвали функцию со значением 5 для value и значением 'h'
для unit_label, вывод программы содержит эти значения.
Инструкции и выражения
Тела функций состоят из последовательности инструкций и могут заканчиваться выражением. До сих пор функции, которые мы рассматривали, не включали завершающего выражения, но вы уже видели выражение как часть инструкции. Поскольку Rust — язык, основанный на выражениях, это важное различие, которое нужно понять. В других языках таких различий может не быть, поэтому давайте рассмотрим, что такое инструкции и выражения и как их различия влияют на тела функций.
- Инструкции — это команды, которые выполняют какое-либо действие и не возвращают значение.
- Выражения вычисляются в результирующее значение.
Рассмотрим несколько примеров.
На самом деле мы уже использовали инструкции и выражения. Создание переменной
и присваивание ей значения с помощью ключевого слова let — это инструкция.
В листинге 3-1 let y = 6; является инструкцией.
fn main() {
    let y = 6;
}main, содержащее одну инструкциюОпределения функций также являются инструкциями; весь предыдущий пример сам по себе является инструкцией. (Однако, как мы вскоре увидим, вызов функции инструкцией не является.)
Инструкции не возвращают значения. Поэтому нельзя присвоить инструкцию let
другой переменной, как пытается сделать следующий код; вы получите ошибку:
Имя файла: src/main.rs
fn main() {
    let x = (let y = 6);
}
Когда вы запустите эту программу, полученная ошибка будет выглядеть так:
$ cargo run
   Compiling functions v0.1.0 (file:///projects/functions)
error: expected expression, found `let` statement
 --> src/main.rs:2:14
  |
2 |     let x = (let y = 6);
  |              ^^^
  |
  = note: only supported directly in conditions of `if` and `while` expressions

warning: unnecessary parentheses around assigned value
 --> src/main.rs:2:13
  |
2 |     let x = (let y = 6);
  |             ^         ^
  |
  = note: `#[warn(unused_parens)]` on by default
help: remove these parentheses
  |
2 -     let x = (let y = 6);
2 +     let x = let y = 6;
  |

warning: `functions` (bin "functions") generated 1 warning
error: could not compile `functions` (bin "functions") due to 1 previous error; 1 warning emitted
Инструкция let y = 6 не возвращает значение, поэтому x не с чем
связываться. Это отличается от поведения в других языках, таких как C и Ruby,
где присваивание возвращает значение присваивания. В этих языках можно
написать x = y = 6, и тогда и x, и y будут иметь значение 6; в Rust
это не так.
Выражения вычисляются в значение и составляют большую часть остального кода,
который вы будете писать на Rust. Рассмотрим математическую операцию, например
5 + 6: это выражение, которое вычисляется в значение 11. Выражения могут
быть частью инструкций: в листинге 3-1 число 6 в инструкции let y = 6; —
это выражение, которое вычисляется в значение 6. Вызов функции — это
выражение. Вызов макроса — это выражение. Новый блок области видимости,
созданный с помощью фигурных скобок, тоже является выражением, например:
Имя файла: src/main.rs
fn main() {
    let y = {
        let x = 3;
        x + 1
    };

    println!("The value of y is: {y}");
}
Это выражение:
{
    let x = 3;
    x + 1
}
является блоком, который в этом случае вычисляется в 4. Это значение
связывается с y как часть инструкции let. Обратите внимание на строку
x + 1 без точки с запятой в конце, что отличает её от большинства строк,
которые вы видели до сих пор. Выражения не заканчиваются точкой с запятой.
Если добавить точку с запятой в конец выражения, вы превратите его
в инструкцию, и тогда оно не будет возвращать значение. Помните об этом, когда
дальше будете изучать возвращаемые значения функций и выражения.
Функции с возвращаемыми значениями
Функции могут возвращать значения коду, который их вызывает. Мы не даём имена
возвращаемым значениям, но должны объявлять их тип после стрелки (->). В Rust
возвращаемое значение функции совпадает со значением последнего выражения
в блоке тела функции. Можно вернуться из функции раньше, используя ключевое
слово return и указывая значение, но большинство функций неявно возвращают
последнее выражение. Вот пример функции, которая возвращает значение:
Имя файла: src/main.rs
fn five() -> i32 {
    5
}

fn main() {
    let x = five();

    println!("The value of x is: {x}");
}
В функции five нет вызовов функций, макросов и даже инструкций let — только
само число 5. Это вполне допустимая функция в Rust. Обратите внимание, что
тип возвращаемого значения функции также указан как -> i32. Попробуйте
запустить этот код; вывод должен выглядеть так:
$ cargo run
   Compiling functions v0.1.0 (file:///projects/functions)
    Finished `dev` profile [unoptimized + debuginfo] target(s) in 0.30s
     Running `target/debug/functions`
The value of x is: 5
5 в функции five — это возвращаемое значение функции, поэтому тип
возвращаемого значения — i32. Рассмотрим это подробнее. Здесь есть две
важные детали. Во-первых, строка let x = five(); показывает, что мы
используем возвращаемое значение функции для инициализации переменной.
Поскольку функция five возвращает 5, эта строка эквивалентна следующей:
#![allow(unused)]
fn main() {
let x = 5;
}
Во-вторых, функция five не имеет параметров и определяет тип возвращаемого
значения, но тело функции состоит из одинокого 5 без точки с запятой, потому
что это выражение, значение которого мы хотим вернуть.
Рассмотрим другой пример:
Имя файла: src/main.rs
fn main() {
    let x = plus_one(5);

    println!("The value of x is: {x}");
}

fn plus_one(x: i32) -> i32 {
    x + 1
}
Запуск этого кода выведет The value of x is: 6. Но что произойдёт, если мы
поставим точку с запятой в конце строки, содержащей x + 1, превратив её из
выражения в инструкцию?
Имя файла: src/main.rs
fn main() {
    let x = plus_one(5);

    println!("The value of x is: {x}");
}

fn plus_one(x: i32) -> i32 {
    x + 1;
}
Компиляция этого кода приведёт к следующей ошибке:
$ cargo run
   Compiling functions v0.1.0 (file:///projects/functions)
error[E0308]: mismatched types
 --> src/main.rs:7:24
  |
7 | fn plus_one(x: i32) -> i32 {
  |    --------            ^^^ expected `i32`, found `()`
  |    |
  |    implicitly returns `()` as its body has no tail or `return` expression
8 |     x + 1;
  |          - help: remove this semicolon to return this value

For more information about this error, try `rustc --explain E0308`.
error: could not compile `functions` (bin "functions") due to 1 previous error
Основное сообщение об ошибке, mismatched types, раскрывает главную проблему
этого кода. Определение функции plus_one говорит, что она вернёт i32, но
инструкции не вычисляются в значение; это выражается типом (), unit-типом.
Следовательно, ничего не возвращается, что противоречит определению функции
и приводит к ошибке. В этом выводе Rust предоставляет сообщение, которое может
помочь исправить проблему: он предлагает удалить точку с запятой, что исправит
ошибку.
Комментарии
Комментарии
Все программисты стремятся сделать свой код простым для понимания, но иногда нужны дополнительные пояснения. В таких случаях программисты оставляют комментарии в исходном коде: компилятор их игнорирует, но людям, читающим код, они могут быть полезны.
Вот простой комментарий:
#![allow(unused)]
fn main() {
// привет, мир
}
В Rust идиоматический стиль комментариев начинается с двух косых черт, а сам
комментарий продолжается до конца строки. Для комментариев, которые занимают
больше одной строки, нужно добавлять // в каждой строке, например так:
#![allow(unused)]
fn main() {
// Итак, здесь мы делаем что-то сложное, настолько длинное, что нам нужно
// несколько строк комментариев, чтобы это описать! Уф! Надеюсь, этот
// комментарий объяснит, что происходит.
}
Комментарии также можно размещать в конце строк, содержащих код:
Имя файла: src/main.rs
fn main() {
    let lucky_number = 7; // I'm feeling lucky today
}
Но чаще вы будете видеть их в таком формате: комментарий находится на отдельной строке над кодом, который он поясняет:
Имя файла: src/main.rs
fn main() {
    // I'm feeling lucky today
    let lucky_number = 7;
}
В Rust также есть другой вид комментариев — документационные комментарии, которые мы обсудим в разделе «Публикация крейта в Crates.io» Главы 14.
Управление потоком выполнения
Управление потоком выполнения
Возможность выполнять некоторый код в зависимости от того, является ли условие
true, и возможность многократно выполнять некоторый код, пока условие
остаётся true, — базовые строительные блоки большинства языков
программирования. Самые распространённые конструкции, позволяющие управлять
потоком выполнения кода Rust, — это выражения if и циклы.
Выражения if
Выражение if позволяет ветвить код в зависимости от условий. Вы задаёте
условие и затем говорите: «Если это условие выполняется, запусти этот блок
кода. Если условие не выполняется, не запускай этот блок кода».
Чтобы изучить выражение if, создайте в каталоге projects новый проект
с именем branches. В файл src/main.rs введите следующее:
Имя файла: src/main.rs
fn main() {
    let number = 3;

    if number < 5 {
        println!("condition was true");
    } else {
        println!("condition was false");
    }
}
Все выражения if начинаются с ключевого слова if, за которым следует
условие. В этом случае условие проверяет, меньше ли значение переменной
number числа 5. Сразу после условия в фигурных скобках мы помещаем блок
кода, который нужно выполнить, если условие равно true. Блоки кода, связанные
с условиями в выражениях if, иногда называют ветвями (arms), как и ветви
в выражениях match, которые мы обсуждали в разделе «Сравнение предположения
с секретным числом»
Главы 2.
Необязательно мы также можем включить выражение else, как сделали здесь,
чтобы предоставить программе альтернативный блок кода для выполнения, если
условие вычислится в false. Если вы не укажете выражение else, а условие
будет false, программа просто пропустит блок if и перейдёт к следующему
фрагменту кода.
Попробуйте запустить этот код; вы должны увидеть следующий вывод:
$ cargo run
   Compiling branches v0.1.0 (file:///projects/branches)
    Finished `dev` profile [unoptimized + debuginfo] target(s) in 0.31s
     Running `target/debug/branches`
condition was true
Попробуем изменить значение number на такое, при котором условие станет
false, и посмотрим, что произойдёт:
fn main() {
    let number = 7;

    if number < 5 {
        println!("condition was true");
    } else {
        println!("condition was false");
    }
}
Запустите программу снова и посмотрите на вывод:
$ cargo run
   Compiling branches v0.1.0 (file:///projects/branches)
    Finished `dev` profile [unoptimized + debuginfo] target(s) in 0.31s
     Running `target/debug/branches`
condition was false
Также стоит отметить, что условие в этом коде должно иметь тип bool. Если
условие не является bool, мы получим ошибку. Например, попробуйте запустить
следующий код:
Имя файла: src/main.rs
fn main() {
    let number = 3;

    if number {
        println!("number was three");
    }
}
На этот раз условие if вычисляется в значение 3, и Rust выдаёт ошибку:
$ cargo run
   Compiling branches v0.1.0 (file:///projects/branches)
error[E0308]: mismatched types
 --> src/main.rs:4:8
  |
4 |     if number {
  |        ^^^^^^ expected `bool`, found integer

For more information about this error, try `rustc --explain E0308`.
error: could not compile `branches` (bin "branches") due to 1 previous error
Ошибка указывает, что Rust ожидал bool, но получил целое число. В отличие от
таких языков, как Ruby и JavaScript, Rust не будет автоматически пытаться
преобразовывать нелогические типы в логический. Нужно быть явными и всегда
передавать в if логическое значение в качестве условия. Например, если мы
хотим, чтобы блок кода if выполнялся только тогда, когда число не равно 0,
мы можем изменить выражение if следующим образом:
Имя файла: src/main.rs
fn main() {
    let number = 3;

    if number != 0 {
        println!("number was something other than zero");
    }
}
Запуск этого кода выведет number was something other than zero.
Обработка нескольких условий с помощью else if
Можно использовать несколько условий, объединяя if и else в выражении
else if. Например:
Имя файла: src/main.rs
fn main() {
    let number = 6;

    if number % 4 == 0 {
        println!("number is divisible by 4");
    } else if number % 3 == 0 {
        println!("number is divisible by 3");
    } else if number % 2 == 0 {
        println!("number is divisible by 2");
    } else {
        println!("number is not divisible by 4, 3, or 2");
    }
}
У этой программы есть четыре возможных пути выполнения. После запуска вы должны увидеть следующий вывод:
$ cargo run
   Compiling branches v0.1.0 (file:///projects/branches)
    Finished `dev` profile [unoptimized + debuginfo] target(s) in 0.31s
     Running `target/debug/branches`
number is divisible by 3
Когда эта программа выполняется, она по очереди проверяет каждое выражение
if и выполняет первое тело, условие которого вычисляется в true. Обратите
внимание: хотя 6 делится на 2, мы не видим вывод number is divisible by 2
и не видим текст number is not divisible by 4, 3, or 2 из блока else.
Причина в том, что Rust выполняет только блок для первого условия, равного
true, и, как только находит его, уже не проверяет остальные.
Использование слишком большого количества выражений else if может загромоздить
код, поэтому, если их больше одного, возможно, стоит выполнить рефакторинг.
Глава 6 описывает мощную конструкцию ветвления Rust под названием match,
которая подходит для таких случаев.
Использование if в инструкции let
Поскольку if — это выражение, мы можем использовать его в правой части
инструкции let, чтобы присвоить результат переменной, как в листинге 3-2.
fn main() {
    let condition = true;
    let number = if condition { 5 } else { 6 };

    println!("The value of number is: {number}");
}if переменнойПеременная number будет связана со значением на основе результата выражения
if. Запустите этот код, чтобы увидеть, что произойдёт:
$ cargo run
   Compiling branches v0.1.0 (file:///projects/branches)
    Finished `dev` profile [unoptimized + debuginfo] target(s) in 0.30s
     Running `target/debug/branches`
The value of number is: 5
Помните, что блоки кода вычисляются в последнее выражение внутри них, а числа
сами по себе тоже являются выражениями. В этом случае значение всего выражения
if зависит от того, какой блок кода выполнится. Это означает, что значения,
которые потенциально могут быть результатами каждой ветви if, должны иметь
один и тот же тип; в листинге 3-2 результатами и ветви if, и ветви else
были целые числа i32. Если типы не совпадают, как в следующем примере, мы
получим ошибку:
Имя файла: src/main.rs
fn main() {
    let condition = true;

    let number = if condition { 5 } else { "six" };

    println!("The value of number is: {number}");
}
Когда мы попытаемся скомпилировать этот код, получим ошибку. Ветви if
и else имеют несовместимые типы значений, и Rust точно указывает, где
в программе находится проблема:
$ cargo run
   Compiling branches v0.1.0 (file:///projects/branches)
error[E0308]: `if` and `else` have incompatible types
 --> src/main.rs:4:44
  |
4 |     let number = if condition { 5 } else { "six" };
  |                                 -          ^^^^^ expected integer, found `&str`
  |                                 |
  |                                 expected because of this

For more information about this error, try `rustc --explain E0308`.
error: could not compile `branches` (bin "branches") due to 1 previous error
Выражение в блоке if вычисляется в целое число, а выражение в блоке else
вычисляется в строку. Это не сработает, потому что переменные должны иметь
один тип, а Rust должен точно знать во время компиляции, какой тип имеет
переменная number. Знание типа number позволяет компилятору проверять, что
тип допустим везде, где мы используем number. Rust не смог бы этого делать,
если бы тип number определялся только во время выполнения; компилятор был бы
сложнее и давал бы меньше гарантий о коде, если бы ему приходилось отслеживать
несколько гипотетических типов для любой переменной.
Повторение с помощью циклов
Часто бывает полезно выполнить блок кода больше одного раза. Для этой задачи Rust предоставляет несколько видов циклов, которые выполняют код внутри тела цикла до конца, а затем сразу возвращаются к началу. Чтобы поэкспериментировать с циклами, создадим новый проект с именем loops.
В Rust есть три вида циклов: loop, while и for. Попробуем каждый из них.
Повторение кода с помощью loop
Ключевое слово loop говорит Rust выполнять блок кода снова и снова: либо
бесконечно, либо до тех пор, пока вы явно не скажете остановиться.
В качестве примера измените файл src/main.rs в каталоге loops так, чтобы он выглядел следующим образом:
Имя файла: src/main.rs
fn main() {
    loop {
        println!("again!");
    }
}
Когда мы запустим эту программу, мы увидим, что again! выводится снова
и снова непрерывно, пока мы вручную не остановим программу. Большинство
терминалов поддерживают сочетание клавиш ctrl-C, чтобы
прервать программу, застрявшую в непрерывном цикле. Попробуйте:
$ cargo run
   Compiling loops v0.1.0 (file:///projects/loops)
    Finished `dev` profile [unoptimized + debuginfo] target(s) in 0.08s
     Running `target/debug/loops`
again!
again!
again!
again!
^Cagain!
Символ ^C показывает место, где вы нажали ctrl-C.
Вы можете увидеть или не увидеть слово again! после ^C — это зависит от
того, где именно в цикле находился код, когда получил сигнал прерывания.
К счастью, Rust также предоставляет способ выйти из цикла с помощью кода. Вы
можете поместить ключевое слово break внутрь цикла, чтобы сообщить программе,
когда нужно прекратить выполнение цикла. Вспомните, что мы делали это в игре
«Угадай число» в разделе «Выход после правильного
предположения» Главы 2, чтобы
выйти из программы, когда пользователь выигрывал игру, угадав правильное число.
В игре «Угадай число» мы также использовали continue, который в цикле
сообщает программе пропустить оставшийся код в текущей итерации цикла и перейти
к следующей итерации.
Возврат значений из циклов
Один из способов применения loop — повторять операцию, которая, как вы
знаете, может завершиться неудачей, например проверку, завершил ли поток свою
работу. Также может понадобиться передать результат этой операции из цикла
в остальную часть кода. Для этого можно добавить значение, которое вы хотите
вернуть, после выражения break, используемого для остановки цикла; это
значение будет возвращено из цикла, чтобы вы могли его использовать, как
показано здесь:
fn main() {
    let mut counter = 0;

    let result = loop {
        counter += 1;

        if counter == 10 {
            break counter * 2;
        }
    };

    println!("The result is {result}");
}
Перед циклом мы объявляем переменную с именем counter и инициализируем её
значением 0. Затем объявляем переменную с именем result, чтобы хранить
значение, возвращённое из цикла. На каждой итерации цикла мы добавляем 1
к переменной counter, а затем проверяем, равен ли counter значению 10.
Когда это так, мы используем ключевое слово break со значением counter * 2.
После цикла мы используем точку с запятой, чтобы завершить инструкцию, которая
присваивает значение result. Наконец, мы выводим значение result, которое
в этом случае равно 20.
Вы также можете использовать return внутри цикла. В то время как break
выходит только из текущего цикла, return всегда выходит из текущей функции.
Уточнение с помощью меток циклов
Если у вас есть циклы внутри циклов, break и continue применяются к самому
внутреннему циклу в этой точке. При желании можно указать для цикла метку
цикла, которую затем можно использовать с break или continue, чтобы
указать, что эти ключевые слова относятся к помеченному циклу, а не к самому
внутреннему. Метки циклов должны начинаться с одинарной кавычки. Вот пример
с двумя вложенными циклами:
fn main() {
    let mut count = 0;
    'counting_up: loop {
        println!("count = {count}");
        let mut remaining = 10;

        loop {
            println!("remaining = {remaining}");
            if remaining == 9 {
                break;
            }
            if count == 2 {
                break 'counting_up;
            }
            remaining -= 1;
        }

        count += 1;
    }
    println!("End count = {count}");
}
Внешний цикл имеет метку 'counting_up и будет считать вверх от 0 до 2.
Внутренний цикл без метки считает вниз от 10 до 9. Первый break, который не
указывает метку, выйдет только из внутреннего цикла. Инструкция
break 'counting_up; выйдет из внешнего цикла. Этот код выводит:
$ cargo run
   Compiling loops v0.1.0 (file:///projects/loops)
    Finished `dev` profile [unoptimized + debuginfo] target(s) in 0.58s
     Running `target/debug/loops`
count = 0
remaining = 10
remaining = 9
count = 1
remaining = 10
remaining = 9
count = 2
remaining = 10
End count = 2
Упрощение условных циклов с помощью while
Программе часто нужно проверять условие внутри цикла. Пока условие равно
true, цикл выполняется. Когда условие перестаёт быть true, программа
вызывает break, останавливая цикл. Такое поведение можно реализовать
комбинацией loop, if, else и break; при желании вы можете попробовать
сделать это сейчас в программе. Однако этот паттерн настолько распространён,
что в Rust для него есть встроенная языковая конструкция — цикл while.
В листинге 3-3 мы используем while, чтобы программа выполнила цикл три раза,
каждый раз выполняя обратный отсчёт, а затем после цикла вывела сообщение
и завершилась.
fn main() {
    let mut number = 3;

    while number != 0 {
        println!("{number}!");

        number -= 1;
    }

    println!("LIFTOFF!!!");
}while для выполнения кода, пока условие вычисляется в trueЭта конструкция устраняет большую часть вложенности, которая потребовалась бы
при использовании loop, if, else и break, и выглядит понятнее. Пока
условие вычисляется в true, код выполняется; иначе происходит выход из цикла.
Перебор коллекции с помощью for
Можно использовать конструкцию while, чтобы проходить по элементам коллекции,
например массива. Например, цикл в листинге 3-4 выводит каждый элемент массива
a.
fn main() {
    let a = [10, 20, 30, 40, 50];
    let mut index = 0;

    while index < 5 {
        println!("the value is: {}", a[index]);

        index += 1;
    }
}whileЗдесь код проходит по элементам массива, увеличивая индекс. Он начинает
с индекса 0 и затем выполняет цикл, пока не достигнет последнего индекса
в массиве (то есть пока index < 5 не перестанет быть true). Запуск этого
кода выведет каждый элемент массива:
$ cargo run
   Compiling loops v0.1.0 (file:///projects/loops)
    Finished `dev` profile [unoptimized + debuginfo] target(s) in 0.32s
     Running `target/debug/loops`
the value is: 10
the value is: 20
the value is: 30
the value is: 40
the value is: 50
Все пять значений массива появляются в терминале, как и ожидалось. Хотя
index в какой-то момент достигнет значения 5, цикл остановится до попытки
получить шестое значение из массива.
Однако этот подход подвержен ошибкам: мы можем вызвать panic в программе, если
значение индекса или проверяемое условие неверны. Например, если вы измените
определение массива a, чтобы в нём было четыре элемента, но забудете обновить
условие на while index < 4, код вызовет panic. Кроме того, это медленно,
потому что компилятор добавляет код времени выполнения для условной проверки
того, находится ли индекс в границах массива, на каждой итерации цикла.
В качестве более краткой альтернативы можно использовать цикл for и выполнять
некоторый код для каждого элемента коллекции. Цикл for выглядит как код
в листинге 3-5.
fn main() {
    let a = [10, 20, 30, 40, 50];

    for element in a {
        println!("the value is: {element}");
    }
}forКогда мы запустим этот код, то увидим тот же вывод, что и в листинге 3-4. Что
ещё важнее, теперь мы повысили безопасность кода и устранили вероятность
ошибок, которые могли бы возникнуть из-за выхода за конец массива или
недостаточного прохода и пропуска некоторых элементов. Машинный код,
сгенерированный из циклов for, также может быть эффективнее, потому что
индекс не нужно сравнивать с длиной массива на каждой итерации.
Используя цикл for, вам не нужно помнить, что требуется изменить какой-либо
другой код при изменении количества значений в массиве, как пришлось бы при
подходе из листинга 3-4.
Безопасность и краткость циклов for делают их самой часто используемой
конструкцией цикла в Rust. Даже в ситуациях, когда нужно выполнить некоторый
код определённое количество раз, как в примере обратного отсчёта с циклом
while в листинге 3-3, большинство разработчиков Rust использовали бы цикл
for. Для этого можно использовать Range, предоставляемый стандартной
библиотекой: он генерирует все числа в последовательности, начиная с одного
числа и заканчивая перед другим, не включая его.
Вот как выглядел бы обратный отсчёт с использованием цикла for и другого
метода, о котором мы ещё не говорили, rev, чтобы развернуть диапазон:
Имя файла: src/main.rs
fn main() {
    for number in (1..4).rev() {
        println!("{number}!");
    }
    println!("LIFTOFF!!!");
}
Этот код немного приятнее, не правда ли?
Итоги
Вы справились! Это была объёмная глава: вы узнали о переменных, скалярных
и составных типах данных, функциях, комментариях, выражениях if и циклах!
Чтобы попрактиковаться с концепциями, обсуждёнными в этой главе, попробуйте
написать программы, которые делают следующее:
- Преобразуют температуру между шкалами Фаренгейта и Цельсия.
- Генерируют n-е число Фибоначчи.
- Печатают текст рождественской песни «Двенадцать дней Рождества», используя повторения в песне.
Когда будете готовы двигаться дальше, мы поговорим о концепции Rust, которая обычно не существует в других языках программирования: о владении.
Понимание владения
Владение — самая уникальная возможность Rust, глубоко влияющая на остальную часть языка. Благодаря владению Rust может гарантировать безопасность памяти без необходимости в сборщике мусора, поэтому важно понимать, как работает владение. В этой главе мы поговорим о владении, а также о нескольких связанных возможностях: заимствовании, срезах и о том, как Rust размещает данные в памяти.
Что такое владение?
Что такое владение?
Владение — это набор правил, которые определяют, как программа на Rust управляет памятью. Все программы во время выполнения должны управлять тем, как они используют память компьютера. В одних языках есть сборка мусора, которая регулярно ищет память, больше не используемую программой; в других языках программист должен явно выделять и освобождать память. Rust использует третий подход: память управляется через систему владения с набором правил, которые проверяет компилятор. Если нарушено любое из этих правил, программа не скомпилируется. Ни одна из возможностей владения не замедляет вашу программу во время выполнения.
Поскольку владение — новая концепция для многих программистов, к нему нужно немного привыкнуть. Хорошая новость в том, что чем больше опыта вы получаете с Rust и правилами системы владения, тем естественнее вам будет писать безопасный и эффективный код. Продолжайте практиковаться!
Когда вы поймёте владение, у вас будет прочная основа для понимания возможностей, которые делают Rust уникальным. В этой главе вы изучите владение на примерах, сосредоточенных на очень распространённой структуре данных: строках.
Стек и куча
Во многих языках программирования не нужно часто думать о стеке и куче. Но в системном языке программирования, таком как Rust, то, находится ли значение в стеке или в куче, влияет на поведение языка и на то, почему вам приходится принимать определённые решения. Позже в этой главе части владения будут описываться через связь со стеком и кучей, поэтому сначала дадим краткое объяснение.
И стек, и куча — это части памяти, доступные вашему коду во время выполнения, но устроены они по-разному. Стек хранит значения в порядке их поступления, а удаляет их в обратном порядке. Это называется последним пришёл — первым вышел (last in, first out, LIFO). Представьте стопку тарелок: когда вы добавляете тарелки, вы кладёте их наверх, а когда нужна тарелка, берёте одну сверху. Добавлять или убирать тарелки из середины или снизу было бы не так удобно! Добавление данных называется помещением в стек, а удаление данных — извлечением из стека. Все данные, хранящиеся в стеке, должны иметь известный фиксированный размер. Данные, размер которых во время компиляции неизвестен или может изменяться, должны храниться в куче.
Куча менее организована: когда вы помещаете данные в кучу, вы запрашиваете определённый объём пространства. Аллокатор памяти находит в куче достаточно большое свободное место, помечает его как используемое и возвращает указатель — адрес этого места. Этот процесс называется выделением памяти в куче и иногда сокращается просто до выделения памяти (помещение значений в стек выделением памяти не считается). Поскольку указатель на кучу имеет известный фиксированный размер, вы можете хранить указатель в стеке, но, когда вам нужны сами данные, нужно перейти по указателю. Представьте, что вас рассаживают в ресторане. Когда вы входите, вы называете количество людей в вашей группе, и администратор находит свободный стол, подходящий всем, и провожает вас туда. Если кто-то из вашей группы придёт позже, он сможет спросить, куда вас посадили, чтобы найти вас.
Помещение в стек быстрее, чем выделение памяти в куче, потому что аллокатору не нужно искать место для хранения новых данных; это место всегда находится на вершине стека. Для сравнения, выделение пространства в куче требует больше работы, потому что аллокатор должен сначала найти достаточно большое место для данных, а затем выполнить служебный учёт, чтобы подготовиться к следующему выделению.
Доступ к данным в куче обычно медленнее, чем доступ к данным в стеке, потому что нужно перейти по указателю. Современные процессоры работают быстрее, если им приходится меньше прыгать по памяти. Продолжая аналогию, представьте официанта в ресторане, который принимает заказы за многими столами. Эффективнее всего получить все заказы за одним столом, прежде чем переходить к следующему. Взять заказ со стола A, затем со стола B, затем снова со стола A, а потом снова со стола B было бы гораздо медленнее. По той же причине процессор обычно лучше выполняет свою работу, если обрабатывает данные, расположенные близко к другим данным (как в стеке), а не дальше от них (как может быть в куче).
Когда ваш код вызывает функцию, значения, переданные в функцию (включая, возможно, указатели на данные в куче), и локальные переменные функции помещаются в стек. Когда функция завершается, эти значения извлекаются из стека.
Отслеживание того, какие части кода используют какие данные в куче, минимизация количества дублирующихся данных в куче и очистка неиспользуемых данных в куче, чтобы у вас не закончилось место, — всё это проблемы, которые решает владение. Когда вы поймёте владение, вам не нужно будет часто думать о стеке и куче. Но знание того, что главная цель владения — управление данными в куче, помогает объяснить, почему оно работает именно так.
Правила владения
Сначала посмотрим на правила владения. Держите эти правила в уме, пока мы будем разбирать примеры, которые их иллюстрируют:
- Каждое значение в Rust имеет владельца.
- В каждый момент времени может быть только один владелец.
- Когда владелец выходит из области видимости, значение будет удалено.
Область видимости переменной
Теперь, когда базовый синтаксис Rust уже позади, мы не будем включать во все
примеры код fn main() {, поэтому, если вы повторяете за нами, вручную
помещайте следующие примеры внутрь функции main. Благодаря этому примеры
будут немного короче, и мы сможем сосредоточиться на реальных деталях, а не
на шаблонном коде.
В качестве первого примера владения рассмотрим область видимости некоторых переменных. Область видимости — это диапазон в программе, в котором элемент является действительным. Возьмём следующую переменную:
#![allow(unused)]
fn main() {
let s = "hello";
}
Переменная s ссылается на строковый литерал, значение которого жёстко задано
в тексте нашей программы. Переменная действительна с момента объявления до
конца текущей области видимости. Листинг 4-1 показывает программу
с комментариями, отмечающими, где переменная s была бы действительной.
fn main() {
    {                      // s is not valid here, since it's not yet declared
        let s = "hello";   // s is valid from this point forward

        // do stuff with s
    }                      // this scope is now over, and s is no longer valid
}Другими словами, здесь есть два важных момента времени:
- Когда
sвходит в область видимости, она становится действительной. - Она остаётся действительной, пока не выходит из области видимости.
На этом этапе связь между областями видимости и тем, когда переменные
действительны, похожа на другие языки программирования. Теперь мы расширим это
понимание, введя тип String.
Тип String
Чтобы проиллюстрировать правила владения, нам нужен тип данных сложнее тех,
которые мы рассматривали в разделе «Типы данных»
Главы 3. Рассмотренные ранее типы имеют известный размер, могут храниться
в стеке и извлекаться из стека, когда их область видимости завершается, а также
могут быстро и тривиально копироваться для создания нового независимого
экземпляра, если другой части кода нужно использовать то же значение в другой
области видимости. Но мы хотим посмотреть на данные, которые хранятся в куче,
и разобраться, как Rust узнаёт, когда нужно очистить эти данные; тип String
для этого отлично подходит.
Мы сосредоточимся на тех частях String, которые связаны с владением. Эти
аспекты также применимы к другим сложным типам данных, независимо от того,
предоставлены они стандартной библиотекой или созданы вами. Аспекты String,
не связанные с владением, мы обсудим в Главе 8.
Мы уже видели строковые литералы, где строковое значение жёстко задано в нашей
программе. Строковые литералы удобны, но подходят не для каждой ситуации, когда
мы хотим использовать текст. Одна причина в том, что они неизменяемы. Другая —
не каждое строковое значение может быть известно во время написания кода:
например, что если мы хотим принять пользовательский ввод и сохранить его?
Для таких ситуаций в Rust есть тип String. Этот тип управляет данными,
выделенными в куче, и поэтому способен хранить объём текста, неизвестный нам
во время компиляции. Вы можете создать String из строкового литерала
с помощью функции from, например так:
#![allow(unused)]
fn main() {
let s = String::from("hello");
}
Оператор двойного двоеточия :: позволяет поместить именно эту функцию from
в пространство имён типа String, а не использовать какое-нибудь имя вроде
string_from. Мы подробнее обсудим этот синтаксис в разделе
«Методы» Главы 5, а также когда будем говорить
о пространствах имён с модулями в разделе «Пути для обращения к элементу
в дереве модулей» Главы 7.
Такой вид строки можно изменять:
fn main() {
    let mut s = String::from("hello");

    s.push_str(", world!"); // push_str() appends a literal to a String

    println!("{s}"); // this will print `hello, world!`
}
Так в чём же разница? Почему String можно изменять, а литералы нельзя?
Разница в том, как эти два типа работают с памятью.
Память и выделение памяти
В случае строкового литерала мы знаем содержимое во время компиляции, поэтому текст жёстко встраивается прямо в итоговый исполняемый файл. Именно поэтому строковые литералы быстры и эффективны. Но эти свойства возникают только благодаря неизменяемости строкового литерала. К сожалению, мы не можем поместить в бинарный файл блок памяти для каждого фрагмента текста, размер которого неизвестен во время компиляции и может изменяться во время выполнения программы.
В случае типа String, чтобы поддерживать изменяемый, растущий фрагмент
текста, нам нужно выделить в куче объём памяти, неизвестный во время
компиляции, для хранения содержимого. Это означает:
- Память должна быть запрошена у аллокатора памяти во время выполнения.
- Нам нужен способ вернуть эту память аллокатору, когда мы закончим работать
с нашим
String.
Первую часть выполняем мы: когда мы вызываем String::from, его реализация
запрашивает необходимую память. Это почти универсально для языков
программирования.
Однако вторая часть отличается. В языках со сборщиком мусора (garbage
collector, GC) сборщик мусора отслеживает и очищает память, которая больше не
используется, и нам не нужно об этом думать. В большинстве языков без GC наша
ответственность — определить, когда память больше не используется, и вызвать
код для её явного освобождения, так же как мы вызывали код для её запроса.
Исторически сделать это правильно было трудной задачей программирования. Если
мы забудем, мы будем расходовать память впустую. Если сделаем это слишком
рано, у нас появится недействительная переменная. Если сделаем это дважды, это
тоже ошибка. Нужно сопоставить ровно один allocate с ровно одним free.
Rust идёт другим путём: память автоматически возвращается, когда переменная,
которая ею владеет, выходит из области видимости. Вот версия нашего примера
с областью видимости из листинга 4-1, использующая String вместо строкового
литерала:
fn main() {
    {
        let s = String::from("hello"); // s is valid from this point forward

        // do stuff with s
    }                                  // this scope is now over, and s is no
                                       // longer valid
}
Есть естественный момент, когда мы можем вернуть аллокатору память, которая
нужна нашему String: когда s выходит из области видимости. Когда переменная
выходит из области видимости, Rust вызывает для нас специальную функцию. Эта
функция называется drop, и именно туда автор String может поместить код для
возврата памяти. Rust автоматически вызывает drop при закрывающей фигурной
скобке.
Примечание: в C++ этот паттерн освобождения ресурсов в конце времени жизни элемента иногда называется получение ресурса является инициализацией (Resource Acquisition Is Initialization, RAII). Функция
dropв Rust будет вам знакома, если вы использовали паттерны RAII.
Этот паттерн глубоко влияет на то, как пишется код Rust. Сейчас это может казаться простым, но в более сложных ситуациях поведение кода может быть неожиданным, когда мы хотим, чтобы несколько переменных использовали данные, выделенные нами в куче. Давайте теперь рассмотрим несколько таких ситуаций.
Взаимодействие переменных и данных при перемещении
В Rust несколько переменных могут по-разному взаимодействовать с одними и теми же данными. Листинг 4-2 показывает пример с целым числом.
fn main() {
    let x = 5;
    let y = x;
}x переменной yВероятно, мы можем догадаться, что здесь происходит: «Свяжи значение 5 с x;
затем сделай копию значения в x и свяжи её с y». Теперь у нас есть две
переменные, x и y, и обе равны 5. Именно это и происходит, потому что
целые числа — простые значения с известным фиксированным размером, и оба эти
значения 5 помещаются в стек.
Теперь посмотрим на версию со String:
fn main() {
    let s1 = String::from("hello");
    let s2 = s1;
}
Это выглядит очень похоже, поэтому можно предположить, что работать это будет
так же: то есть вторая строка создаст копию значения из s1 и свяжет её
с s2. Но происходит не совсем это.
Посмотрите на рисунок 4-1, чтобы увидеть, что происходит со String внутри.
String состоит из трёх частей, показанных слева: указателя на память, где
хранится содержимое строки, длины и ёмкости. Эта группа данных хранится
в стеке. Справа находится память в куче, которая хранит содержимое.
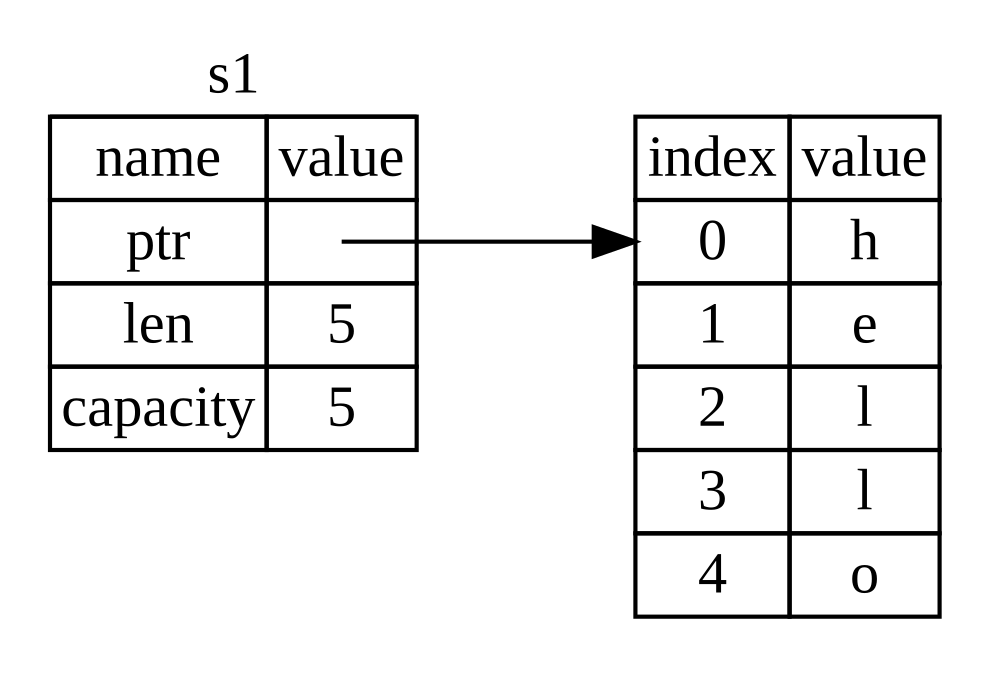
Рисунок 4-1: Представление в памяти значения String,
содержащего "hello" и связанного с s1
Длина — это объём памяти в байтах, который в данный момент использует
содержимое String. Ёмкость — это общий объём памяти в байтах, который
String получил от аллокатора. Разница между длиной и ёмкостью важна, но не
в этом контексте, поэтому сейчас можно не обращать внимания на ёмкость.
Когда мы присваиваем s1 переменной s2, данные String копируются: мы
копируем указатель, длину и ёмкость, находящиеся в стеке. Мы не копируем данные
в куче, на которые указывает указатель. Другими словами, представление данных
в памяти выглядит как на рисунке 4-2.
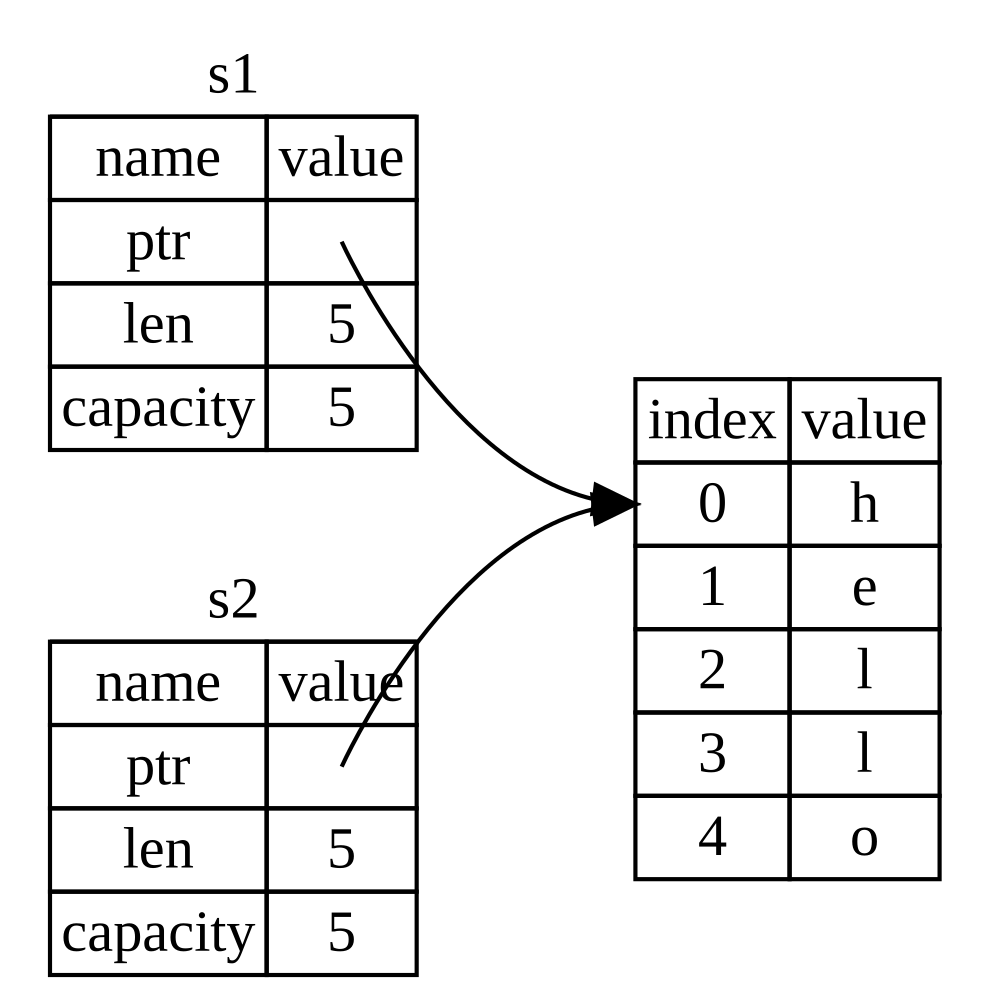
Рисунок 4-2: Представление в памяти переменной s2,
которая содержит копию указателя, длины и ёмкости s1
Представление не выглядит как на рисунке 4-3, где показано, как выглядела бы
память, если бы Rust также копировал данные в куче. Если бы Rust так делал,
операция s2 = s1 могла бы быть очень дорогой с точки зрения
производительности во время выполнения, если бы данные в куче были большими.
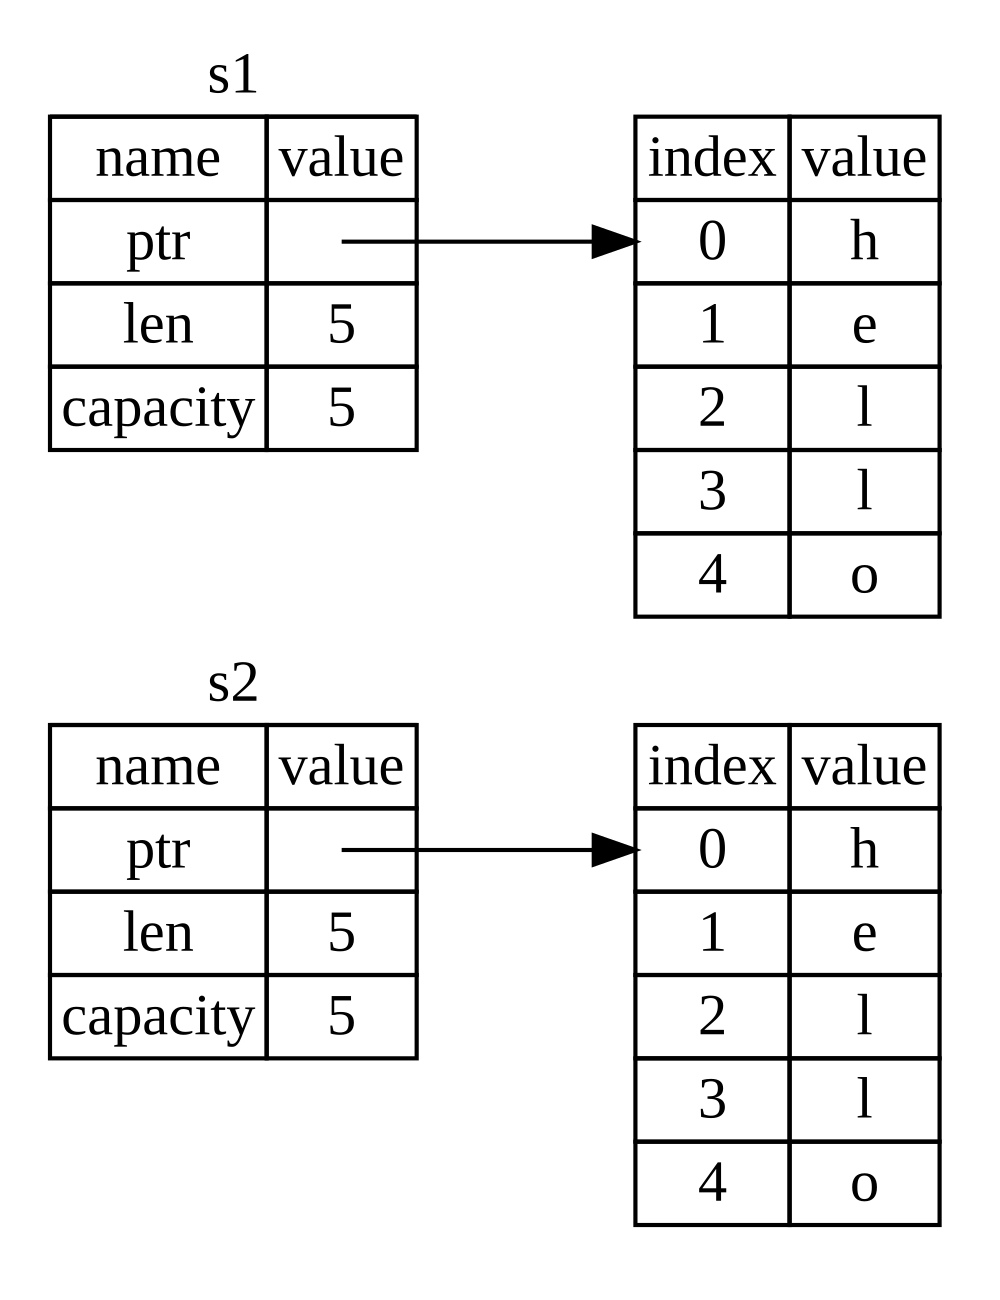
Рисунок 4-3: Другой возможный вариант того, что могла бы
делать операция s2 = s1, если бы Rust также копировал данные в куче
Ранее мы говорили, что, когда переменная выходит из области видимости, Rust
автоматически вызывает функцию drop и очищает память в куче для этой
переменной. Но рисунок 4-2 показывает, что оба указателя данных указывают на
одно и то же место. Это проблема: когда s2 и s1 выйдут из области
видимости, они обе попытаются освободить одну и ту же память. Это известно как
ошибка двойного освобождения и является одной из ошибок безопасности памяти,
о которых мы упоминали ранее. Двойное освобождение памяти может привести
к повреждению памяти, что потенциально может привести к уязвимостям
безопасности.
Чтобы обеспечить безопасность памяти, после строки let s2 = s1; Rust считает
s1 недействительной. Поэтому Rust не нужно ничего освобождать, когда s1
выходит из области видимости. Посмотрите, что произойдёт, если попытаться
использовать s1 после создания s2; это не сработает:
fn main() {
    let s1 = String::from("hello");
    let s2 = s1;

    println!("{s1}, world!");
}
Вы получите такую ошибку, потому что Rust не позволяет использовать недействительное значение:
$ cargo run
   Compiling ownership v0.1.0 (file:///projects/ownership)
error[E0382]: borrow of moved value: `s1`
 --> src/main.rs:5:16
  |
2 |     let s1 = String::from("hello");
  |         -- move occurs because `s1` has type `String`, which does not implement the `Copy` trait
3 |     let s2 = s1;
  |              -- value moved here
4 |
5 |     println!("{s1}, world!");
  |                ^^ value borrowed here after move
  |
  = note: this error originates in the macro `$crate::format_args_nl` which comes from the expansion of the macro `println` (in Nightly builds, run with -Z macro-backtrace for more info)
help: consider cloning the value if the performance cost is acceptable
  |
3 |     let s2 = s1.clone();
  |                ++++++++

For more information about this error, try `rustc --explain E0382`.
error: could not compile `ownership` (bin "ownership") due to 1 previous error
Если при работе с другими языками вы слышали термины поверхностное
копирование и глубокое копирование, то копирование указателя, длины
и ёмкости без копирования самих данных, вероятно, похоже на поверхностное
копирование. Но поскольку Rust также делает первую переменную недействительной,
это называется не поверхностным копированием, а перемещением. В этом примере
мы сказали бы, что s1 была перемещена в s2. Таким образом, на самом деле
происходит то, что показано на рисунке 4-4.
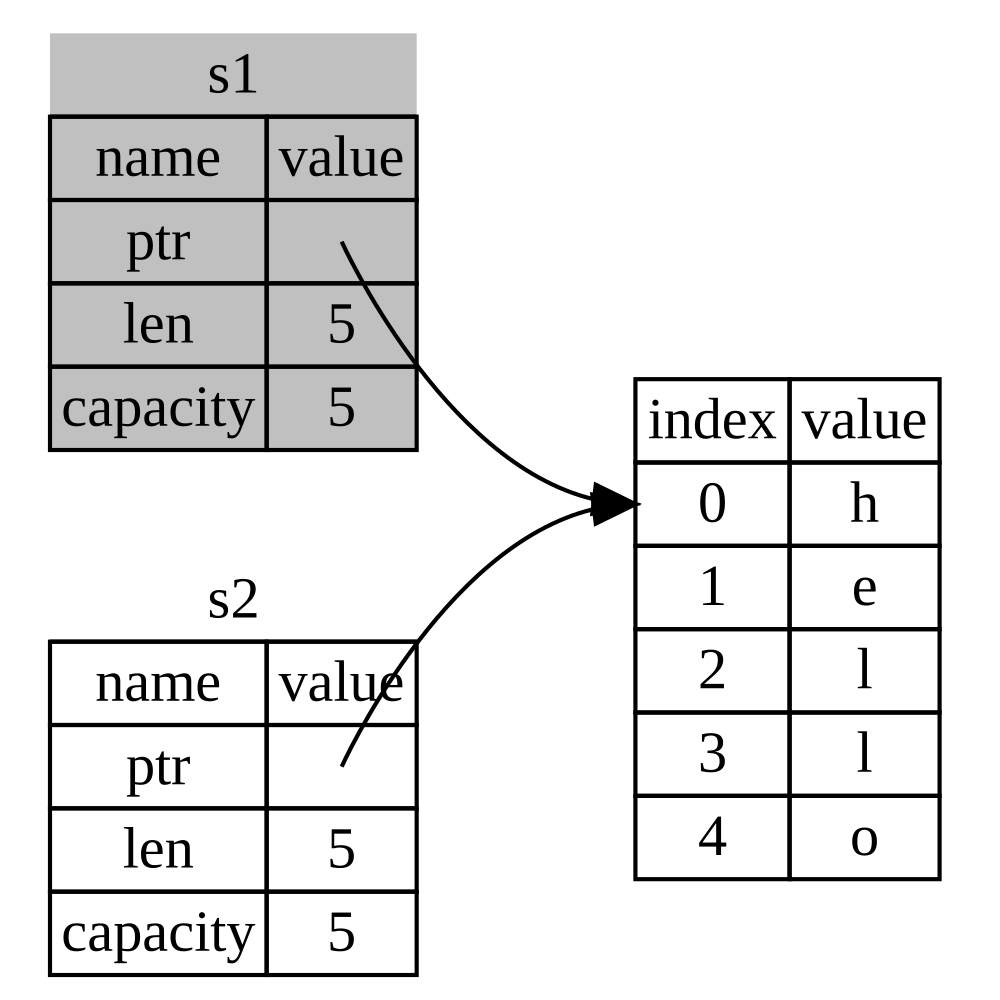
Рисунок 4-4: Представление в памяти после того, как s1
стала недействительной
Это решает нашу проблему! Поскольку действительна только s2, когда она
выйдет из области видимости, только она освободит память, и на этом всё.
Кроме того, из этого следует одно проектное решение: Rust никогда автоматически не создаёт «глубокие» копии ваших данных. Поэтому любое автоматическое копирование можно считать недорогим с точки зрения производительности во время выполнения.
Область видимости и присваивание
Обратное тоже верно для связи между областью видимости, владением
и освобождением памяти через функцию drop. Когда вы присваиваете существующей
переменной совершенно новое значение, Rust вызовет drop и немедленно
освободит память исходного значения. Рассмотрим, например, этот код:
fn main() {
    let mut s = String::from("hello");
    s = String::from("ahoy");

    println!("{s}, world!");
}
Сначала мы объявляем переменную s и связываем её со String со значением
"hello". Затем сразу создаём новый String со значением "ahoy"
и присваиваем его s. В этот момент на исходное значение в куче уже вообще
ничто не ссылается. Рисунок 4-5 показывает, как теперь выглядят данные в стеке
и куче:
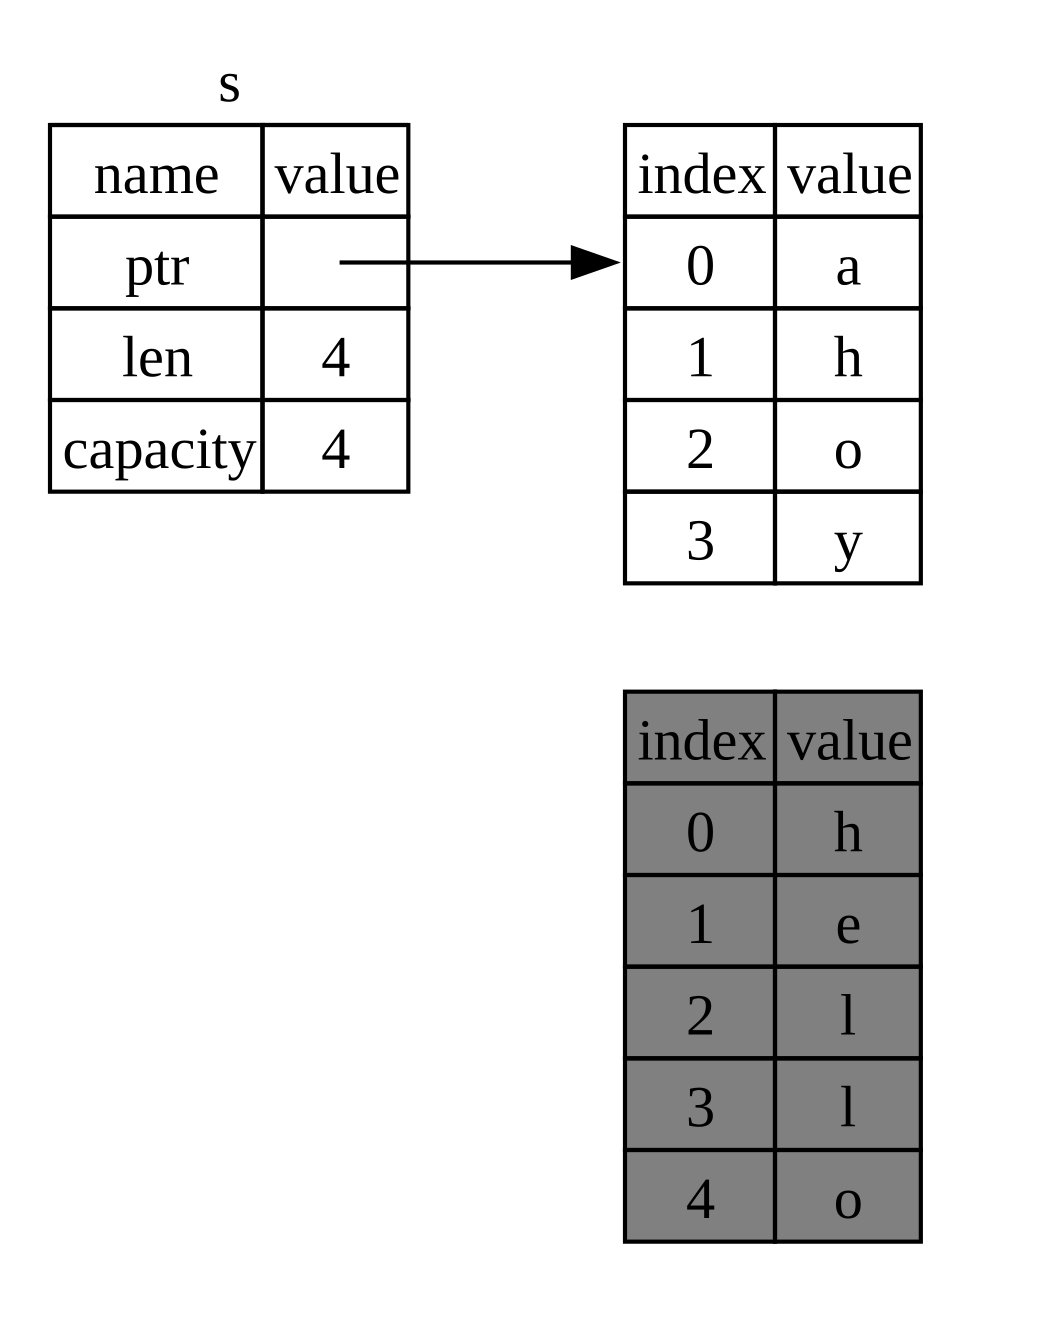
Рисунок 4-5: Представление в памяти после того, как исходное значение было полностью заменено
Таким образом, исходная строка немедленно выходит из области видимости. Rust
выполнит для неё функцию drop, и её память будет сразу освобождена. Когда
в конце мы выведем значение, это будет "ahoy, world!".
Взаимодействие переменных и данных при клонировании
Если мы действительно хотим глубоко скопировать данные String в куче, а не
только данные в стеке, можно использовать распространённый метод clone. Мы
обсудим синтаксис методов в Главе 5, но, поскольку методы — распространённая
возможность во многих языках программирования, вы, вероятно, уже видели их
раньше.
Вот пример использования метода clone:
fn main() {
    let s1 = String::from("hello");
    let s2 = s1.clone();

    println!("s1 = {s1}, s2 = {s2}");
}
Это работает как надо и явно создаёт поведение, показанное на рисунке 4-3, где данные в куче действительно копируются.
Когда вы видите вызов clone, вы знаете, что выполняется некоторый произвольный
код, и этот код может быть дорогим. Это визуальный индикатор того, что
происходит что-то отличное от обычного.
Данные только в стеке: Copy
Есть ещё одна тонкость, о которой мы пока не говорили. Этот код с целыми числами, часть которого была показана в листинге 4-2, работает и является допустимым:
fn main() {
    let x = 5;
    let y = x;

    println!("x = {x}, y = {y}");
}
Но этот код, кажется, противоречит тому, что мы только что узнали: у нас нет
вызова clone, но x всё ещё действительна и не была перемещена в y.
Причина в том, что типы вроде целых чисел, имеющие известный во время
компиляции размер, полностью хранятся в стеке, поэтому копии самих значений
создаются быстро. Это означает, что нет причины запрещать x оставаться
действительной после создания переменной y. Другими словами, здесь нет
разницы между глубоким и поверхностным копированием, поэтому вызов clone не
сделал бы ничего отличного от обычного поверхностного копирования, и мы можем
его не использовать.
В Rust есть специальная аннотация, называемая трейтом Copy, которую можно
использовать для типов, хранящихся в стеке, как целые числа (подробнее
о трейтах мы поговорим в Главе 10). Если тип
реализует трейт Copy, переменные, использующие его, не перемещаются,
а тривиально копируются, поэтому остаются действительными после присваивания
другой переменной.
Rust не позволит нам пометить тип как Copy, если сам тип или любая его часть
реализует трейт Drop. Если типу нужно выполнить что-то особое, когда значение
выходит из области видимости, а мы добавим к этому типу аннотацию Copy, то
получим ошибку времени компиляции. Чтобы узнать, как добавить аннотацию Copy
к своему типу для реализации трейта, смотрите «Автоматически выводимые
трейты» в Приложении C.
Итак, какие типы реализуют трейт Copy? Чтобы убедиться, можно проверить
документацию конкретного типа, но общее правило такое: любая группа простых
скалярных значений может реализовывать Copy, а ничто, что требует выделения
памяти или является какой-либо формой ресурса, не может реализовывать Copy.
Вот некоторые типы, реализующие Copy:
- Все целочисленные типы, например
u32. - Логический тип
boolсо значениямиtrueиfalse. - Все типы с плавающей точкой, например
f64. - Символьный тип
char. - Кортежи, если они содержат только типы, которые тоже реализуют
Copy. Например,(i32, i32)реализуетCopy, а(i32, String)— нет.
Владение и функции
Механика передачи значения в функцию похожа на присваивание значения переменной. Передача переменной в функцию приводит к перемещению или копированию, как и присваивание. В листинге 4-3 приведён пример с аннотациями, показывающими, где переменные входят в область видимости и выходят из неё.
fn main() {
    let s = String::from("hello");  // s comes into scope

    takes_ownership(s);             // s's value moves into the function...
                                    // ... and so is no longer valid here

    let x = 5;                      // x comes into scope

    makes_copy(x);                  // Because i32 implements the Copy trait,
                                    // x does NOT move into the function,
                                    // so it's okay to use x afterward.

} // Here, x goes out of scope, then s. However, because s's value was moved,
  // nothing special happens.

fn takes_ownership(some_string: String) { // some_string comes into scope
    println!("{some_string}");
} // Here, some_string goes out of scope and `drop` is called. The backing
  // memory is freed.

fn makes_copy(some_integer: i32) { // some_integer comes into scope
    println!("{some_integer}");
} // Here, some_integer goes out of scope. Nothing special happens.Если бы мы попытались использовать s после вызова takes_ownership, Rust
выдал бы ошибку времени компиляции. Эти статические проверки защищают нас от
ошибок. Попробуйте добавить в main код, использующий s и x, чтобы
увидеть, где их можно использовать, а где правила владения не позволят это
сделать.
Возвращаемые значения и область видимости
Возврат значений также может передавать владение. Листинг 4-4 показывает пример функции, которая возвращает некоторое значение, с аннотациями, похожими на аннотации из листинга 4-3.
fn main() {
    let s1 = gives_ownership();        // gives_ownership moves its return
                                       // value into s1

    let s2 = String::from("hello");    // s2 comes into scope

    let s3 = takes_and_gives_back(s2); // s2 is moved into
                                       // takes_and_gives_back, which also
                                       // moves its return value into s3
} // Here, s3 goes out of scope and is dropped. s2 was moved, so nothing
  // happens. s1 goes out of scope and is dropped.

fn gives_ownership() -> String {       // gives_ownership will move its
                                       // return value into the function
                                       // that calls it

    let some_string = String::from("yours"); // some_string comes into scope

    some_string                        // some_string is returned and
                                       // moves out to the calling
                                       // function
}

// This function takes a String and returns a String.
fn takes_and_gives_back(a_string: String) -> String {
    // a_string comes into
    // scope

    a_string  // a_string is returned and moves out to the calling function
}Владение переменной каждый раз следует одному и тому же паттерну: присваивание
значения другой переменной перемещает его. Когда переменная, включающая данные
в куче, выходит из области видимости, значение будет очищено функцией drop,
если владение данными не было перемещено в другую переменную.
Хотя это работает, принимать владение и затем возвращать владение из каждой функции немного утомительно. Что, если мы хотим позволить функции использовать значение, но не забирать владение? Довольно неудобно, что всё, что мы передаём в функцию, также нужно передавать обратно, если мы хотим использовать это снова, в дополнение к любым данным, полученным из тела функции, которые мы тоже можем захотеть вернуть.
Rust позволяет возвращать несколько значений с помощью кортежа, как показано в листинге 4-5.
fn main() {
    let s1 = String::from("hello");

    let (s2, len) = calculate_length(s1);

    println!("The length of '{s2}' is {len}.");
}

fn calculate_length(s: String) -> (String, usize) {
    let length = s.len(); // len() returns the length of a String

    (s, length)
}Но это слишком много формальностей и работы для концепции, которая должна быть обычной. К счастью для нас, в Rust есть возможность использовать значение без передачи владения: ссылки.
Ссылки и заимствование
Ссылки и заимствование
Проблема кода с кортежем в листинге 4-5 состоит в том, что нам приходится
возвращать String вызывающей функции, чтобы мы всё ещё могли использовать
String после вызова calculate_length, потому что значение String было
перемещено в calculate_length. Вместо этого мы можем предоставить ссылку
на значение String. Ссылка похожа на указатель тем, что это адрес, по
которому можно перейти для доступа к данным, хранящимся по этому адресу; этими
данными владеет какая-то другая переменная. В отличие от указателя, ссылка
гарантированно указывает на действительное значение определённого типа
на протяжении всей жизни этой ссылки.
Вот как можно определить и использовать функцию calculate_length, которая
принимает ссылку на объект в качестве параметра вместо того, чтобы забирать
владение значением:
fn main() {
    let s1 = String::from("hello");

    let len = calculate_length(&s1);

    println!("The length of '{s1}' is {len}.");
}

fn calculate_length(s: &String) -> usize {
    s.len()
}
Во-первых, обратите внимание, что весь код с кортежем в объявлении переменной
и возвращаемом значении функции исчез. Во-вторых, заметьте, что мы передаём
&s1 в calculate_length, а в её определении принимаем &String, а не
String. Эти амперсанды обозначают ссылки и позволяют ссылаться на некоторое
значение, не забирая владение им. Рисунок 4-6 иллюстрирует эту концепцию.
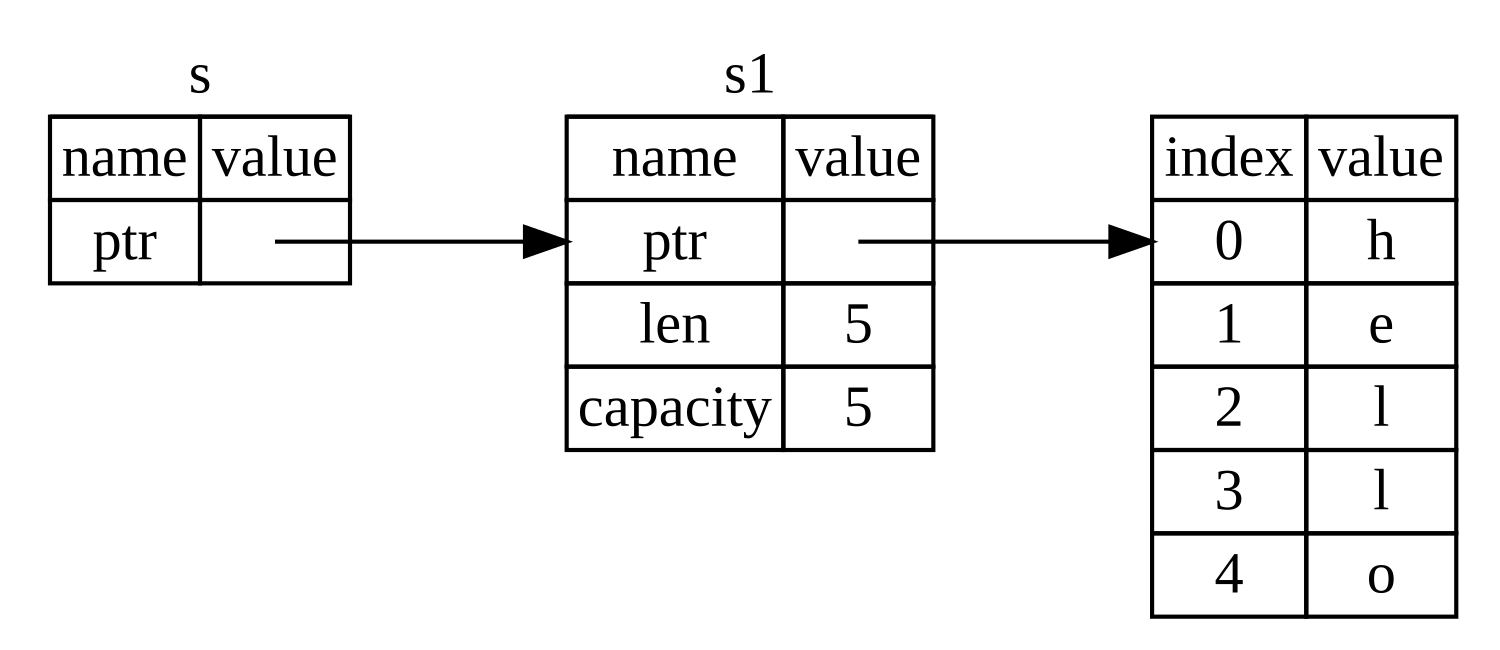
Рисунок 4-6: Схема, на которой &String s указывает
на String s1
Примечание: операция, противоположная созданию ссылки с помощью
&, — разыменование, которое выполняется оператором разыменования*. Мы увидим несколько способов использования оператора разыменования в Главе 8 и подробно обсудим разыменование в Главе 15.
Рассмотрим этот вызов функции подробнее:
fn main() {
    let s1 = String::from("hello");

    let len = calculate_length(&s1);

    println!("The length of '{s1}' is {len}.");
}

fn calculate_length(s: &String) -> usize {
    s.len()
}
Синтаксис &s1 позволяет создать ссылку, которая ссылается на значение s1,
но не владеет им. Поскольку ссылка им не владеет, значение, на которое она
указывает, не будет удалено, когда ссылка перестанет использоваться.
Точно так же сигнатура функции использует &, чтобы указать, что тип параметра
s — ссылка. Добавим несколько поясняющих аннотаций:
fn main() {
    let s1 = String::from("hello");

    let len = calculate_length(&s1);

    println!("The length of '{s1}' is {len}.");
}

fn calculate_length(s: &String) -> usize { // s is a reference to a String
    s.len()
} // Here, s goes out of scope. But because s does not have ownership of what
  // it refers to, the String is not dropped.
Область видимости, в которой переменная s действительна, такая же, как
у любого параметра функции, но значение, на которое указывает ссылка, не
удаляется, когда s перестаёт использоваться, потому что s не владеет им.
Когда функции принимают ссылки как параметры вместо самих значений, нам не
нужно возвращать значения, чтобы вернуть владение, потому что владения у нас
никогда не было.
Действие создания ссылки мы называем заимствованием. Как и в реальной жизни, если человек владеет чем-то, вы можете это у него одолжить. Когда вы закончите, нужно вернуть это обратно. Вы этим не владеете.
Что же произойдёт, если мы попытаемся изменить то, что заимствуем? Попробуйте код из листинга 4-6. Спойлер: это не работает!
fn main() {
    let s = String::from("hello");

    change(&s);
}

fn change(some_string: &String) {
    some_string.push_str(", world");
}Вот ошибка:
$ cargo run
   Compiling ownership v0.1.0 (file:///projects/ownership)
error[E0596]: cannot borrow `*some_string` as mutable, as it is behind a `&` reference
 --> src/main.rs:8:5
  |
8 |     some_string.push_str(", world");
  |     ^^^^^^^^^^^ `some_string` is a `&` reference, so the data it refers to cannot be borrowed as mutable
  |
help: consider changing this to be a mutable reference
  |
7 | fn change(some_string: &mut String) {
  |                         +++

For more information about this error, try `rustc --explain E0596`.
error: could not compile `ownership` (bin "ownership") due to 1 previous error
Как переменные по умолчанию неизменяемы, так и ссылки по умолчанию неизменяемы. Нам не разрешено изменять то, на что у нас есть ссылка.
Изменяемые ссылки
Мы можем исправить код из листинга 4-6, чтобы разрешить изменять заимствованное значение, внеся всего несколько небольших правок и используя изменяемую ссылку:
fn main() {
    let mut s = String::from("hello");

    change(&mut s);
}

fn change(some_string: &mut String) {
    some_string.push_str(", world");
}
Сначала мы меняем s, делая её mut. Затем создаём изменяемую ссылку
с помощью &mut s в месте вызова функции change и обновляем сигнатуру
функции, чтобы она принимала изменяемую ссылку some_string: &mut String.
Это очень ясно показывает, что функция change будет изменять значение,
которое она заимствует.
У изменяемых ссылок есть одно большое ограничение: если у вас есть изменяемая
ссылка на значение, у вас не может быть других ссылок на это значение. Этот
код, пытающийся создать две изменяемые ссылки на s, завершится ошибкой:
fn main() {
    let mut s = String::from("hello");

    let r1 = &mut s;
    let r2 = &mut s;

    println!("{r1}, {r2}");
}
Вот ошибка:
$ cargo run
   Compiling ownership v0.1.0 (file:///projects/ownership)
error[E0499]: cannot borrow `s` as mutable more than once at a time
 --> src/main.rs:5:14
  |
4 |     let r1 = &mut s;
  |              ------ first mutable borrow occurs here
5 |     let r2 = &mut s;
  |              ^^^^^^ second mutable borrow occurs here
6 |
7 |     println!("{r1}, {r2}");
  |                -- first borrow later used here

For more information about this error, try `rustc --explain E0499`.
error: could not compile `ownership` (bin "ownership") due to 1 previous error
Эта ошибка говорит, что такой код недопустим, потому что мы не можем
заимствовать s как изменяемую более одного раза одновременно. Первое
изменяемое заимствование находится в r1 и должно длиться до его использования
в println!, но между созданием этой изменяемой ссылки и её использованием мы
попытались создать другую изменяемую ссылку в r2, которая заимствует те же
данные, что и r1.
Ограничение, запрещающее несколько изменяемых ссылок на одни и те же данные одновременно, допускает изменение, но в очень контролируемом виде. Новым разработчикам Rust с этим бывает сложно, потому что большинство языков позволяют изменять данные когда угодно. Польза этого ограничения в том, что Rust может предотвращать гонки данных во время компиляции. Гонка данных похожа на состояние гонки и возникает, когда происходят три следующих события:
- Два или более указателя одновременно обращаются к одним и тем же данным.
- Хотя бы один из указателей используется для записи в данные.
- Не используется механизм для синхронизации доступа к данным.
Гонки данных вызывают неопределённое поведение, и их бывает трудно диагностировать и исправлять, когда вы пытаетесь отследить их во время выполнения; Rust предотвращает эту проблему, отказываясь компилировать код с гонками данных!
Как всегда, мы можем использовать фигурные скобки, чтобы создать новую область видимости, разрешающую несколько изменяемых ссылок, но только не одновременных:
fn main() {
    let mut s = String::from("hello");

    {
        let r1 = &mut s;
    } // r1 goes out of scope here, so we can make a new reference with no problems.

    let r2 = &mut s;
}
Rust применяет похожее правило для сочетания изменяемых и неизменяемых ссылок. Этот код приводит к ошибке:
fn main() {
    let mut s = String::from("hello");

    let r1 = &s; // no problem
    let r2 = &s; // no problem
    let r3 = &mut s; // BIG PROBLEM

    println!("{r1}, {r2}, and {r3}");
}
Вот ошибка:
$ cargo run
   Compiling ownership v0.1.0 (file:///projects/ownership)
error[E0502]: cannot borrow `s` as mutable because it is also borrowed as immutable
 --> src/main.rs:6:14
  |
4 |     let r1 = &s; // no problem
  |              -- immutable borrow occurs here
5 |     let r2 = &s; // no problem
6 |     let r3 = &mut s; // BIG PROBLEM
  |              ^^^^^^ mutable borrow occurs here
7 |
8 |     println!("{r1}, {r2}, and {r3}");
  |                -- immutable borrow later used here

For more information about this error, try `rustc --explain E0502`.
error: could not compile `ownership` (bin "ownership") due to 1 previous error
Уф! Мы также не можем иметь изменяемую ссылку, пока у нас есть неизменяемая ссылка на то же значение.
Пользователи неизменяемой ссылки не ожидают, что значение внезапно изменится прямо у них под рукой! Однако несколько неизменяемых ссылок разрешены, потому что никто, кто только читает данные, не может повлиять на чтение данных кем-то ещё.
Обратите внимание, что область действия ссылки начинается там, где она введена,
и продолжается до последнего использования этой ссылки. Например, этот код
скомпилируется, потому что последнее использование неизменяемых ссылок
находится в println!, до введения изменяемой ссылки:
fn main() {
    let mut s = String::from("hello");

    let r1 = &s; // no problem
    let r2 = &s; // no problem
    println!("{r1} and {r2}");
    // Variables r1 and r2 will not be used after this point.

    let r3 = &mut s; // no problem
    println!("{r3}");
}
Области действия неизменяемых ссылок r1 и r2 заканчиваются после
println!, где они используются в последний раз, то есть до создания
изменяемой ссылки r3. Эти области не пересекаются, поэтому такой код
разрешён: компилятор может определить, что ссылка больше не используется
в точке до конца области видимости.
Хотя ошибки заимствования иногда могут раздражать, помните: это компилятор Rust заранее указывает на потенциальную ошибку (во время компиляции, а не во время выполнения) и точно показывает, где находится проблема. Тогда вам не придётся выяснять, почему ваши данные оказались не такими, какими вы их ожидали.
Висячие ссылки
В языках с указателями легко ошибочно создать висячий указатель — указатель, который ссылается на место в памяти, уже, возможно, переданное кому-то ещё, — освободив часть памяти, но сохранив указатель на эту память. В Rust, напротив, компилятор гарантирует, что ссылки никогда не будут висячими ссылками: если у вас есть ссылка на какие-то данные, компилятор убедится, что данные не выйдут из области видимости раньше, чем ссылка на эти данные.
Попробуем создать висячую ссылку, чтобы увидеть, как Rust предотвращает это ошибкой времени компиляции:
fn main() {
    let reference_to_nothing = dangle();
}

fn dangle() -> &String {
    let s = String::from("hello");

    &s
}
Вот ошибка:
$ cargo run
   Compiling ownership v0.1.0 (file:///projects/ownership)
error[E0106]: missing lifetime specifier
 --> src/main.rs:5:16
  |
5 | fn dangle() -> &String {
  |                ^ expected named lifetime parameter
  |
  = help: this function's return type contains a borrowed value, but there is no value for it to be borrowed from
help: consider using the `'static` lifetime, but this is uncommon unless you're returning a borrowed value from a `const` or a `static`
  |
5 | fn dangle() -> &'static String {
  |                 +++++++
help: instead, you are more likely to want to return an owned value
  |
5 - fn dangle() -> &String {
5 + fn dangle() -> String {
  |

For more information about this error, try `rustc --explain E0106`.
error: could not compile `ownership` (bin "ownership") due to 1 previous error
Это сообщение об ошибке относится к возможности, которую мы ещё не рассматривали: временам жизни. Мы подробно обсудим времена жизни в Главе 10. Но если не обращать внимания на части о временах жизни, сообщение всё же содержит ключ к пониманию того, почему этот код является проблемой:
this function's return type contains a borrowed value, but there is no value
for it to be borrowed from
Давайте подробнее рассмотрим, что именно происходит на каждом этапе нашего
кода dangle:
fn main() {
    let reference_to_nothing = dangle();
}

fn dangle() -> &String { // dangle returns a reference to a String

    let s = String::from("hello"); // s is a new String

    &s // we return a reference to the String, s
} // Here, s goes out of scope and is dropped, so its memory goes away.
  // Danger!
Поскольку s создаётся внутри dangle, после завершения кода dangle память,
связанная с s, будет освобождена. Но мы попытались вернуть ссылку на неё.
Это означает, что такая ссылка указывала бы на недействительный String. Это
плохо! Rust не позволит нам сделать это.
Решение здесь — вернуть String напрямую:
fn main() {
    let string = no_dangle();
}

fn no_dangle() -> String {
    let s = String::from("hello");

    s
}
Это работает без проблем. Владение перемещается из функции наружу, и ничего не освобождается.
Правила ссылок
Подведём итог тому, что мы обсудили о ссылках:
- В любой момент времени у вас может быть либо одна изменяемая ссылка, либо любое количество неизменяемых ссылок.
- Ссылки всегда должны быть действительными.
Далее мы рассмотрим другой вид ссылок: срезы.
Тип срезов
Тип срезов
Срезы позволяют ссылаться на непрерывную последовательность элементов в коллекции. Срез — это вид ссылки, поэтому он не владеет данными.
Вот небольшая задача программирования: написать функцию, которая принимает строку слов, разделённых пробелами, и возвращает первое слово, найденное в этой строке. Если функция не находит пробел в строке, значит, вся строка является одним словом, поэтому нужно вернуть всю строку.
Примечание: для знакомства со срезами в этом разделе мы предполагаем только ASCII; более подробное обсуждение обработки UTF-8 находится в разделе «Хранение текста в кодировке UTF-8 с помощью строк» Главы 8.
Чтобы понять проблему, которую решают срезы, разберём, как мы написали бы сигнатуру этой функции без использования срезов:
fn first_word(s: &String) -> ?Функция first_word имеет параметр типа &String. Владение нам не нужно,
поэтому это нормально. (В идиоматичном Rust функции не забирают владение своими
аргументами, если им это не требуется, и причины этого будут становиться
понятнее по мере продвижения.) Но что нам вернуть? У нас на самом деле нет
способа говорить о части строки. Однако мы могли бы вернуть индекс конца
слова, на который указывает пробел. Попробуем сделать это, как показано
в листинге 4-7.
fn first_word(s: &String) -> usize {
    let bytes = s.as_bytes();

    for (i, &item) in bytes.iter().enumerate() {
        if item == b' ' {
            return i;
        }
    }

    s.len()
}

fn main() {}first_word, которая возвращает значение байтового индекса внутри параметра StringПоскольку нам нужно пройти по String элемент за элементом и проверить,
является ли значение пробелом, мы преобразуем наш String в массив байтов
с помощью метода as_bytes.
fn first_word(s: &String) -> usize {
    let bytes = s.as_bytes();

    for (i, &item) in bytes.iter().enumerate() {
        if item == b' ' {
            return i;
        }
    }

    s.len()
}

fn main() {}
Затем мы создаём итератор по массиву байтов с помощью метода iter:
fn first_word(s: &String) -> usize {
    let bytes = s.as_bytes();

    for (i, &item) in bytes.iter().enumerate() {
        if item == b' ' {
            return i;
        }
    }

    s.len()
}

fn main() {}
Мы подробнее обсудим итераторы в Главе 13. Пока
достаточно знать, что iter — это метод, возвращающий каждый элемент
коллекции, а enumerate оборачивает результат iter и вместо этого
возвращает каждый элемент как часть кортежа. Первый элемент кортежа,
возвращаемого enumerate, — это индекс, а второй — ссылка на элемент. Это
немного удобнее, чем вычислять индекс самостоятельно.
Поскольку метод enumerate возвращает кортеж, мы можем использовать шаблоны,
чтобы деструктурировать этот кортеж. Подробнее о шаблонах мы поговорим
в Главе 6. В цикле for мы указываем шаблон, где i —
это индекс в кортеже, а &item — один байт в кортеже. Поскольку из
.iter().enumerate() мы получаем ссылку на элемент, в шаблоне используется
&.
Внутри цикла for мы ищем байт, представляющий пробел, используя синтаксис
байтового литерала. Если мы находим пробел, возвращаем его позицию. Иначе
возвращаем длину строки с помощью s.len().
fn first_word(s: &String) -> usize {
    let bytes = s.as_bytes();

    for (i, &item) in bytes.iter().enumerate() {
        if item == b' ' {
            return i;
        }
    }

    s.len()
}

fn main() {}
Теперь у нас есть способ узнать индекс конца первого слова в строке, но есть
проблема. Мы возвращаем отдельный usize, но это число имеет смысл только
в контексте &String. Другими словами, поскольку это значение отделено от
String, нет гарантии, что оно останется действительным в будущем. Рассмотрим
программу в листинге 4-8, которая использует функцию first_word из листинга
4-7.
fn first_word(s: &String) -> usize {
    let bytes = s.as_bytes();

    for (i, &item) in bytes.iter().enumerate() {
        if item == b' ' {
            return i;
        }
    }

    s.len()
}

fn main() {
    let mut s = String::from("hello world");

    let word = first_word(&s); // word will get the value 5

    s.clear(); // this empties the String, making it equal to ""

    // word still has the value 5 here, but s no longer has any content that we
    // could meaningfully use with the value 5, so word is now totally invalid!
}first_word и последующее изменение содержимого StringЭта программа компилируется без ошибок и компилировалась бы и в том случае,
если бы мы использовали word после вызова s.clear(). Поскольку word
никак не связан с состоянием s, word всё ещё содержит значение 5. Мы
могли бы использовать это значение 5 с переменной s, чтобы попытаться
извлечь первое слово, но это было бы ошибкой, потому что содержимое s
изменилось после того, как мы сохранили 5 в word.
Необходимость следить за тем, чтобы индекс в word не рассинхронизировался
с данными в s, утомительна и подвержена ошибкам! Управление такими индексами
становится ещё более хрупким, если мы напишем функцию second_word. Её
сигнатура должна была бы выглядеть так:
fn second_word(s: &String) -> (usize, usize) {Теперь мы отслеживаем начальный и конечный индексы, и у нас становится ещё больше значений, которые были вычислены из данных в определённом состоянии, но совсем не привязаны к этому состоянию. У нас есть три не связанные между собой переменные, которые нужно поддерживать синхронизированными.
К счастью, у Rust есть решение этой проблемы: строковые срезы.
Строковые срезы
Строковый срез — это ссылка на непрерывную последовательность элементов
String, и выглядит он так:
fn main() {
    let s = String::from("hello world");

    let hello = &s[0..5];
    let world = &s[6..11];
}
Вместо ссылки на весь String, hello является ссылкой на часть String,
указанную дополнительным фрагментом [0..5]. Мы создаём срезы с помощью
диапазона внутри квадратных скобок, указывая
[starting_index..ending_index], где starting_index — первая позиция
в срезе, а ending_index — позиция на единицу больше последней позиции
в срезе. Внутри структура данных среза хранит начальную позицию и длину среза,
которая соответствует ending_index минус starting_index. Поэтому
в случае let world = &s[6..11]; world будет срезом, содержащим указатель
на байт с индексом 6 в s и значение длины 5.
Рисунок 4-7 показывает это на схеме.
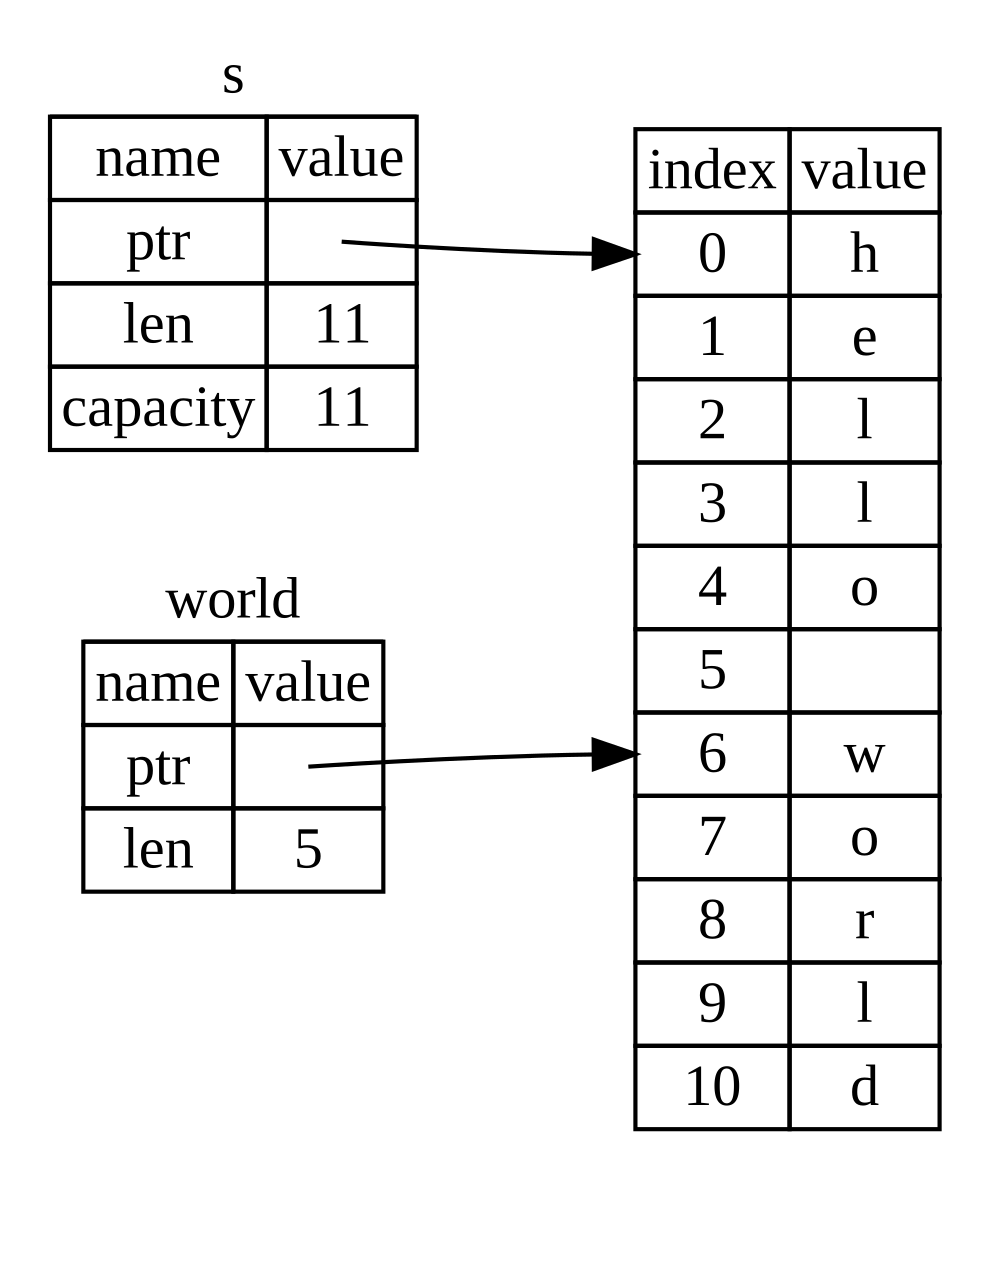
Рисунок 4-7: Строковый срез, ссылающийся на часть
String
В синтаксисе диапазонов Rust с .., если вы хотите начать с индекса 0, можно
опустить значение перед двумя точками. Другими словами, эти варианты
эквивалентны:
#![allow(unused)]
fn main() {
let s = String::from("hello");

let slice = &s[0..2];
let slice = &s[..2];
}
По той же причине, если ваш срез включает последний байт String, можно
опустить конечное число. Это означает, что эти варианты эквивалентны:
#![allow(unused)]
fn main() {
let s = String::from("hello");

let len = s.len();

let slice = &s[3..len];
let slice = &s[3..];
}
Вы также можете опустить оба значения, чтобы получить срез всей строки. Следовательно, эти варианты эквивалентны:
#![allow(unused)]
fn main() {
let s = String::from("hello");

let len = s.len();

let slice = &s[0..len];
let slice = &s[..];
}
Примечание: индексы диапазона строкового среза должны попадать на допустимые границы символов UTF-8. Если вы попытаетесь создать строковый срез в середине многобайтового символа, ваша программа завершится с ошибкой.
Учитывая всё это, перепишем first_word, чтобы она возвращала срез. Тип,
обозначающий «строковый срез», записывается как &str:
fn first_word(s: &String) -> &str {
    let bytes = s.as_bytes();

    for (i, &item) in bytes.iter().enumerate() {
        if item == b' ' {
            return &s[0..i];
        }
    }

    &s[..]
}

fn main() {}
Индекс конца слова мы получаем так же, как в листинге 4-7: ищем первое вхождение пробела. Когда мы находим пробел, возвращаем строковый срез, используя начало строки и индекс пробела как начальный и конечный индексы.
Теперь при вызове first_word мы получаем одно значение, связанное с базовыми
данными. Это значение состоит из ссылки на начальную точку среза и количества
элементов в срезе.
Возврат среза также подошёл бы для функции second_word:
fn second_word(s: &String) -> &str {Теперь у нас есть простой API, в котором гораздо труднее ошибиться, потому что
компилятор проследит, чтобы ссылки внутрь String оставались действительными.
Помните ошибку в программе из листинга 4-8, когда мы получили индекс конца
первого слова, а затем очистили строку, так что наш индекс стал
недействительным? Тот код был логически неверным, но не показывал немедленных
ошибок. Проблемы проявились бы позже, если бы мы продолжили использовать индекс
первого слова с очищенной строкой. Срезы делают такую ошибку невозможной
и гораздо раньше сообщают нам, что в коде есть проблема. Использование версии
first_word со срезом вызовет ошибку времени компиляции:
fn first_word(s: &String) -> &str {
    let bytes = s.as_bytes();

    for (i, &item) in bytes.iter().enumerate() {
        if item == b' ' {
            return &s[0..i];
        }
    }

    &s[..]
}

fn main() {
    let mut s = String::from("hello world");

    let word = first_word(&s);

    s.clear(); // error!

    println!("the first word is: {word}");
}
Вот ошибка компилятора:
$ cargo run
   Compiling ownership v0.1.0 (file:///projects/ownership)
error[E0502]: cannot borrow `s` as mutable because it is also borrowed as immutable
  --> src/main.rs:18:5
   |
16 |     let word = first_word(&s);
   |                           -- immutable borrow occurs here
17 |
18 |     s.clear(); // error!
   |     ^^^^^^^^^ mutable borrow occurs here
19 |
20 |     println!("the first word is: {word}");
   |                                   ---- immutable borrow later used here

For more information about this error, try `rustc --explain E0502`.
error: could not compile `ownership` (bin "ownership") due to 1 previous error
Вспомните из правил заимствования: если у нас есть неизменяемая ссылка на
что-то, мы не можем одновременно взять изменяемую ссылку. Поскольку clear
нужно усечь String, ей нужна изменяемая ссылка. println! после вызова
clear использует ссылку в word, поэтому неизменяемая ссылка должна всё ещё
быть активной в этот момент. Rust запрещает изменяемой ссылке в clear
и неизменяемой ссылке в word существовать одновременно, и компиляция
завершается ошибкой. Rust не только сделал наш API проще в использовании, но
и устранил целый класс ошибок во время компиляции!
Строковые литералы как срезы
Вспомните, что мы говорили о хранении строковых литералов внутри бинарного файла. Теперь, когда мы знаем о срезах, мы можем правильно понять строковые литералы:
#![allow(unused)]
fn main() {
let s = "Hello, world!";
}
Тип s здесь — &str: это срез, указывающий на конкретное место бинарного
файла. Именно поэтому строковые литералы неизменяемы; &str — неизменяемая
ссылка.
Строковые срезы как параметры
Знание того, что можно брать срезы литералов и значений String, приводит нас
к ещё одному улучшению first_word: её сигнатуре.
fn first_word(s: &String) -> &str {Более опытный разработчик Rust написал бы сигнатуру, показанную в листинге
4-9, потому что она позволяет использовать одну и ту же функцию и со значениями
&String, и со значениями &str.
fn first_word(s: &str) -> &str {
    let bytes = s.as_bytes();

    for (i, &item) in bytes.iter().enumerate() {
        if item == b' ' {
            return &s[0..i];
        }
    }

    &s[..]
}

fn main() {
    let my_string = String::from("hello world");

    // `first_word` works on slices of `String`s, whether partial or whole.
    let word = first_word(&my_string[0..6]);
    let word = first_word(&my_string[..]);
    // `first_word` also works on references to `String`s, which are equivalent
    // to whole slices of `String`s.
    let word = first_word(&my_string);

    let my_string_literal = "hello world";

    // `first_word` works on slices of string literals, whether partial or
    // whole.
    let word = first_word(&my_string_literal[0..6]);
    let word = first_word(&my_string_literal[..]);

    // Because string literals *are* string slices already,
    // this works too, without the slice syntax!
    let word = first_word(my_string_literal);
}first_word с помощью строкового среза для типа параметра sЕсли у нас есть строковый срез, мы можем передать его напрямую. Если у нас есть
String, мы можем передать срез String или ссылку на String. Эта гибкость
использует преимущества deref-приведений — возможности, которую мы рассмотрим
в разделе «Использование deref-приведений в функциях и
методах» Главы 15.
Определение функции, принимающей строковый срез вместо ссылки на String,
делает наш API более общим и полезным без потери какой-либо функциональности:
fn first_word(s: &str) -> &str {
    let bytes = s.as_bytes();

    for (i, &item) in bytes.iter().enumerate() {
        if item == b' ' {
            return &s[0..i];
        }
    }

    &s[..]
}

fn main() {
    let my_string = String::from("hello world");

    // `first_word` works on slices of `String`s, whether partial or whole.
    let word = first_word(&my_string[0..6]);
    let word = first_word(&my_string[..]);
    // `first_word` also works on references to `String`s, which are equivalent
    // to whole slices of `String`s.
    let word = first_word(&my_string);

    let my_string_literal = "hello world";

    // `first_word` works on slices of string literals, whether partial or
    // whole.
    let word = first_word(&my_string_literal[0..6]);
    let word = first_word(&my_string_literal[..]);

    // Because string literals *are* string slices already,
    // this works too, without the slice syntax!
    let word = first_word(my_string_literal);
}
Другие срезы
Строковые срезы, как вы можете представить, специфичны для строк. Но существует и более общий тип срезов. Рассмотрим этот массив:
#![allow(unused)]
fn main() {
let a = [1, 2, 3, 4, 5];
}
Так же как нам может понадобиться сослаться на часть строки, нам может понадобиться сослаться на часть массива. Мы сделали бы это так:
#![allow(unused)]
fn main() {
let a = [1, 2, 3, 4, 5];

let slice = &a[1..3];

assert_eq!(slice, &[2, 3]);
}
Этот срез имеет тип &[i32]. Он работает так же, как строковые срезы: хранит
ссылку на первый элемент и длину. Вы будете использовать такой вид срезов для
самых разных коллекций. Мы подробно обсудим эти коллекции, когда будем говорить
о векторах в Главе 8.
Итоги
Концепции владения, заимствования и срезов обеспечивают безопасность памяти в программах на Rust во время компиляции. Язык Rust даёт вам контроль над использованием памяти так же, как и другие системные языки программирования. Но поскольку владелец данных автоматически очищает эти данные, когда выходит из области видимости, вам не нужно писать и отлаживать дополнительный код, чтобы получить этот контроль.
Владение влияет на работу многих других частей Rust, поэтому мы ещё будем
говорить об этих концепциях на протяжении остальной книги. Перейдём к Главе 5
и посмотрим, как группировать фрагменты данных вместе в struct.
Использование структур для организации связанных данных
Struct, или структура, — это пользовательский тип данных, который позволяет объединить вместе и назвать несколько связанных значений, образующих осмысленную группу. Если вы знакомы с объектно-ориентированным языком, структура похожа на атрибуты данных объекта. В этой главе мы сравним кортежи и структуры, опираясь на то, что вы уже знаете, и покажем, когда структуры являются лучшим способом группировать данные.
Мы покажем, как определять структуры и создавать их экземпляры. Мы обсудим, как определять связанные функции, особенно тот вид связанных функций, который называется методами, чтобы задавать поведение, связанное с типом структуры. Структуры и перечисления (обсуждаемые в Главе 6) — это строительные блоки для создания новых типов в предметной области вашей программы, позволяющие в полной мере воспользоваться проверкой типов Rust во время компиляции.
Определение и создание экземпляров структур
Определение и создание экземпляров структур
Структуры похожи на кортежи, обсуждавшиеся в разделе «Тип кортежа», тем, что и те и другие хранят несколько связанных значений. Как и в кортежах, части структуры могут иметь разные типы. В отличие от кортежей, в структуре вы называете каждую часть данных, поэтому понятно, что означают значения. Добавление этих имён делает структуры более гибкими, чем кортежи: вам не нужно полагаться на порядок данных, чтобы задавать значения экземпляра или обращаться к ним.
Чтобы определить структуру, мы вводим ключевое слово struct и задаём имя всей
структуры. Имя структуры должно описывать смысл частей данных, сгруппированных
вместе. Затем внутри фигурных скобок мы определяем имена и типы частей данных,
которые называем полями. Например, листинг 5-1 показывает структуру, которая
хранит информацию об учётной записи пользователя.
struct User {
    active: bool,
    username: String,
    email: String,
    sign_in_count: u64,
}

fn main() {}UserЧтобы использовать структуру после её определения, мы создаём экземпляр этой
структуры, указывая конкретные значения для каждого поля. Мы создаём экземпляр,
записывая имя структуры, а затем добавляя фигурные скобки с парами ключ: значение, где ключи — это имена полей, а значения — данные, которые мы хотим
хранить в этих полях. Нам не обязательно указывать поля в том же порядке,
в котором мы объявили их в структуре. Другими словами, определение структуры
похоже на общий шаблон типа, а экземпляры заполняют этот шаблон конкретными
данными, чтобы создать значения этого типа. Например, мы можем объявить
конкретного пользователя, как показано в листинге 5-2.
struct User {
    active: bool,
    username: String,
    email: String,
    sign_in_count: u64,
}

fn main() {
    let user1 = User {
        active: true,
        username: String::from("someusername123"),
        email: String::from("someone@example.com"),
        sign_in_count: 1,
    };
}UserЧтобы получить конкретное значение из структуры, мы используем точечную
нотацию. Например, чтобы обратиться к адресу электронной почты этого
пользователя, мы используем user1.email. Если экземпляр изменяемый, мы можем
изменить значение с помощью точечной нотации и присваивания в конкретное поле.
Листинг 5-3 показывает, как изменить значение поля email в изменяемом
экземпляре User.
struct User {
    active: bool,
    username: String,
    email: String,
    sign_in_count: u64,
}

fn main() {
    let mut user1 = User {
        active: true,
        username: String::from("someusername123"),
        email: String::from("someone@example.com"),
        sign_in_count: 1,
    };

    user1.email = String::from("anotheremail@example.com");
}email экземпляра UserОбратите внимание, что изменяемым должен быть весь экземпляр; Rust не позволяет помечать изменяемыми только отдельные поля. Как и с любым выражением, мы можем создать новый экземпляр структуры как последнее выражение в теле функции, чтобы неявно вернуть этот новый экземпляр.
Листинг 5-4 показывает функцию build_user, которая возвращает экземпляр
User с заданными адресом электронной почты и именем пользователя. Поле
active получает значение true, а sign_in_count получает значение 1.
struct User {
    active: bool,
    username: String,
    email: String,
    sign_in_count: u64,
}

fn build_user(email: String, username: String) -> User {
    User {
        active: true,
        username: username,
        email: email,
        sign_in_count: 1,
    }
}

fn main() {
    let user1 = build_user(
        String::from("someone@example.com"),
        String::from("someusername123"),
    );
}build_user, которая принимает адрес электронной почты и имя пользователя и возвращает экземпляр UserИмеет смысл называть параметры функции так же, как поля структуры, но повторять
имена полей и переменных email и username немного утомительно. Если бы
у структуры было больше полей, повторение каждого имени стало бы ещё более
раздражающим. К счастью, есть удобное сокращение!
Использование сокращённой инициализации полей
Поскольку имена параметров и имена полей структуры в листинге 5-4 полностью
совпадают, мы можем использовать синтаксис сокращённой инициализации полей,
чтобы переписать build_user так, чтобы она вела себя точно так же, но без
повторения username и email, как показано в листинге 5-5.
struct User {
    active: bool,
    username: String,
    email: String,
    sign_in_count: u64,
}

fn build_user(email: String, username: String) -> User {
    User {
        active: true,
        username,
        email,
        sign_in_count: 1,
    }
}

fn main() {
    let user1 = build_user(
        String::from("someone@example.com"),
        String::from("someusername123"),
    );
}build_user, использующая сокращённую инициализацию полей, потому что параметры username и email имеют те же имена, что и поля структурыЗдесь мы создаём новый экземпляр структуры User, у которой есть поле
с именем email. Мы хотим установить значение поля email равным значению
параметра email функции build_user. Поскольку поле email и параметр
email имеют одно и то же имя, нам нужно написать только email, а не
email: email.
Создание экземпляров с помощью синтаксиса обновления структуры
Часто бывает полезно создать новый экземпляр структуры, который включает большинство значений из другого экземпляра того же типа, но изменяет некоторые из них. Это можно сделать с помощью синтаксиса обновления структуры.
Сначала в листинге 5-6 мы покажем, как создать новый экземпляр User в user2
обычным способом, без синтаксиса обновления. Мы задаём новое значение для
email, но в остальном используем те же значения из user1, который создали
в листинге 5-2.
struct User {
    active: bool,
    username: String,
    email: String,
    sign_in_count: u64,
}

fn main() {
    // --snip--

    let user1 = User {
        email: String::from("someone@example.com"),
        username: String::from("someusername123"),
        active: true,
        sign_in_count: 1,
    };

    let user2 = User {
        active: user1.active,
        username: user1.username,
        email: String::from("another@example.com"),
        sign_in_count: user1.sign_in_count,
    };
}User с использованием всех значений из user1, кроме одногоС помощью синтаксиса обновления структуры мы можем добиться того же эффекта
меньшим количеством кода, как показано в листинге 5-7. Синтаксис ..
указывает, что оставшиеся поля, которые не заданы явно, должны получить те же
значения, что и соответствующие поля в данном экземпляре.
struct User {
    active: bool,
    username: String,
    email: String,
    sign_in_count: u64,
}

fn main() {
    // --snip--

    let user1 = User {
        email: String::from("someone@example.com"),
        username: String::from("someusername123"),
        active: true,
        sign_in_count: 1,
    };

    let user2 = User {
        email: String::from("another@example.com"),
        ..user1
    };
}email для экземпляра User, но использовать остальные значения из user1Код в листинге 5-7 также создаёт экземпляр в user2, у которого другое
значение email, но те же значения полей username, active
и sign_in_count, что и у user1. Запись ..user1 должна идти последней,
чтобы указать, что любые оставшиеся поля должны получить значения из
соответствующих полей user1, но мы можем указать значения для любого числа
полей в любом порядке, независимо от порядка полей в определении структуры.
Обратите внимание, что синтаксис обновления структуры использует =, как
присваивание; это потому, что он перемещает данные, как мы видели в разделе
«Взаимодействие переменных и данных при перемещении».
В этом примере мы больше не можем использовать user1 после создания user2,
потому что String в поле username из user1 был перемещён в user2. Если
бы мы задали для user2 новые значения String и для email, и для
username, а значит, использовали бы из user1 только значения active
и sign_in_count, тогда user1 оставался бы действительным после создания
user2. И active, и sign_in_count имеют типы, реализующие трейт Copy,
поэтому применялось бы поведение, которое мы обсуждали в разделе «Данные
только в стеке: Copy». В этом примере мы также всё ещё
можем использовать user1.email, потому что его значение не было перемещено
из user1.
Создание разных типов с помощью кортежных структур
Rust также поддерживает структуры, похожие на кортежи, которые называются кортежными структурами. Кортежные структуры имеют дополнительный смысл, который даёт имя структуры, но у них нет имён, связанных с полями; вместо этого у них есть только типы полей. Кортежные структуры полезны, когда вы хотите дать имя всему кортежу и сделать этот кортеж отличным типом от других кортежей, а именование каждого поля, как в обычной структуре, было бы многословным или избыточным.
Чтобы определить кортежную структуру, начните с ключевого слова struct
и имени структуры, после которого идут типы в кортеже. Например, здесь мы
определяем и используем две кортежные структуры с именами Color и Point:
struct Color(i32, i32, i32);
struct Point(i32, i32, i32);

fn main() {
    let black = Color(0, 0, 0);
    let origin = Point(0, 0, 0);
}
Обратите внимание, что значения black и origin имеют разные типы, потому
что они являются экземплярами разных кортежных структур. Каждая структура,
которую вы определяете, является собственным типом, даже если поля внутри
структуры могут иметь одинаковые типы. Например, функция, принимающая параметр
типа Color, не может принять Point в качестве аргумента, даже если оба типа
состоят из трёх значений i32. В остальном экземпляры кортежных структур
похожи на кортежи: их можно деструктурировать на отдельные части, а для доступа
к отдельному значению можно использовать . с последующим индексом. В отличие
от кортежей, кортежные структуры требуют указывать имя типа структуры при
деструктурировании. Например, мы написали бы
let Point(x, y, z) = origin;, чтобы деструктурировать значения точки origin
в переменные с именами x, y и z.
Определение unit-like структур
Вы также можете определять структуры, у которых вообще нет полей! Они
называются unit-like структурами, потому что ведут себя похоже на () —
unit-тип, о котором мы упоминали в разделе «Тип кортежа». Unit-like структуры могут быть полезны, когда нужно реализовать трейт для
некоторого типа, но у вас нет данных, которые вы хотите хранить в самом типе.
Мы обсудим трейты в Главе 10. Вот пример объявления и создания экземпляра
unit-структуры с именем AlwaysEqual:
struct AlwaysEqual;

fn main() {
    let subject = AlwaysEqual;
}
Чтобы определить AlwaysEqual, мы используем ключевое слово struct, нужное
нам имя, а затем точку с запятой. Фигурные скобки или круглые скобки не нужны!
Затем похожим образом мы можем получить экземпляр AlwaysEqual в переменной
subject: используя определённое нами имя без фигурных или круглых скобок.
Представьте, что позже мы реализуем поведение для этого типа так, что каждый
экземпляр AlwaysEqual всегда равен каждому экземпляру любого другого типа,
возможно, чтобы иметь известный результат для целей тестирования. Для
реализации такого поведения нам не понадобились бы никакие данные! В Главе 10
вы увидите, как определять трейты и реализовывать их для любого типа, включая
unit-like структуры.
Владение данными структуры
В определении структуры User в листинге 5-1 мы использовали владеющий тип
String, а не тип строкового среза &str. Это осознанный выбор, потому что
мы хотим, чтобы каждый экземпляр этой структуры владел всеми своими данными,
и чтобы эти данные были действительны настолько же долго, насколько
действительна вся структура.
Структуры также могут хранить ссылки на данные, принадлежащие чему-то ещё, но для этого нужно использовать времена жизни — возможность Rust, которую мы обсудим в Главе 10. Времена жизни гарантируют, что данные, на которые ссылается структура, действительны настолько же долго, насколько действительна сама структура. Допустим, вы пытаетесь сохранить ссылку в структуре без указания времён жизни, как в следующем примере в src/main.rs; это не сработает:
struct User {
    active: bool,
    username: &str,
    email: &str,
    sign_in_count: u64,
}

fn main() {
    let user1 = User {
        active: true,
        username: "someusername123",
        email: "someone@example.com",
        sign_in_count: 1,
    };
}
Компилятор пожалуется, что ему нужны спецификаторы времён жизни:
$ cargo run
   Compiling structs v0.1.0 (file:///projects/structs)
error[E0106]: missing lifetime specifier
 --> src/main.rs:3:15
  |
3 |     username: &str,
  |               ^ expected named lifetime parameter
  |
help: consider introducing a named lifetime parameter
  |
1 ~ struct User<'a> {
2 |     active: bool,
3 ~     username: &'a str,
  |

error[E0106]: missing lifetime specifier
 --> src/main.rs:4:12
  |
4 |     email: &str,
  |            ^ expected named lifetime parameter
  |
help: consider introducing a named lifetime parameter
  |
1 ~ struct User<'a> {
2 |     active: bool,
3 |     username: &str,
4 ~     email: &'a str,
  |

For more information about this error, try `rustc --explain E0106`.
error: could not compile `structs` (bin "structs") due to 2 previous errors
В Главе 10 мы обсудим, как исправлять такие ошибки, чтобы вы могли хранить
ссылки в структурах, а пока будем исправлять подобные ошибки с помощью
владеющих типов вроде String вместо ссылок вроде &str.
Пример программы с использованием структур
Пример программы с использованием структур
Чтобы понять, когда нам может понадобиться использовать структуры, давайте напишем программу, которая вычисляет площадь прямоугольника. Мы начнем с использования отдельных переменных, а затем будем перерабатывать программу, пока вместо них не начнем использовать структуры.
Создадим новый бинарный проект с помощью Cargo под названием rectangles, который будет принимать ширину и высоту прямоугольника, заданные в пикселях, и вычислять его площадь. Листинг 5-8 показывает короткую программу с одним из способов сделать именно это в файле src/main.rs нашего проекта.
fn main() {
    let width1 = 30;
    let height1 = 50;

    println!(
        "The area of the rectangle is {} square pixels.",
        area(width1, height1)
    );
}

fn area(width: u32, height: u32) -> u32 {
    width * height
}Теперь запустите эту программу с помощью cargo run:
$ cargo run
   Compiling rectangles v0.1.0 (file:///projects/rectangles)
    Finished `dev` profile [unoptimized + debuginfo] target(s) in 0.42s
     Running `target/debug/rectangles`
The area of the rectangle is 1500 square pixels.
Этот код успешно вычисляет площадь прямоугольника, вызывая функцию area с
каждым измерением, но мы можем сделать код более ясным и читаемым.
Проблема этого кода очевидна в сигнатуре area:
fn main() {
    let width1 = 30;
    let height1 = 50;

    println!(
        "The area of the rectangle is {} square pixels.",
        area(width1, height1)
    );
}

fn area(width: u32, height: u32) -> u32 {
    width * height
}
Функция area должна вычислять площадь одного прямоугольника, но написанная
нами функция имеет два параметра, и нигде в нашей программе не видно, что эти
параметры связаны между собой. Было бы читаемее и удобнее сопровождать код,
если бы мы сгруппировали ширину и высоту вместе. Мы уже обсуждали один способ
сделать это в разделе «Кортежный тип» главы 3:
использовать кортежи.
Рефакторинг с кортежами
Листинг 5-9 показывает другую версию нашей программы, в которой используются кортежи.
fn main() {
    let rect1 = (30, 50);

    println!(
        "The area of the rectangle is {} square pixels.",
        area(rect1)
    );
}

fn area(dimensions: (u32, u32)) -> u32 {
    dimensions.0 * dimensions.1
}В каком-то смысле эта программа лучше. Кортежи позволяют добавить немного структуры, и теперь мы передаем только один аргумент. Но с другой стороны эта версия менее понятна: кортежи не дают имен своим элементам, поэтому нам приходится обращаться к частям кортежа по индексам, из-за чего вычисление становится менее очевидным.
Если перепутать ширину и высоту, для вычисления площади это не имело бы
значения, но если мы захотим нарисовать прямоугольник на экране, значение уже
будет! Нам пришлось бы помнить, что width находится в кортеже по индексу 0,
а height – по индексу 1. Другому человеку, который будет использовать наш
код, было бы еще сложнее разобраться в этом и удерживать это в памяти.
Поскольку мы не выразили смысл наших данных в коде, теперь ошибки внести
проще.
Рефакторинг со структурами
Мы используем структуры, чтобы добавить смысл, присваивая данным метки. Мы можем превратить используемый кортеж в структуру с именем для целого значения и именами для его частей, как показано в листинге 5-10.
struct Rectangle {
    width: u32,
    height: u32,
}

fn main() {
    let rect1 = Rectangle {
        width: 30,
        height: 50,
    };

    println!(
        "The area of the rectangle is {} square pixels.",
        area(&rect1)
    );
}

fn area(rectangle: &Rectangle) -> u32 {
    rectangle.width * rectangle.height
}RectangleЗдесь мы определили структуру и назвали ее Rectangle. Внутри фигурных скобок
мы определили поля width и height, оба типа u32. Затем в main мы
создали конкретный экземпляр Rectangle, у которого ширина равна 30, а
высота равна 50.
Теперь наша функция area определена с одним параметром, который мы назвали
rectangle; его тип – неизменяемое заимствование экземпляра структуры
Rectangle. Как упоминалось в главе 4, мы хотим заимствовать структуру, а не
получать владение ею. Так main сохраняет владение и может продолжать
использовать rect1; именно поэтому мы используем & в сигнатуре функции и в
месте вызова функции.
Функция area обращается к полям width и height экземпляра Rectangle
(обратите внимание: доступ к полям заимствованного экземпляра структуры не
перемещает значения полей, поэтому вы часто видите заимствования структур).
Теперь сигнатура функции area говорит ровно то, что мы имеем в виду:
вычислить площадь Rectangle, используя его поля width и height. Это
показывает, что ширина и высота связаны друг с другом, и дает значениям
описательные имена вместо использования индексов кортежа 0 и 1. Это
победа для ясности.
Добавление функциональности с помощью производных трейтов
Было бы полезно иметь возможность выводить экземпляр Rectangle во время
отладки программы и видеть значения всех его полей. В листинге 5-11 мы
пытаемся использовать макрос println! так же, как
использовали его в предыдущих главах. Однако это не сработает.
struct Rectangle {
    width: u32,
    height: u32,
}

fn main() {
    let rect1 = Rectangle {
        width: 30,
        height: 50,
    };

    println!("rect1 is {rect1}");
}RectangleКогда мы компилируем этот код, получаем ошибку с таким основным сообщением:
error[E0277]: `Rectangle` doesn't implement `std::fmt::Display`
Макрос println! умеет выполнять много видов форматирования, и по умолчанию
фигурные скобки говорят println! использовать форматирование, известное как
Display: вывод, предназначенный для непосредственного потребления конечным
пользователем. Примитивные типы, которые мы видели до сих пор, по умолчанию
реализуют Display, потому что существует только один способ, которым вы,
скорее всего, захотите показать пользователю 1 или любое другое примитивное
значение. Но со структурами менее очевидно, как println! должен форматировать
вывод, потому что есть больше вариантов отображения: нужны ли запятые или нет?
Нужно ли выводить фигурные скобки? Должны ли быть показаны все поля? Из-за этой
неоднозначности Rust не пытается угадать, чего мы хотим, и у структур нет
предоставленной реализации Display, которую можно было бы использовать с
println! и заполнителем {}.
Если продолжить читать ошибки, мы найдем такую полезную заметку:
   |                        |`Rectangle` cannot be formatted with the default formatter
   |                        required by this formatting parameter
Давайте попробуем! Теперь вызов макроса println! будет выглядеть так:
println!("rect1 is {rect1:?}");. Помещение спецификатора :? внутрь фигурных
скобок говорит println!, что мы хотим использовать формат вывода под
названием Debug. Трейт Debug позволяет выводить нашу структуру способом,
полезным для разработчиков, чтобы мы могли видеть ее значение во время отладки
кода.
Скомпилируйте код с этим изменением. Досадно! Мы все еще получаем ошибку:
error[E0277]: `Rectangle` doesn't implement `Debug`
Но снова компилятор дает нам полезную заметку:
   |                        required by this formatting parameter
   |
Rust действительно включает функциональность для вывода отладочной
информации, но нам нужно явно подключить ее, чтобы сделать эту функциональность
доступной для нашей структуры. Для этого мы добавляем внешний атрибут
#[derive(Debug)] прямо перед определением структуры, как показано в листинге
5-12.
#[derive(Debug)]
struct Rectangle {
    width: u32,
    height: u32,
}

fn main() {
    let rect1 = Rectangle {
        width: 30,
        height: 50,
    };

    println!("rect1 is {rect1:?}");
}Debug и вывод экземпляра Rectangle с помощью отладочного форматированияТеперь при запуске программы мы не получим ошибок и увидим следующий вывод:
$ cargo run
   Compiling rectangles v0.1.0 (file:///projects/rectangles)
    Finished `dev` profile [unoptimized + debuginfo] target(s) in 0.48s
     Running `target/debug/rectangles`
rect1 is Rectangle { width: 30, height: 50 }
Отлично! Это не самый красивый вывод, но он показывает значения всех полей для
данного экземпляра, что определенно помогло бы во время отладки. Когда у нас
есть более крупные структуры, полезно иметь вывод, который немного легче
читать; в таких случаях мы можем использовать {:#?} вместо {:?} в строке
println!. В этом примере использование стиля {:#?} выведет следующее:
$ cargo run
   Compiling rectangles v0.1.0 (file:///projects/rectangles)
    Finished `dev` profile [unoptimized + debuginfo] target(s) in 0.48s
     Running `target/debug/rectangles`
rect1 is Rectangle {
    width: 30,
    height: 50,
}
Другой способ вывести значение с помощью формата Debug – использовать
макрос dbg!, который получает владение выражением (в
отличие от println!, который получает ссылку), выводит файл и номер строки,
где в вашем коде находится этот вызов макроса dbg!, вместе с результирующим
значением этого выражения, а затем возвращает владение значением.
Примечание: вызов макроса
dbg!выводит данные в стандартный поток консоли для ошибок (stderr), в отличие отprintln!, который выводит в стандартный поток консоли для вывода (stdout). Подробнее оstderrиstdoutмы поговорим в разделе «Перенаправление ошибок в стандартный поток ошибок» главы 12.
Вот пример, в котором нас интересует значение, присваиваемое полю width, а
также значение всей структуры в rect1:
#[derive(Debug)]
struct Rectangle {
    width: u32,
    height: u32,
}

fn main() {
    let scale = 2;
    let rect1 = Rectangle {
        width: dbg!(30 * scale),
        height: 50,
    };

    dbg!(&rect1);
}
Мы можем поместить dbg! вокруг выражения 30 * scale, и поскольку dbg!
возвращает владение значением выражения, поле width получит то же значение,
как если бы вызова dbg! там не было. Мы не хотим, чтобы dbg! получил
владение rect1, поэтому в следующем вызове используем ссылку на rect1. Вот
как выглядит вывод этого примера:
$ cargo run
   Compiling rectangles v0.1.0 (file:///projects/rectangles)
    Finished `dev` profile [unoptimized + debuginfo] target(s) in 0.61s
     Running `target/debug/rectangles`
[src/main.rs:10:16] 30 * scale = 60
[src/main.rs:14:5] &rect1 = Rectangle {
    width: 60,
    height: 50,
}
Мы видим, что первая часть вывода пришла из строки 10 файла src/main.rs, где
мы отлаживаем выражение 30 * scale, а его результирующее значение равно 60
(форматирование Debug, реализованное для целых чисел, выводит только их
значение). Вызов dbg! в строке 14 файла src/main.rs выводит значение
&rect1, то есть структуру Rectangle. Этот вывод использует красивое
форматирование Debug типа Rectangle. Макрос dbg! может быть действительно
полезен, когда вы пытаетесь понять, что делает ваш код!
Помимо трейта Debug, Rust предоставляет нам ряд трейтов для использования с
атрибутом derive, которые могут добавлять полезное поведение нашим
пользовательским типам. Эти трейты и их поведение перечислены в Приложении
C. В главе 10 мы рассмотрим, как реализовать эти трейты
с пользовательским поведением, а также как создавать собственные трейты. Также
существует много атрибутов помимо derive; дополнительную информацию смотрите
в разделе «Attributes» справочника Rust.
Наша функция area очень специфична: она вычисляет только площадь
прямоугольников. Было бы полезно связать это поведение теснее с нашей
структурой Rectangle, потому что оно не будет работать ни с каким другим
типом. Давайте посмотрим, как можно продолжить рефакторинг этого кода,
превратив функцию area в метод area, определенный для нашего типа
Rectangle.
Методы
Методы
Методы похожи на функции: мы объявляем их с помощью ключевого слова fn и
имени, они могут иметь параметры и возвращаемое значение, а также содержат
какой-то код, который выполняется, когда метод вызывается из другого места. В
отличие от функций, методы определяются в контексте структуры (или перечисления
либо трейт-объекта, которые мы рассмотрим соответственно в главе 6 и главе 18), а их первым параметром
всегда является self, представляющий экземпляр структуры, для которого
вызывается метод.
Синтаксис методов
Давайте изменим функцию area, которая принимает экземпляр Rectangle в
качестве параметра, и вместо этого сделаем ее методом area, определенным для
структуры Rectangle, как показано в листинге 5-13.
#[derive(Debug)]
struct Rectangle {
    width: u32,
    height: u32,
}

impl Rectangle {
    fn area(&self) -> u32 {
        self.width * self.height
    }
}

fn main() {
    let rect1 = Rectangle {
        width: 30,
        height: 50,
    };

    println!(
        "The area of the rectangle is {} square pixels.",
        rect1.area()
    );
}area для структуры RectangleЧтобы определить функцию в контексте Rectangle, мы начинаем блок реализации
impl для Rectangle. Все внутри этого блока impl будет связано с типом
Rectangle. Затем мы переносим функцию area внутрь
фигурных скобок impl и меняем первый (а в данном случае единственный)
параметр на self в сигнатуре и везде в теле функции. В main, где мы
вызывали функцию area и передавали rect1 как аргумент, теперь можно
использовать синтаксис методов, чтобы вызвать метод area для нашего
экземпляра Rectangle. Синтаксис методов записывается после экземпляра: мы
добавляем точку, затем имя метода, круглые скобки и любые аргументы.
В сигнатуре area мы используем &self вместо rectangle: &Rectangle.
Запись &self на самом деле является сокращением для self: &Self. Внутри
блока impl тип Self является псевдонимом для типа, которому принадлежит
этот блок impl. Первым параметром методов должен быть параметр с именем
self типа Self, поэтому Rust позволяет сократить эту запись до одного имени
self на месте первого параметра. Обратите внимание, что нам все равно нужно
использовать & перед сокращенной записью self, чтобы указать, что этот
метод заимствует экземпляр Self, точно так же как мы делали это в
rectangle: &Rectangle. Методы могут получать владение self, неизменяемо
заимствовать self, как мы сделали здесь, или изменяемо заимствовать self,
как и любой другой параметр.
Мы выбрали здесь &self по той же причине, по которой использовали
&Rectangle в версии с функцией: мы не хотим получать владение, а хотим только
читать данные из структуры, а не записывать в нее. Если бы мы хотели изменить
экземпляр, для которого вызван метод, в рамках работы метода, мы использовали
бы &mut self в качестве первого параметра. Метод, который получает владение
экземпляром, используя просто self в качестве первого параметра, встречается
редко; этот прием обычно используют, когда метод преобразует self во что-то
другое и вы хотите запретить вызывающему коду использовать исходный экземпляр
после преобразования.
Главная причина использовать методы вместо функций, помимо предоставления
синтаксиса методов и отсутствия необходимости повторять тип self в сигнатуре
каждого метода, заключается в организации кода. Мы поместили все действия,
которые можно выполнить с экземпляром типа, в один блок impl, вместо того
чтобы заставлять будущих пользователей нашего кода искать возможности
Rectangle в разных местах предоставляемой нами библиотеки.
Обратите внимание, что мы можем дать методу то же имя, что и одному из полей
структуры. Например, можно определить для Rectangle метод, который тоже
называется width:
#[derive(Debug)]
struct Rectangle {
    width: u32,
    height: u32,
}

impl Rectangle {
    fn width(&self) -> bool {
        self.width > 0
    }
}

fn main() {
    let rect1 = Rectangle {
        width: 30,
        height: 50,
    };

    if rect1.width() {
        println!("The rectangle has a nonzero width; it is {}", rect1.width);
    }
}
Здесь мы выбираем, что метод width будет возвращать true, если значение в
поле width экземпляра больше 0, и false, если значение равно 0: мы
можем использовать поле внутри метода с тем же именем для любой цели. В main,
когда после rect1.width стоят круглые скобки, Rust понимает, что мы имеем в
виду метод width. Когда круглых скобок нет, Rust понимает, что мы имеем в
виду поле width.
Часто, но не всегда, когда мы даем методу то же имя, что и полю, мы хотим, чтобы он только возвращал значение этого поля и не делал ничего другого. Такие методы называются геттерами, и Rust не реализует их автоматически для полей структуры, как это делают некоторые другие языки. Геттеры полезны, потому что вы можете сделать поле закрытым, а метод открытым и тем самым разрешить доступ к этому полю только для чтения как часть публичного API типа. Что такое открытое и закрытое, а также как помечать поле или метод как открытые или закрытые, мы обсудим в главе 7.
Где оператор ->?
В C и C++ для вызова методов используются два разных оператора: . применяют,
если метод вызывается непосредственно для объекта, а -> – если метод
вызывается для указателя на объект и сначала нужно разыменовать указатель.
Другими словами, если object – это указатель, то object->something()
похоже на (*object).something().
В Rust нет аналога оператора ->; вместо этого в Rust есть возможность,
которая называется автоматическое взятие ссылки и разыменование. Вызов
методов – одно из немногих мест в Rust с таким поведением.
Вот как это работает: когда вы вызываете метод через object.something(),
Rust автоматически добавляет &, &mut или *, чтобы object
соответствовал сигнатуре метода. Другими словами, следующие записи
эквивалентны:
#![allow(unused)]
fn main() {
#[derive(Debug,Copy,Clone)]
struct Point {
    x: f64,
    y: f64,
}

impl Point {
   fn distance(&self, other: &Point) -> f64 {
       let x_squared = f64::powi(other.x - self.x, 2);
       let y_squared = f64::powi(other.y - self.y, 2);

       f64::sqrt(x_squared + y_squared)
   }
}
let p1 = Point { x: 0.0, y: 0.0 };
let p2 = Point { x: 5.0, y: 6.5 };
p1.distance(&p2);
(&p1).distance(&p2);
}
Первый вариант выглядит намного чище. Такое автоматическое взятие ссылки
работает потому, что у методов есть ясный получатель – тип self. Зная
получателя и имя метода, Rust может однозначно определить, читает ли метод
данные (&self), изменяет их (&mut self) или потребляет значение (self).
То, что Rust делает заимствование неявным для получателей методов, является
важной частью того, что на практике делает владение удобным.
Методы с большим количеством параметров
Давайте потренируемся использовать методы, реализовав второй метод для
структуры Rectangle. На этот раз мы хотим, чтобы экземпляр Rectangle
принимал другой экземпляр Rectangle и возвращал true, если второй
Rectangle может полностью поместиться внутри self (первого Rectangle); в
противном случае он должен возвращать false. Иными словами, после определения
метода can_hold мы хотим иметь возможность написать программу, показанную в
листинге 5-14.
fn main() {
    let rect1 = Rectangle {
        width: 30,
        height: 50,
    };
    let rect2 = Rectangle {
        width: 10,
        height: 40,
    };
    let rect3 = Rectangle {
        width: 60,
        height: 45,
    };

    println!("Can rect1 hold rect2? {}", rect1.can_hold(&rect2));
    println!("Can rect1 hold rect3? {}", rect1.can_hold(&rect3));
}can_holdОжидаемый вывод будет выглядеть следующим образом, потому что оба измерения
rect2 меньше измерений rect1, но rect3 шире, чем rect1:
Can rect1 hold rect2? true
Can rect1 hold rect3? false
Мы знаем, что хотим определить метод, поэтому он будет находиться внутри блока
impl Rectangle. Метод будет называться can_hold и будет принимать
неизменяемое заимствование другого Rectangle в качестве параметра. Мы можем
понять, каким будет тип параметра, посмотрев на код, который вызывает метод:
rect1.can_hold(&rect2) передает &rect2, то есть неизменяемое заимствование
rect2, экземпляра Rectangle. Это имеет смысл, потому что нам нужно только
читать rect2 (а не записывать в него, для чего потребовалось бы изменяемое
заимствование), и мы хотим, чтобы main сохранил владение rect2, чтобы мы
могли снова использовать его после вызова метода can_hold. Возвращаемым
значением can_hold будет булево значение, а реализация проверит, больше ли
ширина и высота self соответственно ширины и высоты другого Rectangle.
Добавим новый метод can_hold в блок impl из листинга 5-13, как показано в
листинге 5-15.
#[derive(Debug)]
struct Rectangle {
width: u32,
height: u32,
}
impl Rectangle {
fn area(&self) -> u32 {
self.width * self.height
}
fn can_hold(&self, other: &Rectangle) -> bool {
self.width > other.width && self.height > other.height
}
}
fn main() {
let rect1 = Rectangle {
width: 30,
height: 50,
};
let rect2 = Rectangle {
width: 10,
height: 40,
};
let rect3 = Rectangle {
width: 60,
height: 45,
};
println!("Can rect1 hold rect2? {}", rect1.can_hold(&rect2));
println!("Can rect1 hold rect3? {}", rect1.can_hold(&rect3));
}can_hold для Rectangle, который принимает другой экземпляр Rectangle как параметрКогда мы запустим этот код с функцией main из листинга 5-14, мы получим
желаемый вывод. Методы могут принимать несколько параметров, которые мы
добавляем в сигнатуру после параметра self, и эти параметры работают точно
так же, как параметры в функциях.
Ассоциированные функции
Все функции, определенные внутри блока impl, называются ассоциированными
функциями, потому что они связаны с типом, указанным после impl. Мы можем
определять ассоциированные функции, у которых первым параметром нет self (и
поэтому они не являются методами), потому что для их работы не нужен экземпляр
типа. Одну такую функцию мы уже использовали: функцию String::from,
определенную для типа String.
Ассоциированные функции, которые не являются методами, часто используются как
конструкторы, возвращающие новый экземпляр структуры. Их часто называют new,
но new не является особым именем и не встроено в язык. Например, мы могли бы
предоставить ассоциированную функцию с именем square, которая принимала бы
один параметр размера и использовала его и как ширину, и как высоту, тем самым
упрощая создание квадратного Rectangle по сравнению с необходимостью
указывать одно и то же значение дважды:
Имя файла: src/main.rs
#[derive(Debug)]
struct Rectangle {
width: u32,
height: u32,
}
impl Rectangle {
fn square(size: u32) -> Self {
Self {
width: size,
height: size,
}
}
}
fn main() {
let sq = Rectangle::square(3);
}Ключевые слова Self в возвращаемом типе и в теле функции являются
псевдонимами типа, который указан после ключевого слова impl; в данном случае
это Rectangle.
Чтобы вызвать эту ассоциированную функцию, мы используем синтаксис :: с
именем структуры; пример – let sq = Rectangle::square(3);. Эта функция
находится в пространстве имен структуры: синтаксис :: используется и для
ассоциированных функций, и для пространств имен, создаваемых модулями. Мы
обсудим модули в главе 7.
Несколько блоков impl
У каждой структуры может быть несколько блоков impl. Например, листинг 5-15
эквивалентен коду, показанному в листинге 5-16, где каждый метод находится в
собственном блоке impl.
#[derive(Debug)]
struct Rectangle {
width: u32,
height: u32,
}
impl Rectangle {
fn area(&self) -> u32 {
self.width * self.height
}
}
impl Rectangle {
fn can_hold(&self, other: &Rectangle) -> bool {
self.width > other.width && self.height > other.height
}
}
fn main() {
let rect1 = Rectangle {
width: 30,
height: 50,
};
let rect2 = Rectangle {
width: 10,
height: 40,
};
let rect3 = Rectangle {
width: 60,
height: 45,
};
println!("Can rect1 hold rect2? {}", rect1.can_hold(&rect2));
println!("Can rect1 hold rect3? {}", rect1.can_hold(&rect3));
}implЗдесь нет причины разделять эти методы на несколько блоков impl, но такой
синтаксис допустим. В главе 10, где мы обсудим обобщенные типы и трейты, мы
увидим случай, в котором несколько блоков impl полезны.
Итоги
Структуры позволяют создавать пользовательские типы, которые имеют смысл в
вашей предметной области. Используя структуры, вы можете удерживать связанные
части данных вместе и давать имя каждой части, чтобы сделать код понятнее. В
блоках impl можно определять функции, ассоциированные с вашим типом, а
методы – это разновидность ассоциированных функций, которая позволяет
задавать поведение экземпляров ваших структур.
Но структуры – не единственный способ создавать пользовательские типы: давайте обратимся к перечислениям Rust, чтобы добавить еще один инструмент в ваш набор.
Перечисления и сопоставление с образцом
В этой главе мы рассмотрим перечисления, которые также называют enums.
Перечисления позволяют определить тип, перечислив его возможные варианты.
Сначала мы определим и используем перечисление, чтобы показать, как enum может
кодировать смысл вместе с данными. Затем мы изучим особенно полезное
перечисление под названием Option, которое выражает, что значение может быть
либо чем-то, либо ничем. После этого мы рассмотрим, как сопоставление с
образцом в выражении match позволяет легко выполнять разный код для разных
значений перечисления. Наконец, мы разберем, как конструкция if let дает еще
одну удобную и краткую идиому для обработки перечислений в вашем коде.
Определение перечисления
Определение перечисления
Если структуры дают способ группировать связанные поля и данные, например
Rectangle с его width и height, то перечисления дают способ сказать, что
значение является одним вариантом из возможного набора значений. Например, мы
можем захотеть сказать, что Rectangle – это одна из возможных фигур, среди
которых также есть Circle и Triangle. Для этого Rust позволяет кодировать
такие возможности в виде перечисления.
Давайте рассмотрим ситуацию, которую мы можем захотеть выразить в коде, и увидим, почему перечисления в этом случае полезны и подходят лучше, чем структуры. Допустим, нам нужно работать с IP-адресами. Сейчас для IP-адресов используются два основных стандарта: четвертая и шестая версии. Поскольку это единственные возможности для IP-адреса, с которыми столкнется наша программа, мы можем перечислить все возможные варианты; отсюда и происходит название перечисления.
Любой IP-адрес может быть либо адресом четвертой версии, либо адресом шестой версии, но не обоими одновременно. Это свойство IP-адресов делает enum подходящей структурой данных, потому что значение enum может быть только одним из его вариантов. Адреса четвертой и шестой версий при этом по своей сути все еще остаются IP-адресами, поэтому их следует рассматривать как один и тот же тип, когда код обрабатывает ситуации, применимые к любому виду IP-адреса.
Мы можем выразить эту идею в коде, определив перечисление IpAddrKind и
перечислив возможные виды IP-адреса: V4 и V6. Это варианты перечисления:
enum IpAddrKind {
V4,
V6,
}
fn main() {
let four = IpAddrKind::V4;
let six = IpAddrKind::V6;
route(IpAddrKind::V4);
route(IpAddrKind::V6);
}
fn route(ip_kind: IpAddrKind) {}Теперь IpAddrKind – это пользовательский тип данных, который мы можем
использовать в других местах нашего кода.
Значения перечисления
Мы можем создать экземпляры каждого из двух вариантов IpAddrKind следующим
образом:
enum IpAddrKind {
V4,
V6,
}
fn main() {
let four = IpAddrKind::V4;
let six = IpAddrKind::V6;
route(IpAddrKind::V4);
route(IpAddrKind::V6);
}
fn route(ip_kind: IpAddrKind) {}Обратите внимание, что варианты перечисления находятся в пространстве имен его
идентификатора, и мы используем двойное двоеточие, чтобы разделить эти две
части. Это полезно, потому что теперь оба значения, IpAddrKind::V4 и
IpAddrKind::V6, имеют один и тот же тип: IpAddrKind. Затем мы можем,
например, определить функцию, которая принимает любой IpAddrKind:
enum IpAddrKind {
V4,
V6,
}
fn main() {
let four = IpAddrKind::V4;
let six = IpAddrKind::V6;
route(IpAddrKind::V4);
route(IpAddrKind::V6);
}
fn route(ip_kind: IpAddrKind) {}И мы можем вызвать эту функцию с любым из вариантов:
enum IpAddrKind {
V4,
V6,
}
fn main() {
let four = IpAddrKind::V4;
let six = IpAddrKind::V6;
route(IpAddrKind::V4);
route(IpAddrKind::V6);
}
fn route(ip_kind: IpAddrKind) {}Использование перечислений дает еще больше преимуществ. Если подумать дальше о нашем типе IP-адреса, сейчас у нас нет способа хранить фактические данные IP-адреса; мы знаем только, какого он вида. С учетом того, что вы только что узнали о структурах в главе 5, у вас может возникнуть желание решить эту задачу с помощью структур, как показано в листинге 6-1.
fn main() {
enum IpAddrKind {
V4,
V6,
}
struct IpAddr {
kind: IpAddrKind,
address: String,
}
let home = IpAddr {
kind: IpAddrKind::V4,
address: String::from("127.0.0.1"),
};
let loopback = IpAddr {
kind: IpAddrKind::V6,
address: String::from("::1"),
};
}IpAddrKind с помощью structЗдесь мы определили структуру IpAddr с двумя полями: полем kind типа
IpAddrKind (перечисление, которое мы определили ранее) и полем address
типа String. У нас есть два экземпляра этой структуры. Первый – home; в
его поле kind хранится значение IpAddrKind::V4, а связанные данные адреса
равны 127.0.0.1. Второй экземпляр – loopback. В качестве значения kind
у него другой вариант IpAddrKind, V6, и с ним связан адрес ::1. Мы
использовали структуру, чтобы объединить значения kind и address, поэтому
теперь вариант связан со значением.
Однако представить ту же идею с помощью одного только перечисления можно
короче: вместо перечисления внутри структуры мы можем поместить данные прямо в
каждый вариант перечисления. Новое определение enum IpAddr говорит, что оба
варианта, V4 и V6, будут иметь связанные значения типа String:
fn main() {
enum IpAddr {
V4(String),
V6(String),
}
let home = IpAddr::V4(String::from("127.0.0.1"));
let loopback = IpAddr::V6(String::from("::1"));
}Мы прикрепляем данные напрямую к каждому варианту перечисления, поэтому
дополнительная структура не нужна. Здесь также легче увидеть еще одну деталь
работы перечислений: имя каждого варианта enum, который мы определяем, также
становится функцией, создающей экземпляр перечисления. То есть IpAddr::V4()
– это вызов функции, которая принимает аргумент String и возвращает
экземпляр типа IpAddr. Мы автоматически получаем эту функцию-конструктор в
результате определения enum.
У использования enum вместо структуры есть еще одно преимущество: каждый
вариант может иметь разные типы и разное количество связанных данных.
IP-адреса четвертой версии всегда будут иметь четыре числовых компонента со
значениями от 0 до 255. Если бы мы захотели хранить адреса V4 как четыре
значения u8, но по-прежнему выражать адреса V6 одним значением String, со
структурой мы не смогли бы этого сделать. Перечисления легко справляются с
таким случаем:
fn main() {
enum IpAddr {
V4(u8, u8, u8, u8),
V6(String),
}
let home = IpAddr::V4(127, 0, 0, 1);
let loopback = IpAddr::V6(String::from("::1"));
}Мы показали несколько разных способов определить структуры данных для хранения
IP-адресов четвертой и шестой версий. Однако, как оказывается, желание хранить
IP-адреса и кодировать, какого они вида, настолько распространено, что в
стандартной библиотеке уже есть определение, которое мы можем
использовать! Посмотрим, как стандартная библиотека
определяет IpAddr. В ней есть точно такой enum и такие варианты, какие мы
определили и использовали, но данные адреса встроены внутрь вариантов в форме
двух разных структур, определенных по-разному для каждого варианта:
#![allow(unused)]
fn main() {
struct Ipv4Addr {
// --snip--
}
struct Ipv6Addr {
// --snip--
}
enum IpAddr {
V4(Ipv4Addr),
V6(Ipv6Addr),
}
}Этот код показывает, что внутрь варианта enum можно поместить данные любого вида: например, строки, числовые типы или структуры. Можно даже включить другое перечисление! Кроме того, типы стандартной библиотеки часто не намного сложнее того, что вы могли бы придумать сами.
Обратите внимание: хотя стандартная библиотека содержит определение IpAddr,
мы все равно можем создать и использовать свое собственное определение без
конфликта, потому что мы не ввели определение из стандартной библиотеки в нашу
область видимости. Подробнее о введении типов в область видимости мы поговорим
в главе 7.
Давайте рассмотрим еще один пример enum в листинге 6-2: у него в вариантах встроено большое разнообразие типов.
enum Message {
Quit,
Move { x: i32, y: i32 },
Write(String),
ChangeColor(i32, i32, i32),
}
fn main() {}Message, каждый вариант которого хранит разные количества и типы значенийУ этого enum есть четыре варианта с разными типами:
Quit: вообще не имеет связанных с ним данныхMove: имеет именованные поля, как у структурыWrite: содержит одно значениеStringChangeColor: содержит три значенияi32
Определение enum с такими вариантами, как в листинге 6-2, похоже на
определение разных видов структур, за исключением того, что enum не использует
ключевое слово struct, а все варианты сгруппированы вместе под типом
Message. Следующие структуры могли бы хранить те же данные, что хранят
варианты предыдущего enum:
struct QuitMessage; // unit struct
struct MoveMessage {
x: i32,
y: i32,
}
struct WriteMessage(String); // tuple struct
struct ChangeColorMessage(i32, i32, i32); // tuple struct
fn main() {}Но если бы мы использовали разные структуры, каждая из которых имеет свой
собственный тип, нам было бы не так просто определить функцию, принимающую
любой из этих видов сообщений, как с enum Message, определенным в листинге
6-2, потому что он является единым типом.
Между перечислениями и структурами есть еще одно сходство: точно так же, как мы
можем определять методы для структур с помощью impl, мы можем определять
методы и для перечислений. Вот метод с именем call, который мы могли бы
определить для нашего enum Message:
fn main() {
enum Message {
Quit,
Move { x: i32, y: i32 },
Write(String),
ChangeColor(i32, i32, i32),
}
impl Message {
fn call(&self) {
// method body would be defined here
}
}
let m = Message::Write(String::from("hello"));
m.call();
}Тело метода использовало бы self, чтобы получить значение, для которого мы
вызвали метод. В этом примере мы создали переменную m со значением
Message::Write(String::from("hello")), и именно этим значением будет self
в теле метода call, когда выполнится m.call().
Давайте рассмотрим еще одно перечисление из стандартной библиотеки, очень
распространенное и полезное: Option.
Перечисление Option
В этом разделе мы разберем пример использования Option – еще одного enum,
определенного стандартной библиотекой. Тип Option кодирует очень
распространенный сценарий, в котором значение может чем-то быть или может быть
ничем.
Например, если вы запросите первый элемент непустого списка, вы получите значение. Если вы запросите первый элемент пустого списка, вы не получите ничего. Выражение этой идеи через систему типов означает, что компилятор может проверить, обработали ли вы все случаи, которые должны быть обработаны; эта возможность помогает предотвращать ошибки, чрезвычайно распространенные в других языках программирования.
Проектирование языка программирования часто рассматривают через призму того, какие возможности в него включают, но возможности, которые исключают, тоже важны. В Rust нет возможности null, которая есть во многих других языках. Null – это значение, означающее отсутствие значения. В языках с null переменные всегда могут находиться в одном из двух состояний: null или не-null.
В своей презентации 2009 года «Null References: The Billion Dollar Mistake» Тони Хоар, изобретатель null, сказал об этом так:
Я называю это своей ошибкой на миллиард долларов. В то время я проектировал первую всеобъемлющую систему типов для ссылок в объектно-ориентированном языке. Моей целью было гарантировать, что любое использование ссылок будет абсолютно безопасным, а проверка будет автоматически выполняться компилятором. Но я не смог устоять перед искушением добавить null-ссылку просто потому, что ее было так легко реализовать. Это привело к бесчисленным ошибкам, уязвимостям и сбоям систем, которые, вероятно, причинили боль и ущерб на миллиард долларов за последние сорок лет.
Проблема null-значений в том, что если вы попытаетесь использовать null-значение как значение, которое не является null, вы получите какую-либо ошибку. Поскольку свойство «null или не-null» распространено повсюду, ошибку такого рода сделать чрезвычайно легко.
Однако идея, которую пытается выразить null, все равно полезна: null – это значение, которое сейчас по какой-то причине недопустимо или отсутствует.
Проблема на самом деле не в самой идее, а в конкретной реализации. Поэтому в
Rust нет null, но есть enum, который может кодировать идею наличия или
отсутствия значения. Этот enum называется Option<T>, и он определен
стандартной библиотекой следующим образом:
#![allow(unused)]
fn main() {
enum Option<T> {
None,
Some(T),
}
}Перечисление Option<T> настолько полезно, что даже включено в прелюдию; вам
не нужно явно вводить его в область видимости. Его варианты тоже включены в
прелюдию: вы можете использовать Some и None напрямую, без префикса
Option::. Option<T> при этом остается обычным enum, а Some(T) и None
по-прежнему являются вариантами типа Option<T>.
Синтаксис <T> – это возможность Rust, о которой мы еще не говорили. Это
обобщенный параметр типа, и обобщения мы подробнее рассмотрим в главе 10. Пока
вам достаточно знать, что <T> означает: вариант Some enum Option может
хранить одно значение любого типа, а каждый конкретный тип, используемый
вместо T, делает весь тип Option<T> другим типом. Вот несколько примеров
использования значений Option для хранения числовых типов и символьных
типов:
fn main() {
let some_number = Some(5);
let some_char = Some('e');
let absent_number: Option<i32> = None;
}Тип some_number – Option<i32>. Тип some_char – Option<char>, и это
другой тип. Rust может вывести эти типы, потому что мы указали значение внутри
варианта Some. Для absent_number Rust требует, чтобы мы указали общий тип
Option: компилятор не может вывести тип, который будет хранить
соответствующий вариант Some, глядя только на значение None. Здесь мы
говорим Rust, что хотим, чтобы absent_number имел тип Option<i32>.
Когда у нас есть значение Some, мы знаем, что значение присутствует и
хранится внутри Some. Когда у нас есть значение None, в некотором смысле
оно означает то же самое, что и null: у нас нет допустимого значения. Так
почему же наличие Option<T> лучше, чем наличие null?
Коротко говоря, потому что Option<T> и T (где T может быть любым типом)
– это разные типы, и компилятор не позволит нам использовать значение
Option<T> так, как будто оно точно является допустимым значением. Например,
этот код не скомпилируется, потому что пытается прибавить i8 к
Option<i8>:
fn main() {
let x: i8 = 5;
let y: Option<i8> = Some(5);
let sum = x + y;
}Если мы запустим этот код, получим сообщение об ошибке, похожее на следующее:
$ cargo run
Compiling enums v0.1.0 (file:///projects/enums)
error[E0277]: cannot add `Option<i8>` to `i8`
--> src/main.rs:5:17
|
5 | let sum = x + y;
| ^ no implementation for `i8 + Option<i8>`
|
= help: the trait `Add<Option<i8>>` is not implemented for `i8`
= help: the following other types implement trait `Add<Rhs>`:
`&i8` implements `Add<i8>`
`&i8` implements `Add`
`i8` implements `Add<&i8>`
`i8` implements `Add`
For more information about this error, try `rustc --explain E0277`.
error: could not compile `enums` (bin "enums") due to 1 previous error
Сурово! По сути, это сообщение об ошибке означает, что Rust не понимает, как
сложить i8 и Option<i8>, потому что это разные типы. Когда в Rust у нас
есть значение такого типа, как i8, компилятор гарантирует, что у нас всегда
есть допустимое значение. Мы можем уверенно продолжать работу, не проверяя
значение на null перед его использованием. Только когда у нас есть Option<i8>
(или Option с любым другим типом значения, с которым мы работаем), нам нужно
думать о возможном отсутствии значения, и компилятор проследит, чтобы мы
обработали этот случай перед использованием значения.
Иными словами, нужно преобразовать Option<T> в T, прежде чем можно будет
выполнять с ним операции для T. В общем случае это помогает поймать одну из
самых распространенных проблем с null: предположение, что что-то не является
null, хотя на самом деле является.
Устранение риска ошибочно предположить, что значение не равно null, помогает
быть увереннее в коде. Чтобы иметь значение, которое потенциально может быть
null, нужно явно согласиться на это, сделав тип этого значения Option<T>.
Затем, когда вы используете это значение, от вас требуется явно обработать
случай, когда значение отсутствует. Везде, где значение имеет тип, отличный от
Option<T>, вы можете безопасно предполагать, что значение не является
null. Это было осознанным проектным решением Rust: ограничить
распространенность null и повысить безопасность кода на Rust.
Так как же получить значение T из варианта Some, когда у вас есть значение
типа Option<T>, чтобы затем использовать это значение? У enum Option<T>
есть большое количество методов, полезных в самых разных ситуациях; вы можете
изучить их в его документации. Знакомство с методами
Option<T> будет чрезвычайно полезно на вашем пути в Rust.
В целом, чтобы использовать значение Option<T>, вам нужен код, который
обработает каждый вариант. Вам нужен один код, который выполнится только при
наличии значения Some(T), и этому коду разрешено использовать внутреннее
значение T. Вам нужен другой код, который выполнится только при значении
None, и у этого кода нет доступного значения T. Выражение match – это
конструкция управления потоком выполнения, которая при использовании с enum
делает именно это: она выполняет разный код в зависимости от того, какой
вариант enum у нее есть, и этот код может использовать данные внутри
совпавшего значения.
Конструкция управления потоком match
Конструкция управления потоком match
В Rust есть чрезвычайно мощная конструкция управления потоком под названием
match, которая позволяет сравнить значение с рядом образцов, а затем
выполнить код в зависимости от того, какой образец совпал. Образцы могут
состоять из литеральных значений, имен переменных, подстановочных знаков и
многих других элементов; глава 19 охватывает
все виды образцов и то, что они делают. Сила match заключается в
выразительности образцов и в том, что компилятор подтверждает: обработаны все
возможные случаи.
Представьте выражение match как машину для сортировки монет: монеты
скользят по направляющей, вдоль которой расположены отверстия разного размера,
и каждая монета падает в первое отверстие, в которое она подходит. Так же и
значения проходят через каждый образец в match, и при первом образце, к
которому значение «подходит», значение попадает в связанный с ним блок кода
для использования во время выполнения.
Раз уж речь зашла о монетах, давайте используем их как пример для match! Мы
можем написать функцию, которая принимает неизвестную монету США и, подобно
счетной машине, определяет, что это за монета, и возвращает ее стоимость в
центах, как показано в листинге 6-3.
enum Coin {
Penny,
Nickel,
Dime,
Quarter,
}
fn value_in_cents(coin: Coin) -> u8 {
match coin {
Coin::Penny => 1,
Coin::Nickel => 5,
Coin::Dime => 10,
Coin::Quarter => 25,
}
}
fn main() {}match, в котором варианты enum используются как образцыДавайте разберем match в функции value_in_cents. Сначала мы пишем ключевое
слово match, за которым следует выражение; в данном случае это значение
coin. Это очень похоже на условное выражение, используемое с if, но есть
большое отличие: с if условие должно вычисляться в булево значение, а здесь
оно может быть любого типа. Тип coin в этом примере – enum Coin, который
мы определили в первой строке.
Далее идут ветви match. У ветви есть две части: образец и некоторый код. У
первой ветви здесь образцом является значение Coin::Penny, а затем идет
оператор =>, который отделяет образец от кода, который нужно выполнить. В
данном случае код – это просто значение 1. Каждая ветвь отделяется от
следующей запятой.
Когда выражение match выполняется, оно по порядку сравнивает результирующее
значение с образцом каждой ветви. Если образец соответствует значению,
выполняется код, связанный с этим образцом. Если этот образец не соответствует
значению, выполнение продолжается со следующей ветви, почти как в машине для
сортировки монет. У нас может быть столько ветвей, сколько нужно: в листинге
6-3 у нашего match четыре ветви.
Код, связанный с каждой ветвью, является выражением, а результирующее значение
выражения в совпавшей ветви становится значением, которое возвращается для
всего выражения match.
Обычно мы не используем фигурные скобки, если код ветви match короткий, как в
листинге 6-3, где каждая ветвь просто возвращает значение. Если вы хотите
выполнить несколько строк кода в ветви match, нужно использовать фигурные
скобки, и запятая после ветви тогда становится необязательной. Например,
следующий код выводит “Lucky penny!” каждый раз, когда метод вызывается с
Coin::Penny, но все равно возвращает последнее значение блока, 1:
enum Coin {
Penny,
Nickel,
Dime,
Quarter,
}
fn value_in_cents(coin: Coin) -> u8 {
match coin {
Coin::Penny => {
println!("Lucky penny!");
1
}
Coin::Nickel => 5,
Coin::Dime => 10,
Coin::Quarter => 25,
}
}
fn main() {}Образцы, которые связываются со значениями
Еще одна полезная возможность ветвей match заключается в том, что они могут связываться с частями значений, которые соответствуют образцу. Именно так мы можем извлекать значения из вариантов enum.
В качестве примера изменим один из вариантов нашего enum так, чтобы он хранил
данные внутри себя. С 1999 по 2008 год США выпускали 25-центовые монеты с
разными изображениями для каждого из 50 штатов на одной стороне. Никакие
другие монеты не получали изображений штатов, поэтому только у 25-центовых
монет есть это дополнительное значение. Мы можем добавить эту информацию в наш
enum, изменив вариант Quarter так, чтобы он включал значение UsState,
хранящееся внутри него, как сделано в листинге 6-4.
#[derive(Debug)] // so we can inspect the state in a minute
enum UsState {
Alabama,
Alaska,
// --snip--
}
enum Coin {
Penny,
Nickel,
Dime,
Quarter(UsState),
}
fn main() {}Coin, в котором вариант Quarter также хранит значение UsStateПредставим, что друг пытается собрать все 50 монет с изображениями штатов. Пока мы сортируем мелочь по типу монеты, мы также будем называть штат, связанный с каждой 25-центовой монетой, чтобы, если такой у друга еще нет, он мог добавить ее в свою коллекцию.
В выражении match для этого кода мы добавляем переменную state в образец,
который соответствует значениям варианта Coin::Quarter. Когда совпадает
Coin::Quarter, переменная state связывается со значением штата этой
25-центовой монеты. Затем мы можем использовать state в коде этой ветви, вот
так:
#[derive(Debug)]
enum UsState {
Alabama,
Alaska,
// --snip--
}
enum Coin {
Penny,
Nickel,
Dime,
Quarter(UsState),
}
fn value_in_cents(coin: Coin) -> u8 {
match coin {
Coin::Penny => 1,
Coin::Nickel => 5,
Coin::Dime => 10,
Coin::Quarter(state) => {
println!("State quarter from {state:?}!");
25
}
}
}
fn main() {
value_in_cents(Coin::Quarter(UsState::Alaska));
}Если бы мы вызвали value_in_cents(Coin::Quarter(UsState::Alaska)), значение
coin было бы Coin::Quarter(UsState::Alaska). Когда мы сравниваем это
значение с каждой из ветвей match, ни одна из них не совпадает, пока мы не
дойдем до Coin::Quarter(state). В этот момент привязка state получит
значение UsState::Alaska. Затем мы можем использовать эту привязку в
выражении println!, тем самым извлекая внутреннее значение штата из варианта
enum Coin для Quarter.
Образец match для Option<T>
В предыдущем разделе мы хотели получить внутреннее значение T из случая
Some при использовании Option<T>; мы также можем обрабатывать Option<T> с
помощью match, как мы делали с enum Coin! Вместо сравнения монет мы будем
сравнивать варианты Option<T>, но принцип работы выражения match остается
тем же.
Допустим, мы хотим написать функцию, которая принимает Option<i32> и, если
внутри есть значение, прибавляет к нему 1. Если внутри нет значения, функция
должна вернуть значение None и не пытаться выполнять никаких операций.
Благодаря match эту функцию очень легко написать, и она будет выглядеть как
в листинге 6-5.
fn main() {
fn plus_one(x: Option<i32>) -> Option<i32> {
match x {
None => None,
Some(i) => Some(i + 1),
}
}
let five = Some(5);
let six = plus_one(five);
let none = plus_one(None);
}match для Option<i32>Давайте подробнее рассмотрим первое выполнение plus_one. Когда мы вызываем
plus_one(five), переменная x в теле plus_one будет иметь значение
Some(5). Затем мы сравниваем его с каждой ветвью match:
fn main() {
fn plus_one(x: Option<i32>) -> Option<i32> {
match x {
None => None,
Some(i) => Some(i + 1),
}
}
let five = Some(5);
let six = plus_one(five);
let none = plus_one(None);
}Значение Some(5) не соответствует образцу None, поэтому мы переходим к
следующей ветви:
fn main() {
fn plus_one(x: Option<i32>) -> Option<i32> {
match x {
None => None,
Some(i) => Some(i + 1),
}
}
let five = Some(5);
let six = plus_one(five);
let none = plus_one(None);
}Соответствует ли Some(5) образцу Some(i)? Да! У нас тот же вариант.
Переменная i связывается со значением, содержащимся в Some, поэтому i
получает значение 5. Затем выполняется код в ветви match: мы прибавляем 1 к
значению i и создаем новое значение Some, внутри которого находится наш
результат 6.
Теперь рассмотрим второй вызов plus_one в листинге 6-5, где x равно
None. Мы входим в match и сравниваем с первой ветвью:
fn main() {
fn plus_one(x: Option<i32>) -> Option<i32> {
match x {
None => None,
Some(i) => Some(i + 1),
}
}
let five = Some(5);
let six = plus_one(five);
let none = plus_one(None);
}Совпадает! Значения, к которому можно что-то прибавить, нет, поэтому программа
останавливается и возвращает значение None в правой части =>. Поскольку
первая ветвь совпала, остальные ветви не сравниваются.
Объединение match и enum полезно во многих ситуациях. Вы часто будете видеть
этот шаблон в коде Rust: сопоставить enum с образцами, связать переменную с
данными внутри, а затем выполнить код на их основе. Поначалу это немного
непривычно, но когда вы привыкнете, вам захочется иметь такую возможность во
всех языках. Пользователям она стабильно нравится.
Сопоставления являются исчерпывающими
Есть еще один аспект match, который нужно обсудить: образцы ветвей должны
покрывать все возможности. Рассмотрим эту версию нашей функции plus_one, в
которой есть ошибка и которая не скомпилируется:
fn main() {
fn plus_one(x: Option<i32>) -> Option<i32> {
match x {
Some(i) => Some(i + 1),
}
}
let five = Some(5);
let six = plus_one(five);
let none = plus_one(None);
}Мы не обработали случай None, поэтому этот код приведет к ошибке. К счастью,
Rust умеет такую ошибку обнаруживать. Если мы попробуем скомпилировать этот
код, получим такую ошибку:
$ cargo run
Compiling enums v0.1.0 (file:///projects/enums)
error[E0004]: non-exhaustive patterns: `None` not covered
--> src/main.rs:3:15
|
3 | match x {
| ^ pattern `None` not covered
|
note: `Option<i32>` defined here
--> /rustc/1159e78c4747b02ef996e55082b704c09b970588/library/core/src/option.rs:593:1
::: /rustc/1159e78c4747b02ef996e55082b704c09b970588/library/core/src/option.rs:597:5
|
= note: not covered
= note: the matched value is of type `Option<i32>`
help: ensure that all possible cases are being handled by adding a match arm with a wildcard pattern or an explicit pattern as shown
|
4 ~ Some(i) => Some(i + 1),
5 ~ None => todo!(),
|
For more information about this error, try `rustc --explain E0004`.
error: could not compile `enums` (bin "enums") due to 1 previous error
Rust знает, что мы не покрыли все возможные случаи, и даже знает, какой
образец мы забыли! Сопоставления в Rust исчерпывающие: мы должны исчерпать
все до последней возможности, чтобы код был допустимым. Особенно в случае
Option<T>, когда Rust не дает нам забыть явно обработать случай None, он
защищает нас от предположения, что у нас есть значение, когда у нас может быть
null, тем самым делая невозможной ошибку на миллиард долларов, обсуждавшуюся
ранее.
Всеохватывающие образцы и заполнитель _
Используя enum, мы также можем выполнять особые действия для нескольких
конкретных значений, а для всех остальных значений выполнять одно действие по
умолчанию. Представьте, что мы реализуем игру, где, если при броске кости
выпадает 3, ваш игрок не двигается, а вместо этого получает красивую новую
шляпу. Если выпадает 7, ваш игрок теряет красивую шляпу. Для всех остальных
значений игрок перемещается на это число клеток по игровому полю. Вот match,
который реализует эту логику; результат броска кости задан прямо в коде, а
вся остальная логика представлена функциями без тел, потому что их фактическая
реализация выходит за рамки этого примера:
fn main() {
let dice_roll = 9;
match dice_roll {
3 => add_fancy_hat(),
7 => remove_fancy_hat(),
other => move_player(other),
}
fn add_fancy_hat() {}
fn remove_fancy_hat() {}
fn move_player(num_spaces: u8) {}
}Для первых двух ветвей образцами являются литеральные значения 3 и 7. Для
последней ветви, которая покрывает все остальные возможные значения, образцом
является переменная, которой мы выбрали имя other. Код, выполняемый для
ветви other, использует эту переменную, передавая ее в функцию
move_player.
Этот код компилируется, хотя мы не перечислили все возможные значения, которые
может иметь u8, потому что последний образец совпадет со всеми значениями,
которые не были явно перечислены. Этот всеохватывающий образец удовлетворяет
требованию, что match должен быть исчерпывающим. Обратите внимание, что
всеохватывающую ветвь нужно ставить последней, потому что образцы проверяются
по порядку. Если бы мы поставили всеохватывающую ветвь раньше, остальные ветви
никогда бы не выполнялись, поэтому Rust предупредит нас, если мы добавим ветви
после всеохватывающей!
В Rust также есть образец, который можно использовать, когда нам нужен
всеохватывающий вариант, но мы не хотим использовать значение в
всеохватывающем образце: _ – это специальный образец, который соответствует
любому значению и не связывается с ним. Так мы говорим Rust, что не будем
использовать значение, поэтому Rust не предупредит нас о неиспользуемой
переменной.
Изменим правила игры: теперь, если выпадает что угодно, кроме 3 или 7, нужно
бросить кость еще раз. Нам больше не нужно использовать всеохватывающее
значение, поэтому мы можем изменить код, чтобы использовать _ вместо
переменной с именем other:
fn main() {
let dice_roll = 9;
match dice_roll {
3 => add_fancy_hat(),
7 => remove_fancy_hat(),
_ => reroll(),
}
fn add_fancy_hat() {}
fn remove_fancy_hat() {}
fn reroll() {}
}Этот пример также удовлетворяет требованию исчерпываемости, потому что в последней ветви мы явно игнорируем все остальные значения; мы ничего не забыли.
Наконец, изменим правила игры еще раз: если выпадает что угодно, кроме 3 или
7, в ваш ход больше ничего не происходит. Мы можем выразить это, используя
единичное значение (пустой кортежный тип, который мы упоминали в разделе
«Кортежный тип») как код, связанный с ветвью _:
fn main() {
let dice_roll = 9;
match dice_roll {
3 => add_fancy_hat(),
7 => remove_fancy_hat(),
_ => (),
}
fn add_fancy_hat() {}
fn remove_fancy_hat() {}
}Здесь мы явно говорим Rust, что не собираемся использовать никакое другое значение, которое не соответствует образцу в более ранней ветви, и не хотим выполнять никакой код в этом случае.
О сопоставлении с образцом есть еще много материала, который мы рассмотрим в
главе 19. А пока мы перейдем к синтаксису
if let, который может быть полезен в ситуациях, когда выражение match
получается немного многословным.
Компактное управление потоком с if let и let...else
Краткое управление потоком с if let и let...else
Синтаксис if let позволяет объединить if и let в менее многословный
способ обработки значений, которые соответствуют одному образцу, с
игнорированием остальных. Рассмотрим программу в листинге 6-6, которая
сопоставляет значение Option<u8> в переменной config_max, но должна
выполнить код только в том случае, если значение является вариантом Some.
fn main() {
let config_max = Some(3u8);
match config_max {
Some(max) => println!("The maximum is configured to be {max}"),
_ => (),
}
}match, которому важно выполнить код только тогда, когда значение равно SomeЕсли значение равно Some, мы выводим значение внутри варианта Some,
связывая его с переменной max в образце. Мы не хотим ничего делать со
значением None. Чтобы удовлетворить выражение match, после обработки
только одного варианта нам приходится добавить _ => (), что является
досадным шаблонным кодом.
Вместо этого мы могли бы записать то же самое короче с помощью if let.
Следующий код ведет себя так же, как match в листинге 6-6:
fn main() {
let config_max = Some(3u8);
if let Some(max) = config_max {
println!("The maximum is configured to be {max}");
}
}Синтаксис if let принимает образец и выражение, разделенные знаком равенства.
Он работает так же, как match, где выражение передается в match, а образец
является его первой ветвью. В этом случае образец – Some(max), и max
связывается со значением внутри Some. Затем мы можем использовать max в
теле блока if let так же, как использовали max в соответствующей ветви
match. Код в блоке if let выполняется только если значение соответствует
образцу.
Использование if let означает, что нужно меньше печатать, делать меньше
отступов и писать меньше шаблонного кода. Однако при этом вы теряете
исчерпывающую проверку, которую навязывает match и которая гарантирует, что
вы не забыли обработать ни один случай. Выбор между match и if let зависит
от того, что именно вы делаете в конкретной ситуации, и от того, является ли
краткость приемлемым обменом на потерю исчерпывающей проверки.
Иными словами, if let можно рассматривать как синтаксический сахар для
match, который выполняет код, когда значение соответствует одному образцу, а
затем игнорирует все остальные значения.
Мы можем использовать else вместе с if let. Блок кода, связанный с else,
соответствует блоку кода, который был бы связан со случаем _ в выражении
match, эквивалентном сочетанию if let и else. Вспомните определение enum
Coin из листинга 6-4, где вариант Quarter также хранил значение UsState.
Если бы мы хотели подсчитывать все монеты, не являющиеся 25-центовыми, и
одновременно объявлять штат для 25-центовых монет, мы могли бы сделать это с
помощью выражения match, вот так:
#[derive(Debug)]
enum UsState {
Alabama,
Alaska,
// --snip--
}
enum Coin {
Penny,
Nickel,
Dime,
Quarter(UsState),
}
fn main() {
let coin = Coin::Penny;
let mut count = 0;
match coin {
Coin::Quarter(state) => println!("State quarter from {state:?}!"),
_ => count += 1,
}
}Или мы могли бы использовать выражение if let и else, вот так:
#[derive(Debug)]
enum UsState {
Alabama,
Alaska,
// --snip--
}
enum Coin {
Penny,
Nickel,
Dime,
Quarter(UsState),
}
fn main() {
let coin = Coin::Penny;
let mut count = 0;
if let Coin::Quarter(state) = coin {
println!("State quarter from {state:?}!");
} else {
count += 1;
}
}Оставаться на «счастливом пути» с let...else
Распространенный шаблон – выполнить некоторое вычисление, когда значение
присутствует, и вернуть значение по умолчанию в противном случае. Продолжая
наш пример с монетами, хранящими значение UsState, если бы мы хотели сказать
что-то забавное в зависимости от того, насколько старым был штат на
25-центовой монете, мы могли бы добавить метод для UsState, чтобы проверить
возраст штата, вот так:
#[derive(Debug)] // so we can inspect the state in a minute
enum UsState {
Alabama,
Alaska,
// --snip--
}
impl UsState {
fn existed_in(&self, year: u16) -> bool {
match self {
UsState::Alabama => year >= 1819,
UsState::Alaska => year >= 1959,
// -- snip --
}
}
}
enum Coin {
Penny,
Nickel,
Dime,
Quarter(UsState),
}
fn describe_state_quarter(coin: Coin) -> Option<String> {
if let Coin::Quarter(state) = coin {
if state.existed_in(1900) {
Some(format!("{state:?} is pretty old, for America!"))
} else {
Some(format!("{state:?} is relatively new."))
}
} else {
None
}
}
fn main() {
if let Some(desc) = describe_state_quarter(Coin::Quarter(UsState::Alaska)) {
println!("{desc}");
}
}Затем мы могли бы использовать if let, чтобы сопоставить тип монеты и ввести
переменную state внутри тела условия, как в листинге 6-7.
#[derive(Debug)] // so we can inspect the state in a minute
enum UsState {
Alabama,
Alaska,
// --snip--
}
impl UsState {
fn existed_in(&self, year: u16) -> bool {
match self {
UsState::Alabama => year >= 1819,
UsState::Alaska => year >= 1959,
// -- snip --
}
}
}
enum Coin {
Penny,
Nickel,
Dime,
Quarter(UsState),
}
fn describe_state_quarter(coin: Coin) -> Option<String> {
if let Coin::Quarter(state) = coin {
if state.existed_in(1900) {
Some(format!("{state:?} is pretty old, for America!"))
} else {
Some(format!("{state:?} is relatively new."))
}
} else {
None
}
}
fn main() {
if let Some(desc) = describe_state_quarter(Coin::Quarter(UsState::Alaska)) {
println!("{desc}");
}
}if letЭто решает задачу, но переносит работу в тело инструкции if let, и если
работа, которую нужно выполнить, становится сложнее, может быть трудно понять,
как именно соотносятся ветви верхнего уровня. Мы также могли бы воспользоваться
тем, что выражения создают значение: либо получить state из if let, либо
выполнить ранний возврат, как в листинге 6-8. (Нечто похожее можно сделать и с
match.)
#[derive(Debug)] // so we can inspect the state in a minute
enum UsState {
Alabama,
Alaska,
// --snip--
}
impl UsState {
fn existed_in(&self, year: u16) -> bool {
match self {
UsState::Alabama => year >= 1819,
UsState::Alaska => year >= 1959,
// -- snip --
}
}
}
enum Coin {
Penny,
Nickel,
Dime,
Quarter(UsState),
}
fn describe_state_quarter(coin: Coin) -> Option<String> {
let state = if let Coin::Quarter(state) = coin {
state
} else {
return None;
};
if state.existed_in(1900) {
Some(format!("{state:?} is pretty old, for America!"))
} else {
Some(format!("{state:?} is relatively new."))
}
}
fn main() {
if let Some(desc) = describe_state_quarter(Coin::Quarter(UsState::Alaska)) {
println!("{desc}");
}
}if let, чтобы получить значение или выполнить ранний возвратНо и за этим следить по-своему немного неудобно! Одна ветвь if let создает
значение, а другая полностью возвращает управление из функции.
Чтобы этот распространенный шаблон было приятнее выражать, в Rust есть
let...else. Синтаксис let...else принимает образец слева и выражение
справа, очень похоже на if let, но у него нет ветви if, есть только ветвь
else. Если образец совпадает, он связывает значение из образца во внешней
области видимости. Если образец не совпадает, программа переходит в ветвь
else, которая должна вернуть управление из функции.
В листинге 6-9 показано, как выглядит листинг 6-8 при использовании
let...else вместо if let.
#[derive(Debug)] // so we can inspect the state in a minute
enum UsState {
Alabama,
Alaska,
// --snip--
}
impl UsState {
fn existed_in(&self, year: u16) -> bool {
match self {
UsState::Alabama => year >= 1819,
UsState::Alaska => year >= 1959,
// -- snip --
}
}
}
enum Coin {
Penny,
Nickel,
Dime,
Quarter(UsState),
}
fn describe_state_quarter(coin: Coin) -> Option<String> {
let Coin::Quarter(state) = coin else {
return None;
};
if state.existed_in(1900) {
Some(format!("{state:?} is pretty old, for America!"))
} else {
Some(format!("{state:?} is relatively new."))
}
}
fn main() {
if let Some(desc) = describe_state_quarter(Coin::Quarter(UsState::Alaska)) {
println!("{desc}");
}
}let...else, чтобы сделать поток выполнения функции понятнееОбратите внимание, что так основной текст функции остается на «счастливом
пути»: без двух ветвей с существенно разным потоком управления, как это было с
if let.
Если у вас возникла ситуация, в которой логика программы слишком многословна
для выражения с помощью match, помните, что if let и let...else тоже
есть в вашем наборе инструментов Rust.
Итоги
Теперь мы рассмотрели, как использовать enum для создания пользовательских
типов, которые могут быть одним из набора перечисленных значений. Мы показали,
как тип Option<T> из стандартной библиотеки помогает использовать систему
типов для предотвращения ошибок. Когда значения enum содержат данные внутри
себя, можно использовать match или if let, чтобы извлечь и использовать
эти значения, в зависимости от того, сколько случаев нужно обработать.
Теперь ваши программы на Rust могут выражать понятия из вашей предметной области с помощью структур и enum. Создание пользовательских типов для использования в вашем API обеспечивает типобезопасность: компилятор проследит, чтобы ваши функции получали только значения того типа, который каждая функция ожидает.
Чтобы предоставить пользователям хорошо организованный API, который прост в использовании и открывает только то, что им действительно понадобится, теперь перейдем к модулям Rust.
Пакеты, крейты и модули
По мере написания больших программ организация кода будет становиться все важнее. Группируя связанную функциональность и разделяя код с разными возможностями, вы яснее показываете, где найти код, реализующий конкретную возможность, и куда перейти, чтобы изменить то, как эта возможность работает.
Программы, которые мы писали до сих пор, находились в одном модуле в одном файле. По мере роста проекта следует организовывать код, разделяя его сначала на несколько модулей, а затем на несколько файлов. Пакет может содержать несколько бинарных крейтов и необязательно один библиотечный крейт. По мере роста пакета можно выносить его части в отдельные крейты, которые становятся внешними зависимостями. Эта глава охватывает все эти приемы. Для очень больших проектов, состоящих из набора взаимосвязанных пакетов, которые развиваются вместе, Cargo предоставляет рабочие пространства, которые мы рассмотрим в разделе «Рабочие пространства Cargo» главы 14.
Мы также обсудим инкапсуляцию деталей реализации, которая позволяет повторно использовать код на более высоком уровне: как только вы реализовали операцию, другой код может вызвать ваш код через его публичный интерфейс, не зная, как устроена реализация. То, как вы пишете код, определяет, какие части являются публичными и доступны для использования другим кодом, а какие части являются закрытыми деталями реализации, которые вы оставляете за собой право изменять. Это еще один способ ограничить количество деталей, которые нужно держать в голове.
Связанное понятие – область видимости: вложенный контекст, в котором написан код, имеет набор имен, определенных как «находящиеся в области видимости». При чтении, написании и компиляции кода программистам и компиляторам нужно знать, относится ли конкретное имя в конкретном месте к переменной, функции, структуре, enum, модулю, константе или другому элементу, и что этот элемент означает. Вы можете создавать области видимости и менять, какие имена входят в область видимости или выходят из нее. В одной области видимости нельзя иметь два элемента с одним и тем же именем; для разрешения конфликтов имен доступны инструменты.
В Rust есть ряд возможностей, которые позволяют управлять организацией кода: какие детали раскрыты, какие детали закрыты и какие имена находятся в каждой области видимости ваших программ. Эти возможности, которые иногда вместе называют системой модулей, включают:
- Пакеты: возможность Cargo, которая позволяет собирать, тестировать и распространять крейты
- Крейты: дерево модулей, которое создает библиотеку или исполняемый файл
- Модули и use: позволяют управлять организацией, областью видимости и приватностью путей
- Пути: способ назвать элемент, например структуру, функцию или модуль
В этой главе мы рассмотрим все эти возможности, обсудим, как они взаимодействуют, и объясним, как использовать их для управления областью видимости. К концу главы у вас должно сложиться прочное понимание системы модулей, и вы сможете работать с областями видимости как профессионал!
Пакеты и крейты
Пакеты и крейты
Первые части системы модулей, которые мы рассмотрим, – это пакеты и крейты.
Крейт – это наименьший объем кода, который компилятор Rust рассматривает за
один раз. Даже если вы запускаете rustc, а не cargo, и передаете один файл
исходного кода (как мы делали еще в разделе «Основы программы на
Rust» главы 1), компилятор считает этот файл крейтом.
Крейты могут содержать модули, а модули могут быть определены в других файлах,
которые компилируются вместе с крейтом, как мы увидим в следующих разделах.
Крейт может быть одной из двух форм: бинарным крейтом или библиотечным
крейтом. Бинарные крейты – это программы, которые можно скомпилировать в
исполняемый файл, который затем можно запустить, например программу командной
строки или сервер. Каждый из них должен иметь функцию с именем main, которая
определяет, что происходит при запуске исполняемого файла. Все крейты, которые
мы создавали до сих пор, были бинарными крейтами.
Библиотечные крейты не имеют функции main и не компилируются в исполняемый
файл. Вместо этого они определяют функциональность, предназначенную для
совместного использования несколькими проектами. Например, крейт rand,
который мы использовали в главе 2, предоставляет
функциональность для генерации случайных чисел. В большинстве случаев, когда
разработчики Rust говорят «крейт», они имеют в виду библиотечный крейт и
используют слово «крейт» взаимозаменяемо с общим программистским термином
«библиотека».
Корень крейта – это исходный файл, с которого компилятор Rust начинает работу и который образует корневой модуль вашего крейта (мы подробно объясним модули в разделе «Управление областью видимости и приватностью с помощью модулей»).
Пакет – это набор одного или нескольких крейтов, который предоставляет некоторую функциональность. Пакет содержит файл Cargo.toml, описывающий, как собирать эти крейты. Сам Cargo фактически является пакетом, который содержит бинарный крейт для инструмента командной строки, которым вы пользовались для сборки кода. Пакет Cargo также содержит библиотечный крейт, от которого зависит бинарный крейт. Другие проекты могут зависеть от библиотечного крейта Cargo, чтобы использовать ту же логику, которую использует инструмент командной строки Cargo.
Пакет может содержать сколько угодно бинарных крейтов, но не более одного библиотечного крейта. Пакет должен содержать хотя бы один крейт, будь то библиотечный или бинарный крейт.
Давайте пройдемся по тому, что происходит, когда мы создаем пакет. Сначала мы
вводим команду cargo new my-project:
$ cargo new my-project
Created binary (application) `my-project` package
$ ls my-project
Cargo.toml
src
$ ls my-project/src
main.rs
После запуска cargo new my-project мы используем ls, чтобы увидеть, что
создал Cargo. В каталоге my-project находится файл Cargo.toml, так что у
нас есть пакет. Также есть каталог src, который содержит main.rs. Откройте
Cargo.toml в текстовом редакторе и обратите внимание, что там нет упоминания
src/main.rs. Cargo следует соглашению, по которому src/main.rs является
корнем бинарного крейта с тем же именем, что и пакет. Аналогично Cargo знает:
если каталог пакета содержит src/lib.rs, пакет содержит библиотечный крейт с
тем же именем, что и пакет, а src/lib.rs является его корнем крейта. Cargo
передает файлы корней крейтов в rustc, чтобы собрать библиотеку или бинарный
файл.
Здесь у нас есть пакет, который содержит только src/main.rs, то есть он
содержит только бинарный крейт с именем my-project. Если пакет содержит
src/main.rs и src/lib.rs, в нем два крейта: бинарный и библиотечный, оба с
тем же именем, что и пакет. Пакет может иметь несколько бинарных крейтов, если
поместить файлы в каталог src/bin: каждый файл будет отдельным бинарным
крейтом.
Управление областью видимости и приватностью с помощью модулей
Управление областью видимости и приватностью с помощью модулей
В этом разделе мы поговорим о модулях и других частях системы модулей, а
именно о путях, которые позволяют называть элементы; о ключевом слове use,
которое вводит путь в область видимости; и о ключевом слове pub, которое
делает элементы публичными. Мы также обсудим ключевое слово as, внешние
пакеты и оператор glob.
Шпаргалка по модулям
Прежде чем перейти к подробностям о модулях и путях, дадим краткую справку о
том, как модули, пути, ключевое слово use и ключевое слово pub работают в
компиляторе, а также о том, как большинство разработчиков организует свой код.
В этой главе мы пройдем через примеры каждого из этих правил, но сюда удобно
возвращаться как к напоминанию о том, как работают модули.
- Начинайте с корня крейта: при компиляции крейта компилятор сначала ищет код для компиляции в файле корня крейта (обычно src/lib.rs для библиотечного крейта и src/main.rs для бинарного крейта).
- Объявление модулей: в файле корня крейта можно объявлять новые модули;
допустим, вы объявляете модуль “garden” с помощью
mod garden;. Компилятор будет искать код модуля в следующих местах:- Встроенным образом, внутри фигурных скобок, которые заменяют точку с
запятой после
mod garden - В файле src/garden.rs
- В файле src/garden/mod.rs
- Встроенным образом, внутри фигурных скобок, которые заменяют точку с
запятой после
- Объявление подмодулей: в любом файле, кроме корня крейта, можно объявлять
подмодули. Например, вы можете объявить
mod vegetables;в src/garden.rs. Компилятор будет искать код подмодуля внутри каталога, названного по имени родительского модуля, в следующих местах:- Встроенным образом, сразу после
mod vegetables, внутри фигурных скобок вместо точки с запятой - В файле src/garden/vegetables.rs
- В файле src/garden/vegetables/mod.rs
- Встроенным образом, сразу после
- Пути к коду в модулях: как только модуль становится частью вашего крейта,
вы можете обращаться к коду в этом модуле из любого другого места того же
крейта, если это позволяют правила приватности, используя путь к коду.
Например, тип
Asparagusв модулеvegetables, вложенном вgarden, можно найти по путиcrate::garden::vegetables::Asparagus. - Приватное и публичное: код внутри модуля по умолчанию приватен для его
родительских модулей. Чтобы сделать модуль публичным, объявите его с помощью
pub modвместоmod. Чтобы элементы внутри публичного модуля тоже стали публичными, используйтеpubперед их объявлениями. - Ключевое слово
use: внутри области видимости ключевое словоuseсоздает сокращения для элементов, чтобы уменьшить повторение длинных путей. В любой области видимости, которая может обратиться кcrate::garden::vegetables::Asparagus, можно создать сокращение с помощьюuse crate::garden::vegetables::Asparagus;, и с этого момента в этой области видимости достаточно писатьAsparagus, чтобы использовать этот тип.
Здесь мы создаем бинарный крейт с именем backyard, который иллюстрирует эти
правила. Каталог крейта, также названный backyard, содержит такие файлы и
каталоги:
backyard
├── Cargo.lock
├── Cargo.toml
└── src
├── garden
│ └── vegetables.rs
├── garden.rs
└── main.rs
Файл корня крейта в этом случае – src/main.rs, и он содержит:
use crate::garden::vegetables::Asparagus;
pub mod garden;
fn main() {
let plant = Asparagus {};
println!("I'm growing {plant:?}!");
}Строка pub mod garden; сообщает компилятору включить код, который он найдет
в src/garden.rs, а именно:
pub mod vegetables;Здесь pub mod vegetables; означает, что код из src/garden/vegetables.rs
тоже включается. Этот код:
#[derive(Debug)]
pub struct Asparagus {}Теперь перейдем к деталям этих правил и покажем их в действии!
Группирование связанного кода в модулях
Модули позволяют организовывать код внутри крейта для читаемости и удобного повторного использования. Модули также позволяют управлять приватностью элементов, потому что код внутри модуля по умолчанию приватен. Приватные элементы – это внутренние детали реализации, недоступные для внешнего использования. Мы можем сделать модули и элементы внутри них публичными, чтобы внешний код мог использовать их и зависеть от них.
В качестве примера напишем библиотечный крейт, который предоставляет функциональность ресторана. Мы определим сигнатуры функций, но оставим их тела пустыми, чтобы сосредоточиться на организации кода, а не на реализации ресторана.
В ресторанной индустрии некоторые части ресторана называют залом, а другие – служебной частью. Зал – это место, где находятся клиенты: сюда входят зоны, где администраторы рассаживают клиентов, официанты принимают заказы и оплату, а бармены готовят напитки. Служебная часть – это место, где повара работают на кухне, посудомойщики убирают, а управляющие выполняют административную работу.
Чтобы структурировать наш крейт таким образом, мы можем организовать его
функции во вложенные модули. Создайте новую библиотеку с именем restaurant,
выполнив cargo new restaurant --lib. Затем введите код из листинга 7-1 в
src/lib.rs, чтобы определить несколько модулей и сигнатур функций; этот код
представляет часть, относящуюся к залу.
mod front_of_house {
mod hosting {
fn add_to_waitlist() {}
fn seat_at_table() {}
}
mod serving {
fn take_order() {}
fn serve_order() {}
fn take_payment() {}
}
}front_of_house, содержащий другие модули, которые затем содержат функцииМы определяем модуль с помощью ключевого слова mod, за которым следует имя
модуля (в этом случае front_of_house). Затем тело модуля помещается внутрь
фигурных скобок. Внутри модулей можно размещать другие модули, как в этом
случае с модулями hosting и serving. Модули также могут содержать
определения других элементов, например структур, enum, констант, трейтов и,
как в листинге 7-1, функций.
Используя модули, мы можем группировать связанные определения вместе и давать имя тому, почему они связаны. Программисты, использующие этот код, могут перемещаться по коду на основе групп, вместо того чтобы читать все определения подряд; так им проще найти нужные определения. Программисты, добавляющие новую функциональность в этот код, будут знать, куда поместить код, чтобы программа оставалась организованной.
Ранее мы упоминали, что src/main.rs и src/lib.rs называются корнями
крейта. Причина такого названия в том, что содержимое любого из этих двух
файлов образует модуль с именем crate в корне модульной структуры крейта,
известной как дерево модулей.
Листинг 7-2 показывает дерево модулей для структуры из листинга 7-1.
crate
└── front_of_house
├── hosting
│ ├── add_to_waitlist
│ └── seat_at_table
└── serving
├── take_order
├── serve_order
└── take_payment
Это дерево показывает, как некоторые модули вложены в другие модули; например,
hosting вложен в front_of_house. Дерево также показывает, что некоторые
модули являются соседними, то есть они определены в одном и том же модуле;
hosting и serving – соседние модули, определенные внутри
front_of_house. Если модуль A содержится внутри модуля B, мы говорим, что
модуль A является дочерним модулем B, а модуль B является родительским
модулем A. Обратите внимание, что все дерево модулей находится под корнем в
неявном модуле с именем crate.
Дерево модулей может напомнить вам дерево каталогов файловой системы на вашем компьютере; это очень точное сравнение! Так же как каталоги в файловой системе, модули используются для организации кода. И так же как с файлами в каталоге, нам нужен способ находить наши модули.
Пути для обращения к элементу в дереве модулей
Пути для обращения к элементу в дереве модулей
Чтобы показать Rust, где найти элемент в дереве модулей, мы используем путь так же, как используем путь при навигации по файловой системе. Чтобы вызвать функцию, нам нужно знать ее путь.
Путь может иметь две формы:
- Абсолютный путь – это полный путь, начинающийся от корня крейта; для кода
из внешнего крейта абсолютный путь начинается с имени крейта, а для кода из
текущего крейта он начинается с литерала
crate. - Относительный путь начинается от текущего модуля и использует
self,superили идентификатор в текущем модуле.
После абсолютных и относительных путей следует один или несколько
идентификаторов, разделенных двойными двоеточиями (::).
Вернемся к листингу 7-1. Допустим, мы хотим вызвать функцию
add_to_waitlist. Это то же самое, что спросить: какой путь у функции
add_to_waitlist? Листинг 7-3 содержит листинг 7-1, из которого удалена часть
модулей и функций.
Мы покажем два способа вызвать функцию add_to_waitlist из новой функции
eat_at_restaurant, определенной в корне крейта. Эти пути правильные, но
остается еще одна проблема, из-за которой этот пример пока не скомпилируется в
таком виде. Скоро мы объясним почему.
Функция eat_at_restaurant является частью публичного API нашего
библиотечного крейта, поэтому мы помечаем ее ключевым словом pub. В разделе
«Открытие путей с помощью ключевого слова pub» мы
подробнее рассмотрим pub.
mod front_of_house {
mod hosting {
fn add_to_waitlist() {}
}
}
pub fn eat_at_restaurant() {
// Absolute path
crate::front_of_house::hosting::add_to_waitlist();
// Relative path
front_of_house::hosting::add_to_waitlist();
}add_to_waitlist с использованием абсолютного и относительного путейПри первом вызове функции add_to_waitlist в eat_at_restaurant мы используем
абсолютный путь. Функция add_to_waitlist определена в том же крейте, что и
eat_at_restaurant, а значит, мы можем использовать ключевое слово crate,
чтобы начать абсолютный путь. Затем мы указываем каждый последующий модуль,
пока не доберемся до add_to_waitlist. Можно представить файловую систему с
такой же структурой: чтобы запустить программу add_to_waitlist, мы указали
бы путь /front_of_house/hosting/add_to_waitlist; использование имени crate
для начала от корня крейта похоже на использование / для начала от корня
файловой системы в командной оболочке.
При втором вызове add_to_waitlist в eat_at_restaurant мы используем
относительный путь. Путь начинается с front_of_house, имени модуля,
определенного на том же уровне дерева модулей, что и eat_at_restaurant.
Эквивалентом в файловой системе здесь был бы путь
front_of_house/hosting/add_to_waitlist. Начало с имени модуля означает, что
путь относительный.
Выбор между относительным и абсолютным путем – это решение, которое вы будете
принимать в зависимости от проекта; оно зависит от того, насколько вероятно,
что вы будете перемещать код определения элемента отдельно от кода, который
использует этот элемент, или вместе с ним. Например, если бы мы переместили
модуль front_of_house и функцию eat_at_restaurant в модуль с именем
customer_experience, нам пришлось бы обновить абсолютный путь к
add_to_waitlist, но относительный путь остался бы действительным. Однако если
бы мы отдельно переместили функцию eat_at_restaurant в модуль с именем
dining, абсолютный путь к вызову add_to_waitlist остался бы тем же, а
относительный путь пришлось бы обновить. В целом мы предпочитаем указывать
абсолютные пути, потому что чаще хотим перемещать определения кода и вызовы
элементов независимо друг от друга.
Попробуем скомпилировать листинг 7-3 и выяснить, почему он пока не компилируется! Ошибки, которые мы получим, показаны в листинге 7-4.
$ cargo build
Compiling restaurant v0.1.0 (file:///projects/restaurant)
error[E0603]: module `hosting` is private
--> src/lib.rs:9:28
|
9 | crate::front_of_house::hosting::add_to_waitlist();
| ^^^^^^^ --------------- function `add_to_waitlist` is not publicly re-exported
| |
| private module
|
note: the module `hosting` is defined here
--> src/lib.rs:2:5
|
2 | mod hosting {
| ^^^^^^^^^^^
error[E0603]: module `hosting` is private
--> src/lib.rs:12:21
|
12 | front_of_house::hosting::add_to_waitlist();
| ^^^^^^^ --------------- function `add_to_waitlist` is not publicly re-exported
| |
| private module
|
note: the module `hosting` is defined here
--> src/lib.rs:2:5
|
2 | mod hosting {
| ^^^^^^^^^^^
For more information about this error, try `rustc --explain E0603`.
error: could not compile `restaurant` (lib) due to 2 previous errors
Сообщения об ошибках говорят, что модуль hosting приватный. Иными словами, у
нас правильные пути к модулю hosting и функции add_to_waitlist, но Rust не
позволит использовать их, потому что у него нет доступа к приватным частям.
В Rust все элементы (функции, методы, структуры, enum, модули и константы) по
умолчанию приватны для родительских модулей. Если вы хотите сделать элемент,
например функцию или структуру, приватным, вы помещаете его в модуль.
Элементы в родительском модуле не могут использовать приватные элементы внутри дочерних модулей, но элементы в дочерних модулях могут использовать элементы в своих модулях-предках. Это связано с тем, что дочерние модули оборачивают и скрывают детали своей реализации, но могут видеть контекст, в котором они определены. Продолжая нашу метафору, думайте о правилах приватности как о служебном кабинете ресторана: то, что там происходит, скрыто от клиентов ресторана, но менеджеры служебной части могут видеть и делать все в ресторане, которым они управляют.
Rust выбрал такую работу системы модулей, чтобы сокрытие внутренних деталей
реализации было поведением по умолчанию. Так вы знаете, какие части
внутреннего кода можно менять, не ломая внешний код. Однако Rust дает
возможность открыть внутренние части кода дочерних модулей для внешних
модулей-предков, используя ключевое слово pub, чтобы сделать элемент
публичным.
Открытие путей с помощью ключевого слова pub
Вернемся к ошибке из листинга 7-4, которая сообщила, что модуль hosting
приватный. Мы хотим, чтобы функция eat_at_restaurant в родительском модуле
имела доступ к функции add_to_waitlist в дочернем модуле, поэтому помечаем
модуль hosting ключевым словом pub, как показано в листинге 7-5.
mod front_of_house {
pub mod hosting {
fn add_to_waitlist() {}
}
}
// -- snip --
pub fn eat_at_restaurant() {
// Absolute path
crate::front_of_house::hosting::add_to_waitlist();
// Relative path
front_of_house::hosting::add_to_waitlist();
}hosting как pub, чтобы использовать его из eat_at_restaurantК сожалению, код в листинге 7-5 все равно приводит к ошибкам компилятора, как показано в листинге 7-6.
$ cargo build
Compiling restaurant v0.1.0 (file:///projects/restaurant)
error[E0603]: function `add_to_waitlist` is private
--> src/lib.rs:10:37
|
10 | crate::front_of_house::hosting::add_to_waitlist();
| ^^^^^^^^^^^^^^^ private function
|
note: the function `add_to_waitlist` is defined here
--> src/lib.rs:3:9
|
3 | fn add_to_waitlist() {}
| ^^^^^^^^^^^^^^^^^^^^
error[E0603]: function `add_to_waitlist` is private
--> src/lib.rs:13:30
|
13 | front_of_house::hosting::add_to_waitlist();
| ^^^^^^^^^^^^^^^ private function
|
note: the function `add_to_waitlist` is defined here
--> src/lib.rs:3:9
|
3 | fn add_to_waitlist() {}
| ^^^^^^^^^^^^^^^^^^^^
For more information about this error, try `rustc --explain E0603`.
error: could not compile `restaurant` (lib) due to 2 previous errors
Что произошло? Добавление ключевого слова pub перед mod hosting делает
модуль публичным. С этим изменением, если мы можем получить доступ к
front_of_house, мы можем получить доступ к hosting. Но содержимое
hosting все еще приватно; публичность модуля не делает его содержимое
публичным. Ключевое слово pub у модуля только позволяет коду в
модулях-предках ссылаться на него, но не получать доступ к его внутреннему
коду. Поскольку модули являются контейнерами, от одной только публичности
модуля мало пользы; нужно пойти дальше и решить сделать один или несколько
элементов внутри модуля тоже публичными.
Ошибки в листинге 7-6 говорят, что функция add_to_waitlist приватная.
Правила приватности применяются к структурам, enum, функциям и методам так же,
как и к модулям.
Сделаем функцию add_to_waitlist тоже публичной, добавив ключевое слово pub
перед ее определением, как в листинге 7-7.
mod front_of_house {
pub mod hosting {
pub fn add_to_waitlist() {}
}
}
// -- snip --
pub fn eat_at_restaurant() {
// Absolute path
crate::front_of_house::hosting::add_to_waitlist();
// Relative path
front_of_house::hosting::add_to_waitlist();
}pub к mod hosting и fn add_to_waitlist позволяет вызвать функцию из eat_at_restaurant.Теперь код скомпилируется! Чтобы понять, почему добавление ключевого слова
pub позволяет использовать эти пути в eat_at_restaurant с точки зрения
правил приватности, рассмотрим абсолютный и относительный пути.
В абсолютном пути мы начинаем с crate, корня дерева модулей нашего крейта.
Модуль front_of_house определен в корне крейта. Хотя front_of_house не
публичный, функция eat_at_restaurant определена в том же модуле, что и
front_of_house (то есть eat_at_restaurant и front_of_house являются
соседними элементами), поэтому мы можем ссылаться на front_of_house из
eat_at_restaurant. Далее идет модуль hosting, помеченный pub. Мы можем
получить доступ к родительскому модулю hosting, поэтому можем получить
доступ к hosting. Наконец, функция add_to_waitlist помечена pub, и мы
можем получить доступ к ее родительскому модулю, поэтому этот вызов функции
работает!
В относительном пути логика такая же, как и в абсолютном пути, за исключением
первого шага: вместо начала от корня крейта путь начинается с
front_of_house. Модуль front_of_house определен внутри того же модуля, что
и eat_at_restaurant, поэтому относительный путь, начинающийся от модуля, в
котором определена функция eat_at_restaurant, работает. Затем, поскольку hosting и
add_to_waitlist помечены pub, остальная часть пути работает, и этот вызов
функции допустим!
Если вы планируете распространять свой библиотечный крейт, чтобы другие проекты могли использовать ваш код, публичный API является вашим контрактом с пользователями крейта и определяет, как они могут взаимодействовать с вашим кодом. В управлении изменениями публичного API есть много нюансов, которые помогают людям проще зависеть от вашего крейта. Эти вопросы выходят за рамки этой книги; если вам интересна эта тема, смотрите Рекомендации по API Rust.
Лучшие практики для пакетов с бинарным и библиотечным крейтом
Мы упоминали, что пакет может содержать как корень бинарного крейта src/main.rs, так и корень библиотечного крейта src/lib.rs, и оба крейта по умолчанию будут иметь имя пакета. Обычно пакеты с такой схемой, содержащие и библиотечный, и бинарный крейт, имеют в бинарном крейте ровно столько кода, сколько нужно для запуска исполняемого файла, который вызывает код, определенный в библиотечном крейте. Это позволяет другим проектам извлечь пользу из большей части функциональности, предоставляемой пакетом, потому что код библиотечного крейта можно использовать совместно.
Дерево модулей должно быть определено в src/lib.rs. Затем любые публичные элементы можно использовать в бинарном крейте, начиная пути с имени пакета. Бинарный крейт становится пользователем библиотечного крейта точно так же, как полностью внешний крейт использовал бы библиотечный крейт: он может использовать только публичный API. Это помогает проектировать хороший API: вы не только автор, но и клиент!
В главе 12 мы продемонстрируем эту практику организации на программе командной строки, которая будет содержать и бинарный крейт, и библиотечный крейт.
Начало относительных путей с super
Мы можем строить относительные пути, которые начинаются в родительском модуле,
а не в текущем модуле или корне крейта, используя super в начале пути. Это
похоже на начало пути файловой системы с синтаксиса .., который означает
переход к родительскому каталогу. Использование super позволяет ссылаться на
элемент, который, как мы знаем, находится в родительском модуле; это может
упростить перестройку дерева модулей, когда модуль тесно связан с родителем,
но родитель когда-нибудь может быть перемещен в другое место дерева модулей.
Рассмотрим код в листинге 7-8, который моделирует ситуацию, когда повар
исправляет неправильный заказ и лично выносит его клиенту. Функция
fix_incorrect_order, определенная в модуле back_of_house, вызывает функцию
deliver_order, определенную в родительском модуле, указывая путь к
deliver_order, начинающийся с super.
fn deliver_order() {}
mod back_of_house {
fn fix_incorrect_order() {
cook_order();
super::deliver_order();
}
fn cook_order() {}
}superФункция fix_incorrect_order находится в модуле back_of_house, поэтому мы
можем использовать super, чтобы перейти к родительскому модулю
back_of_house, которым в этом случае является crate, корень. Оттуда мы
ищем deliver_order и находим его. Успех! Мы считаем, что модуль
back_of_house и функция deliver_order, скорее всего, останутся в таком же
отношении друг к другу и будут перемещаться вместе, если мы решим
реорганизовать дерево модулей крейта. Поэтому мы использовали super, чтобы в
будущем было меньше мест, где нужно обновлять код, если этот код переместится
в другой модуль.
Как сделать структуры и enum публичными
Мы также можем использовать pub, чтобы обозначить структуры и enum как
публичные, но в использовании pub со структурами и enum есть несколько
дополнительных деталей. Если мы используем pub перед определением структуры,
мы делаем структуру публичной, но поля структуры по-прежнему будут приватными.
Каждое поле можно сделать публичным или оставить приватным отдельно. В
листинге 7-9 мы определили публичную структуру back_of_house::Breakfast с
публичным полем toast и приватным полем seasonal_fruit. Это моделирует
случай в ресторане, где клиент может выбрать тип хлеба, который идет с едой,
но повар решает, какой фрукт подается с блюдом, исходя из сезона и наличия на
складе. Доступные фрукты быстро меняются, поэтому клиенты не могут выбрать
фрукт и даже увидеть, какой фрукт они получат.
mod back_of_house {
pub struct Breakfast {
pub toast: String,
seasonal_fruit: String,
}
impl Breakfast {
pub fn summer(toast: &str) -> Breakfast {
Breakfast {
toast: String::from(toast),
seasonal_fruit: String::from("peaches"),
}
}
}
}
pub fn eat_at_restaurant() {
// Order a breakfast in the summer with Rye toast.
let mut meal = back_of_house::Breakfast::summer("Rye");
// Change our mind about what bread we'd like.
meal.toast = String::from("Wheat");
println!("I'd like {} toast please", meal.toast);
// The next line won't compile if we uncomment it; we're not allowed
// to see or modify the seasonal fruit that comes with the meal.
// meal.seasonal_fruit = String::from("blueberries");
}Поскольку поле toast в структуре back_of_house::Breakfast публичное, в
eat_at_restaurant мы можем записывать и читать поле toast, используя
точечную нотацию. Обратите внимание, что мы не можем использовать поле
seasonal_fruit в eat_at_restaurant, потому что seasonal_fruit приватное.
Попробуйте раскомментировать строку, изменяющую значение поля
seasonal_fruit, чтобы увидеть, какую ошибку вы получите!
Также обратите внимание: поскольку у back_of_house::Breakfast есть приватное
поле, структура должна предоставить публичную ассоциированную функцию, которая
создает экземпляр Breakfast (здесь мы назвали ее summer). Если бы у
Breakfast не было такой функции, мы не смогли бы создать экземпляр
Breakfast в eat_at_restaurant, потому что не могли бы задать значение
приватного поля seasonal_fruit в eat_at_restaurant.
В отличие от этого, если мы делаем enum публичным, все его варианты тоже
становятся публичными. Нам нужно поставить pub только перед ключевым словом
enum, как показано в листинге 7-10.
mod back_of_house {
pub enum Appetizer {
Soup,
Salad,
}
}
pub fn eat_at_restaurant() {
let order1 = back_of_house::Appetizer::Soup;
let order2 = back_of_house::Appetizer::Salad;
}Поскольку мы сделали enum Appetizer публичным, мы можем использовать варианты
Soup и Salad в eat_at_restaurant.
Enum не очень полезны, если их варианты не публичны; было бы утомительно
помечать все варианты enum с помощью pub в каждом случае, поэтому по
умолчанию варианты enum являются публичными. Структуры часто полезны и без
публичных полей, поэтому поля структур следуют общему правилу: все приватно по
умолчанию, если не помечено pub.
Есть еще одна ситуация, связанная с pub, которую мы не рассмотрели, и это
последняя возможность системы модулей: ключевое слово use. Сначала мы
рассмотрим use отдельно, а затем покажем, как сочетать pub и use.
Добавление путей в область видимости с помощью ключевого слова use
Введение путей в область видимости с помощью ключевого слова use
Необходимость каждый раз полностью записывать пути для вызова функций может
казаться неудобной и повторяющейся. В листинге 7-7, независимо от того,
выбрали ли мы абсолютный или относительный путь к функции add_to_waitlist,
каждый раз при вызове add_to_waitlist нам также приходилось указывать
front_of_house и hosting. К счастью, есть способ упростить этот процесс:
мы можем один раз создать сокращение для пути с помощью ключевого слова use,
а затем использовать более короткое имя во всей остальной области видимости.
В листинге 7-11 мы вводим модуль crate::front_of_house::hosting в область
видимости функции eat_at_restaurant, чтобы для вызова функции
add_to_waitlist в eat_at_restaurant нам нужно было указывать только
hosting::add_to_waitlist.
mod front_of_house {
pub mod hosting {
pub fn add_to_waitlist() {}
}
}
use crate::front_of_house::hosting;
pub fn eat_at_restaurant() {
hosting::add_to_waitlist();
}useДобавление use и пути в область видимости похоже на создание символической
ссылки в файловой системе. Добавляя use crate::front_of_house::hosting в
корень крейта, мы делаем hosting допустимым именем в этой области видимости,
как если бы модуль hosting был определен в корне крейта. Пути, введенные в
область видимости с помощью use, также проверяются на приватность, как и
любые другие пути.
Обратите внимание, что use создает сокращение только для той конкретной
области видимости, в которой он находится. Листинг 7-12 перемещает функцию
eat_at_restaurant в новый дочерний модуль с именем customer, который
является областью видимости, отличной от инструкции use, поэтому тело
функции не скомпилируется.
mod front_of_house {
pub mod hosting {
pub fn add_to_waitlist() {}
}
}
use crate::front_of_house::hosting;
mod customer {
pub fn eat_at_restaurant() {
hosting::add_to_waitlist();
}
}use применяется только в той области видимости, где она находится.Ошибка компилятора показывает, что сокращение больше не действует внутри
модуля customer:
$ cargo build
Compiling restaurant v0.1.0 (file:///projects/restaurant)
error[E0433]: failed to resolve: use of unresolved module or unlinked crate `hosting`
--> src/lib.rs:11:9
|
11 | hosting::add_to_waitlist();
| ^^^^^^^ use of unresolved module or unlinked crate `hosting`
|
= help: if you wanted to use a crate named `hosting`, use `cargo add hosting` to add it to your `Cargo.toml`
help: consider importing this module through its public re-export
|
10 + use crate::hosting;
|
warning: unused import: `crate::front_of_house::hosting`
--> src/lib.rs:7:5
|
7 | use crate::front_of_house::hosting;
| ^^^^^^^^^^^^^^^^^^^^^^^^^^^^^^
|
= note: `#[warn(unused_imports)]` on by default
For more information about this error, try `rustc --explain E0433`.
warning: `restaurant` (lib) generated 1 warning
error: could not compile `restaurant` (lib) due to 1 previous error; 1 warning emitted
Обратите внимание, что также есть предупреждение: use больше не используется
в своей области видимости! Чтобы исправить эту проблему, переместите use
также внутрь модуля customer или обращайтесь к сокращению в родительском
модуле через super::hosting внутри дочернего модуля customer.
Создание идиоматичных путей use
В листинге 7-11 вы могли задаться вопросом, почему мы указали use crate::front_of_house::hosting, а затем вызвали
hosting::add_to_waitlist в eat_at_restaurant, вместо того чтобы указать
путь use до самой функции add_to_waitlist и получить тот же результат, как
в листинге 7-13.
mod front_of_house {
pub mod hosting {
pub fn add_to_waitlist() {}
}
}
use crate::front_of_house::hosting::add_to_waitlist;
pub fn eat_at_restaurant() {
add_to_waitlist();
}add_to_waitlist в область видимости с помощью use, что не является идиоматичнымХотя листинг 7-11 и листинг 7-13 выполняют одну и ту же задачу, листинг 7-11
является идиоматичным способом ввести функцию в область видимости с помощью
use. Введение родительского модуля функции в область видимости с помощью
use означает, что при вызове функции нужно указывать родительский модуль.
Указание родительского модуля при вызове функции ясно показывает, что функция
не определена локально, но при этом все еще сокращает повторение полного пути.
В коде листинга 7-13 неясно, где определена add_to_waitlist.
С другой стороны, при введении структур, enum и других элементов в область
видимости с помощью use идиоматично указывать полный путь. Листинг 7-14
показывает идиоматичный способ ввести структуру HashMap из стандартной
библиотеки в область видимости бинарного крейта.
use std::collections::HashMap;
fn main() {
let mut map = HashMap::new();
map.insert(1, 2);
}HashMap в область видимостиЗа этой идиомой нет строгой причины: это просто сложившееся соглашение, и люди привыкли читать и писать код Rust именно так.
Исключение из этой идиомы возникает, если мы вводим в область видимости два
элемента с одним и тем же именем с помощью инструкций use, потому что Rust не
разрешает этого. Листинг 7-15 показывает, как ввести в область видимости два
типа Result, у которых одинаковое имя, но разные родительские модули, и как
к ним обращаться.
use std::fmt;
use std::io;
fn function1() -> fmt::Result {
// --snip--
Ok(())
}
fn function2() -> io::Result<()> {
// --snip--
Ok(())
}Как видите, использование родительских модулей различает два типа Result.
Если бы вместо этого мы указали use std::fmt::Result и use std::io::Result,
в одной области видимости оказалось бы два типа Result, и Rust не знал бы,
какой из них мы имеем в виду при использовании Result.
Предоставление новых имен с помощью ключевого слова as
Есть еще одно решение проблемы введения двух типов с одинаковым именем в одну
область видимости с помощью use: после пути можно указать as и новое
локальное имя, или псевдоним, для типа. Листинг 7-16 показывает другой
способ записать код из листинга 7-15, переименовав один из двух типов Result
с помощью as.
use std::fmt::Result;
use std::io::Result as IoResult;
fn function1() -> Result {
// --snip--
Ok(())
}
fn function2() -> IoResult<()> {
// --snip--
Ok(())
}asВо второй инструкции use мы выбрали новое имя IoResult для типа
std::io::Result, которое не будет конфликтовать с Result из std::fmt,
также введенным в область видимости. Листинги 7-15 и 7-16 считаются
идиоматичными, поэтому выбор за вами!
Повторный экспорт имен с помощью pub use
Когда мы вводим имя в область видимости с помощью ключевого слова use, это
имя является приватным для области видимости, в которую мы его импортировали.
Чтобы код вне этой области видимости мог обращаться к этому имени так, как
если бы оно было определено в этой области, можно объединить pub и use.
Этот прием называется повторным экспортом, потому что мы вводим элемент в
область видимости и одновременно делаем его доступным для другого кода, чтобы
тот мог вводить этот элемент в свою область видимости.
Листинг 7-17 показывает код из листинга 7-11, где use в корневом модуле
заменен на pub use.
mod front_of_house {
pub mod hosting {
pub fn add_to_waitlist() {}
}
}
pub use crate::front_of_house::hosting;
pub fn eat_at_restaurant() {
hosting::add_to_waitlist();
}pub useДо этого изменения внешний код должен был бы вызывать функцию add_to_waitlist
по пути restaurant::front_of_house::hosting::add_to_waitlist(), что также
требовало бы пометить модуль front_of_house как pub. Теперь, когда этот
pub use повторно экспортировал модуль hosting из корневого модуля, внешний
код может вместо этого использовать путь restaurant::hosting::add_to_waitlist().
Повторный экспорт полезен, когда внутренняя структура вашего кода отличается
от того, как программисты, вызывающие ваш код, воспринимали бы предметную
область. Например, в этой ресторанной метафоре люди, управляющие рестораном,
мыслят категориями «зал» и «служебная часть». Но клиенты, посещающие ресторан,
скорее всего, не будут думать о частях ресторана в этих терминах. С помощью
pub use мы можем писать код с одной структурой, но предоставлять внешнему
коду другую структуру. Это делает нашу библиотеку хорошо организованной и для
программистов, работающих над библиотекой, и для программистов, вызывающих
библиотеку. Мы рассмотрим еще один пример pub use и то, как он влияет на
документацию крейта, в разделе «Экспорт удобного публичного API» главы 14.
Использование внешних пакетов
В главе 2 мы программировали проект игры в угадывание, который использовал
внешний пакет rand для получения случайных чисел. Чтобы использовать rand
в нашем проекте, мы добавили эту строку в Cargo.toml:
rand = "0.8.5"
Добавление rand как зависимости в Cargo.toml говорит Cargo загрузить пакет
rand и любые его зависимости с crates.io и сделать
rand доступным нашему проекту.
Затем, чтобы ввести определения rand в область видимости нашего пакета, мы
добавили строку use, начинающуюся с имени крейта, rand, и перечислили
элементы, которые хотели ввести в область видимости. Вспомните, что в разделе
«Генерация случайного числа» главы 2 мы ввели трейт
Rng в область видимости и вызвали функцию rand::thread_rng:
use std::io;
use rand::Rng;
fn main() {
println!("Guess the number!");
let secret_number = rand::thread_rng().gen_range(1..=100);
println!("The secret number is: {secret_number}");
println!("Please input your guess.");
let mut guess = String::new();
io::stdin()
.read_line(&mut guess)
.expect("Failed to read line");
println!("You guessed: {guess}");
}Участники сообщества Rust сделали множество пакетов доступными на
crates.io, и подключение любого из них к вашему пакету
включает те же шаги: перечислить их в файле Cargo.toml вашего пакета и
использовать use, чтобы ввести элементы из их крейтов в область видимости.
Обратите внимание, что стандартная библиотека std также является крейтом,
внешним по отношению к нашему пакету. Поскольку стандартная библиотека
поставляется вместе с языком Rust, нам не нужно менять Cargo.toml, чтобы
включить std. Но нам нужно обращаться к ней с помощью use, чтобы ввести
элементы оттуда в область видимости нашего пакета. Например, для HashMap мы
использовали бы такую строку:
#![allow(unused)]
fn main() {
use std::collections::HashMap;
}Это абсолютный путь, начинающийся с std, имени крейта стандартной
библиотеки.
Использование вложенных путей для очистки списков use
Если мы используем несколько элементов, определенных в одном и том же крейте
или модуле, перечисление каждого элемента в отдельной строке может занимать
много вертикального пространства в наших файлах. Например, эти две инструкции
use, которые были у нас в игре в угадывание в листинге 2-4, вводят элементы
из std в область видимости:
use rand::Rng;
// --snip--
use std::cmp::Ordering;
use std::io;
// --snip--
fn main() {
println!("Guess the number!");
let secret_number = rand::thread_rng().gen_range(1..=100);
println!("The secret number is: {secret_number}");
println!("Please input your guess.");
let mut guess = String::new();
io::stdin()
.read_line(&mut guess)
.expect("Failed to read line");
println!("You guessed: {guess}");
match guess.cmp(&secret_number) {
Ordering::Less => println!("Too small!"),
Ordering::Greater => println!("Too big!"),
Ordering::Equal => println!("You win!"),
}
}Вместо этого мы можем использовать вложенные пути, чтобы ввести те же элементы в область видимости одной строкой. Мы делаем это, указывая общую часть пути, затем два двоеточия, а затем в фигурных скобках список частей путей, которые различаются, как показано в листинге 7-18.
use rand::Rng;
// --snip--
use std::{cmp::Ordering, io};
// --snip--
fn main() {
println!("Guess the number!");
let secret_number = rand::thread_rng().gen_range(1..=100);
println!("The secret number is: {secret_number}");
println!("Please input your guess.");
let mut guess = String::new();
io::stdin()
.read_line(&mut guess)
.expect("Failed to read line");
let guess: u32 = guess.trim().parse().expect("Please type a number!");
println!("You guessed: {guess}");
match guess.cmp(&secret_number) {
Ordering::Less => println!("Too small!"),
Ordering::Greater => println!("Too big!"),
Ordering::Equal => println!("You win!"),
}
}В больших программах введение множества элементов из одного и того же крейта
или модуля в область видимости с помощью вложенных путей может значительно
уменьшить количество отдельных инструкций use!
Мы можем использовать вложенный путь на любом уровне пути, что полезно при
объединении двух инструкций use, у которых есть общая часть пути. Например,
листинг 7-19 показывает две инструкции use: одна вводит std::io в область
видимости, а другая вводит std::io::Write в область видимости.
use std::io;
use std::io::Write;use, где одна является частью пути другойОбщая часть этих двух путей – std::io, и это полный первый путь. Чтобы
объединить эти два пути в одну инструкцию use, мы можем использовать self
во вложенном пути, как показано в листинге 7-20.
use std::io::{self, Write};useЭта строка вводит std::io и std::io::Write в область видимости.
Импорт элементов с помощью glob-оператора
Если мы хотим ввести в область видимости все публичные элементы,
определенные в пути, мы можем указать этот путь, за которым следует
glob-оператор *:
#![allow(unused)]
fn main() {
use std::collections::*;
}Эта инструкция use вводит все публичные элементы, определенные в
std::collections, в текущую область видимости. Будьте осторожны при
использовании glob-оператора! Glob может затруднить понимание того, какие
имена находятся в области видимости и где было определено имя, используемое в
вашей программе. Кроме того, если зависимость изменит свои определения,
изменится и то, что вы импортировали; например, это может привести к ошибкам
компилятора при обновлении зависимости, если зависимость добавит определение с
тем же именем, что и ваше определение в той же области видимости.
Glob-оператор часто используется при тестировании, чтобы ввести все, что
тестируется, в модуль tests; мы поговорим об этом в разделе «Как писать
тесты» главы 11. Glob-оператор также иногда
используется как часть шаблона прелюдии: дополнительную информацию об этом
шаблоне смотрите в документации стандартной
библиотеки.
Разделение модулей на отдельные файлы
Разделение модулей по разным файлам
До сих пор все примеры в этой главе определяли несколько модулей в одном файле. Когда модули становятся большими, вы можете захотеть перенести их определения в отдельный файл, чтобы по коду было легче перемещаться.
Например, начнем с кода из листинга 7-17, где было несколько ресторанных модулей. Мы вынесем модули в файлы вместо того, чтобы определять все модули в файле корня крейта. В этом случае файл корня крейта – src/lib.rs, но эта процедура также работает с бинарными крейтами, у которых файл корня крейта – src/main.rs.
Сначала мы вынесем модуль front_of_house в собственный файл. Удалите код
внутри фигурных скобок модуля front_of_house, оставив только объявление
mod front_of_house;, чтобы src/lib.rs содержал код, показанный в листинге
7-21. Обратите внимание, что это не скомпилируется, пока мы не создадим файл
src/front_of_house.rs из листинга 7-22.
mod front_of_house;
pub use crate::front_of_house::hosting;
pub fn eat_at_restaurant() {
hosting::add_to_waitlist();
}front_of_house, тело которого будет находиться в src/front_of_house.rsЗатем поместите код, который был внутри фигурных скобок, в новый файл с именем
src/front_of_house.rs, как показано в листинге 7-22. Компилятор знает, что
нужно искать в этом файле, потому что он встретил объявление модуля с именем
front_of_house в корне крейта.
pub mod hosting {
pub fn add_to_waitlist() {}
}front_of_house в src/front_of_house.rsОбратите внимание, что файл нужно загрузить с помощью объявления mod только
один раз в дереве модулей. После того как компилятор узнает, что файл
является частью проекта (и узнает, где в дереве модулей находится код, из-за
того, где вы поместили инструкцию mod), другие файлы проекта должны
обращаться к коду загруженного файла по пути к месту, где он был объявлен, как
описано в разделе «Пути для обращения к элементу в дереве
модулей». Иными словами, mod – это не операция
«include», которую вы могли видеть в других языках программирования.
Далее мы вынесем модуль hosting в собственный файл. Процесс немного
отличается, потому что hosting – дочерний модуль front_of_house, а не
корневого модуля. Мы поместим файл для hosting в новый каталог, который
будет назван по его предкам в дереве модулей, в данном случае
src/front_of_house.
Чтобы начать перенос hosting, изменим src/front_of_house.rs так, чтобы он
содержал только объявление модуля hosting:
pub mod hosting;Затем мы создаем каталог src/front_of_house и файл hosting.rs, который
будет содержать определения, сделанные в модуле hosting:
pub fn add_to_waitlist() {}Если бы вместо этого мы поместили hosting.rs в каталог src, компилятор
ожидал бы, что код hosting.rs находится в модуле hosting, объявленном в
корне крейта, а не объявлен как дочерний модуль front_of_house. Правила
компилятора о том, какие файлы проверять для кода каких модулей, означают, что
каталоги и файлы ближе соответствуют дереву модулей.
Альтернативные пути к файлам
До сих пор мы рассматривали наиболее идиоматичные пути к файлам, которые
использует компилятор Rust, но Rust также поддерживает более старый стиль
путей к файлам. Для модуля с именем front_of_house, объявленного в корне
крейта, компилятор будет искать код модуля в:
- src/front_of_house.rs (то, что мы рассмотрели)
- src/front_of_house/mod.rs (старый стиль, путь все еще поддерживается)
Для модуля с именем hosting, который является подмодулем front_of_house,
компилятор будет искать код модуля в:
- src/front_of_house/hosting.rs (то, что мы рассмотрели)
- src/front_of_house/hosting/mod.rs (старый стиль, путь все еще поддерживается)
Если вы используете оба стиля для одного и того же модуля, получите ошибку компилятора. Смешение обоих стилей для разных модулей в одном проекте разрешено, но может запутать людей, которые перемещаются по вашему проекту.
Главный недостаток стиля, использующего файлы с именем mod.rs, в том, что в проекте может оказаться много файлов с именем mod.rs, а это может сбивать с толку, когда несколько таких файлов одновременно открыты в редакторе.
Мы переместили код каждого модуля в отдельный файл, и дерево модулей осталось
тем же. Вызовы функций в eat_at_restaurant будут работать без каких-либо
изменений, хотя определения теперь находятся в разных файлах. Этот прием
позволяет переносить модули в новые файлы по мере того, как они растут в
размере.
Обратите внимание, что инструкция pub use crate::front_of_house::hosting в
src/lib.rs также не изменилась, и use никак не влияет на то, какие файлы
компилируются как часть крейта. Ключевое слово mod объявляет модули, а Rust
ищет в файле с тем же именем, что и модуль, код, который входит в этот модуль.
Итоги
Rust позволяет разделить пакет на несколько крейтов, а крейт – на модули, так
что вы можете обращаться к элементам, определенным в одном модуле, из другого
модуля. Это можно делать, указывая абсолютные или относительные пути. Эти пути
можно вводить в область видимости с помощью инструкции use, чтобы
использовать более короткий путь при многократном обращении к элементу в этой
области видимости. Код модулей по умолчанию приватен, но определения можно
сделать публичными, добавив ключевое слово pub.
В следующей главе мы рассмотрим некоторые структуры данных коллекций из стандартной библиотеки, которые можно использовать в вашем аккуратно организованном коде.
Распространенные коллекции
Стандартная библиотека Rust включает ряд очень полезных структур данных, которые называются коллекциями. Большинство других типов данных представляют одно конкретное значение, но коллекции могут содержать несколько значений. В отличие от встроенных типов массивов и кортежей, данные, на которые указывают эти коллекции, хранятся в куче. Это означает, что объем данных не обязан быть известен во время компиляции и может увеличиваться или уменьшаться во время выполнения программы. У каждого вида коллекции есть разные возможности и стоимость использования, а выбор подходящей коллекции для конкретной ситуации – это навык, который вы будете развивать со временем. В этой главе мы обсудим три коллекции, которые очень часто используются в программах на Rust:
- Вектор позволяет хранить переменное количество значений рядом друг с другом.
- Строка – это коллекция символов. Мы уже упоминали тип
Stringраньше, но в этой главе поговорим о нем подробно. - Хеш-карта позволяет связать значение с определенным ключом. Это конкретная реализация более общей структуры данных, называемой map.
Чтобы узнать о других видах коллекций, предоставляемых стандартной библиотекой, смотрите документацию.
Мы обсудим, как создавать и обновлять векторы, строки и хеш-карты, а также что делает каждую из них особенной.
Хранение списков значений с помощью векторов
Хранение списков значений с помощью векторов
Первый тип коллекции, который мы рассмотрим, – это Vec<T>, также известный
как вектор. Векторы позволяют хранить более одного значения в одной структуре
данных, размещая все значения рядом друг с другом в памяти. Векторы могут
хранить значения только одного и того же типа. Они полезны, когда у вас есть
список элементов, например строки текста в файле или цены товаров в корзине
покупок.
Создание нового вектора
Чтобы создать новый пустой вектор, мы вызываем функцию Vec::new, как
показано в листинге 8-1.
fn main() {
let v: Vec<i32> = Vec::new();
}i32Обратите внимание, что здесь мы добавили аннотацию типа. Поскольку мы не
вставляем в этот вектор никаких значений, Rust не знает, элементы какого типа
мы собираемся хранить. Это важный момент. Векторы реализованы с помощью
обобщений; в главе 10 мы рассмотрим, как использовать обобщения с вашими
собственными типами. Пока достаточно знать, что тип Vec<T>, предоставляемый
стандартной библиотекой, может хранить любой тип. Когда мы создаем вектор для
хранения конкретного типа, можно указать этот тип в угловых скобках. В
листинге 8-1 мы сообщили Rust, что Vec<T> в переменной v будет хранить
элементы типа i32.
Чаще вы будете создавать Vec<T> с начальными значениями, и Rust сам выведет
тип значений, которые вы хотите хранить, поэтому такая аннотация типа нужна
редко. Rust удобно предоставляет макрос vec!, который создает новый вектор,
содержащий переданные ему значения. Листинг 8-2 создает новый Vec<i32>,
который хранит значения 1, 2 и 3. Целочисленный тип – i32, потому что
это целочисленный тип по умолчанию, как мы обсуждали в разделе «Типы
данных» главы 3.
fn main() {
let v = vec![1, 2, 3];
}Поскольку мы задали начальные значения i32, Rust может вывести, что тип v
– Vec<i32>, и аннотация типа не нужна. Далее посмотрим, как изменять вектор.
Обновление вектора
Чтобы создать вектор, а затем добавить в него элементы, можно использовать
метод push, как показано в листинге 8-3.
fn main() {
let mut v = Vec::new();
v.push(5);
v.push(6);
v.push(7);
v.push(8);
}push для добавления значений в векторКак и с любой переменной, если мы хотим иметь возможность изменять ее значение,
нужно сделать ее изменяемой с помощью ключевого слова mut, как обсуждалось в
главе 3. Все числа, которые мы помещаем внутрь, имеют тип i32, и Rust
выводит это из данных, поэтому аннотация Vec<i32> нам не нужна.
Чтение элементов векторов
Есть два способа сослаться на значение, хранящееся в векторе: через индексацию
или с помощью метода get. В следующих примерах мы аннотировали типы
значений, возвращаемых этими функциями, для дополнительной ясности.
Листинг 8-4 показывает оба способа доступа к значению в векторе: с помощью
синтаксиса индексации и метода get.
fn main() {
let v = vec![1, 2, 3, 4, 5];
let third: &i32 = &v[2];
println!("The third element is {third}");
let third: Option<&i32> = v.get(2);
match third {
Some(third) => println!("The third element is {third}"),
None => println!("There is no third element."),
}
}get для доступа к элементу в вектореОбратите внимание на несколько деталей. Мы используем значение индекса 2,
чтобы получить третий элемент, потому что векторы индексируются числами,
начиная с нуля. Использование & и [] дает нам ссылку на элемент по этому
индексу. Когда мы используем метод get и передаем индекс как аргумент, мы
получаем Option<&T>, с которым можно работать через match.
Rust предоставляет эти два способа обращения к элементу, чтобы вы могли выбрать, как программа должна вести себя при попытке использовать индекс за пределами диапазона существующих элементов. В качестве примера посмотрим, что происходит, когда у нас есть вектор из пяти элементов и мы пытаемся получить элемент с индексом 100 каждым из способов, как показано в листинге 8-5.
fn main() {
let v = vec![1, 2, 3, 4, 5];
let does_not_exist = &v[100];
let does_not_exist = v.get(100);
}Когда мы запустим этот код, первый способ с [] вызовет панику программы,
потому что он ссылается на несуществующий элемент. Этот способ лучше
использовать, когда вы хотите, чтобы программа аварийно завершилась при
попытке обратиться к элементу за концом вектора.
Когда методу get передают индекс, находящийся за пределами вектора, он
возвращает None без паники. Этот способ стоит использовать, если доступ к
элементу за пределами диапазона вектора может время от времени происходить при
нормальных обстоятельствах. Тогда в вашем коде будет логика для обработки
Some(&element) или None, как обсуждалось в главе 6. Например, индекс может
поступать от человека, вводящего число. Если он случайно введет слишком
большое число и программа получит значение None, вы можете сообщить
пользователю, сколько элементов находится в текущем векторе, и дать ему еще
одну возможность ввести допустимое значение. Это было бы удобнее для
пользователя, чем аварийное завершение программы из-за опечатки!
Когда у программы есть допустимая ссылка, проверщик заимствований применяет правила владения и заимствования (рассмотренные в главе 4), чтобы убедиться, что эта ссылка и любые другие ссылки на содержимое вектора остаются действительными. Вспомните правило, которое говорит, что нельзя иметь изменяемые и неизменяемые ссылки в одной области видимости. Это правило применяется в листинге 8-6, где мы удерживаем неизменяемую ссылку на первый элемент вектора и пытаемся добавить элемент в конец. Эта программа не будет работать, если мы также попытаемся позже обратиться к этому элементу в функции.
fn main() {
let mut v = vec![1, 2, 3, 4, 5];
let first = &v[0];
v.push(6);
println!("The first element is: {first}");
}Компиляция этого кода приведет к такой ошибке:
$ cargo run
Compiling collections v0.1.0 (file:///projects/collections)
error[E0502]: cannot borrow `v` as mutable because it is also borrowed as immutable
--> src/main.rs:6:5
|
4 | let first = &v[0];
| - immutable borrow occurs here
5 |
6 | v.push(6);
| ^^^^^^^^^ mutable borrow occurs here
7 |
8 | println!("The first element is: {first}");
| ----- immutable borrow later used here
For more information about this error, try `rustc --explain E0502`.
error: could not compile `collections` (bin "collections") due to 1 previous error
Код в листинге 8-6 может выглядеть так, будто должен работать: почему ссылка на первый элемент должна зависеть от изменений в конце вектора? Эта ошибка связана с тем, как работают векторы: поскольку векторы размещают значения рядом друг с другом в памяти, добавление нового элемента в конец вектора может потребовать выделения новой памяти и копирования старых элементов в новое место, если там, где вектор сейчас хранится, недостаточно места, чтобы разместить все элементы рядом друг с другом. В таком случае ссылка на первый элемент указывала бы на освобожденную память. Правила заимствования предотвращают попадание программ в такую ситуацию.
Примечание: подробнее о деталях реализации типа
Vec<T>смотрите в «Rustonomicon».
Итерация по значениям в векторе
Чтобы получить доступ к каждому элементу вектора по очереди, мы должны
итерироваться по всем элементам, а не использовать индексы для доступа к одному
элементу за раз. Листинг 8-7 показывает, как использовать цикл for, чтобы
получить неизменяемые ссылки на каждый элемент в векторе значений i32 и
вывести их.
fn main() {
let v = vec![100, 32, 57];
for i in &v {
println!("{i}");
}
}forМы также можем итерироваться по изменяемым ссылкам на каждый элемент в
изменяемом векторе, чтобы изменить все элементы. Цикл for в листинге 8-8
добавит 50 к каждому элементу.
fn main() {
let mut v = vec![100, 32, 57];
for i in &mut v {
*i += 50;
}
}Чтобы изменить значение, на которое указывает изменяемая ссылка, нужно
использовать оператор разыменования *, чтобы получить значение в i, прежде
чем применять оператор +=. Подробнее об операторе разыменования мы поговорим
в разделе «Переход по ссылке к значению» главы 15.
Итерация по вектору, неизменяемая или изменяемая, безопасна благодаря правилам
проверщика заимствований. Если бы мы попытались вставлять или удалять элементы
в телах циклов for в листингах 8-7 и 8-8, мы получили бы ошибку компилятора,
похожую на ту, что получили с кодом из листинга 8-6. Ссылка на вектор,
которую удерживает цикл for, предотвращает одновременное изменение всего
вектора.
Использование enum для хранения нескольких типов
Векторы могут хранить только значения одного и того же типа. Это может быть неудобно; определенно существуют случаи, когда нужно хранить список элементов разных типов. К счастью, варианты enum определены внутри одного и того же типа enum, поэтому, когда нам нужен один тип для представления элементов разных типов, можно определить и использовать enum!
Например, допустим, мы хотим получить значения из строки электронной таблицы, где некоторые столбцы строки содержат целые числа, некоторые – числа с плавающей точкой, а некоторые – строки. Мы можем определить enum, варианты которого будут хранить разные типы значений, и все варианты enum будут считаться одним и тем же типом: типом этого enum. Затем мы можем создать вектор для хранения этого enum и тем самым в конечном итоге хранить разные типы. Мы продемонстрировали это в листинге 8-9.
fn main() {
enum SpreadsheetCell {
Int(i32),
Float(f64),
Text(String),
}
let row = vec![
SpreadsheetCell::Int(3),
SpreadsheetCell::Text(String::from("blue")),
SpreadsheetCell::Float(10.12),
];
}Rust должен знать во время компиляции, какие типы будут находиться в векторе,
чтобы точно понимать, сколько памяти в куче потребуется для хранения каждого
элемента. Мы также должны явно указать, какие типы разрешены в этом векторе.
Если бы Rust позволял вектору хранить любой тип, существовала бы вероятность,
что один или несколько типов вызовут ошибки при операциях, выполняемых над
элементами вектора. Использование enum вместе с выражением match означает,
что Rust во время компиляции гарантирует обработку каждого возможного случая,
как обсуждалось в главе 6.
Если вы не знаете исчерпывающий набор типов, которые программа получит во время выполнения для хранения в векторе, прием с enum не сработает. Вместо этого можно использовать трейт-объект, который мы рассмотрим в главе 18.
Теперь, когда мы обсудили некоторые самые распространенные способы
использования векторов, обязательно просмотрите документацию API по всем многочисленным полезным методам, определенным для Vec<T>
стандартной библиотекой. Например, помимо push, метод pop удаляет и
возвращает последний элемент.
Освобождение вектора освобождает его элементы
Как и любая другая struct, вектор освобождается, когда выходит из области
видимости, как отмечено в листинге 8-10.
fn main() {
{
let v = vec![1, 2, 3, 4];
// do stuff with v
} // <- v goes out of scope and is freed here
}Когда вектор освобождается, все его содержимое тоже освобождается, то есть целые числа, которые он хранит, будут очищены. Проверщик заимствований гарантирует, что любые ссылки на содержимое вектора используются только пока сам вектор действителен.
Перейдем к следующему типу коллекции: String!
Хранение текста в кодировке UTF-8 с помощью строк
Хранение текста в кодировке UTF-8 с помощью строк
Мы говорили о строках в главе 4, но теперь рассмотрим их подробнее. Новички в Rust часто застревают на строках из-за сочетания трех причин: склонности Rust показывать возможные ошибки, того факта, что строки являются более сложной структурой данных, чем многие программисты привыкли считать, и UTF-8. Эти факторы соединяются так, что при переходе с других языков программирования строки могут казаться трудными.
Мы обсуждаем строки в контексте коллекций, потому что строки реализованы как
коллекция байтов плюс набор методов, которые предоставляют полезную
функциональность, когда эти байты интерпретируются как текст. В этом разделе
мы поговорим об операциях над String, которые есть у каждого типа коллекции,
таких как создание, обновление и чтение. Также мы обсудим, чем String
отличается от других коллекций, а именно почему индексация в String
усложняется различиями между тем, как люди и компьютеры интерпретируют данные
String.
Определение строк
Сначала определим, что мы имеем в виду под термином строка. В самом языке
Rust есть только один строковый тип: строковый срез str, который обычно
встречается в заимствованной форме, &str. В главе 4 мы говорили о строковых
срезах, которые являются ссылками на данные строки в кодировке UTF-8,
хранящиеся где-то еще. Например, строковые литералы хранятся в бинарном файле
программы и поэтому являются строковыми срезами.
Тип String, предоставляемый стандартной библиотекой Rust, а не встроенный в
сам язык, является строковым типом с владением, кодировкой UTF-8, изменяемым и
способным расти. Когда разработчики Rust говорят о «строках» в Rust, они могут
иметь в виду как тип String, так и тип строкового среза &str, а не только
один из этих типов. Хотя этот раздел в основном посвящен String, оба типа
широко используются в стандартной библиотеке Rust, и как String, так и
строковые срезы кодируются в UTF-8.
Создание новой строки
Многие операции, доступные для Vec<T>, доступны и для String, потому что
String фактически реализован как обертка над вектором байтов с некоторыми
дополнительными гарантиями, ограничениями и возможностями. Пример функции,
которая работает одинаково с Vec<T> и String, – функция new для
создания экземпляра, показанная в листинге 8-11.
fn main() {
let mut s = String::new();
}StringЭта строка создает новую пустую строку с именем s, в которую затем можно
загрузить данные. Часто у нас уже есть начальные данные, с которых мы хотим
начать строку. Для этого мы используем метод to_string, доступный для любого
типа, реализующего трейт Display, как это делают строковые литералы. Листинг
8-12 показывает два примера.
fn main() {
let data = "initial contents";
let s = data.to_string();
// The method also works on a literal directly:
let s = "initial contents".to_string();
}to_string для создания String из строкового литералаЭтот код создает строку, содержащую initial contents.
Мы также можем использовать функцию String::from, чтобы создать String из
строкового литерала. Код в листинге 8-13 эквивалентен коду из листинга 8-12,
который использует to_string.
fn main() {
let s = String::from("initial contents");
}String::from для создания String из строкового литералаПоскольку строки используются для множества задач, для них доступно много
разных обобщенных API, что дает нам немало вариантов. Некоторые из них могут
казаться избыточными, но у каждого есть свое место! В этом случае
String::from и to_string делают одно и то же, поэтому выбор между ними –
вопрос стиля и читаемости.
Помните, что строки кодируются в UTF-8, поэтому мы можем включать в них любые корректно закодированные данные, как показано в листинге 8-14.
fn main() {
let hello = String::from("السلام عليكم");
let hello = String::from("Dobrý den");
let hello = String::from("Hello");
let hello = String::from("שלום");
let hello = String::from("नमस्ते");
let hello = String::from("こんにちは");
let hello = String::from("안녕하세요");
let hello = String::from("你好");
let hello = String::from("Olá");
let hello = String::from("Здравствуйте");
let hello = String::from("Hola");
}Все эти значения являются допустимыми значениями String.
Обновление строки
String может увеличиваться в размере, а ее содержимое может изменяться, как
и содержимое Vec<T>, если добавить в нее больше данных. Кроме того, для
конкатенации значений String можно удобно использовать оператор + или
макрос format!.
Добавление с помощью push_str или push
Мы можем увеличить String, используя метод push_str для добавления
строкового среза, как показано в листинге 8-15.
fn main() {
let mut s = String::from("foo");
s.push_str("bar");
}String с помощью метода push_strПосле этих двух строк s будет содержать foobar. Метод push_str принимает
строковый срез, потому что мы не обязательно хотим получать владение
параметром. Например, в коде листинга 8-16 мы хотим иметь возможность
использовать s2 после добавления ее содержимого к s1.
fn main() {
let mut s1 = String::from("foo");
let s2 = "bar";
s1.push_str(s2);
println!("s2 is {s2}");
}StringЕсли бы метод push_str получал владение s2, мы не смогли бы вывести ее
значение в последней строке. Однако этот код работает так, как мы ожидаем!
Метод push принимает один символ как параметр и добавляет его к String.
Листинг 8-17 добавляет букву l к String с помощью метода push.
fn main() {
let mut s = String::from("lo");
s.push('l');
}String с помощью pushВ результате s будет содержать lol.
Конкатенация с помощью + или format!
Часто требуется объединить две существующие строки. Один способ сделать это –
использовать оператор +, как показано в листинге 8-18.
fn main() {
let s1 = String::from("Hello, ");
let s2 = String::from("world!");
let s3 = s1 + &s2; // note s1 has been moved here and can no longer be used
}+ для объединения двух значений String в новое значение StringСтрока s3 будет содержать Hello, world!. Причина, по которой s1 больше
не действительна после сложения, и причина, по которой мы использовали ссылку
на s2, связаны с сигнатурой метода, вызываемого при использовании оператора
+. Оператор + использует метод add, сигнатура которого выглядит примерно
так:
fn add(self, s: &str) -> String {В стандартной библиотеке вы увидите, что add определен с использованием
обобщений и ассоциированных типов. Здесь мы подставили конкретные типы, что и
происходит, когда мы вызываем этот метод со значениями String. Мы обсудим
обобщения в главе 10. Эта сигнатура дает нам подсказки, необходимые для
понимания сложных частей оператора +.
Во-первых, у s2 есть &, что означает: мы добавляем ссылку на вторую строку
к первой строке. Это связано с параметром s в функции add: мы можем
добавить к String только строковый срез; мы не можем сложить два значения
String напрямую. Но подождите: тип &s2 – &String, а не &str, как
указано во втором параметре add. Так почему листинг 8-18 компилируется?
Причина, по которой мы можем использовать &s2 в вызове add, заключается в
том, что компилятор может привести аргумент &String к &str. Когда мы
вызываем метод add, Rust использует принудительное разыменовывающее
приведение (deref coercion), которое здесь превращает &s2 в &s2[..]. Мы
подробнее обсудим deref coercion в главе 15. Поскольку add не получает
владение параметром s, s2 останется действительной String после этой
операции.
Во-вторых, из сигнатуры видно, что add получает владение self, потому что
у self нет &. Это означает, что s1 в листинге 8-18 будет перемещена в
вызов add и после этого больше не будет действительной. Поэтому, хотя
let s3 = s1 + &s2; выглядит так, будто копирует обе строки и создает новую,
на самом деле эта инструкция получает владение s1, добавляет копию
содержимого s2, а затем возвращает владение результатом. Иными словами,
выглядит так, будто создается много копий, но это не так; реализация
эффективнее копирования.
Если нужно конкатенировать несколько строк, поведение оператора + становится
громоздким:
fn main() {
let s1 = String::from("tic");
let s2 = String::from("tac");
let s3 = String::from("toe");
let s = s1 + "-" + &s2 + "-" + &s3;
}В этот момент s будет равно tic-tac-toe. Со всеми символами + и "
трудно понять, что происходит. Для более сложного объединения строк вместо
этого можно использовать макрос format!:
fn main() {
let s1 = String::from("tic");
let s2 = String::from("tac");
let s3 = String::from("toe");
let s = format!("{s1}-{s2}-{s3}");
}Этот код тоже устанавливает s в tic-tac-toe. Макрос format! работает как
println!, но вместо вывода результата на экран возвращает String с
содержимым. Версия кода с format! намного легче читается, а код,
сгенерированный макросом format!, использует ссылки, поэтому этот вызов не
получает владение ни одним из своих параметров.
Индексация строк
Во многих других языках программирования доступ к отдельным символам строки по
индексу является допустимой и распространенной операцией. Однако если вы
попытаетесь получить доступ к частям String с помощью синтаксиса индексации
в Rust, получите ошибку. Рассмотрим недопустимый код в листинге 8-19.
fn main() {
let s1 = String::from("hi");
let h = s1[0];
}StringЭтот код приведет к следующей ошибке:
$ cargo run
Compiling collections v0.1.0 (file:///projects/collections)
error[E0277]: the type `str` cannot be indexed by `{integer}`
--> src/main.rs:3:16
|
3 | let h = s1[0];
| ^ string indices are ranges of `usize`
|
= help: the trait `SliceIndex<str>` is not implemented for `{integer}`
= note: you can use `.chars().nth()` or `.bytes().nth()`
for more information, see chapter 8 in The Book: <https://doc.rust-lang.org/book/ch08-02-strings.html#indexing-into-strings>
= help: the following other types implement trait `SliceIndex<T>`:
`usize` implements `SliceIndex<ByteStr>`
`usize` implements `SliceIndex<[T]>`
= note: required for `String` to implement `Index<{integer}>`
For more information about this error, try `rustc --explain E0277`.
error: could not compile `collections` (bin "collections") due to 1 previous error
Ошибка говорит сама за себя: строки Rust не поддерживают индексацию. Но почему нет? Чтобы ответить на этот вопрос, нужно обсудить, как Rust хранит строки в памяти.
Внутреннее представление
String – это обертка над Vec<u8>. Посмотрим на некоторые наши корректно
закодированные примеры строк UTF-8 из листинга 8-14. Сначала этот:
fn main() {
let hello = String::from("السلام عليكم");
let hello = String::from("Dobrý den");
let hello = String::from("Hello");
let hello = String::from("שלום");
let hello = String::from("नमस्ते");
let hello = String::from("こんにちは");
let hello = String::from("안녕하세요");
let hello = String::from("你好");
let hello = String::from("Olá");
let hello = String::from("Здравствуйте");
let hello = String::from("Hola");
}В этом случае len будет равно 4, что означает: вектор, хранящий строку
"Hola", имеет длину 4 байта. Каждая из этих букв занимает 1 байт при
кодировании в UTF-8. Однако следующая строка может вас удивить (обратите
внимание, что эта строка начинается с заглавной кириллической буквы Зе, а не
с цифры 3):
fn main() {
let hello = String::from("السلام عليكم");
let hello = String::from("Dobrý den");
let hello = String::from("Hello");
let hello = String::from("שלום");
let hello = String::from("नमस्ते");
let hello = String::from("こんにちは");
let hello = String::from("안녕하세요");
let hello = String::from("你好");
let hello = String::from("Olá");
let hello = String::from("Здравствуйте");
let hello = String::from("Hola");
}Если бы вас спросили, какова длина строки, вы могли бы сказать 12. На самом деле ответ Rust – 24: это количество байтов, необходимое для кодирования «Здравствуйте» в UTF-8, потому что каждое скалярное значение Unicode в этой строке занимает 2 байта памяти. Поэтому индекс в байтах строки не всегда соответствует допустимому скалярному значению Unicode. Для демонстрации рассмотрим этот недопустимый код Rust:
let hello = "Здравствуйте";
let answer = &hello[0];Вы уже знаете, что answer не будет З, первой буквой. При кодировании в
UTF-8 первый байт З равен 208, а второй – 151, поэтому может
показаться, что answer на самом деле должен быть 208, но 208 сам по себе
не является допустимым символом. Возврат 208, скорее всего, не то, чего
пользователь ожидал бы, попросив первую букву этой строки; однако это
единственные данные, которые Rust имеет по байтовому индексу 0. Пользователи
обычно не хотят получать байтовое значение, даже если строка содержит только
латинские буквы: если бы &"hi"[0] был допустимым кодом и возвращал байтовое
значение, он вернул бы 104, а не h.
Следовательно, ответ таков: чтобы избежать возврата неожиданного значения и ошибок, которые могут быть обнаружены не сразу, Rust вообще не компилирует этот код и предотвращает недоразумения на раннем этапе разработки.
Байты, скалярные значения и графемные кластеры
Еще один момент о UTF-8: с точки зрения Rust есть фактически три важных способа смотреть на строки – как на байты, скалярные значения и графемные кластеры (самое близкое к тому, что мы назвали бы буквами).
Если мы посмотрим на слово на хинди “नमस्ते”, записанное письмом деванагари,
оно хранится как вектор значений u8, который выглядит так:
[224, 164, 168, 224, 164, 174, 224, 164, 184, 224, 165, 141, 224, 164, 164,
224, 165, 135]
Это 18 байтов, и именно так компьютеры в конечном счете хранят эти данные.
Если смотреть на них как на скалярные значения Unicode, то есть как на то, чем
является тип Rust char, эти байты выглядят так:
['न', 'म', 'स', '्', 'त', 'े']
Здесь шесть значений char, но четвертое и шестое не являются буквами: это
диакритические знаки, которые не имеют смысла сами по себе. Наконец, если
посмотреть на них как на графемные кластеры, мы получим то, что человек назвал
бы четырьмя буквами, из которых состоит слово на хинди:
["न", "म", "स्", "ते"]
Rust предоставляет разные способы интерпретации сырых строковых данных, которые хранят компьютеры, чтобы каждая программа могла выбрать нужную ей интерпретацию независимо от того, на каком человеческом языке находятся данные.
Последняя причина, по которой Rust не позволяет индексировать String, чтобы
получить символ, заключается в том, что операции индексации, как ожидается,
всегда должны выполняться за постоянное время (O(1)). Но с String
гарантировать такую производительность невозможно, потому что Rust пришлось бы
проходить по содержимому от начала до индекса, чтобы определить, сколько там
допустимых символов.
Срезы строк
Индексировать строку часто плохая идея, потому что неясно, каким должен быть тип возвращаемого значения операции индексации строки: байтовое значение, символ, графемный кластер или строковый срез. Поэтому, если вам действительно нужно использовать индексы для создания строковых срезов, Rust просит быть более конкретным.
Вместо индексации с помощью [] и одного числа можно использовать [] с
диапазоном, чтобы создать строковый срез, содержащий определенные байты:
#![allow(unused)]
fn main() {
let hello = "Здравствуйте";
let s = &hello[0..4];
}Здесь s будет &str, содержащим первые 4 байта строки. Ранее мы упоминали,
что каждый из этих символов занимает 2 байта, а значит s будет Зд.
Если бы мы попытались взять срез только части байтов символа, например
&hello[0..1], Rust запаниковал бы во время выполнения так же, как при
обращении к недопустимому индексу в векторе:
$ cargo run
Compiling collections v0.1.0 (file:///projects/collections)
Finished `dev` profile [unoptimized + debuginfo] target(s) in 0.43s
Running `target/debug/collections`
thread 'main' panicked at src/main.rs:4:19:
byte index 1 is not a char boundary; it is inside 'З' (bytes 0..2) of `Здравствуйте`
note: run with `RUST_BACKTRACE=1` environment variable to display a backtrace
При создании строковых срезов с диапазонами следует быть осторожным, потому что это может привести к аварийному завершению программы.
Итерация по строкам
Лучший способ работать с частями строк – явно указать, нужны вам символы или
байты. Для отдельных скалярных значений Unicode используйте метод chars.
Вызов chars для “Зд” разделяет строку и возвращает два значения типа
char, и по результату можно итерироваться, чтобы получить доступ к каждому
элементу:
#![allow(unused)]
fn main() {
for c in "Зд".chars() {
println!("{c}");
}
}Этот код выведет следующее:
З
д
В качестве альтернативы метод bytes возвращает каждый сырой байт, что может
подходить для вашей предметной области:
#![allow(unused)]
fn main() {
for b in "Зд".bytes() {
println!("{b}");
}
}Этот код выведет 4 байта, из которых состоит эта строка:
208
151
208
180
Но обязательно помните, что допустимые скалярные значения Unicode могут состоять более чем из 1 байта.
Получение графемных кластеров из строк, как в случае письма деванагари, – сложная задача, поэтому эта функциональность не предоставляется стандартной библиотекой. Если вам нужна такая функциональность, на crates.io доступны крейты.
Работа со сложностью строк
Подводя итог, строки сложны. Разные языки программирования делают разные
выборы в том, как представить эту сложность программисту. Rust выбрал
поведение по умолчанию, при котором данные String обрабатываются корректно
во всех программах на Rust. Это означает, что программистам нужно заранее
внимательнее относиться к обработке данных UTF-8. Такой компромисс раскрывает
больше сложности строк, чем видно в других языках программирования, но
избавляет вас от необходимости позже в жизненном цикле разработки
обрабатывать ошибки, связанные с не-ASCII-символами.
Хорошая новость в том, что стандартная библиотека предлагает много
функциональности, построенной на типах String и &str, чтобы помочь
правильно обрабатывать такие сложные ситуации. Обязательно посмотрите
документацию на полезные методы вроде contains для поиска в строке и
replace для замены частей строки другой строкой.
Переключимся на что-то немного менее сложное: хеш-карты!
Хранение ключей со связанными значениями в HashMap
Хранение ключей со связанными значениями в хеш-картах
Последняя из наших распространенных коллекций – хеш-карта. Тип
HashMap<K, V> хранит соответствие ключей типа K значениям типа V с
помощью хеш-функции, которая определяет, как размещать эти ключи и значения
в памяти. Многие языки программирования поддерживают такую структуру данных,
но часто используют для нее другое имя, например hash, map, object,
hash table, dictionary или associative array, если назвать лишь
несколько вариантов.
Хеш-карты полезны, когда нужно искать данные не по индексу, как в векторах, а по ключу, который может быть любого типа. Например, в игре можно отслеживать счет каждой команды в хеш-карте, где каждый ключ – это имя команды, а значения – счет каждой команды. Зная имя команды, можно получить ее счет.
В этом разделе мы рассмотрим базовый API хеш-карт, но в функциях,
определенных стандартной библиотекой для HashMap<K, V>, скрыто гораздо
больше полезных возможностей. Как всегда, за дополнительной информацией
обращайтесь к документации стандартной библиотеки.
Создание новой хеш-карты
Один способ создать пустую хеш-карту – использовать new и добавлять
элементы с помощью insert. В листинге 8-20 мы отслеживаем счет двух команд,
имена которых Blue и Yellow. Команда Blue начинает с 10 очков, а команда
Yellow – с 50.
fn main() {
use std::collections::HashMap;
let mut scores = HashMap::new();
scores.insert(String::from("Blue"), 10);
scores.insert(String::from("Yellow"), 50);
}Обратите внимание, что сначала нужно подключить HashMap из части стандартной
библиотеки, посвященной коллекциям, с помощью use. Из трех распространенных
коллекций эта используется реже всего, поэтому она не входит в набор
возможностей, автоматически вводимых в область видимости прелюдией. Хеш-карты
также имеют меньшую поддержку со стороны стандартной библиотеки; например, нет
встроенного макроса для их создания.
Как и векторы, хеш-карты хранят свои данные в куче. У этой HashMap ключи
имеют тип String, а значения – тип i32. Как и векторы, хеш-карты
однородны: все ключи должны иметь один и тот же тип, и все значения должны
иметь один и тот же тип.
Доступ к значениям в хеш-карте
Мы можем получить значение из хеш-карты, передав его ключ в метод get, как
показано в листинге 8-21.
fn main() {
use std::collections::HashMap;
let mut scores = HashMap::new();
scores.insert(String::from("Blue"), 10);
scores.insert(String::from("Yellow"), 50);
let team_name = String::from("Blue");
let score = scores.get(&team_name).copied().unwrap_or(0);
}Здесь score получит значение, связанное с командой Blue, и результатом будет
10. Метод get возвращает Option<&V>; если в хеш-карте нет значения для
такого ключа, get вернет None. Эта программа обрабатывает Option, вызывая
copied, чтобы получить Option<i32> вместо Option<&i32>, а затем
unwrap_or, чтобы установить score в ноль, если в scores нет записи для
ключа.
Мы можем итерироваться по каждой паре ключ-значение в хеш-карте похожим
образом на то, как делаем это с векторами, используя цикл for:
fn main() {
use std::collections::HashMap;
let mut scores = HashMap::new();
scores.insert(String::from("Blue"), 10);
scores.insert(String::from("Yellow"), 50);
for (key, value) in &scores {
println!("{key}: {value}");
}
}Этот код выведет каждую пару в произвольном порядке:
Yellow: 50
Blue: 10
Управление владением в хеш-картах
Для типов, реализующих трейт Copy, таких как i32, значения копируются в
хеш-карту. Для значений с владением, таких как String, значения будут
перемещены, и хеш-карта станет владельцем этих значений, как показано в
листинге 8-22.
fn main() {
use std::collections::HashMap;
let field_name = String::from("Favorite color");
let field_value = String::from("Blue");
let mut map = HashMap::new();
map.insert(field_name, field_value);
// field_name and field_value are invalid at this point, try using them and
// see what compiler error you get!
}Мы не сможем использовать переменные field_name и field_value после того,
как они будут перемещены в хеш-карту вызовом insert.
Если мы вставляем в хеш-карту ссылки на значения, значения не будут перемещены в хеш-карту. Значения, на которые указывают ссылки, должны быть действительны как минимум столько же, сколько действительна хеш-карта. Подробнее об этих вопросах мы поговорим в разделе «Проверка ссылок с помощью времен жизни» главы 10.
Обновление хеш-карты
Хотя количество пар ключ-значение может расти, каждый уникальный ключ может
иметь только одно связанное с ним значение в каждый момент времени (но не
наоборот: например, и команда Blue, и команда Yellow могли бы иметь значение
10, сохраненное в хеш-карте scores).
Когда вы хотите изменить данные в хеш-карте, нужно решить, как обрабатывать случай, когда ключ уже имеет назначенное значение. Можно заменить старое значение новым, полностью проигнорировав старое значение. Можно сохранить старое значение и проигнорировать новое, добавляя новое значение только если у ключа еще нет значения. Или можно объединить старое значение с новым. Посмотрим, как сделать каждый из этих вариантов!
Перезапись значения
Если мы вставим ключ и значение в хеш-карту, а затем вставим тот же ключ с
другим значением, значение, связанное с этим ключом, будет заменено. Хотя код
в листинге 8-23 вызывает insert дважды, хеш-карта будет содержать только
одну пару ключ-значение, потому что оба раза мы вставляем значение для ключа
команды Blue.
fn main() {
use std::collections::HashMap;
let mut scores = HashMap::new();
scores.insert(String::from("Blue"), 10);
scores.insert(String::from("Blue"), 25);
println!("{scores:?}");
}Этот код выведет {"Blue": 25}. Исходное значение 10 было перезаписано.
Добавление ключа и значения только если ключ отсутствует
Часто нужно проверить, существует ли уже в хеш-карте конкретный ключ со значением, а затем выполнить следующие действия: если ключ есть в хеш-карте, существующее значение должно остаться как есть; если ключа нет, нужно вставить его и значение для него.
У хеш-карт есть специальный API для этого, называемый entry, который
принимает ключ, который вы хотите проверить, как параметр. Возвращаемое
значение метода entry – enum под названием Entry, представляющий значение,
которое может существовать или не существовать. Допустим, мы хотим проверить,
связано ли значение с ключом команды Yellow. Если нет, мы хотим вставить
значение 50; то же самое сделаем для команды Blue. При использовании API entry
код выглядит как в листинге 8-24.
fn main() {
use std::collections::HashMap;
let mut scores = HashMap::new();
scores.insert(String::from("Blue"), 10);
scores.entry(String::from("Yellow")).or_insert(50);
scores.entry(String::from("Blue")).or_insert(50);
println!("{scores:?}");
}entry, чтобы вставить значение только если у ключа еще нет значенияМетод or_insert для Entry определен так, что он возвращает изменяемую
ссылку на значение для соответствующего ключа Entry, если этот ключ
существует; если нет, он вставляет параметр как новое значение для этого ключа
и возвращает изменяемую ссылку на новое значение. Этот прием гораздо чище, чем
самостоятельное написание такой логики, и, кроме того, лучше взаимодействует с
проверщиком заимствований.
Запуск кода из листинга 8-24 выведет {"Yellow": 50, "Blue": 10}. Первый
вызов entry вставит ключ команды Yellow со значением 50, потому что у
команды Yellow еще нет значения. Второй вызов entry не изменит хеш-карту,
потому что у команды Blue уже есть значение 10.
Обновление значения на основе старого значения
Еще один распространенный сценарий использования хеш-карт – найти значение по
ключу, а затем обновить его на основе старого значения. Например, листинг 8-25
показывает код, который подсчитывает, сколько раз каждое слово встречается в
некотором тексте. Мы используем хеш-карту, где слова являются ключами, и
увеличиваем значение, чтобы отслеживать, сколько раз мы видели это слово. Если
мы видим слово впервые, сначала вставим значение 0.
fn main() {
use std::collections::HashMap;
let text = "hello world wonderful world";
let mut map = HashMap::new();
for word in text.split_whitespace() {
let count = map.entry(word).or_insert(0);
*count += 1;
}
println!("{map:?}");
}Этот код выведет {"world": 2, "hello": 1, "wonderful": 1}. Вы можете увидеть
те же пары ключ-значение, выведенные в другом порядке: вспомните из раздела
«Доступ к значениям в хеш-карте», что итерация по
хеш-карте происходит в произвольном порядке.
Метод split_whitespace возвращает итератор по подсрезам значения text,
разделенным пробельными символами. Метод or_insert возвращает изменяемую
ссылку (&mut V) на значение для указанного ключа. Здесь мы сохраняем эту
изменяемую ссылку в переменной count, поэтому, чтобы присвоить значение
тому, на что она указывает, сначала нужно разыменовать count с помощью
звездочки (*). Изменяемая ссылка выходит из области видимости в конце цикла
for, поэтому все эти изменения безопасны и разрешены правилами
заимствования.
Хеш-функции
По умолчанию HashMap использует хеш-функцию под названием SipHash, которая
может обеспечивать устойчивость к атакам отказа в обслуживании (DoS),
связанным с хеш-таблицами1. Это не самый быстрый
доступный алгоритм хеширования, но компромисс в пользу лучшей безопасности,
который сопровождается снижением производительности, того стоит. Если вы
профилируете свой код и обнаружите, что хеш-функция по умолчанию слишком
медленная для ваших целей, можно переключиться на другую функцию, указав
другой хешер. Хешер – это тип, реализующий трейт BuildHasher. Мы
поговорим о трейтах и о том, как их реализовывать, в главе 10. Вам не обязательно реализовывать собственный хешер с нуля; на
crates.io есть библиотеки, опубликованные
другими пользователями Rust, которые предоставляют хешеры с реализациями
многих распространенных алгоритмов хеширования.
Итоги
Векторы, строки и хеш-карты предоставляют большой объем функциональности, необходимой в программах, когда нужно хранить, получать доступ и изменять данные. Вот несколько упражнений, которые теперь вы должны быть готовы решить:
- Дан список целых чисел. Используйте вектор и верните медиану (после сортировки это значение в средней позиции) и моду (значение, которое встречается чаще всего; здесь пригодится хеш-карта) списка.
- Преобразуйте строки в Pig Latin. Первая согласная каждого слова переносится в конец слова, и добавляется ay, так что first становится irst-fay. К словам, начинающимся с гласной, вместо этого добавляется hay в конец (apple становится apple-hay). Помните о деталях кодировки UTF-8!
- Используя хеш-карту и векторы, создайте текстовый интерфейс, позволяющий пользователю добавлять имена сотрудников в отдел компании; например, “Add Sally to Engineering” или “Add Amir to Sales”. Затем позвольте пользователю получить список всех людей в отделе или всех людей в компании по отделам, отсортированный по алфавиту.
Документация API стандартной библиотеки описывает методы, которые есть у векторов, строк и хеш-карт и которые будут полезны для этих упражнений!
Мы переходим к более сложным программам, в которых операции могут завершаться неудачей, поэтому сейчас самое время обсудить обработку ошибок. Этим мы и займемся дальше!
Обработка ошибок
Ошибки – неотъемлемая часть жизни программного обеспечения, поэтому в Rust есть ряд возможностей для обработки ситуаций, когда что-то идет не так. Во многих случаях Rust требует, чтобы вы признали возможность ошибки и предприняли какое-то действие до того, как ваш код скомпилируется. Это требование делает программу надежнее, гарантируя, что вы обнаружите ошибки и обработаете их надлежащим образом до развертывания кода в рабочую среду!
Rust делит ошибки на две основные категории: восстанавливаемые и невосстанавливаемые. При восстанавливаемой ошибке, например ошибке файл не найден, мы, скорее всего, просто хотим сообщить пользователю о проблеме и повторить операцию. Невосстанавливаемые ошибки всегда являются симптомами дефектов, например попытки обратиться к позиции за концом массива, поэтому мы хотим немедленно остановить программу.
Большинство языков не различают эти два вида ошибок и обрабатывают оба
одинаково, используя такие механизмы, как исключения. В Rust исключений нет.
Вместо этого в нем есть тип Result<T, E> для восстанавливаемых ошибок и
макрос panic!, который останавливает выполнение, когда программа сталкивается
с невосстанавливаемой ошибкой. В этой главе мы сначала рассмотрим вызов
panic!, а затем поговорим о возврате значений Result<T, E>. Кроме того,
мы изучим соображения, которые помогают решить, пытаться ли восстановиться
после ошибки или остановить выполнение.
Неустранимые ошибки с panic!
Невосстанавливаемые ошибки с panic!
Иногда в коде происходят плохие вещи, и вы ничего не можете с этим сделать. В
таких случаях в Rust есть макрос panic!. На практике вызвать панику можно
двумя способами: выполнить действие, из-за которого наш код паникует
(например, обратиться к элементу массива за его концом), или явно вызвать
макрос panic!. В обоих случаях мы вызываем панику в нашей программе. По
умолчанию такие паники выводят сообщение об ошибке, раскручивают стек, очищают
его и завершают работу. С помощью переменной окружения можно также попросить
Rust показать стек вызовов при возникновении паники, чтобы было проще найти ее
источник.
Раскручивание стека или аварийное завершение в ответ на панику
По умолчанию при возникновении паники программа начинает раскручивание стека: Rust поднимается обратно по стеку и очищает данные из каждой встреченной функции. Однако такой обратный проход и очистка требуют большой работы. Поэтому Rust позволяет выбрать альтернативу – немедленное аварийное завершение, которое завершает программу без очистки.
Память, которую использовала программа, затем должна будет очистить
операционная система. Если в вашем проекте нужно сделать итоговый бинарный
файл как можно меньше, можно переключиться с раскручивания стека на аварийное
завершение при панике, добавив panic = 'abort' в соответствующие разделы
[profile] файла Cargo.toml. Например, если вы хотите аварийно завершать
программу при панике в режиме release, добавьте следующее:
[profile.release]
panic = 'abort'
Попробуем вызвать panic! в простой программе:
fn main() {
panic!("crash and burn");
}Когда вы запустите программу, то увидите примерно следующее:
$ cargo run
Compiling panic v0.1.0 (file:///projects/panic)
Finished `dev` profile [unoptimized + debuginfo] target(s) in 0.25s
Running `target/debug/panic`
thread 'main' panicked at src/main.rs:2:5:
crash and burn
note: run with `RUST_BACKTRACE=1` environment variable to display a backtrace
Вызов panic! приводит к сообщению об ошибке, содержащемуся в последних двух
строках. Первая строка показывает наше сообщение паники и место в исходном
коде, где произошла паника: src/main.rs:2:5 означает вторую строку, пятый
символ файла src/main.rs.
В этом случае указанная строка является частью нашего кода, и если мы перейдем
к ней, то увидим вызов макроса panic!. В других случаях вызов panic! может
находиться в коде, который вызывается нашим кодом, и имя файла с номером
строки, указанные в сообщении об ошибке, будут относиться к чужому коду, где
вызван макрос panic!, а не к строке нашего кода, которая в итоге привела к
вызову panic!.
Мы можем использовать обратную трассировку функций, из которых пришел вызов
panic!, чтобы понять, какая часть нашего кода вызывает проблему. Чтобы
понять, как использовать обратную трассировку panic!, рассмотрим еще один
пример и посмотрим, как выглядит ситуация, когда вызов panic! происходит из
библиотеки из-за дефекта в нашем коде, а не из-за того, что наш код напрямую
вызывает этот макрос. В листинге 9-1 приведен код, который пытается обратиться
к индексу в векторе за пределами диапазона допустимых индексов.
fn main() {
let v = vec![1, 2, 3];
v[99];
}panic!Здесь мы пытаемся обратиться к 100-му элементу нашего вектора (он находится по
индексу 99, потому что индексация начинается с нуля), но вектор содержит
только три элемента. В этой ситуации Rust запаникует. Использование []
предполагает возврат элемента, но если передать недопустимый индекс, здесь нет
элемента, который Rust мог бы корректно вернуть.
В C попытка прочитать данные за концом структуры данных является неопределенным поведением. Вы можете получить то, что находится в области памяти, которая соответствовала бы этому элементу в структуре данных, даже если эта память не принадлежит данной структуре. Это называется чтением за пределами буфера и может привести к уязвимостям безопасности, если злоумышленник сможет управлять индексом так, чтобы прочитать данные, доступ к которым ему не должен быть разрешен и которые хранятся после структуры данных.
Чтобы защитить программу от такого рода уязвимости, Rust остановит выполнение и откажется продолжать работу, если вы попытаетесь прочитать элемент по несуществующему индексу. Давайте попробуем и посмотрим:
$ cargo run
Compiling panic v0.1.0 (file:///projects/panic)
Finished `dev` profile [unoptimized + debuginfo] target(s) in 0.27s
Running `target/debug/panic`
thread 'main' panicked at src/main.rs:4:6:
index out of bounds: the len is 3 but the index is 99
note: run with `RUST_BACKTRACE=1` environment variable to display a backtrace
Эта ошибка указывает на строку 4 файла main.rs, где мы пытаемся обратиться к
индексу 99 вектора v.
Строка note: сообщает, что можно установить переменную окружения
RUST_BACKTRACE, чтобы получить обратную трассировку того, что именно
произошло и привело к ошибке. Обратная трассировка – это список всех
функций, которые были вызваны, чтобы дойти до этой точки. Обратные трассировки
в Rust работают так же, как и в других языках: главное при чтении трассировки
– начать сверху и читать до тех пор, пока вы не увидите файлы, которые писали
сами. Это и есть место, где возникла проблема. Строки выше этого места – это
код, который был вызван вашим кодом; строки ниже – код, который вызвал ваш
код. Эти строки до и после могут включать код ядра Rust, код стандартной
библиотеки или крейты, которые вы используете. Попробуем получить обратную
трассировку, установив переменную окружения RUST_BACKTRACE в любое значение,
кроме 0. Листинг 9-2 показывает вывод, похожий на тот, который вы увидите.
$ RUST_BACKTRACE=1 cargo run
thread 'main' panicked at src/main.rs:4:6:
index out of bounds: the len is 3 but the index is 99
stack backtrace:
0: rust_begin_unwind
at /rustc/4d91de4e48198da2e33413efdcd9cd2cc0c46688/library/std/src/panicking.rs:692:5
1: core::panicking::panic_fmt
at /rustc/4d91de4e48198da2e33413efdcd9cd2cc0c46688/library/core/src/panicking.rs:75:14
2: core::panicking::panic_bounds_check
at /rustc/4d91de4e48198da2e33413efdcd9cd2cc0c46688/library/core/src/panicking.rs:273:5
3: <usize as core::slice::index::SliceIndex<[T]>>::index
at file:///home/.rustup/toolchains/1.85/lib/rustlib/src/rust/library/core/src/slice/index.rs:274:10
4: core::slice::index::<impl core::ops::index::Index<I> for [T]>::index
at file:///home/.rustup/toolchains/1.85/lib/rustlib/src/rust/library/core/src/slice/index.rs:16:9
5: <alloc::vec::Vec<T,A> as core::ops::index::Index<I>>::index
at file:///home/.rustup/toolchains/1.85/lib/rustlib/src/rust/library/alloc/src/vec/mod.rs:3361:9
6: panic::main
at ./src/main.rs:4:6
7: core::ops::function::FnOnce::call_once
at file:///home/.rustup/toolchains/1.85/lib/rustlib/src/rust/library/core/src/ops/function.rs:250:5
note: Some details are omitted, run with `RUST_BACKTRACE=full` for a verbose backtrace.
panic! и показанная, когда установлена переменная окружения RUST_BACKTRACEВывода получилось много! Точный вывод может отличаться в зависимости от вашей
операционной системы и версии Rust. Чтобы получить обратные трассировки с такой
информацией, должны быть включены отладочные символы. Отладочные символы
включены по умолчанию при использовании cargo build или cargo run без флага
--release, как в нашем случае.
В выводе листинга 9-2 строка 6 обратной трассировки указывает на строку в нашем проекте, которая вызывает проблему: строку 4 файла src/main.rs. Если мы не хотим, чтобы наша программа паниковала, расследование следует начинать с места, на которое указывает первая строка с упоминанием файла, написанного нами. В листинге 9-1 мы намеренно написали код, который запаникует, и способ исправить панику – не запрашивать элемент за пределами диапазона индексов вектора. Когда ваш код будет паниковать в будущем, вам нужно будет выяснить, какое действие выполняет код, с какими значениями это вызывает панику и что код должен делать вместо этого.
Мы вернемся к panic! и к тому, когда следует и когда не следует использовать
panic! для обработки ошибочных условий, позже в этой главе, в разделе
«Использовать panic! или не использовать
panic!». Далее мы рассмотрим, как
восстанавливаться после ошибки с помощью Result.
Устранимые ошибки с Result
Восстанавливаемые ошибки с Result
Большинство ошибок недостаточно серьезны, чтобы требовать полной остановки программы. Иногда функция завершается неудачно по причине, которую можно легко понять и на которую можно отреагировать. Например, если вы пытаетесь открыть файл и эта операция завершается неудачно, потому что файла не существует, вы можете захотеть создать файл, а не завершать процесс.
Вспомните из раздела «Обработка потенциальной ошибки с
Result» главы 2, что enum Result определен
с двумя вариантами, Ok и Err, следующим образом:
#![allow(unused)]
fn main() {
enum Result<T, E> {
Ok(T),
Err(E),
}
}T и E – это обобщенные параметры типов: подробнее об обобщениях мы
поговорим в главе 10. Сейчас вам нужно знать, что T представляет тип
значения, которое будет возвращено в случае успеха внутри варианта Ok, а E
представляет тип ошибки, которая будет возвращена в случае неудачи внутри
варианта Err. Поскольку у Result есть эти обобщенные параметры типов, мы
можем использовать тип Result и определенные для него функции во многих
разных ситуациях, где возвращаемые значения успеха и ошибки могут отличаться.
Вызовем функцию, которая возвращает значение Result, потому что эта функция
может завершиться неудачно. В листинге 9-3 мы пытаемся открыть файл.
use std::fs::File;
fn main() {
let greeting_file_result = File::open("hello.txt");
}Возвращаемый тип File::open – Result<T, E>. Обобщенный параметр T в
реализации File::open заменен типом значения успеха, std::fs::File, то
есть дескриптором файла. Тип E, используемый в значении ошибки, –
std::io::Error. Такой возвращаемый тип означает, что вызов File::open может
завершиться успешно и вернуть дескриптор файла, из которого можно читать или в
который можно писать. Вызов функции также может завершиться неудачно:
например, файл может не существовать, или у нас может не быть прав доступа к
нему. Функции File::open нужен способ сообщить нам, завершилась ли она
успешно или неудачно, и одновременно дать нам либо дескриптор файла, либо
информацию об ошибке. Именно эту информацию и передает enum Result.
В случае успеха File::open значение в переменной greeting_file_result будет
экземпляром Ok, содержащим дескриптор файла. В случае неудачи значение в
greeting_file_result будет экземпляром Err, содержащим больше информации о
том, какая ошибка произошла.
Нам нужно дополнить код из листинга 9-3, чтобы выполнять разные действия в
зависимости от значения, которое возвращает File::open. Листинг 9-4
показывает один способ обработать Result с помощью базового инструмента –
выражения match, которое мы обсуждали в главе 6.
use std::fs::File;
fn main() {
let greeting_file_result = File::open("hello.txt");
let greeting_file = match greeting_file_result {
Ok(file) => file,
Err(error) => panic!("Problem opening the file: {error:?}"),
};
}match для обработки вариантов Result, которые могут быть возвращеныОбратите внимание: как и enum Option, enum Result и его варианты уже
введены в область видимости прелюдией, поэтому нам не нужно указывать
Result:: перед вариантами Ok и Err в ветвях match.
Когда результат равен Ok, этот код вернет внутреннее значение file из
варианта Ok, а затем мы присвоим этот дескриптор файла переменной
greeting_file. После match мы сможем использовать дескриптор файла для
чтения или записи.
Другая ветвь match обрабатывает случай, когда от File::open мы получаем
значение Err. В этом примере мы решили вызвать макрос panic!. Если в нашем
текущем каталоге нет файла с именем hello.txt и мы запустим этот код, то
увидим следующий вывод от макроса panic!:
$ cargo run
Compiling error-handling v0.1.0 (file:///projects/error-handling)
Finished `dev` profile [unoptimized + debuginfo] target(s) in 0.73s
Running `target/debug/error-handling`
thread 'main' panicked at src/main.rs:8:23:
Problem opening the file: Os { code: 2, kind: NotFound, message: "No such file or directory" }
note: run with `RUST_BACKTRACE=1` environment variable to display a backtrace
Как обычно, этот вывод точно сообщает нам, что пошло не так.
Сопоставление разных ошибок
Код в листинге 9-4 вызовет panic! независимо от того, почему File::open
завершилась неудачно. Однако мы хотим выполнять разные действия для разных
причин неудачи. Если File::open завершилась неудачно из-за того, что файл не
существует, мы хотим создать файл и вернуть дескриптор нового файла. Если
File::open завершилась неудачно по любой другой причине – например, потому
что у нас нет прав на открытие файла, – мы все равно хотим, чтобы код вызвал
panic! так же, как в листинге 9-4. Для этого мы добавим внутреннее выражение
match, показанное в листинге 9-5.
use std::fs::File;
use std::io::ErrorKind;
fn main() {
let greeting_file_result = File::open("hello.txt");
let greeting_file = match greeting_file_result {
Ok(file) => file,
Err(error) => match error.kind() {
ErrorKind::NotFound => match File::create("hello.txt") {
Ok(fc) => fc,
Err(e) => panic!("Problem creating the file: {e:?}"),
},
_ => {
panic!("Problem opening the file: {error:?}");
}
},
};
}Тип значения, которое File::open возвращает внутри варианта Err, –
io::Error, структура из стандартной библиотеки. У этой структуры есть метод
kind, который можно вызвать, чтобы получить значение io::ErrorKind. Enum
io::ErrorKind предоставляется стандартной библиотекой и содержит варианты,
представляющие разные виды ошибок, которые могут возникнуть при операции
ввода-вывода. Нужный нам вариант – ErrorKind::NotFound, который указывает,
что файла, который мы пытаемся открыть, еще не существует. Поэтому мы
сопоставляем greeting_file_result, но также используем внутренний match для
error.kind().
Условие, которое мы хотим проверить во внутреннем match, состоит в том,
является ли значение, возвращенное error.kind(), вариантом NotFound enum
ErrorKind. Если это так, мы пытаемся создать файл с помощью File::create.
Однако, поскольку File::create тоже может завершиться неудачно, нам нужна
вторая ветвь во внутреннем выражении match. Когда файл нельзя создать,
печатается другое сообщение об ошибке. Вторая ветвь внешнего match остается
прежней, поэтому программа паникует при любой ошибке, кроме ошибки отсутствия
файла.
Альтернативы использованию match с Result<T, E>
Здесь много match! Выражение match очень полезно, но при этом довольно
низкоуровневое. В главе 13 вы узнаете о замыканиях, которые используются со
многими методами, определенными для Result<T, E>. Эти методы могут быть
более лаконичными, чем использование match, когда вы обрабатываете значения
Result<T, E> в своем коде.
Например, вот еще один способ записать ту же логику, что и в листинге 9-5,
на этот раз с использованием замыканий и метода unwrap_or_else:
use std::fs::File;
use std::io::ErrorKind;
fn main() {
let greeting_file = File::open("hello.txt").unwrap_or_else(|error| {
if error.kind() == ErrorKind::NotFound {
File::create("hello.txt").unwrap_or_else(|error| {
panic!("Problem creating the file: {error:?}");
})
} else {
panic!("Problem opening the file: {error:?}");
}
});
}Хотя этот код ведет себя так же, как код из листинга 9-5, в нем нет ни одного
выражения match, и его проще читать. Вернитесь к этому примеру после
прочтения главы 13 и найдите метод unwrap_or_else в документации
стандартной библиотеки. Многие подобные методы могут привести в порядок
огромные вложенные выражения match, когда вы работаете с ошибками.
Краткие способы вызвать панику при ошибке
Использование match работает достаточно хорошо, но может быть немного
многословным и не всегда хорошо передает намерение. Для типа Result<T, E>
определено множество вспомогательных методов, выполняющих разные, более
конкретные задачи. Метод unwrap – это сокращенный метод, реализованный так
же, как выражение match, которое мы написали в листинге 9-4. Если значение
Result является вариантом Ok, unwrap вернет значение внутри Ok. Если
Result является вариантом Err, unwrap вызовет за нас макрос panic!.
Вот пример unwrap в действии:
use std::fs::File;
fn main() {
let greeting_file = File::open("hello.txt").unwrap();
}Если мы запустим этот код без файла hello.txt, то увидим сообщение об
ошибке от вызова panic!, который делает метод unwrap:
thread 'main' panicked at src/main.rs:4:49:
called `Result::unwrap()` on an `Err` value: Os { code: 2, kind: NotFound, message: "No such file or directory" }
Аналогично, метод expect позволяет нам также выбрать сообщение об ошибке для
panic!. Использование expect вместо unwrap и хорошие сообщения об ошибках
могут передать ваше намерение и упростить поиск источника паники. Синтаксис
expect выглядит так:
use std::fs::File;
fn main() {
let greeting_file = File::open("hello.txt")
.expect("hello.txt should be included in this project");
}Мы используем expect так же, как unwrap: чтобы вернуть дескриптор файла или
вызвать макрос panic!. Сообщение об ошибке, которое expect использует при
вызове panic!, будет параметром, который мы передаем в expect, а не
стандартным сообщением panic!, используемым unwrap. Вот как это выглядит:
thread 'main' panicked at src/main.rs:5:10:
hello.txt should be included in this project: Os { code: 2, kind: NotFound, message: "No such file or directory" }
В коде промышленного качества большинство Rust-разработчиков выбирают
expect, а не unwrap, и дают больше контекста о том, почему операция, как
ожидается, должна всегда завершаться успешно. Тогда, если ваши предположения
когда-нибудь окажутся неверными, у вас будет больше информации для отладки.
Распространение ошибок
Когда реализация функции вызывает что-то, что может завершиться неудачно, вместо обработки ошибки внутри самой функции можно вернуть ошибку вызывающему коду, чтобы он решил, что делать. Это называется распространением ошибки и дает больше контроля вызывающему коду, где может быть больше информации или логики, определяющей, как следует обработать ошибку, чем доступно в контексте вашего кода.
Например, листинг 9-6 показывает функцию, которая читает имя пользователя из файла. Если файл не существует или его нельзя прочитать, эта функция вернет эти ошибки коду, который ее вызвал.
#![allow(unused)]
fn main() {
use std::fs::File;
use std::io::{self, Read};
fn read_username_from_file() -> Result<String, io::Error> {
let username_file_result = File::open("hello.txt");
let mut username_file = match username_file_result {
Ok(file) => file,
Err(e) => return Err(e),
};
let mut username = String::new();
match username_file.read_to_string(&mut username) {
Ok(_) => Ok(username),
Err(e) => Err(e),
}
}
}matchЭту функцию можно написать гораздо короче, но мы начнем с подробной ручной
версии, чтобы изучить обработку ошибок; в конце мы покажем более короткий
способ. Сначала посмотрим на возвращаемый тип функции:
Result<String, io::Error>. Это означает, что функция возвращает значение типа
Result<T, E>, где обобщенный параметр T заменен конкретным типом String,
а обобщенный тип E заменен конкретным типом io::Error.
Если эта функция успешно выполнится без каких-либо проблем, код, вызывающий эту
функцию, получит значение Ok, содержащее String, – имя пользователя,
которое функция прочитала из файла. Если функция столкнется с проблемами,
вызывающий код получит значение Err, содержащее экземпляр io::Error с
дополнительной информацией о том, какие проблемы произошли. Мы выбрали
io::Error в качестве возвращаемого типа этой функции, потому что именно этот
тип значения ошибки возвращают обе операции, которые мы вызываем в теле
функции и которые могут завершиться неудачно: функция File::open и метод
read_to_string.
Тело функции начинается с вызова функции File::open. Затем мы обрабатываем
значение Result с помощью match, похожего на match из листинга 9-4. Если
File::open завершается успешно, дескриптор файла в переменной шаблона file
становится значением изменяемой переменной username_file, и функция
продолжает выполнение. В случае Err вместо вызова panic! мы используем
ключевое слово return, чтобы досрочно выйти из функции целиком и передать
значение ошибки из File::open, теперь находящееся в переменной шаблона e,
обратно вызывающему коду как значение ошибки этой функции.
Итак, если у нас есть дескриптор файла в username_file, функция затем
создает новую String в переменной username и вызывает метод
read_to_string для дескриптора файла в username_file, чтобы прочитать
содержимое файла в username. Метод read_to_string тоже возвращает
Result, потому что он может завершиться неудачно, даже если File::open
завершилась успешно. Поэтому нам нужен еще один match, чтобы обработать этот
Result: если read_to_string завершается успешно, наша функция тоже
завершилась успешно, и мы возвращаем имя пользователя из файла, которое теперь
находится в username, обернув его в Ok. Если read_to_string завершается
неудачно, мы возвращаем значение ошибки так же, как вернули значение ошибки в
match, который обрабатывал возвращаемое значение File::open. Однако здесь
не нужно явно писать return, потому что это последнее выражение в функции.
Код, который вызывает эту функцию, затем обработает либо значение Ok,
содержащее имя пользователя, либо значение Err, содержащее io::Error.
Именно вызывающий код решает, что делать с этими значениями. Если вызывающий
код получит значение Err, он может вызвать panic! и аварийно завершить
программу, использовать имя пользователя по умолчанию или, например, найти имя
пользователя где-то еще, а не в файле. У нас недостаточно информации о том, что
на самом деле пытается сделать вызывающий код, поэтому мы распространяем всю
информацию об успехе или ошибке вверх, чтобы она была обработана подходящим
образом.
Этот шаблон распространения ошибок настолько распространен в Rust, что Rust
предоставляет оператор вопросительного знака ?, чтобы упростить его.
Сокращение для распространения ошибок: оператор ?
Листинг 9-7 показывает реализацию read_username_from_file, которая имеет ту
же функциональность, что и в листинге 9-6, но использует оператор ?.
#![allow(unused)]
fn main() {
use std::fs::File;
use std::io::{self, Read};
fn read_username_from_file() -> Result<String, io::Error> {
let mut username_file = File::open("hello.txt")?;
let mut username = String::new();
username_file.read_to_string(&mut username)?;
Ok(username)
}
}?Оператор ?, поставленный после значения Result, определен так, что работает
почти так же, как выражения match, которые мы написали для обработки значений
Result в листинге 9-6. Если значение Result равно Ok, значение внутри
Ok будет возвращено из этого выражения, и программа продолжит выполнение.
Если значение равно Err, Err будет возвращен из всей функции так, как если
бы мы использовали ключевое слово return, чтобы значение ошибки было
распространено в вызывающий код.
Между тем, что делает выражение match из листинга 9-6, и тем, что делает
оператор ?, есть различие: значения ошибок, к которым применяется оператор
?, проходят через функцию from, определенную в трейте From стандартной
библиотеки и используемую для преобразования значений из одного типа в другой.
Когда оператор ? вызывает функцию from, полученный тип ошибки
преобразуется в тип ошибки, указанный в возвращаемом типе текущей функции. Это
полезно, когда функция возвращает один тип ошибки, представляющий все способы,
которыми функция может завершиться неудачно, даже если разные части могут
завершаться неудачно по разным причинам.
Например, мы могли бы изменить функцию read_username_from_file из листинга
9-7 так, чтобы она возвращала собственный тип ошибки с именем OurError,
который мы определим. Если мы также определим impl From<io::Error> for OurError, чтобы создавать экземпляр OurError из io::Error, то вызовы
оператора ? в теле read_username_from_file будут вызывать from и
преобразовывать типы ошибок без необходимости добавлять в функцию какой-либо
дополнительный код.
В контексте листинга 9-7 оператор ? в конце вызова File::open вернет
значение внутри Ok в переменную username_file. Если произойдет ошибка,
оператор ? досрочно выйдет из всей функции и отдаст любое значение Err
вызывающему коду. То же самое относится к оператору ? в конце вызова
read_to_string.
Оператор ? устраняет большое количество шаблонного кода и делает реализацию
этой функции проще. Мы могли бы сократить этот код еще сильнее, сразу связав
вызовы методов после ?, как показано в листинге 9-8.
#![allow(unused)]
fn main() {
use std::fs::File;
use std::io::{self, Read};
fn read_username_from_file() -> Result<String, io::Error> {
let mut username = String::new();
File::open("hello.txt")?.read_to_string(&mut username)?;
Ok(username)
}
}?Мы перенесли создание новой String в username в начало функции; эта часть
не изменилась. Вместо создания переменной username_file мы связали вызов
read_to_string напрямую с результатом File::open("hello.txt")?. У нас
по-прежнему есть ? в конце вызова read_to_string, и мы по-прежнему
возвращаем значение Ok, содержащее username, когда и File::open, и
read_to_string завершаются успешно, вместо того чтобы возвращать ошибки.
Функциональность снова та же, что в листингах 9-6 и 9-7; это просто другой,
более эргономичный способ записать ее.
Листинг 9-9 показывает, как сделать это еще короче с помощью
fs::read_to_string.
#![allow(unused)]
fn main() {
use std::fs;
use std::io;
fn read_username_from_file() -> Result<String, io::Error> {
fs::read_to_string("hello.txt")
}
}fs::read_to_string вместо открытия и последующего чтения файлаЧтение файла в строку – довольно распространенная операция, поэтому
стандартная библиотека предоставляет удобную функцию fs::read_to_string,
которая открывает файл, создает новую String, читает содержимое файла,
помещает содержимое в эту String и возвращает ее. Конечно, использование
fs::read_to_string не дало бы нам возможности объяснить всю обработку
ошибок, поэтому сначала мы сделали это более длинным способом.
Где можно использовать оператор ?
Оператор ? можно использовать только в функциях, возвращаемый тип которых
совместим со значением, к которому применяется ?. Причина в том, что
оператор ? определен так, чтобы выполнять досрочный возврат значения из
функции, так же как выражение match, которое мы определили в листинге 9-6. В
листинге 9-6 match использовал значение Result, а ветвь досрочного
возврата возвращала значение Err(e). Возвращаемый тип функции должен быть
Result, чтобы быть совместимым с этим return.
В листинге 9-10 посмотрим, какую ошибку мы получим, если используем оператор
? в функции main с возвращаемым типом, несовместимым с типом значения, к
которому мы применяем ?.
use std::fs::File;
fn main() {
let greeting_file = File::open("hello.txt")?;
}? в функции main, которая возвращает (), не скомпилируется.Этот код открывает файл, что может завершиться неудачно. Оператор ? следует
за значением Result, возвращенным File::open, но у этой функции main
возвращаемый тип (), а не Result. Когда мы компилируем этот код, получаем
следующее сообщение об ошибке:
$ cargo run
Compiling error-handling v0.1.0 (file:///projects/error-handling)
error[E0277]: the `?` operator can only be used in a function that returns `Result` or `Option` (or another type that implements `FromResidual`)
--> src/main.rs:4:48
|
3 | fn main() {
| --------- this function should return `Result` or `Option` to accept `?`
4 | let greeting_file = File::open("hello.txt")?;
| ^ cannot use the `?` operator in a function that returns `()`
|
help: consider adding return type
|
3 ~ fn main() -> Result<(), Box<dyn std::error::Error>> {
4 | let greeting_file = File::open("hello.txt")?;
5 + Ok(())
|
For more information about this error, try `rustc --explain E0277`.
error: could not compile `error-handling` (bin "error-handling") due to 1 previous error
Эта ошибка указывает, что использовать оператор ? разрешено только в функции,
которая возвращает Result, Option или другой тип, реализующий
FromResidual.
Чтобы исправить ошибку, у вас есть два варианта. Первый – изменить
возвращаемый тип функции так, чтобы он был совместим со значением, к которому
вы применяете оператор ?, если этому ничего не препятствует. Второй –
использовать match или один из методов Result<T, E>, чтобы обработать
Result<T, E> подходящим образом.
Сообщение об ошибке также упоминало, что ? можно использовать и со значениями
Option<T>. Как и при использовании ? с Result, использовать ? с
Option можно только в функции, которая возвращает Option. Поведение
оператора ? при вызове для Option<T> похоже на его поведение при вызове для
Result<T, E>: если значение равно None, None будет досрочно возвращено
из функции в этой точке. Если значение равно Some, значение внутри Some
становится итоговым значением выражения, и функция продолжает выполнение. В
листинге 9-11 приведен пример функции, которая находит последний символ первой
строки в заданном тексте.
fn last_char_of_first_line(text: &str) -> Option<char> {
text.lines().next()?.chars().last()
}
fn main() {
assert_eq!(
last_char_of_first_line("Hello, world\nHow are you today?"),
Some('d')
);
assert_eq!(last_char_of_first_line(""), None);
assert_eq!(last_char_of_first_line("\nhi"), None);
}? для значения Option<T>Эта функция возвращает Option<char>, потому что символ может существовать, а
может и отсутствовать. Этот код принимает строковый срез text в качестве
аргумента и вызывает для него метод lines, который возвращает итератор по
строкам в строке. Поскольку эта функция хочет проверить первую строку, она
вызывает next у итератора, чтобы получить первое значение из итератора. Если
text – пустая строка, этот вызов next вернет None; в таком случае мы
используем ?, чтобы остановиться и вернуть None из
last_char_of_first_line. Если text не является пустой строкой, next
вернет значение Some, содержащее строковый срез первой строки в text.
Оператор ? извлекает строковый срез, и мы можем вызвать chars для этого
строкового среза, чтобы получить итератор по его символам. Нас интересует
последний символ в этой первой строке, поэтому мы вызываем last, чтобы
вернуть последний элемент итератора. Это Option, потому что первая строка
может быть пустой: например, если text начинается с пустой строки, но
содержит символы в других строках, как в "\nhi". Однако если в первой строке
есть последний символ, он будет возвращен в варианте Some. Оператор ? в
середине дает нам лаконичный способ выразить эту логику, позволяя реализовать
функцию в одну строку. Если бы мы не могли использовать оператор ? с
Option, нам пришлось бы реализовать эту логику с помощью большего числа
вызовов методов или выражения match.
Обратите внимание: оператор ? можно использовать с Result в функции,
которая возвращает Result, и можно использовать оператор ? с Option в
функции, которая возвращает Option, но нельзя смешивать эти случаи. Оператор
? не будет автоматически преобразовывать Result в Option или наоборот; в
таких случаях можно использовать методы вроде ok для Result или ok_or
для Option, чтобы выполнить преобразование явно.
Пока что все функции main, которые мы использовали, возвращали (). Функция
main особенная, потому что это точка входа и точка выхода исполняемой
программы, и существуют ограничения на то, каким может быть ее возвращаемый
тип, чтобы программа вела себя ожидаемым образом.
К счастью, main также может возвращать Result<(), E>. В листинге 9-12
показан код из листинга 9-10, но мы изменили возвращаемый тип main на
Result<(), Box<dyn Error>> и добавили возвращаемое значение Ok(()) в конец.
Теперь этот код скомпилируется.
use std::error::Error;
use std::fs::File;
fn main() -> Result<(), Box<dyn Error>> {
let greeting_file = File::open("hello.txt")?;
Ok(())
}main так, чтобы она возвращала Result<(), E>, позволяет использовать оператор ? для значений Result.Тип Box<dyn Error> – это трейт-объект, о котором мы поговорим в разделе
«Использование трейт-объектов для абстракции над общим
поведением» главы 18. Пока что можно читать
Box<dyn Error> как «любой вид ошибки». Использовать ? для значения Result
в функции main с типом ошибки Box<dyn Error> разрешено, потому что это
позволяет досрочно вернуть любое значение Err. Хотя тело этой функции main
всегда будет возвращать только ошибки типа std::io::Error, при указании
Box<dyn Error> эта сигнатура останется корректной, даже если в тело main
позже будет добавлен код, возвращающий другие ошибки.
Когда функция main возвращает Result<(), E>, исполняемый файл завершится со
значением 0, если main вернет Ok(()), и завершится с ненулевым значением,
если main вернет значение Err. Исполняемые файлы, написанные на C,
возвращают целые числа при завершении: программы, завершившиеся успешно,
возвращают целое число 0, а программы, завершившиеся с ошибкой, возвращают
какое-то целое число, отличное от 0. Rust также возвращает целые числа из
исполняемых файлов, чтобы быть совместимым с этим соглашением.
Функция main может возвращать любые типы, реализующие трейт
std::process::Termination, который содержит
функцию report, возвращающую ExitCode. Обратитесь к документации
стандартной библиотеки за дополнительной информацией о реализации трейта
Termination для собственных типов.
Теперь, когда мы обсудили детали вызова panic! и возвращения Result,
вернемся к вопросу о том, как решать, что из этого уместно использовать в
каких случаях.
panic! или не panic!
Использовать panic! или не использовать panic!
Итак, как решить, когда следует вызывать panic!, а когда следует возвращать
Result? Когда код паникует, восстановиться уже невозможно. Вы можете вызвать
panic! в любой ошибочной ситуации, независимо от того, есть ли возможный
способ восстановиться или нет, но тогда вы принимаете решение за вызывающий код
о том, что ситуация невосстанавливаемая. Когда вы выбираете возврат значения
Result, вы даете вызывающему коду варианты. Вызывающий код может попытаться
восстановиться способом, подходящим для его ситуации, или решить, что значение
Err в этом случае невосстанавливаемо, и вызвать panic!, превратив вашу
восстанавливаемую ошибку в невосстанавливаемую. Поэтому возврат Result –
хороший выбор по умолчанию при определении функции, которая может завершиться
неудачно.
В ситуациях вроде примеров, прототипного кода и тестов уместнее писать код,
который паникует, а не возвращает Result. Давайте разберем почему, а затем
обсудим ситуации, в которых компилятор не может понять, что неудача
невозможна, но вы как человек можете это понять. В конце главы будут приведены
общие рекомендации о том, как решать, следует ли паниковать в библиотечном
коде.
Примеры, прототипный код и тесты
Когда вы пишете пример, чтобы проиллюстрировать какую-то концепцию, добавление
надежного кода обработки ошибок может сделать пример менее понятным. В
примерах подразумевается, что вызов метода вроде unwrap, который может
запаниковать, служит заполнителем для того способа обработки ошибок, который
вы захотите использовать в своем приложении; этот способ может отличаться в
зависимости от того, что делает остальной код.
Аналогично, методы unwrap и expect очень удобны при прототипировании, когда
вы еще не готовы решить, как обрабатывать ошибки. Они оставляют в коде явные
маркеры для момента, когда вы будете готовы сделать программу более надежной.
Если вызов метода завершается неудачно в тесте, вы хотите, чтобы весь тест
провалился, даже если этот метод не является проверяемой функциональностью.
Поскольку именно panic! помечает тест как неуспешный, вызов unwrap или
expect – ровно то, что должно произойти.
Когда у вас больше информации, чем у компилятора
Также уместно вызвать expect, когда у вас есть другая логика, гарантирующая,
что Result будет содержать значение Ok, но эта логика не является чем-то,
что понимает компилятор. У вас все равно будет значение Result, которое нужно
обработать: любая вызываемая операция в общем случае все еще может завершиться
неудачно, хотя в вашей конкретной ситуации это логически невозможно. Если с
помощью ручной проверки кода вы можете убедиться, что варианта Err никогда
не будет, вполне допустимо вызвать expect и в тексте аргумента
задокументировать причину, по которой, как вы считаете, варианта Err никогда
не будет. Вот пример:
fn main() {
use std::net::IpAddr;
let home: IpAddr = "127.0.0.1"
.parse()
.expect("Hardcoded IP address should be valid");
}Мы создаем экземпляр IpAddr, разбирая жестко заданную строку. Мы видим, что
127.0.0.1 – допустимый IP-адрес, поэтому здесь допустимо использовать
expect. Однако наличие жестко заданной допустимой строки не меняет
возвращаемый тип метода parse: мы все равно получаем значение Result, и
компилятор все равно заставит нас обработать Result так, как если бы вариант
Err был возможен, потому что компилятор недостаточно умен, чтобы увидеть,
что эта строка всегда является допустимым IP-адресом. Если бы строка IP-адреса
поступала от пользователя, а не была жестко задана в программе, и поэтому
действительно могла привести к неудаче, мы определенно захотели бы вместо
этого обработать Result более надежным способом. Упоминание предположения о
том, что этот IP-адрес жестко задан, подскажет нам заменить expect на более
качественный код обработки ошибок, если в будущем нам понадобится получать
IP-адрес из другого источника.
Рекомендации по обработке ошибок
Желательно, чтобы ваш код паниковал, когда существует возможность, что он окажется в плохом состоянии. В этом контексте плохое состояние – это ситуация, когда нарушено какое-то предположение, гарантия, контракт или инвариант, например когда в ваш код передаются недопустимые, противоречивые или отсутствующие значения, а также выполняется одно или несколько из следующих условий:
- Плохое состояние является чем-то неожиданным, в отличие от того, что, вероятно, иногда будет происходить, например когда пользователь вводит данные в неправильном формате.
- После этой точки ваш код должен полагаться на то, что он не находится в этом плохом состоянии, а не проверять проблему на каждом шаге.
- Нет хорошего способа закодировать эту информацию в используемых типах. Мы разберем пример того, что имеется в виду, в разделе «Кодирование состояний и поведения как типов» главы 18.
Если кто-то вызывает ваш код и передает значения, которые не имеют смысла,
лучше вернуть ошибку, если это возможно, чтобы пользователь библиотеки мог
решить, что он хочет сделать в этом случае. Однако в случаях, когда продолжать
работу может быть небезопасно или вредно, лучшим выбором может быть вызов
panic!, чтобы сообщить человеку, использующему вашу библиотеку, об ошибке в
его коде, которую он сможет исправить во время разработки. Аналогично,
panic! часто уместен, если вы вызываете внешний код, который не находится под
вашим контролем и возвращает недопустимое состояние, которое вы никак не можете
исправить.
Однако когда неудача ожидаема, уместнее вернуть Result, чем вызывать
panic!. Примеры включают парсер, которому передали некорректные данные, или
HTTP-запрос, вернувший статус, показывающий, что вы достигли ограничения
частоты запросов. В таких случаях возврат Result указывает, что неудача –
ожидаемая возможность, и вызывающий код должен решить, как ее обработать.
Когда ваш код выполняет операцию, которая может подвергнуть пользователя риску,
если ее вызвать с недопустимыми значениями, ваш код должен сначала проверить,
что значения допустимы, и запаниковать, если они недопустимы. Это нужно в
основном по причинам безопасности: попытка работать с недопустимыми данными
может открыть ваш код для уязвимостей. Это главная причина, по которой
стандартная библиотека вызовет panic!, если вы попытаетесь обратиться к
памяти за допустимыми границами: попытка доступа к памяти, которая не
принадлежит текущей структуре данных, является распространенной проблемой
безопасности. У функций часто есть контракты: их поведение гарантируется
только если входные данные удовлетворяют определенным требованиям. Паника при
нарушении контракта имеет смысл, потому что нарушение контракта всегда
указывает на ошибку со стороны вызывающего кода, и это не тот вид ошибки,
который вызывающий код должен явно обрабатывать. Фактически у вызывающего кода
нет разумного способа восстановиться; исправить код должны вызывающие
программисты. Контракты функции, особенно когда нарушение приведет к панике,
должны быть объяснены в API-документации этой функции.
Однако большое количество проверок ошибок во всех ваших функциях было бы
многословным и раздражающим. К счастью, можно использовать систему типов Rust
(и, следовательно, проверку типов, выполняемую компилятором), чтобы сделать
многие проверки за вас. Если у функции есть параметр определенного типа, вы
можете продолжать выполнять логику своего кода, зная, что компилятор уже
убедился в наличии допустимого значения. Например, если у вас есть тип, а не
Option, ваша программа ожидает получить что-то, а не ничего. Тогда коду
не нужно обрабатывать два случая для вариантов Some и None: у него будет
только один случай – значение точно есть. Код, который пытается передать в
вашу функцию ничего, даже не скомпилируется, поэтому вашей функции не нужно
проверять этот случай во время выполнения. Другой пример – использование
беззнакового целочисленного типа, такого как u32, который гарантирует, что
параметр никогда не будет отрицательным.
Пользовательские типы для валидации
Сделаем еще один шаг в идее использования системы типов Rust, чтобы обеспечить наличие допустимого значения, и рассмотрим создание пользовательского типа для валидации. Вспомните игру в угадывание из главы 2, где наш код просил пользователя угадать число от 1 до 100. Мы никогда не проверяли, что предположение пользователя находится между этими числами, прежде чем сравнивать его с нашим секретным числом; мы проверяли только, что предположение положительное. В этом случае последствия были не слишком серьезными: наш вывод «Слишком много» или «Слишком мало» все равно был бы корректным. Но полезным улучшением было бы направлять пользователя к допустимым предположениям и иметь разное поведение, когда пользователь угадывает число вне диапазона и когда пользователь вводит, например, буквы.
Один способ сделать это – разобрать предположение как i32, а не только как
u32, чтобы допустить потенциально отрицательные числа, а затем добавить
проверку, что число находится в диапазоне, вот так:
use rand::Rng;
use std::cmp::Ordering;
use std::io;
fn main() {
println!("Guess the number!");
let secret_number = rand::thread_rng().gen_range(1..=100);
loop {
// --snip--
println!("Please input your guess.");
let mut guess = String::new();
io::stdin()
.read_line(&mut guess)
.expect("Failed to read line");
let guess: i32 = match guess.trim().parse() {
Ok(num) => num,
Err(_) => continue,
};
if guess < 1 || guess > 100 {
println!("The secret number will be between 1 and 100.");
continue;
}
match guess.cmp(&secret_number) {
// --snip--
Ordering::Less => println!("Too small!"),
Ordering::Greater => println!("Too big!"),
Ordering::Equal => {
println!("You win!");
break;
}
}
}
}Выражение if проверяет, находится ли наше значение вне диапазона, сообщает
пользователю о проблеме и вызывает continue, чтобы начать следующую итерацию
цикла и запросить другое предположение. После выражения if мы можем продолжить
сравнения между guess и секретным числом, зная, что guess находится между
1 и 100.
Однако это не идеальное решение: если бы было абсолютно критично, чтобы программа работала только со значениями между 1 и 100, и в ней было много функций с таким требованием, такая проверка в каждой функции была бы утомительной (и могла бы повлиять на производительность).
Вместо этого мы можем создать новый тип в отдельном модуле и поместить
валидации в функцию, которая создает экземпляр типа, а не повторять проверки
повсюду. Тогда функции смогут безопасно использовать новый тип в своих
сигнатурах и уверенно работать с полученными значениями. Листинг 9-13
показывает один способ определить тип Guess, который создаст экземпляр
Guess только если функция new получит значение между 1 и 100.
#![allow(unused)]
fn main() {
pub struct Guess {
value: i32,
}
impl Guess {
pub fn new(value: i32) -> Guess {
if value < 1 || value > 100 {
panic!("Guess value must be between 1 and 100, got {value}.");
}
Guess { value }
}
pub fn value(&self) -> i32 {
self.value
}
}
}Guess, который продолжит работу только со значениями между 1 и 100Обратите внимание, что этот код в src/guessing_game.rs зависит от добавления
объявления модуля mod guessing_game; в src/lib.rs, которое здесь не
показано. В файле этого нового модуля мы определяем структуру с именем Guess,
у которой есть поле с именем value, содержащее i32. Именно здесь будет
храниться число.
Затем мы реализуем для Guess связанную функцию с именем new, которая
создает экземпляры значений Guess. Функция new определена с одним
параметром value типа i32 и возвращает Guess. Код в теле функции new
проверяет value, чтобы убедиться, что оно находится между 1 и 100. Если
value не проходит эту проверку, мы вызываем panic!, что предупредит
программиста, пишущего вызывающий код, о наличии ошибки, которую нужно
исправить, потому что создание Guess со значением value вне этого
диапазона нарушило бы контракт, на который полагается Guess::new. Условия,
при которых Guess::new может паниковать, следует обсудить в его публичной
API-документации; в главе 14 мы рассмотрим соглашения документации,
указывающие на возможность panic! в API-документации, которую вы создаете.
Если value проходит проверку, мы создаем новый Guess, установив его поле
value равным параметру value, и возвращаем Guess.
Затем мы реализуем метод с именем value, который заимствует self, не имеет
других параметров и возвращает i32. Такой метод иногда называют геттером,
потому что его цель – получить некоторые данные из полей и вернуть их. Этот
публичный метод необходим, потому что поле value структуры Guess приватное.
Важно, чтобы поле value было приватным, чтобы код, использующий структуру
Guess, не мог устанавливать value напрямую: код вне модуля guessing_game
обязан использовать функцию Guess::new для создания экземпляра Guess,
тем самым гарантируя, что не существует способа получить Guess со значением
value, которое не было проверено условиями в функции Guess::new.
Функция, параметром которой являются только числа между 1 и 100 или которая
возвращает только такие числа, затем могла бы объявить в своей сигнатуре, что
она принимает или возвращает Guess, а не i32, и ей не потребовались бы
дополнительные проверки в теле.
Итоги
Возможности Rust для обработки ошибок предназначены для того, чтобы помогать
писать более надежный код. Макрос panic! сигнализирует, что ваша программа
находится в состоянии, с которым не может справиться, и позволяет сказать
процессу остановиться, вместо того чтобы пытаться продолжать работу с
недопустимыми или некорректными значениями. Enum Result использует систему
типов Rust, чтобы указать, что операции могут завершиться неудачно таким
образом, от которого ваш код может восстановиться. Вы можете использовать
Result, чтобы сообщить коду, вызывающему ваш код, что ему тоже нужно
обработать потенциальный успех или неудачу. Использование panic! и Result
в подходящих ситуациях сделает ваш код надежнее перед лицом неизбежных
проблем.
Теперь, когда вы увидели полезные способы, которыми стандартная библиотека
использует обобщения с enum Option и Result, мы поговорим о том, как
работают обобщения и как можно использовать их в своем коде.
Обобщенные типы, трейты и времена жизни
В каждом языке программирования есть инструменты для эффективной работы с дублированием понятий. В Rust один из таких инструментов – обобщения: абстрактные заменители конкретных типов или других свойств. Мы можем выразить поведение обобщений или то, как они связаны с другими обобщениями, не зная, что окажется на их месте при компиляции и выполнении кода.
Функции могут принимать параметры некоторого обобщенного типа вместо
конкретного типа, такого как i32 или String, подобно тому как они принимают
параметры с неизвестными значениями, чтобы выполнять один и тот же код для
нескольких конкретных значений. Фактически мы уже использовали обобщения в
главе 6 с Option<T>, в главе 8 с Vec<T> и HashMap<K, V>, а в главе 9 с
Result<T, E>. В этой главе вы узнаете, как определять собственные типы,
функции и методы с обобщениями!
Сначала мы повторим, как выделить функцию, чтобы уменьшить дублирование кода. Затем применим тот же прием, чтобы сделать обобщенную функцию из двух функций, которые отличаются только типами своих параметров. Мы также объясним, как использовать обобщенные типы в определениях структур и enum.
Затем вы узнаете, как использовать трейты, чтобы определять поведение обобщенным способом. Трейты можно сочетать с обобщенными типами, чтобы ограничить обобщенный тип только теми типами, которые обладают определенным поведением, а не принимать вообще любой тип.
Наконец, мы обсудим времена жизни: разновидность обобщений, которая дает компилятору информацию о том, как ссылки связаны друг с другом. Времена жизни позволяют нам дать компилятору достаточно информации о заимствованных значениях, чтобы он мог гарантировать, что ссылки будут действительными в большем числе ситуаций, чем он смог бы без нашей помощи.
Устранение дублирования путем выделения функции
Обобщения позволяют заменить конкретные типы заполнителем, представляющим несколько типов, чтобы устранить дублирование кода. Прежде чем погружаться в синтаксис обобщений, сначала посмотрим, как устранить дублирование способом, который не связан с обобщенными типами: выделим функцию, заменяющую конкретные значения заполнителем, представляющим несколько значений. Затем применим тот же прием, чтобы выделить обобщенную функцию! Рассматривая, как распознавать дублирующийся код, который можно вынести в функцию, вы начнете распознавать и дублирующийся код, где можно использовать обобщения.
Начнем с короткой программы в листинге 10-1, которая находит наибольшее число в списке.
fn main() {
let number_list = vec![34, 50, 25, 100, 65];
let mut largest = &number_list[0];
for number in &number_list {
if number > largest {
largest = number;
}
}
println!("The largest number is {largest}");
assert_eq!(*largest, 100);
}Мы сохраняем список целых чисел в переменной number_list и помещаем ссылку
на первое число в списке в переменную с именем largest. Затем мы перебираем
все числа в списке, и если текущее число больше числа, сохраненного в
largest, заменяем ссылку в этой переменной. Однако если текущее число меньше
или равно наибольшему числу, встреченному на данный момент, переменная не
изменяется, и код переходит к следующему числу в списке. После рассмотрения
всех чисел в списке largest должна ссылаться на наибольшее число, которым в
этом случае является 100.
Теперь нам поручили найти наибольшее число в двух разных списках чисел. Для этого мы можем продублировать код из листинга 10-1 и использовать ту же логику в двух разных местах программы, как показано в листинге 10-2.
fn main() {
let number_list = vec![34, 50, 25, 100, 65];
let mut largest = &number_list[0];
for number in &number_list {
if number > largest {
largest = number;
}
}
println!("The largest number is {largest}");
let number_list = vec![102, 34, 6000, 89, 54, 2, 43, 8];
let mut largest = &number_list[0];
for number in &number_list {
if number > largest {
largest = number;
}
}
println!("The largest number is {largest}");
}Хотя этот код работает, дублирование кода утомительно и чревато ошибками. Кроме того, когда мы хотим изменить код, нам нужно не забыть обновить его в нескольких местах.
Чтобы устранить это дублирование, мы создадим абстракцию, определив функцию, которая работает с любым списком целых чисел, переданным в качестве параметра. Это решение делает наш код понятнее и позволяет выразить понятие поиска наибольшего числа в списке абстрактно.
В листинге 10-3 мы выделяем код, который находит наибольшее число, в функцию с
именем largest. Затем мы вызываем эту функцию, чтобы найти наибольшее число
в двух списках из листинга 10-2. В будущем мы также могли бы использовать эту
функцию для любого другого имеющегося у нас списка значений i32.
fn largest(list: &[i32]) -> &i32 {
let mut largest = &list[0];
for item in list {
if item > largest {
largest = item;
}
}
largest
}
fn main() {
let number_list = vec![34, 50, 25, 100, 65];
let result = largest(&number_list);
println!("The largest number is {result}");
assert_eq!(*result, 100);
let number_list = vec![102, 34, 6000, 89, 54, 2, 43, 8];
let result = largest(&number_list);
println!("The largest number is {result}");
assert_eq!(*result, 6000);
}Функция largest имеет параметр с именем list, который представляет любой
конкретный срез значений i32, передаваемый в функцию. В результате, когда мы
вызываем функцию, код выполняется для конкретных значений, которые мы передаем.
Итак, вот шаги, которые мы выполнили, чтобы изменить код из листинга 10-2 в код из листинга 10-3:
- Определить дублирующийся код.
- Выделить дублирующийся код в тело функции и указать входные и возвращаемые значения этого кода в сигнатуре функции.
- Обновить два экземпляра дублирующегося кода так, чтобы вместо него они вызывали функцию.
Далее мы используем эти же шаги с обобщениями, чтобы уменьшить дублирование
кода. Подобно тому как тело функции может работать с абстрактным list вместо
конкретных значений, обобщения позволяют коду работать с абстрактными типами.
Например, допустим, у нас есть две функции: одна находит наибольший элемент в
срезе значений i32, а другая находит наибольший элемент в срезе значений
char. Как устранить это дублирование? Давайте выясним!
Обобщённые типы данных
Обобщенные типы данных
Мы используем обобщения, чтобы создавать определения для таких элементов, как сигнатуры функций или структуры, которые затем можно использовать со множеством разных конкретных типов данных. Сначала посмотрим, как определять функции, структуры, enum и методы с помощью обобщений. Затем обсудим, как обобщения влияют на производительность кода.
В определениях функций
При определении функции, использующей обобщения, мы помещаем обобщения в сигнатуру функции там, где обычно указывали бы типы данных параметров и возвращаемого значения. Это делает код более гибким и дает вызывающим нашу функцию больше возможностей, одновременно предотвращая дублирование кода.
Продолжая работу с нашей функцией largest, листинг 10-4 показывает две
функции, каждая из которых находит наибольшее значение в срезе. Затем мы
объединим их в одну функцию, использующую обобщения.
fn largest_i32(list: &[i32]) -> &i32 {
let mut largest = &list[0];
for item in list {
if item > largest {
largest = item;
}
}
largest
}
fn largest_char(list: &[char]) -> &char {
let mut largest = &list[0];
for item in list {
if item > largest {
largest = item;
}
}
largest
}
fn main() {
let number_list = vec![34, 50, 25, 100, 65];
let result = largest_i32(&number_list);
println!("The largest number is {result}");
assert_eq!(*result, 100);
let char_list = vec!['y', 'm', 'a', 'q'];
let result = largest_char(&char_list);
println!("The largest char is {result}");
assert_eq!(*result, 'y');
}Функция largest_i32 – это функция, которую мы выделили в листинге 10-3 и
которая находит наибольшее значение i32 в срезе. Функция largest_char
находит наибольшее значение char в срезе. Тела функций содержат один и тот
же код, поэтому устраним дублирование, введя параметр обобщенного типа в
единственной функции.
Чтобы параметризовать типы в новой единственной функции, нужно дать имя
параметру типа, так же как мы даем имена параметрам значений функции. В
качестве имени параметра типа можно использовать любой идентификатор. Но мы
будем использовать T, потому что по соглашению имена параметров типов в Rust
короткие, часто всего из одной буквы, а соглашение Rust об именовании типов –
UpperCamelCase. T, сокращение от type, является выбором по умолчанию для
большинства Rust-программистов.
Когда мы используем параметр в теле функции, нужно объявить имя параметра в
сигнатуре, чтобы компилятор знал, что означает это имя. Аналогично, когда мы
используем имя параметра типа в сигнатуре функции, нужно объявить это имя
параметра типа до его использования. Чтобы определить обобщенную функцию
largest, мы помещаем объявления имен типов в угловые скобки, <>, между
именем функции и списком параметров, вот так:
fn largest<T>(list: &[T]) -> &T {Мы читаем это определение так: «Функция largest является обобщенной по
некоторому типу T». У этой функции есть один параметр с именем list, срез
значений типа T. Функция largest вернет ссылку на значение того же типа
T.
Листинг 10-5 показывает объединенное определение функции largest, в
сигнатуре которой используется обобщенный тип данных. Листинг также показывает,
как можно вызвать функцию либо со срезом значений i32, либо со значениями
char. Обратите внимание, что этот код пока не скомпилируется.
fn largest<T>(list: &[T]) -> &T {
let mut largest = &list[0];
for item in list {
if item > largest {
largest = item;
}
}
largest
}
fn main() {
let number_list = vec![34, 50, 25, 100, 65];
let result = largest(&number_list);
println!("The largest number is {result}");
let char_list = vec!['y', 'm', 'a', 'q'];
let result = largest(&char_list);
println!("The largest char is {result}");
}largest, использующая параметры обобщенного типа; этот код пока не компилируетсяЕсли мы скомпилируем этот код прямо сейчас, получим такую ошибку:
$ cargo run
Compiling chapter10 v0.1.0 (file:///projects/chapter10)
error[E0369]: binary operation `>` cannot be applied to type `&T`
--> src/main.rs:5:17
|
5 | if item > largest {
| ---- ^ ------- &T
| |
| &T
|
help: consider restricting type parameter `T` with trait `PartialOrd`
|
1 | fn largest<T: std::cmp::PartialOrd>(list: &[T]) -> &T {
| ++++++++++++++++++++++
For more information about this error, try `rustc --explain E0369`.
error: could not compile `chapter10` (bin "chapter10") due to 1 previous error
Текст помощи упоминает std::cmp::PartialOrd, который является трейтом, а о
трейтах мы поговорим в следующем разделе. Пока достаточно знать, что эта ошибка
говорит: тело largest не будет работать для всех возможных типов, которыми
может быть T. Поскольку мы хотим сравнивать значения типа T в теле
функции, можно использовать только типы, значения которых можно упорядочивать.
Чтобы включить сравнения, стандартная библиотека предоставляет трейт
std::cmp::PartialOrd, который можно реализовать для типов (подробнее об этом
трейте см. в приложении C). Чтобы исправить листинг 10-5, можно последовать
предложению текста помощи и ограничить типы, допустимые для T, только теми,
которые реализуют PartialOrd. Тогда листинг скомпилируется, потому что
стандартная библиотека реализует PartialOrd и для i32, и для char.
В определениях структур
Мы также можем определять структуры так, чтобы они использовали параметр
обобщенного типа в одном или нескольких полях, применяя синтаксис <>.
Листинг 10-6 определяет структуру Point<T> для хранения значений координат
x и y любого типа.
struct Point<T> {
x: T,
y: T,
}
fn main() {
let integer = Point { x: 5, y: 10 };
let float = Point { x: 1.0, y: 4.0 };
}Point<T>, которая хранит значения x и y типа TСинтаксис использования обобщений в определениях структур похож на синтаксис в определениях функций. Сначала мы объявляем имя параметра типа в угловых скобках сразу после имени структуры. Затем используем обобщенный тип в определении структуры там, где иначе указали бы конкретные типы данных.
Обратите внимание: поскольку мы использовали только один обобщенный тип для
определения Point<T>, это определение говорит, что структура Point<T>
является обобщенной по некоторому типу T, а поля x и y имеют оба этот
же самый тип, каким бы он ни был. Если мы создадим экземпляр Point<T> со
значениями разных типов, как в листинге 10-7, наш код не скомпилируется.
struct Point<T> {
x: T,
y: T,
}
fn main() {
let wont_work = Point { x: 5, y: 4.0 };
}x и y должны быть одного типа, потому что оба имеют один и тот же обобщенный тип данных T.В этом примере, когда мы присваиваем целочисленное значение 5 полю x, мы
сообщаем компилятору, что обобщенный тип T для этого экземпляра Point<T>
будет целочисленным. Затем, когда мы указываем 4.0 для y, которое
определено как имеющее тот же тип, что и x, мы получим ошибку несоответствия
типов вроде этой:
$ cargo run
Compiling chapter10 v0.1.0 (file:///projects/chapter10)
error[E0308]: mismatched types
--> src/main.rs:7:38
|
7 | let wont_work = Point { x: 5, y: 4.0 };
| ^^^ expected integer, found floating-point number
For more information about this error, try `rustc --explain E0308`.
error: could not compile `chapter10` (bin "chapter10") due to 1 previous error
Чтобы определить структуру Point, где x и y оба являются обобщенными, но
могут иметь разные типы, можно использовать несколько параметров обобщенных
типов. Например, в листинге 10-8 мы изменяем определение Point так, чтобы
оно было обобщенным по типам T и U, где x имеет тип T, а y – тип
U.
struct Point<T, U> {
x: T,
y: U,
}
fn main() {
let both_integer = Point { x: 5, y: 10 };
let both_float = Point { x: 1.0, y: 4.0 };
let integer_and_float = Point { x: 5, y: 4.0 };
}Point<T, U>, обобщенная по двум типам, чтобы x и y могли быть значениями разных типовТеперь все показанные экземпляры Point разрешены! В определении можно
использовать сколько угодно параметров обобщенных типов, но если их больше
нескольких, код становится трудно читать. Если вы обнаруживаете, что в вашем
коде нужно много обобщенных типов, это может указывать, что код следует
переструктурировать на более мелкие части.
В определениях enum
Как и со структурами, мы можем определять enum так, чтобы их варианты хранили
обобщенные типы данных. Давайте еще раз посмотрим на enum Option<T>,
предоставляемый стандартной библиотекой, который мы использовали в главе 6:
#![allow(unused)]
fn main() {
enum Option<T> {
Some(T),
None,
}
}Теперь это определение должно быть понятнее. Как видите, enum Option<T>
является обобщенным по типу T и имеет два варианта: Some, который хранит
одно значение типа T, и вариант None, который не хранит никакого значения.
Используя enum Option<T>, мы можем выразить абстрактное понятие
необязательного значения, и поскольку Option<T> является обобщенным, мы
можем использовать эту абстракцию независимо от типа необязательного значения.
Enum также могут использовать несколько обобщенных типов. Определение enum
Result, которое мы использовали в главе 9, является одним из примеров:
#![allow(unused)]
fn main() {
enum Result<T, E> {
Ok(T),
Err(E),
}
}Enum Result является обобщенным по двум типам, T и E, и имеет два
варианта: Ok, который хранит значение типа T, и Err, который хранит
значение типа E. Это определение делает удобным использование enum Result
везде, где есть операция, которая может завершиться успешно (вернуть значение
некоторого типа T) или завершиться неудачно (вернуть ошибку некоторого типа
E). Фактически именно это мы использовали для открытия файла в листинге 9-3:
T был заменен типом std::fs::File, когда файл успешно открывался, а E –
типом std::io::Error, когда при открытии файла возникали проблемы.
Когда вы распознаете в своем коде ситуации с несколькими определениями структур или enum, которые отличаются только типами хранимых значений, можно избежать дублирования, используя вместо этого обобщенные типы.
В определениях методов
Мы можем реализовывать методы для структур и enum (как делали в главе 5) и
также использовать обобщенные типы в их определениях. Листинг 10-9 показывает
структуру Point<T>, которую мы определили в листинге 10-6, с реализованным
для нее методом с именем x.
struct Point<T> {
x: T,
y: T,
}
impl<T> Point<T> {
fn x(&self) -> &T {
&self.x
}
}
fn main() {
let p = Point { x: 5, y: 10 };
println!("p.x = {}", p.x());
}x для структуры Point<T>, который возвращает ссылку на поле x типа TЗдесь мы определили метод с именем x для Point<T>, который возвращает
ссылку на данные в поле x.
Обратите внимание, что нужно объявить T сразу после impl, чтобы мы могли
использовать T для указания, что реализуем методы для типа Point<T>.
Объявляя T как обобщенный тип после impl, Rust может определить, что тип в
угловых скобках в Point является обобщенным типом, а не конкретным типом. Мы
могли бы выбрать другое имя для этого обобщенного параметра, отличное от
обобщенного параметра, объявленного в определении структуры, но использовать то
же имя принято по соглашению. Если вы пишете метод внутри impl, который
объявляет обобщенный тип, этот метод будет определен для любого экземпляра
типа, независимо от того, какой конкретный тип в итоге подставится вместо
обобщенного типа.
При определении методов для типа мы также можем задавать ограничения на
обобщенные типы. Например, можно реализовать методы только для экземпляров
Point<f32>, а не для экземпляров Point<T> с любым обобщенным типом. В
листинге 10-10 мы используем конкретный тип f32, то есть не объявляем никаких
типов после impl.
struct Point<T> {
x: T,
y: T,
}
impl<T> Point<T> {
fn x(&self) -> &T {
&self.x
}
}
impl Point<f32> {
fn distance_from_origin(&self) -> f32 {
(self.x.powi(2) + self.y.powi(2)).sqrt()
}
}
fn main() {
let p = Point { x: 5, y: 10 };
println!("p.x = {}", p.x());
}impl, который применяется только к структуре с определенным конкретным типом для параметра обобщенного типа TЭтот код означает, что тип Point<f32> будет иметь метод
distance_from_origin; другие экземпляры Point<T>, где T не является
типом f32, не будут иметь определенного метода. Метод измеряет, как далеко
наша точка находится от точки с координатами (0.0, 0.0), и использует
математические операции, доступные только для типов с плавающей точкой.
Параметры обобщенных типов в определении структуры не всегда совпадают с теми,
которые используются в сигнатурах методов этой же структуры. Листинг 10-11
использует обобщенные типы X1 и Y1 для структуры Point и X2 и Y2 для
сигнатуры метода mixup, чтобы сделать пример понятнее. Метод создает новый
экземпляр Point со значением x из self типа Point (типа X1) и
значением y из переданного Point (типа Y2).
struct Point<X1, Y1> {
x: X1,
y: Y1,
}
impl<X1, Y1> Point<X1, Y1> {
fn mixup<X2, Y2>(self, other: Point<X2, Y2>) -> Point<X1, Y2> {
Point {
x: self.x,
y: other.y,
}
}
}
fn main() {
let p1 = Point { x: 5, y: 10.4 };
let p2 = Point { x: "Hello", y: 'c' };
let p3 = p1.mixup(p2);
println!("p3.x = {}, p3.y = {}", p3.x, p3.y);
}В main мы определили Point, у которого x имеет тип i32 (со значением
5), а y имеет тип f64 (со значением 10.4). Переменная p2 – это
структура Point, у которой x является строковым срезом (со значением
"Hello"), а y имеет тип char (со значением c). Вызов mixup для p1 с
аргументом p2 дает нам p3, у которого x будет иметь тип i32, потому
что x пришел из p1. У переменной p3 y будет иметь тип char, потому
что y пришел из p2. Вызов макроса println! напечатает
p3.x = 5, p3.y = c.
Цель этого примера – показать ситуацию, в которой некоторые обобщенные
параметры объявляются с impl, а некоторые – с определением метода. Здесь
обобщенные параметры X1 и Y1 объявлены после impl, потому что они
относятся к определению структуры. Обобщенные параметры X2 и Y2 объявлены
после fn mixup, потому что они относятся только к методу.
Производительность кода, использующего обобщения
Вам может быть интересно, есть ли затраты времени выполнения при использовании параметров обобщенных типов. Хорошая новость в том, что использование обобщенных типов не заставит вашу программу работать медленнее, чем она работала бы с конкретными типами.
Rust достигает этого, выполняя мономорфизацию кода, использующего обобщения, во время компиляции. Мономорфизация – это процесс превращения обобщенного кода в конкретный код путем подстановки конкретных типов, которые используются при компиляции. В этом процессе компилятор делает противоположное тому, что мы делали при создании обобщенной функции в листинге 10-5: компилятор смотрит на все места, где вызывается обобщенный код, и генерирует код для конкретных типов, с которыми вызывается обобщенный код.
Посмотрим, как это работает, используя обобщенный enum Option<T> из
стандартной библиотеки:
#![allow(unused)]
fn main() {
let integer = Some(5);
let float = Some(5.0);
}Когда Rust компилирует этот код, он выполняет мономорфизацию. Во время этого
процесса компилятор читает значения, использованные в экземплярах Option<T>,
и определяет две разновидности Option<T>: одна – i32, другая – f64.
Соответственно, он разворачивает обобщенное определение Option<T> в два
определения, специализированные для i32 и f64, тем самым заменяя
обобщенное определение конкретными.
Мономорфизированная версия кода выглядит примерно так (для иллюстрации компилятор использует имена, отличные от тех, что используем здесь мы):
enum Option_i32 {
Some(i32),
None,
}
enum Option_f64 {
Some(f64),
None,
}
fn main() {
let integer = Option_i32::Some(5);
let float = Option_f64::Some(5.0);
}Обобщенный Option<T> заменяется конкретными определениями, созданными
компилятором. Поскольку Rust компилирует обобщенный код в код, где в каждом
экземпляре указан конкретный тип, мы не платим никаких затрат времени
выполнения за использование обобщений. Когда код выполняется, он работает так
же, как если бы мы вручную продублировали каждое определение. Процесс
мономорфизации делает обобщения Rust чрезвычайно эффективными во время
выполнения.
Определение общего поведения с помощью трейтов
Определение общего поведения с помощью трейтов
Трейт определяет функциональность, которой обладает конкретный тип и которую он может разделять с другими типами. Трейты позволяют определять общее поведение абстрактным способом. Мы можем использовать ограничения трейтов, чтобы указать, что обобщенный тип может быть любым типом, обладающим определенным поведением.
Примечание: трейты похожи на возможность, которую в других языках часто называют интерфейсами, хотя между ними есть некоторые различия.
Определение трейта
Поведение типа состоит из методов, которые можно вызвать для этого типа. Разные типы разделяют одно и то же поведение, если мы можем вызывать одни и те же методы для всех этих типов. Определения трейтов – это способ сгруппировать сигнатуры методов вместе, чтобы определить набор поведений, необходимых для достижения некоторой цели.
Например, допустим, у нас есть несколько структур, которые хранят разные виды
и объемы текста: структура NewsArticle, хранящая новостную историю,
отправленную из определенного места, и SocialPost, который может иметь не
более 280 символов вместе с метаданными, указывающими, был ли это новый пост,
репост или ответ на другой пост.
Мы хотим создать библиотечный крейт медиаагрегатора с именем aggregator,
который может отображать краткие сводки данных, хранящихся в экземпляре
NewsArticle или SocialPost. Для этого нам нужна сводка от каждого типа, и
мы будем запрашивать ее вызовом метода summarize для экземпляра. Листинг
10-12 показывает определение публичного трейта Summary, выражающего это
поведение.
pub trait Summary {
fn summarize(&self) -> String;
}Summary, состоящий из поведения, предоставляемого методом summarizeЗдесь мы объявляем трейт с помощью ключевого слова trait, а затем указываем
имя трейта, в данном случае Summary. Мы также объявляем трейт как pub,
чтобы крейты, зависящие от этого крейта, тоже могли использовать этот трейт,
как мы увидим в нескольких примерах. Внутри фигурных скобок мы объявляем
сигнатуры методов, описывающие поведение типов, реализующих этот трейт; в
данном случае это fn summarize(&self) -> String.
После сигнатуры метода вместо предоставления реализации в фигурных скобках мы
используем точку с запятой. Каждый тип, реализующий этот трейт, должен
предоставить собственное поведение для тела метода. Компилятор проследит, что
у любого типа с трейтом Summary метод summarize будет определен именно с
такой сигнатурой.
Трейт может содержать несколько методов в своем теле: сигнатуры методов перечисляются по одной на строку, и каждая строка заканчивается точкой с запятой.
Реализация трейта для типа
Теперь, когда мы определили желаемые сигнатуры методов трейта Summary, мы
можем реализовать его для типов в нашем медиаагрегаторе. Листинг 10-13
показывает реализацию трейта Summary для структуры NewsArticle, которая
использует заголовок, автора и место, чтобы создать возвращаемое значение
summarize. Для структуры SocialPost мы определяем summarize как имя
пользователя, за которым следует весь текст поста, предполагая, что содержимое
поста уже ограничено 280 символами.
pub trait Summary {
fn summarize(&self) -> String;
}
pub struct NewsArticle {
pub headline: String,
pub location: String,
pub author: String,
pub content: String,
}
impl Summary for NewsArticle {
fn summarize(&self) -> String {
format!("{}, by {} ({})", self.headline, self.author, self.location)
}
}
pub struct SocialPost {
pub username: String,
pub content: String,
pub reply: bool,
pub repost: bool,
}
impl Summary for SocialPost {
fn summarize(&self) -> String {
format!("{}: {}", self.username, self.content)
}
}Summary для типов NewsArticle и SocialPostРеализация трейта для типа похожа на реализацию обычных методов. Разница в том,
что после impl мы пишем имя трейта, который хотим реализовать, затем
используем ключевое слово for, а затем указываем имя типа, для которого
хотим реализовать трейт. Внутри блока impl мы помещаем сигнатуры методов,
которые определены в определении трейта. Вместо добавления точки с запятой
после каждой сигнатуры мы используем фигурные скобки и заполняем тело метода
конкретным поведением, которое методы трейта должны иметь для данного типа.
Теперь, когда библиотека реализовала трейт Summary для NewsArticle и
SocialPost, пользователи крейта могут вызывать методы трейта для экземпляров
NewsArticle и SocialPost так же, как мы вызываем обычные методы.
Единственное отличие в том, что пользователь должен ввести в область видимости
и трейт, и типы. Вот пример того, как бинарный крейт мог бы использовать наш
библиотечный крейт aggregator:
use aggregator::{SocialPost, Summary};
fn main() {
let post = SocialPost {
username: String::from("horse_ebooks"),
content: String::from(
"of course, as you probably already know, people",
),
reply: false,
repost: false,
};
println!("1 new post: {}", post.summarize());
}Этот код печатает 1 new post: horse_ebooks: of course, as you probably already know, people.
Другие крейты, зависящие от крейта aggregator, также могут ввести трейт
Summary в область видимости, чтобы реализовать Summary для собственных
типов. Важно отметить одно ограничение: мы можем реализовать трейт для типа
только если трейт, тип или они оба являются локальными для нашего крейта.
Например, мы можем реализовать трейты стандартной библиотеки вроде Display
для пользовательского типа вроде SocialPost как часть функциональности
нашего крейта aggregator, потому что тип SocialPost локален для нашего
крейта aggregator. Мы также можем реализовать Summary для Vec<T> в нашем
крейте aggregator, потому что трейт Summary локален для нашего крейта
aggregator.
Но мы не можем реализовывать внешние трейты для внешних типов. Например, мы не
можем реализовать трейт Display для Vec<T> внутри нашего крейта
aggregator, потому что и Display, и Vec<T> определены в стандартной
библиотеке и не являются локальными для нашего крейта aggregator. Это
ограничение является частью свойства, называемого согласованностью
(coherence), а точнее правилом сиротства (orphan rule), названным так
потому, что родительский тип отсутствует. Это правило гарантирует, что чужой
код не сможет сломать ваш код и наоборот. Без этого правила два крейта могли
бы реализовать один и тот же трейт для одного и того же типа, и Rust не знал
бы, какую реализацию использовать.
Использование реализаций по умолчанию
Иногда полезно иметь поведение по умолчанию для некоторых или всех методов трейта вместо того, чтобы требовать реализации всех методов для каждого типа. Тогда при реализации трейта для конкретного типа мы можем сохранить или переопределить поведение каждого метода по умолчанию.
В листинге 10-14 мы задаем строку по умолчанию для метода summarize трейта
Summary, вместо того чтобы только определить сигнатуру метода, как мы делали
в листинге 10-12.
pub trait Summary {
fn summarize(&self) -> String {
String::from("(Read more...)")
}
}
pub struct NewsArticle {
pub headline: String,
pub location: String,
pub author: String,
pub content: String,
}
impl Summary for NewsArticle {}
pub struct SocialPost {
pub username: String,
pub content: String,
pub reply: bool,
pub repost: bool,
}
impl Summary for SocialPost {
fn summarize(&self) -> String {
format!("{}: {}", self.username, self.content)
}
}Summary с реализацией метода summarize по умолчаниюЧтобы использовать реализацию по умолчанию для краткого описания экземпляров
NewsArticle, мы указываем пустой блок impl Summary for NewsArticle {}.
Даже несмотря на то, что мы больше не определяем метод summarize для
NewsArticle напрямую, мы предоставили реализацию по умолчанию и указали, что
NewsArticle реализует трейт Summary. В результате мы все еще можем вызвать
метод summarize для экземпляра NewsArticle, вот так:
use aggregator::{self, NewsArticle, Summary};
fn main() {
let article = NewsArticle {
headline: String::from("Penguins win the Stanley Cup Championship!"),
location: String::from("Pittsburgh, PA, USA"),
author: String::from("Iceburgh"),
content: String::from(
"The Pittsburgh Penguins once again are the best \
hockey team in the NHL.",
),
};
println!("New article available! {}", article.summarize());
}Этот код печатает New article available! (Read more...).
Создание реализации по умолчанию не требует ничего менять в реализации
Summary для SocialPost из листинга 10-13. Причина в том, что синтаксис
переопределения реализации по умолчанию такой же, как синтаксис реализации
метода трейта, у которого нет реализации по умолчанию.
Реализации по умолчанию могут вызывать другие методы того же трейта, даже если
у этих других методов нет реализации по умолчанию. Таким образом, трейт может
предоставлять много полезной функциональности и требовать от реализующих типов
указать лишь небольшую ее часть. Например, мы могли бы определить трейт
Summary так, чтобы в нем был метод summarize_author, реализация которого
обязательна, а затем определить метод summarize с реализацией по умолчанию,
которая вызывает метод summarize_author:
pub trait Summary {
fn summarize_author(&self) -> String;
fn summarize(&self) -> String {
format!("(Read more from {}...)", self.summarize_author())
}
}
pub struct SocialPost {
pub username: String,
pub content: String,
pub reply: bool,
pub repost: bool,
}
impl Summary for SocialPost {
fn summarize_author(&self) -> String {
format!("@{}", self.username)
}
}Чтобы использовать эту версию Summary, нам нужно определить только
summarize_author, когда мы реализуем трейт для типа:
pub trait Summary {
fn summarize_author(&self) -> String;
fn summarize(&self) -> String {
format!("(Read more from {}...)", self.summarize_author())
}
}
pub struct SocialPost {
pub username: String,
pub content: String,
pub reply: bool,
pub repost: bool,
}
impl Summary for SocialPost {
fn summarize_author(&self) -> String {
format!("@{}", self.username)
}
}После определения summarize_author мы можем вызвать summarize для
экземпляров структуры SocialPost, и реализация summarize по умолчанию
вызовет предоставленное нами определение summarize_author. Поскольку мы
реализовали summarize_author, трейт Summary дал нам поведение метода
summarize без необходимости писать дополнительный код. Вот как это выглядит:
use aggregator::{self, SocialPost, Summary};
fn main() {
let post = SocialPost {
username: String::from("horse_ebooks"),
content: String::from(
"of course, as you probably already know, people",
),
reply: false,
repost: false,
};
println!("1 new post: {}", post.summarize());
}Этот код печатает 1 new post: (Read more from @horse_ebooks...).
Обратите внимание, что вызвать реализацию по умолчанию из переопределяющей реализации того же метода невозможно.
Использование трейтов как параметров
Теперь, когда вы знаете, как определять и реализовывать трейты, мы можем
рассмотреть, как использовать трейты для определения функций, принимающих много
разных типов. Мы используем трейт Summary, реализованный для типов
NewsArticle и SocialPost в листинге 10-13, чтобы определить функцию
notify, вызывающую метод summarize для своего параметра item, который
имеет некоторый тип, реализующий трейт Summary. Для этого мы используем
синтаксис impl Trait, вот так:
pub trait Summary {
fn summarize(&self) -> String;
}
pub struct NewsArticle {
pub headline: String,
pub location: String,
pub author: String,
pub content: String,
}
impl Summary for NewsArticle {
fn summarize(&self) -> String {
format!("{}, by {} ({})", self.headline, self.author, self.location)
}
}
pub struct SocialPost {
pub username: String,
pub content: String,
pub reply: bool,
pub repost: bool,
}
impl Summary for SocialPost {
fn summarize(&self) -> String {
format!("{}: {}", self.username, self.content)
}
}
pub fn notify(item: &impl Summary) {
println!("Breaking news! {}", item.summarize());
}Вместо конкретного типа для параметра item мы указываем ключевое слово
impl и имя трейта. Этот параметр принимает любой тип, который реализует
указанный трейт. В теле notify мы можем вызывать для item любые методы,
предоставляемые трейтом Summary, например summarize. Мы можем вызвать notify
и передать любой экземпляр NewsArticle или SocialPost. Код, который
вызывает функцию с любым другим типом, например String или i32, не
скомпилируется, потому что эти типы не реализуют Summary.
Синтаксис ограничений трейтов
Синтаксис impl Trait работает для простых случаев, но на самом деле это
синтаксический сахар для более длинной формы, известной как ограничение
трейта; она выглядит так:
pub fn notify<T: Summary>(item: &T) {
println!("Breaking news! {}", item.summarize());
}Эта более длинная форма эквивалентна примеру из предыдущего раздела, но более многословна. Мы помещаем ограничения трейтов вместе с объявлением параметра обобщенного типа после двоеточия и внутри угловых скобок.
Синтаксис impl Trait удобен и делает код в простых случаях более кратким, а
полный синтаксис ограничений трейтов позволяет выражать более сложные случаи.
Например, у нас могут быть два параметра, реализующих Summary. С синтаксисом
impl Trait это выглядит так:
pub fn notify(item1: &impl Summary, item2: &impl Summary) {Использование impl Trait подходит, если мы хотим, чтобы эта функция
разрешала item1 и item2 иметь разные типы (при условии, что оба типа
реализуют Summary). Однако если мы хотим заставить оба параметра иметь один
и тот же тип, нужно использовать ограничение трейта, вот так:
pub fn notify<T: Summary>(item1: &T, item2: &T) {Обобщенный тип T, указанный как тип параметров item1 и item2,
ограничивает функцию так, что конкретный тип значения, переданного как
аргумент для item1 и item2, должен быть одним и тем же.
Несколько ограничений трейтов с синтаксисом +
Мы также можем указать более одного ограничения трейта. Допустим, мы хотим,
чтобы notify использовала для item форматирование для отображения, а также
summarize: в определении notify мы указываем, что item должен
реализовывать и Display, и Summary. Это можно сделать с помощью синтаксиса
+:
pub fn notify(item: &(impl Summary + Display)) {Синтаксис + также допустим с ограничениями трейтов для обобщенных типов:
pub fn notify<T: Summary + Display>(item: &T) {Когда указаны эти два ограничения трейтов, тело notify может вызывать
summarize и использовать {} для форматирования item.
Более понятные ограничения трейтов с предложениями where
У использования слишком большого количества ограничений трейтов есть свои
недостатки. У каждого обобщения есть собственные ограничения трейтов, поэтому
функции с несколькими параметрами обобщенных типов могут содержать много
информации об ограничениях трейтов между именем функции и списком параметров,
из-за чего сигнатуру функции становится трудно читать. По этой причине в Rust
есть альтернативный синтаксис для указания ограничений трейтов внутри
предложения where после сигнатуры функции. Поэтому вместо того чтобы писать
так:
fn some_function<T: Display + Clone, U: Clone + Debug>(t: &T, u: &U) -> i32 {можно использовать предложение where, вот так:
fn some_function<T, U>(t: &T, u: &U) -> i32
where
T: Display + Clone,
U: Clone + Debug,
{
unimplemented!()
}Сигнатура этой функции менее загромождена: имя функции, список параметров и возвращаемый тип находятся рядом, как у функции без большого количества ограничений трейтов.
Возврат типов, реализующих трейты
Мы также можем использовать синтаксис impl Trait в позиции возвращаемого
типа, чтобы вернуть значение некоторого типа, реализующего трейт, как показано
здесь:
pub trait Summary {
fn summarize(&self) -> String;
}
pub struct NewsArticle {
pub headline: String,
pub location: String,
pub author: String,
pub content: String,
}
impl Summary for NewsArticle {
fn summarize(&self) -> String {
format!("{}, by {} ({})", self.headline, self.author, self.location)
}
}
pub struct SocialPost {
pub username: String,
pub content: String,
pub reply: bool,
pub repost: bool,
}
impl Summary for SocialPost {
fn summarize(&self) -> String {
format!("{}: {}", self.username, self.content)
}
}
fn returns_summarizable() -> impl Summary {
SocialPost {
username: String::from("horse_ebooks"),
content: String::from(
"of course, as you probably already know, people",
),
reply: false,
repost: false,
}
}Используя impl Summary для возвращаемого типа, мы указываем, что функция
returns_summarizable возвращает некоторый тип, реализующий трейт Summary,
не называя конкретный тип. В этом случае returns_summarizable возвращает
SocialPost, но коду, вызывающему эту функцию, не нужно это знать.
Возможность указать возвращаемый тип только по трейту, который он реализует,
особенно полезна в контексте замыканий и итераторов, которые мы рассмотрим в
главе 13. Замыкания и итераторы создают типы, известные только компилятору,
или типы, которые очень долго записывать. Синтаксис impl Trait позволяет
кратко указать, что функция возвращает некоторый тип, реализующий трейт
Iterator, без необходимости выписывать очень длинный тип.
Однако использовать impl Trait можно только если вы возвращаете один
единственный тип. Например, этот код, возвращающий либо NewsArticle, либо
SocialPost с возвращаемым типом, указанным как impl Summary, не будет
работать:
pub trait Summary {
fn summarize(&self) -> String;
}
pub struct NewsArticle {
pub headline: String,
pub location: String,
pub author: String,
pub content: String,
}
impl Summary for NewsArticle {
fn summarize(&self) -> String {
format!("{}, by {} ({})", self.headline, self.author, self.location)
}
}
pub struct SocialPost {
pub username: String,
pub content: String,
pub reply: bool,
pub repost: bool,
}
impl Summary for SocialPost {
fn summarize(&self) -> String {
format!("{}: {}", self.username, self.content)
}
}
fn returns_summarizable(switch: bool) -> impl Summary {
if switch {
NewsArticle {
headline: String::from(
"Penguins win the Stanley Cup Championship!",
),
location: String::from("Pittsburgh, PA, USA"),
author: String::from("Iceburgh"),
content: String::from(
"The Pittsburgh Penguins once again are the best \
hockey team in the NHL.",
),
}
} else {
SocialPost {
username: String::from("horse_ebooks"),
content: String::from(
"of course, as you probably already know, people",
),
reply: false,
repost: false,
}
}
}Возвращать либо NewsArticle, либо SocialPost нельзя из-за ограничений того,
как синтаксис impl Trait реализован в компиляторе. Мы рассмотрим, как
написать функцию с таким поведением, в разделе «Использование трейт-объектов
для абстракции над общим поведением» главы 18.
Использование ограничений трейтов для условной реализации методов
Используя ограничение трейта с блоком impl, который применяет параметры
обобщенных типов, мы можем условно реализовывать методы для типов, реализующих
указанные трейты. Например, тип Pair<T> в листинге 10-15 всегда реализует
функцию new, возвращающую новый экземпляр Pair<T> (вспомните из раздела
«Синтаксис методов» главы 5, что Self – это
псевдоним типа для типа блока impl, которым в этом случае является
Pair<T>). Но в следующем блоке impl Pair<T> реализует метод
cmp_display только если его внутренний тип T реализует трейт PartialOrd,
который включает сравнение, и трейт Display, который включает печать.
use std::fmt::Display;
struct Pair<T> {
x: T,
y: T,
}
impl<T> Pair<T> {
fn new(x: T, y: T) -> Self {
Self { x, y }
}
}
impl<T: Display + PartialOrd> Pair<T> {
fn cmp_display(&self) {
if self.x >= self.y {
println!("The largest member is x = {}", self.x);
} else {
println!("The largest member is y = {}", self.y);
}
}
}Мы также можем условно реализовать трейт для любого типа, реализующего другой
трейт. Реализации трейта для любого типа, удовлетворяющего ограничениям
трейтов, называются blanket-реализациями и широко используются в стандартной
библиотеке Rust. Например, стандартная библиотека реализует трейт ToString
для любого типа, реализующего трейт Display. Блок impl в стандартной
библиотеке выглядит примерно так:
impl<T: Display> ToString for T {
// --snip--
}Поскольку в стандартной библиотеке есть такая blanket-реализация, мы можем
вызывать метод to_string, определенный трейтом ToString, для любого типа,
реализующего трейт Display. Например, мы можем превратить целые числа в
соответствующие значения String вот так, потому что целые числа реализуют
Display:
#![allow(unused)]
fn main() {
let s = 3.to_string();
}Blanket-реализации появляются в документации для трейта в разделе “Implementors”.
Трейты и ограничения трейтов позволяют писать код, который использует параметры обобщенных типов для уменьшения дублирования, но также указывать компилятору, что мы хотим, чтобы обобщенный тип обладал определенным поведением. Затем компилятор может использовать информацию об ограничениях трейтов, чтобы проверить, что все конкретные типы, используемые с нашим кодом, предоставляют правильное поведение. В языках с динамической типизацией мы получили бы ошибку во время выполнения, если бы вызвали метод для типа, у которого этот метод не определен. Но Rust переносит эти ошибки во время компиляции, чтобы мы были вынуждены исправить проблемы еще до того, как наш код сможет выполниться. Кроме того, нам не нужно писать код, который проверяет поведение во время выполнения, потому что мы уже проверили его во время компиляции. Это повышает производительность без необходимости отказываться от гибкости обобщений.
Проверка ссылок с помощью времён жизни
Проверка ссылок с помощью времен жизни
Времена жизни – еще один вид обобщений, который мы уже использовали. Вместо того чтобы гарантировать, что тип обладает нужным нам поведением, времена жизни гарантируют, что ссылки действительны настолько долго, насколько нам нужно.
Одна деталь, которую мы не обсуждали в разделе «Ссылки и заимствование» главы 4, состоит в том, что у каждой ссылки в Rust есть время жизни, то есть область видимости, в которой эта ссылка действительна. Большую часть времени времена жизни неявны и выводятся, так же как большую часть времени выводятся типы. Мы обязаны аннотировать типы только тогда, когда возможны несколько типов. Похожим образом мы должны аннотировать времена жизни, когда времена жизни ссылок могут быть связаны несколькими разными способами. Rust требует аннотировать эти связи с помощью обобщенных параметров времен жизни, чтобы гарантировать, что реальные ссылки, используемые во время выполнения, точно будут действительны.
Аннотирование времен жизни – это понятие, которого в большинстве других языков программирования даже нет, поэтому оно будет казаться непривычным. Хотя в этой главе мы не рассмотрим времена жизни полностью, мы обсудим типичные способы встретить синтаксис времен жизни, чтобы вы привыкли к этому понятию.
Висячие ссылки
Главная цель времен жизни – предотвращать висячие ссылки, которые, если бы их разрешили, заставляли бы программу ссылаться на данные, отличные от тех, на которые она должна ссылаться. Рассмотрим программу в листинге 10-16, где есть внешняя и внутренняя области видимости.
fn main() {
let r;
{
let x = 5;
r = &x;
}
println!("r: {r}");
}Примечание: примеры в листингах 10-16, 10-17 и 10-23 объявляют переменные, не задавая им начального значения, поэтому имя переменной существует во внешней области видимости. На первый взгляд это может показаться конфликтом с тем, что в Rust нет null-значений. Однако если мы попытаемся использовать переменную до присваивания ей значения, то получим ошибку времени компиляции, что показывает: Rust действительно не допускает null-значений.
Во внешней области видимости объявляется переменная с именем r без
начального значения, а во внутренней области видимости объявляется переменная с
именем x и начальным значением 5. Внутри внутренней области видимости мы
пытаемся установить значение r как ссылку на x. Затем внутренняя область
видимости завершается, и мы пытаемся напечатать значение в r. Этот код не
скомпилируется, потому что значение, на которое ссылается r, выходит из
области видимости до того, как мы пытаемся его использовать. Вот сообщение об
ошибке:
$ cargo run
Compiling chapter10 v0.1.0 (file:///projects/chapter10)
error[E0597]: `x` does not live long enough
--> src/main.rs:6:13
|
5 | let x = 5;
| - binding `x` declared here
6 | r = &x;
| ^^ borrowed value does not live long enough
7 | }
| - `x` dropped here while still borrowed
8 |
9 | println!("r: {r}");
| - borrow later used here
For more information about this error, try `rustc --explain E0597`.
error: could not compile `chapter10` (bin "chapter10") due to 1 previous error
Сообщение об ошибке говорит, что переменная x «живет недостаточно долго».
Причина в том, что x выйдет из области видимости, когда внутренняя область
закончится в строке 7. Но r все еще действительна для внешней области
видимости; поскольку ее область видимости больше, мы говорим, что она «живет
дольше». Если бы Rust разрешил этому коду работать, r ссылалась бы на
память, освобожденную после выхода x из области видимости, и все, что мы
попытались бы сделать с r, работало бы некорректно. Так как же Rust
определяет, что этот код недопустим? Он использует проверку заимствований.
Проверка заимствований
В компиляторе Rust есть проверка заимствований (borrow checker), которая сравнивает области видимости, чтобы определить, все ли заимствования действительны. Листинг 10-17 показывает тот же код, что и листинг 10-16, но с аннотациями, показывающими времена жизни переменных.
fn main() {
let r; // ---------+-- 'a
// |
{ // |
let x = 5; // -+-- 'b |
r = &x; // | |
} // -+ |
// |
println!("r: {r}"); // |
} // ---------+r и x, названных соответственно 'a и 'bЗдесь мы аннотировали время жизни r как 'a, а время жизни x как 'b.
Как видите, внутренний блок 'b намного меньше внешнего блока времени жизни
'a. Во время компиляции Rust сравнивает размеры двух времен жизни и видит,
что у r время жизни 'a, но она ссылается на память со временем жизни 'b.
Программа отклоняется, потому что 'b короче, чем 'a: объект ссылки живет
не так долго, как сама ссылка.
Листинг 10-18 исправляет код так, что в нем нет висячей ссылки, и он компилируется без ошибок.
fn main() {
let x = 5; // ----------+-- 'b
// |
let r = &x; // --+-- 'a |
// | |
println!("r: {r}"); // | |
// --+ |
} // ----------+Здесь у x время жизни 'b, которое в этом случае больше, чем 'a. Это
означает, что r может ссылаться на x, потому что Rust знает: ссылка в r
всегда будет действительна, пока x остается действительной.
Теперь, когда вы знаете, где находятся времена жизни ссылок и как Rust анализирует времена жизни, чтобы гарантировать, что ссылки всегда будут действительными, рассмотрим обобщенные времена жизни в параметрах функций и возвращаемых значениях.
Обобщенные времена жизни в функциях
Мы напишем функцию, которая возвращает более длинный из двух строковых срезов.
Эта функция будет принимать два строковых среза и возвращать один строковый
срез. После реализации функции longest код в листинге 10-19 должен напечатать
The longest string is abcd.
fn main() {
let string1 = String::from("abcd");
let string2 = "xyz";
let result = longest(string1.as_str(), string2);
println!("The longest string is {result}");
}main, которая вызывает функцию longest, чтобы найти более длинный из двух строковых срезовОбратите внимание, что мы хотим, чтобы функция принимала строковые срезы, то
есть ссылки, а не строки, потому что не хотим, чтобы функция longest
забирала владение своими параметрами. См. раздел «Строковые срезы как
параметры» главы 4, где подробнее
обсуждается, почему параметры, используемые в листинге 10-19, именно такие.
Если мы попытаемся реализовать функцию longest, как показано в листинге
10-20, она не скомпилируется.
fn main() {
let string1 = String::from("abcd");
let string2 = "xyz";
let result = longest(string1.as_str(), string2);
println!("The longest string is {result}");
}
fn longest(x: &str, y: &str) -> &str {
if x.len() > y.len() { x } else { y }
}longest, которая возвращает более длинный из двух строковых срезов, но пока не компилируетсяВместо этого мы получим следующую ошибку, связанную со временами жизни:
$ cargo run
Compiling chapter10 v0.1.0 (file:///projects/chapter10)
error[E0106]: missing lifetime specifier
--> src/main.rs:9:33
|
9 | fn longest(x: &str, y: &str) -> &str {
| ---- ---- ^ expected named lifetime parameter
|
= help: this function's return type contains a borrowed value, but the signature does not say whether it is borrowed from `x` or `y`
help: consider introducing a named lifetime parameter
|
9 | fn longest<'a>(x: &'a str, y: &'a str) -> &'a str {
| ++++ ++ ++ ++
For more information about this error, try `rustc --explain E0106`.
error: could not compile `chapter10` (bin "chapter10") due to 1 previous error
Текст помощи показывает, что возвращаемому типу нужен обобщенный параметр
времени жизни, потому что Rust не может понять, относится ли возвращаемая
ссылка к x или к y. На самом деле мы тоже этого не знаем, потому что блок
if в теле этой функции возвращает ссылку на x, а блок else возвращает
ссылку на y!
Когда мы определяем эту функцию, мы не знаем конкретных значений, которые
будут переданы в нее, поэтому не знаем, выполнится ветка if или ветка
else. Мы также не знаем конкретных времен жизни ссылок, которые будут
переданы, поэтому не можем посмотреть на области видимости, как делали в
листингах 10-17 и 10-18, чтобы определить, всегда ли возвращаемая ссылка будет
действительна. Проверка заимствований тоже не может этого определить, потому
что не знает, как времена жизни x и y связаны со временем жизни
возвращаемого значения. Чтобы исправить эту ошибку, мы добавим обобщенные
параметры времен жизни, которые определяют связь между ссылками, чтобы
проверка заимствований могла выполнить свой анализ.
Синтаксис аннотаций времен жизни
Аннотации времен жизни не изменяют длительность жизни каких-либо ссылок. Скорее, они описывают связи времен жизни нескольких ссылок друг с другом, не влияя на сами времена жизни. Так же как функции могут принимать любой тип, когда в сигнатуре указан параметр обобщенного типа, функции могут принимать ссылки с любым временем жизни, если указан обобщенный параметр времени жизни.
У аннотаций времен жизни немного необычный синтаксис: имена параметров времен
жизни должны начинаться с апострофа (') и обычно состоят только из строчных
букв и очень короткие, как имена обобщенных типов. Большинство людей
используют имя 'a для первой аннотации времени жизни. Мы помещаем аннотации
параметров времен жизни после & у ссылки, отделяя аннотацию от типа ссылки
пробелом.
Вот несколько примеров: ссылка на i32 без параметра времени жизни, ссылка на
i32 с параметром времени жизни с именем 'a и изменяемая ссылка на i32,
которая также имеет время жизни 'a:
&i32 // ссылка
&'a i32 // ссылка с явным временем жизни
&'a mut i32 // изменяемая ссылка с явным временем жизниОдна аннотация времени жизни сама по себе не имеет большого смысла, потому что
аннотации предназначены для того, чтобы сообщать Rust, как обобщенные параметры
времен жизни нескольких ссылок связаны друг с другом. Посмотрим, как аннотации
времен жизни связаны друг с другом в контексте функции longest.
В сигнатурах функций
Чтобы использовать аннотации времен жизни в сигнатурах функций, нужно объявить обобщенные параметры времен жизни внутри угловых скобок между именем функции и списком параметров, как мы делали с параметрами обобщенных типов.
Мы хотим, чтобы сигнатура выражала следующее ограничение: возвращаемая ссылка
будет действительна настолько долго, насколько действительны оба параметра.
Это связь между временами жизни параметров и возвращаемого значения. Мы
назовем время жизни 'a, а затем добавим его к каждой ссылке, как показано в
листинге 10-21.
fn main() {
let string1 = String::from("abcd");
let string2 = "xyz";
let result = longest(string1.as_str(), string2);
println!("The longest string is {result}");
}
fn longest<'a>(x: &'a str, y: &'a str) -> &'a str {
if x.len() > y.len() { x } else { y }
}longest, указывающее, что все ссылки в сигнатуре должны иметь одно и то же время жизни 'aЭтот код должен скомпилироваться и дать нужный нам результат, когда мы
используем его с функцией main из листинга 10-19.
Теперь сигнатура функции сообщает Rust, что для некоторого времени жизни 'a
функция принимает два параметра, оба из которых являются строковыми срезами,
живущими как минимум столько же, сколько время жизни 'a. Сигнатура функции
также сообщает Rust, что строковый срез, возвращаемый функцией, будет жить как
минимум столько же, сколько время жизни 'a. На практике это означает, что
время жизни ссылки, возвращенной функцией longest, совпадает с меньшим из
времен жизни значений, на которые ссылаются аргументы функции. Именно эти
связи мы хотим, чтобы Rust использовал при анализе этого кода.
Помните: когда мы указываем параметры времен жизни в этой сигнатуре функции,
мы не изменяем времена жизни каких-либо переданных или возвращаемых значений.
Скорее, мы указываем, что проверка заимствований должна отклонять любые
значения, которые не удовлетворяют этим ограничениям. Обратите внимание, что
функции longest не нужно точно знать, как долго будут жить x и y; ей
нужно знать только, что вместо 'a можно подставить некоторую область
видимости, удовлетворяющую этой сигнатуре.
При аннотировании времен жизни в функциях аннотации находятся в сигнатуре функции, а не в теле функции. Аннотации времен жизни становятся частью контракта функции, почти как типы в сигнатуре. Когда сигнатуры функций содержат контракт времен жизни, анализ, выполняемый компилятором Rust, может быть проще. Если есть проблема с тем, как функция аннотирована или как она вызвана, ошибки компилятора могут точнее указывать на часть нашего кода и на ограничения. Если бы вместо этого компилятор Rust делал больше выводов о том, какими мы предполагали связи времен жизни, он мог бы указать только на использование нашего кода, находящееся во многих шагах от причины проблемы.
Когда мы передаем конкретные ссылки в longest, конкретное время жизни,
подставляемое вместо 'a, является частью области видимости x, которая
пересекается с областью видимости y. Другими словами, обобщенное время жизни
'a получит конкретное время жизни, равное меньшему из времен жизни x и
y. Поскольку мы аннотировали возвращаемую ссылку тем же параметром времени
жизни 'a, возвращаемая ссылка также будет действительна в течение меньшего из
времен жизни x и y.
Посмотрим, как аннотации времен жизни ограничивают функцию longest, передав
ей ссылки с разными конкретными временами жизни. Листинг 10-22 – простой
пример.
fn main() {
let string1 = String::from("long string is long");
{
let string2 = String::from("xyz");
let result = longest(string1.as_str(), string2.as_str());
println!("The longest string is {result}");
}
}
fn longest<'a>(x: &'a str, y: &'a str) -> &'a str {
if x.len() > y.len() { x } else { y }
}longest со ссылками на значения String, имеющие разные конкретные времена жизниВ этом примере string1 действительна до конца внешней области видимости,
string2 действительна до конца внутренней области видимости, а result
ссылается на что-то, что действительно до конца внутренней области видимости.
Запустите этот код, и вы увидите, что проверка заимствований его одобряет: он
скомпилируется и напечатает The longest string is long string is long.
Теперь попробуем пример, который показывает, что время жизни ссылки в result
должно быть меньшим временем жизни из двух аргументов. Мы переместим
объявление переменной result за пределы внутренней области видимости, но
оставим присваивание значения переменной result внутри области видимости с
string2. Затем переместим println!, использующий result, за пределы
внутренней области видимости, после того как внутренняя область завершилась.
Код в листинге 10-23 не скомпилируется.
fn main() {
let string1 = String::from("long string is long");
let result;
{
let string2 = String::from("xyz");
result = longest(string1.as_str(), string2.as_str());
}
println!("The longest string is {result}");
}
fn longest<'a>(x: &'a str, y: &'a str) -> &'a str {
if x.len() > y.len() { x } else { y }
}result после выхода string2 из области видимостиКогда мы попытаемся скомпилировать этот код, получим такую ошибку:
$ cargo run
Compiling chapter10 v0.1.0 (file:///projects/chapter10)
error[E0597]: `string2` does not live long enough
--> src/main.rs:6:44
|
5 | let string2 = String::from("xyz");
| ------- binding `string2` declared here
6 | result = longest(string1.as_str(), string2.as_str());
| ^^^^^^^ borrowed value does not live long enough
7 | }
| - `string2` dropped here while still borrowed
8 | println!("The longest string is {result}");
| ------ borrow later used here
For more information about this error, try `rustc --explain E0597`.
error: could not compile `chapter10` (bin "chapter10") due to 1 previous error
Ошибка показывает, что для действительности result в инструкции println!
переменная string2 должна была бы быть действительной до конца внешней
области видимости. Rust знает это, потому что мы аннотировали времена жизни
параметров функции и возвращаемых значений одним и тем же параметром времени
жизни 'a.
Как люди, мы можем посмотреть на этот код и увидеть, что string1 длиннее,
чем string2, а значит result будет содержать ссылку на string1. Поскольку
string1 еще не вышла из области видимости, ссылка на string1 все еще будет
действительна для инструкции println!. Однако компилятор не может увидеть,
что в этом случае ссылка действительна. Мы сообщили Rust, что время жизни
ссылки, возвращаемой функцией longest, совпадает с меньшим из времен жизни
переданных ссылок. Поэтому проверка заимствований запрещает код из листинга
10-23 как потенциально содержащий недействительную ссылку.
Попробуйте спроектировать еще несколько экспериментов, изменяя значения и
времена жизни ссылок, передаваемых в функцию longest, а также способ
использования возвращаемой ссылки. До компиляции формулируйте гипотезы о том,
пройдут ли ваши эксперименты проверку заимствований, а затем проверяйте, правы
ли вы!
Связи
То, как именно нужно указывать параметры времен жизни, зависит от того, что
делает ваша функция. Например, если бы мы изменили реализацию функции
longest, чтобы она всегда возвращала первый параметр, а не самый длинный
строковый срез, нам не нужно было бы указывать время жизни для параметра y.
Следующий код скомпилируется:
fn main() {
let string1 = String::from("abcd");
let string2 = "efghijklmnopqrstuvwxyz";
let result = longest(string1.as_str(), string2);
println!("The longest string is {result}");
}
fn longest<'a>(x: &'a str, y: &str) -> &'a str {
x
}Мы указали параметр времени жизни 'a для параметра x и возвращаемого типа,
но не для параметра y, потому что время жизни y не связано ни со временем
жизни x, ни с возвращаемым значением.
Когда функция возвращает ссылку, параметр времени жизни возвращаемого типа
должен совпадать с параметром времени жизни одного из параметров. Если
возвращаемая ссылка не ссылается на один из параметров, она должна ссылаться
на значение, созданное внутри этой функции. Однако это была бы висячая ссылка,
потому что значение выйдет из области видимости в конце функции. Рассмотрим
попытку реализации функции longest, которая не скомпилируется:
fn main() {
let string1 = String::from("abcd");
let string2 = "xyz";
let result = longest(string1.as_str(), string2);
println!("The longest string is {result}");
}
fn longest<'a>(x: &str, y: &str) -> &'a str {
let result = String::from("really long string");
result.as_str()
}Здесь, хотя мы указали параметр времени жизни 'a для возвращаемого типа, эта
реализация не скомпилируется, потому что время жизни возвращаемого значения
вообще не связано со временем жизни параметров. Вот сообщение об ошибке,
которое мы получим:
$ cargo run
Compiling chapter10 v0.1.0 (file:///projects/chapter10)
error[E0515]: cannot return value referencing local variable `result`
--> src/main.rs:11:5
|
11 | result.as_str()
| ------^^^^^^^^^
| |
| returns a value referencing data owned by the current function
| `result` is borrowed here
For more information about this error, try `rustc --explain E0515`.
error: could not compile `chapter10` (bin "chapter10") due to 1 previous error
Проблема в том, что result выходит из области видимости и очищается в конце
функции longest. Мы также пытаемся вернуть из функции ссылку на result.
Нет такого способа указать параметры времен жизни, который изменил бы висячую
ссылку, и Rust не позволит нам создать висячую ссылку. В этом случае лучшим
исправлением будет вернуть владеющий тип данных, а не ссылку, чтобы вызывающая
функция затем отвечала за очистку значения.
В конечном счете синтаксис времен жизни нужен для связывания времен жизни различных параметров и возвращаемых значений функций. Когда они связаны, у Rust достаточно информации, чтобы разрешать безопасные для памяти операции и запрещать операции, которые создали бы висячие указатели или иным образом нарушили бы безопасность памяти.
В определениях структур
До сих пор все определенные нами структуры содержали владеющие типы. Мы можем
определять структуры, хранящие ссылки, но в таком случае нужно добавить
аннотацию времени жизни к каждой ссылке в определении структуры. В листинге
10-24 есть структура с именем ImportantExcerpt, которая хранит строковый
срез.
struct ImportantExcerpt<'a> {
part: &'a str,
}
fn main() {
let novel = String::from("Call me Ishmael. Some years ago...");
let first_sentence = novel.split('.').next().unwrap();
let i = ImportantExcerpt {
part: first_sentence,
};
}Эта структура имеет единственное поле part, которое хранит строковый срез, то
есть ссылку. Как и с обобщенными типами данных, мы объявляем имя обобщенного
параметра времени жизни внутри угловых скобок после имени структуры, чтобы
использовать параметр времени жизни в теле определения структуры. Эта аннотация
означает, что экземпляр ImportantExcerpt не может пережить ссылку, которую
он хранит в поле part.
Функция main здесь создает экземпляр структуры ImportantExcerpt, который
хранит ссылку на первое предложение из String, принадлежащей переменной
novel. Данные в novel существуют до создания экземпляра ImportantExcerpt.
Кроме того, novel не выходит из области видимости до тех пор, пока
ImportantExcerpt не выйдет из области видимости, поэтому ссылка в экземпляре
ImportantExcerpt действительна.
Опущение времен жизни
Вы узнали, что у каждой ссылки есть время жизни и что нужно указывать параметры времен жизни для функций или структур, использующих ссылки. Однако в листинге 4-9 у нас была функция, снова показанная в листинге 10-25, которая компилировалась без аннотаций времен жизни.
fn first_word(s: &str) -> &str {
let bytes = s.as_bytes();
for (i, &item) in bytes.iter().enumerate() {
if item == b' ' {
return &s[0..i];
}
}
&s[..]
}
fn main() {
let my_string = String::from("hello world");
// first_word works on slices of `String`s
let word = first_word(&my_string[..]);
let my_string_literal = "hello world";
// first_word works on slices of string literals
let word = first_word(&my_string_literal[..]);
// Because string literals *are* string slices already,
// this works too, without the slice syntax!
let word = first_word(my_string_literal);
}Причина, по которой эта функция компилируется без аннотаций времен жизни, историческая: в ранних версиях Rust (до 1.0) этот код не скомпилировался бы, потому что каждой ссылке требовалось явное время жизни. В то время сигнатура функции была бы записана так:
fn first_word<'a>(s: &'a str) -> &'a str {После написания большого количества кода на Rust команда Rust обнаружила, что Rust-программисты снова и снова вводили одни и те же аннотации времен жизни в определенных ситуациях. Эти ситуации были предсказуемыми и следовали нескольким детерминированным шаблонам. Разработчики внесли эти шаблоны в код компилятора, чтобы проверка заимствований могла выводить времена жизни в таких ситуациях и не требовала явных аннотаций.
Этот фрагмент истории Rust важен, потому что возможно появление новых детерминированных шаблонов, которые будут добавлены в компилятор. В будущем может потребоваться еще меньше аннотаций времен жизни.
Шаблоны, встроенные в анализ ссылок Rust, называются правилами опущения времен жизни (lifetime elision rules). Это не правила, которым должны следовать программисты; это набор конкретных случаев, которые компилятор рассматривает, и если ваш код подходит под эти случаи, вам не нужно писать времена жизни явно.
Правила опущения не обеспечивают полного вывода. Если после применения правил в Rust все еще остается неоднозначность относительно времен жизни ссылок, компилятор не будет гадать, какими должны быть времена жизни оставшихся ссылок. Вместо предположений компилятор выдаст ошибку, которую можно исправить добавлением аннотаций времен жизни.
Времена жизни у параметров функций или методов называются входными временами жизни, а времена жизни возвращаемых значений – выходными временами жизни.
Компилятор использует три правила, чтобы определить времена жизни ссылок,
когда явных аннотаций нет. Первое правило применяется к входным временам
жизни, а второе и третье – к выходным временам жизни. Если компилятор дойдет
до конца трех правил и все еще останутся ссылки, для которых он не сможет
определить времена жизни, компилятор остановится с ошибкой. Эти правила
применяются как к определениям fn, так и к блокам impl.
Первое правило: компилятор назначает параметр времени жизни каждому параметру,
который является ссылкой. Другими словами, функция с одним параметром получает
один параметр времени жизни: fn foo<'a>(x: &'a i32); функция с двумя
параметрами получает два отдельных параметра времени жизни:
fn foo<'a, 'b>(x: &'a i32, y: &'b i32); и так далее.
Второе правило: если есть ровно один входной параметр времени жизни, это время
жизни назначается всем выходным параметрам времени жизни: fn foo<'a>(x: &'a i32) -> &'a i32.
Третье правило: если есть несколько входных параметров времен жизни, но один из
них – &self или &mut self, потому что это метод, время жизни self
назначается всем выходным параметрам времен жизни. Это третье правило делает
методы намного приятнее читать и писать, потому что требуется меньше символов.
Представим, что мы компилятор. Применим эти правила, чтобы определить времена
жизни ссылок в сигнатуре функции first_word из листинга 10-25. Сигнатура
начинается без каких-либо времен жизни, связанных со ссылками:
fn first_word(s: &str) -> &str {Затем компилятор применяет первое правило, которое указывает, что каждый
параметр получает собственное время жизни. Как обычно, назовем его 'a, и
теперь сигнатура выглядит так:
fn first_word<'a>(s: &'a str) -> &str {Второе правило применяется, потому что есть ровно одно входное время жизни. Второе правило указывает, что время жизни единственного входного параметра назначается выходному времени жизни, поэтому теперь сигнатура выглядит так:
fn first_word<'a>(s: &'a str) -> &'a str {Теперь у всех ссылок в этой сигнатуре функции есть времена жизни, и компилятор может продолжить анализ без необходимости, чтобы программист аннотировал времена жизни в этой сигнатуре функции.
Посмотрим на другой пример, на этот раз с функцией longest, у которой не
было параметров времен жизни, когда мы начали работать с ней в листинге 10-20:
fn longest(x: &str, y: &str) -> &str {Применим первое правило: каждый параметр получает собственное время жизни. На этот раз у нас два параметра вместо одного, поэтому у нас два времени жизни:
fn longest<'a, 'b>(x: &'a str, y: &'b str) -> &str {Вы видите, что второе правило не применяется, потому что входных времен жизни
больше одного. Третье правило тоже не применяется, потому что longest – это
функция, а не метод, поэтому ни один из параметров не является self. После
применения всех трех правил мы все еще не выяснили, какое время жизни у
возвращаемого типа. Именно поэтому мы получили ошибку при попытке
скомпилировать код из листинга 10-20: компилятор прошел по правилам опущения
времен жизни, но все еще не смог определить все времена жизни ссылок в
сигнатуре.
Поскольку третье правило на самом деле применяется только в сигнатурах методов, дальше мы рассмотрим времена жизни именно в этом контексте, чтобы увидеть, почему благодаря третьему правилу нам редко приходится аннотировать времена жизни в сигнатурах методов.
В определениях методов
Когда мы реализуем методы для структуры со временами жизни, мы используем тот же синтаксис, что и для параметров обобщенных типов, как показано в листинге 10-11. Где объявлять и использовать параметры времен жизни, зависит от того, связаны ли они с полями структуры или с параметрами и возвращаемыми значениями методов.
Имена времен жизни для полей структуры всегда нужно объявлять после ключевого
слова impl, а затем использовать после имени структуры, потому что эти
времена жизни являются частью типа структуры.
В сигнатурах методов внутри блока impl ссылки могут быть связаны со временем
жизни ссылок в полях структуры или могут быть независимыми. Кроме того,
правила опущения времен жизни часто делают так, что аннотации времен жизни в
сигнатурах методов не нужны. Рассмотрим несколько примеров со структурой
ImportantExcerpt, которую мы определили в листинге 10-24.
Сначала используем метод с именем level, единственным параметром которого
является ссылка на self, а возвращаемым значением – i32, который не
является ссылкой ни на что:
struct ImportantExcerpt<'a> {
part: &'a str,
}
impl<'a> ImportantExcerpt<'a> {
fn level(&self) -> i32 {
3
}
}
impl<'a> ImportantExcerpt<'a> {
fn announce_and_return_part(&self, announcement: &str) -> &str {
println!("Attention please: {announcement}");
self.part
}
}
fn main() {
let novel = String::from("Call me Ishmael. Some years ago...");
let first_sentence = novel.split('.').next().unwrap();
let i = ImportantExcerpt {
part: first_sentence,
};
}Объявление параметра времени жизни после impl и его использование после
имени типа обязательны, но благодаря первому правилу опущения мы не обязаны
аннотировать время жизни ссылки на self.
Вот пример, где применяется третье правило опущения времен жизни:
struct ImportantExcerpt<'a> {
part: &'a str,
}
impl<'a> ImportantExcerpt<'a> {
fn level(&self) -> i32 {
3
}
}
impl<'a> ImportantExcerpt<'a> {
fn announce_and_return_part(&self, announcement: &str) -> &str {
println!("Attention please: {announcement}");
self.part
}
}
fn main() {
let novel = String::from("Call me Ishmael. Some years ago...");
let first_sentence = novel.split('.').next().unwrap();
let i = ImportantExcerpt {
part: first_sentence,
};
}Есть два входных времени жизни, поэтому Rust применяет первое правило опущения
времен жизни и дает собственные времена жизни и &self, и announcement.
Затем, поскольку один из параметров – &self, возвращаемый тип получает
время жизни &self, и все времена жизни оказываются учтены.
Статическое время жизни
Одно особое время жизни, которое нужно обсудить, – это 'static, означающее,
что затронутая ссылка может жить в течение всего времени работы программы.
Все строковые литералы имеют время жизни 'static, которое можно аннотировать
следующим образом:
#![allow(unused)]
fn main() {
let s: &'static str = "I have a static lifetime.";
}Текст этой строки хранится прямо в бинарном файле программы, который всегда
доступен. Поэтому время жизни всех строковых литералов – 'static.
В сообщениях об ошибках вы можете увидеть предложения использовать время жизни
'static. Но прежде чем указывать 'static как время жизни для ссылки,
подумайте, действительно ли имеющаяся у вас ссылка живет все время работы
программы и хотите ли вы этого. Чаще всего сообщение об ошибке, предлагающее
время жизни 'static, возникает из-за попытки создать висячую ссылку или из-за
несоответствия доступных времен жизни. В таких случаях решение – исправить эти
проблемы, а не указывать время жизни 'static.
Параметры обобщенных типов, ограничения трейтов и времена жизни вместе
Коротко посмотрим на синтаксис указания параметров обобщенных типов, ограничений трейтов и времен жизни вместе в одной функции!
fn main() {
let string1 = String::from("abcd");
let string2 = "xyz";
let result = longest_with_an_announcement(
string1.as_str(),
string2,
"Today is someone's birthday!",
);
println!("The longest string is {result}");
}
use std::fmt::Display;
fn longest_with_an_announcement<'a, T>(
x: &'a str,
y: &'a str,
ann: T,
) -> &'a str
where
T: Display,
{
println!("Announcement! {ann}");
if x.len() > y.len() { x } else { y }
}Это функция longest из листинга 10-21, которая возвращает более длинный из
двух строковых срезов. Но теперь у нее есть дополнительный параметр с именем
ann обобщенного типа T, вместо которого можно подставить любой тип,
реализующий трейт Display, как указано предложением where. Этот
дополнительный параметр будет напечатан с помощью {}, поэтому ограничение
трейта Display необходимо. Поскольку времена жизни являются разновидностью
обобщений, объявления параметра времени жизни 'a и параметра обобщенного
типа T находятся в одном списке внутри угловых скобок после имени функции.
Итоги
В этой главе мы рассмотрели многое! Теперь, когда вы знаете о параметрах обобщенных типов, трейтах и ограничениях трейтов, а также об обобщенных параметрах времен жизни, вы готовы писать код без повторений, работающий во множестве разных ситуаций. Параметры обобщенных типов позволяют применять код к разным типам. Трейты и ограничения трейтов гарантируют, что, даже если типы обобщенные, у них будет поведение, необходимое коду. Вы узнали, как использовать аннотации времен жизни, чтобы гарантировать, что в этом гибком коде не будет висячих ссылок. И весь этот анализ происходит во время компиляции, что не влияет на производительность во время выполнения!
Хотите верьте, хотите нет, но по темам, которые мы обсуждали в этой главе, можно узнать еще многое: глава 18 обсуждает трейт-объекты, еще один способ использовать трейты. Также есть более сложные сценарии с аннотациями времен жизни, которые понадобятся только в очень продвинутых случаях; о них следует прочитать в Rust Reference. Но дальше вы узнаете, как писать тесты в Rust, чтобы убедиться, что ваш код работает так, как должен.
Написание автоматизированных тестов
В своем эссе 1972 года «Скромный программист» Эдсгер В. Дейкстра сказал, что «тестирование программы может быть очень эффективным способом показать наличие ошибок, но совершенно непригодно для доказательства их отсутствия». Это не значит, что мы не должны стараться тестировать как можно больше!
Корректность наших программ – это степень, в которой код делает то, что мы от него ожидаем. Rust спроектирован с большим вниманием к корректности программ, но корректность сложна, и доказать ее непросто. Система типов Rust берет на себя огромную часть этой нагрузки, но она не может поймать все ошибки. Поэтому Rust включает поддержку написания автоматизированных тестов программного обеспечения.
Допустим, мы пишем функцию add_two, которая прибавляет 2 к любому переданному
ей числу. Сигнатура этой функции принимает целое число как параметр и
возвращает целое число как результат. Когда мы реализуем и компилируем эту
функцию, Rust выполняет все проверки типов и проверки заимствований, которые
вы уже изучили, чтобы гарантировать, например, что мы не передаем в эту
функцию значение String или недействительную ссылку. Но Rust не может
проверить, что эта функция сделает ровно то, что мы задумали: вернет параметр
плюс 2, а не, скажем, параметр плюс 10 или параметр минус 50! Именно здесь
нужны тесты.
Мы можем написать тесты, которые утверждают, например, что при передаче 3 в
функцию add_two возвращаемое значение равно 5. Мы можем запускать эти
тесты каждый раз, когда меняем код, чтобы убедиться, что существующее
правильное поведение не изменилось.
Тестирование – сложный навык: хотя в одной главе невозможно охватить каждую деталь написания хороших тестов, в этой главе мы обсудим механику средств тестирования Rust. Мы поговорим об аннотациях и макросах, доступных при написании тестов, о поведении по умолчанию и параметрах запуска тестов, а также о том, как организовывать тесты в модульные и интеграционные тесты.
Как писать тесты
Как писать тесты
Тесты в Rust – это функции, которые проверяют, что код, не являющийся тестовым, работает ожидаемым образом. Тела тестовых функций обычно выполняют три действия:
- Подготавливают необходимые данные или состояние.
- Запускают код, который нужно проверить.
- Проверяют, что результаты соответствуют ожиданиям.
Рассмотрим возможности, которые Rust предоставляет специально для написания
тестов, выполняющих эти действия: атрибут test, несколько макросов и атрибут
should_panic.
Структура тестовых функций
В самом простом виде тест в Rust – это функция, помеченная атрибутом test.
Атрибуты – это метаданные о частях кода Rust; один пример – атрибут derive,
который мы использовали со структурами в главе 5. Чтобы превратить функцию в
тестовую, добавьте #[test] в строке перед fn. Когда вы запускаете тесты
командой cargo test, Rust собирает бинарный файл запуска тестов, который
выполняет помеченные функции и сообщает, прошла или провалилась каждая
тестовая функция.
Каждый раз, когда мы создаем новый библиотечный проект с помощью Cargo, для нас автоматически создается тестовый модуль с тестовой функцией внутри. Этот модуль дает шаблон для написания тестов, чтобы вам не приходилось каждый раз при создании нового проекта искать точную структуру и синтаксис. Можно добавлять сколько угодно дополнительных тестовых функций и тестовых модулей!
Мы изучим некоторые стороны работы тестов, экспериментируя с шаблонным тестом, прежде чем начнем проверять настоящий код. Затем напишем более практичные тесты, которые вызывают написанный нами код и проверяют, что его поведение корректно.
Создадим новый библиотечный проект с именем adder, который будет складывать
два числа:
$ cargo new adder --lib
Created library `adder` project
$ cd adder
Содержимое файла src/lib.rs в вашей библиотеке adder должно выглядеть как
в листинге 11-1.
pub fn add(left: u64, right: u64) -> u64 {
left + right
}
#[cfg(test)]
mod tests {
use super::*;
#[test]
fn it_works() {
let result = add(2, 2);
assert_eq!(result, 4);
}
}cargo newФайл начинается с примерной функции add, чтобы нам было что тестировать.
Пока сосредоточимся только на функции it_works. Обратите внимание на
аннотацию #[test]: этот атрибут указывает, что функция является тестовой, и
запускатель тестов знает, что ее нужно рассматривать как тест. В модуле
tests у нас также могут быть функции, не являющиеся тестами, чтобы помогать
подготавливать общие сценарии или выполнять общие операции, поэтому всегда
нужно указывать, какие функции являются тестами.
Тело примерной функции использует макрос assert_eq!, чтобы проверить, что
result, содержащий результат вызова add с 2 и 2, равен 4. Это утверждение
служит примером формата типичного теста. Запустим его и убедимся, что тест
проходит.
Команда cargo test запускает все тесты в нашем проекте, как показано в
листинге 11-2.
$ cargo test
Compiling adder v0.1.0 (file:///projects/adder)
Finished `test` profile [unoptimized + debuginfo] target(s) in 0.57s
Running unittests src/lib.rs (target/debug/deps/adder-01ad14159ff659ab)
running 1 test
test tests::it_works ... ok
test result: ok. 1 passed; 0 failed; 0 ignored; 0 measured; 0 filtered out; finished in 0.00s
Doc-tests adder
running 0 tests
test result: ok. 0 passed; 0 failed; 0 ignored; 0 measured; 0 filtered out; finished in 0.00s
Cargo скомпилировал и запустил тест. Мы видим строку running 1 test.
Следующая строка показывает имя сгенерированной тестовой функции,
tests::it_works, и то, что результат запуска этого теста – ok. Общая
сводка test result: ok. означает, что все тесты прошли, а часть 1 passed; 0 failed суммирует количество прошедших и провалившихся тестов.
Тест можно пометить как игнорируемый, чтобы в конкретном запуске он не
выполнялся; мы рассмотрим это позже в этой главе, в разделе «Игнорирование
тестов, если они не запрошены явно». Поскольку здесь
мы этого не делали, сводка показывает 0 ignored. Команде cargo test также
можно передать аргумент, чтобы запускались только тесты, имя которых совпадает
со строкой; это называется фильтрацией, и мы рассмотрим ее в разделе
«Запуск подмножества тестов по имени». Здесь мы не
фильтровали запускаемые тесты, поэтому в конце сводки показано 0 filtered out.
Статистика 0 measured относится к benchmark-тестам, измеряющим
производительность. На момент написания benchmark-тесты доступны только в
nightly Rust. Подробнее см. документацию по benchmark-тестам.
Следующая часть вывода тестов, начинающаяся с Doc-tests adder, относится к
результатам тестов документации. У нас пока нет тестов документации, но Rust
может компилировать любые примеры кода, встречающиеся в API-документации. Эта
возможность помогает поддерживать документацию и код в согласованном
состоянии! О том, как писать тесты документации, мы поговорим в разделе
«Комментарии документации как тесты» главы 14.
Пока мы проигнорируем вывод Doc-tests.
Начнем настраивать тест под свои нужды. Сначала изменим имя функции it_works
на другое, например exploration, вот так:
Файл: src/lib.rs
pub fn add(left: u64, right: u64) -> u64 {
left + right
}
#[cfg(test)]
mod tests {
use super::*;
#[test]
fn exploration() {
let result = add(2, 2);
assert_eq!(result, 4);
}
}Затем снова запустим cargo test. Теперь в выводе будет показано
exploration вместо it_works:
$ cargo test
Compiling adder v0.1.0 (file:///projects/adder)
Finished `test` profile [unoptimized + debuginfo] target(s) in 0.59s
Running unittests src/lib.rs (target/debug/deps/adder-92948b65e88960b4)
running 1 test
test tests::exploration ... ok
test result: ok. 1 passed; 0 failed; 0 ignored; 0 measured; 0 filtered out; finished in 0.00s
Doc-tests adder
running 0 tests
test result: ok. 0 passed; 0 failed; 0 ignored; 0 measured; 0 filtered out; finished in 0.00s
Теперь добавим еще один тест, но на этот раз сделаем тест, который
проваливается! Тесты проваливаются, когда что-то в тестовой функции паникует.
Каждый тест запускается в новом потоке, и когда главный поток видит, что поток
теста завершился аварийно, тест помечается как провалившийся. В главе 9 мы
говорили, что самый простой способ вызвать панику – вызвать макрос panic!.
Введите новый тест как функцию с именем another, чтобы ваш файл src/lib.rs
выглядел как в листинге 11-3.
pub fn add(left: u64, right: u64) -> u64 {
left + right
}
#[cfg(test)]
mod tests {
use super::*;
#[test]
fn exploration() {
let result = add(2, 2);
assert_eq!(result, 4);
}
#[test]
fn another() {
panic!("Make this test fail");
}
}panic!Снова запустите тесты с помощью cargo test. Вывод должен выглядеть как в
листинге 11-4: он показывает, что тест exploration прошел, а another
провалился.
$ cargo test
Compiling adder v0.1.0 (file:///projects/adder)
Finished `test` profile [unoptimized + debuginfo] target(s) in 0.72s
Running unittests src/lib.rs (target/debug/deps/adder-92948b65e88960b4)
running 2 tests
test tests::another ... FAILED
test tests::exploration ... ok
failures:
---- tests::another stdout ----
thread 'tests::another' panicked at src/lib.rs:17:9:
Make this test fail
note: run with `RUST_BACKTRACE=1` environment variable to display a backtrace
failures:
tests::another
test result: FAILED. 1 passed; 1 failed; 0 ignored; 0 measured; 0 filtered out; finished in 0.00s
error: test failed, to rerun pass `--lib`
Вместо ok строка test tests::another показывает FAILED. Между
отдельными результатами и сводкой появляются два новых раздела: первый
показывает подробную причину каждого сбоя теста. В этом случае мы получаем
подробности о том, что tests::another провалился, потому что запаниковал с
сообщением Make this test fail в строке 17 файла src/lib.rs. Следующий
раздел перечисляет только имена всех провалившихся тестов, что полезно, когда
тестов много и подробного вывода об ошибках тоже много. Мы можем использовать
имя провалившегося теста, чтобы запустить только его и проще отладить; подробнее
о способах запуска тестов мы поговорим в разделе «Управление запуском
тестов».
В конце выводится строка сводки: в целом результат наших тестов – FAILED.
Один тест прошел, и один тест провалился.
Теперь, когда вы увидели, как выглядят результаты тестов в разных сценариях,
рассмотрим несколько полезных в тестах макросов, кроме panic!.
Проверка результатов с помощью assert!
Макрос assert!, предоставляемый стандартной библиотекой, полезен, когда
нужно убедиться, что некоторое условие в тесте вычисляется в true. Мы
передаем макросу assert! аргумент, который вычисляется в логическое
значение. Если значение равно true, ничего не происходит и тест проходит.
Если значение равно false, макрос assert! вызывает panic!, чтобы тест
провалился. Использование макроса assert! помогает проверить, что наш код
работает так, как мы задумали.
В главе 5, в листинге 5-15, мы использовали структуру Rectangle и метод
can_hold; они повторены здесь, в листинге 11-5. Поместим этот код в файл
src/lib.rs, а затем напишем для него тесты с помощью макроса assert!.
#[derive(Debug)]
struct Rectangle {
width: u32,
height: u32,
}
impl Rectangle {
fn can_hold(&self, other: &Rectangle) -> bool {
self.width > other.width && self.height > other.height
}
}Rectangle и ее метод can_hold из главы 5Метод can_hold возвращает логическое значение, а значит он идеально подходит
для макроса assert!. В листинге 11-6 мы пишем тест, который проверяет метод
can_hold: создаем экземпляр Rectangle с шириной 8 и высотой 7 и утверждаем,
что он может вместить другой экземпляр Rectangle с шириной 5 и высотой 1.
#[derive(Debug)]
struct Rectangle {
width: u32,
height: u32,
}
impl Rectangle {
fn can_hold(&self, other: &Rectangle) -> bool {
self.width > other.width && self.height > other.height
}
}
#[cfg(test)]
mod tests {
use super::*;
#[test]
fn larger_can_hold_smaller() {
let larger = Rectangle {
width: 8,
height: 7,
};
let smaller = Rectangle {
width: 5,
height: 1,
};
assert!(larger.can_hold(&smaller));
}
}can_hold, проверяющий, действительно ли больший прямоугольник может вместить меньшийОбратите внимание на строку use super::*; внутри модуля tests. Модуль
tests – обычный модуль, который подчиняется привычным правилам видимости,
рассмотренным в главе 7 в разделе «Пути для ссылки на элемент в дереве
модулей».
Поскольку модуль tests является внутренним модулем, нам нужно ввести
тестируемый код из внешнего модуля в область видимости внутреннего модуля.
Здесь мы используем glob-импорт, поэтому все, что мы определим во внешнем
модуле, будет доступно этому модулю tests.
Мы назвали тест larger_can_hold_smaller и создали два нужных экземпляра
Rectangle. Затем вызвали макрос assert! и передали ему результат вызова
larger.can_hold(&smaller). Это выражение должно вернуть true, поэтому наш
тест должен пройти. Проверим!
$ cargo test
Compiling rectangle v0.1.0 (file:///projects/rectangle)
Finished `test` profile [unoptimized + debuginfo] target(s) in 0.66s
Running unittests src/lib.rs (target/debug/deps/rectangle-6584c4561e48942e)
running 1 test
test tests::larger_can_hold_smaller ... ok
test result: ok. 1 passed; 0 failed; 0 ignored; 0 measured; 0 filtered out; finished in 0.00s
Doc-tests rectangle
running 0 tests
test result: ok. 0 passed; 0 failed; 0 ignored; 0 measured; 0 filtered out; finished in 0.00s
Он действительно проходит! Добавим еще один тест, на этот раз утверждая, что меньший прямоугольник не может вместить больший:
Файл: src/lib.rs
#[derive(Debug)]
struct Rectangle {
width: u32,
height: u32,
}
impl Rectangle {
fn can_hold(&self, other: &Rectangle) -> bool {
self.width > other.width && self.height > other.height
}
}
#[cfg(test)]
mod tests {
use super::*;
#[test]
fn larger_can_hold_smaller() {
// --snip--
let larger = Rectangle {
width: 8,
height: 7,
};
let smaller = Rectangle {
width: 5,
height: 1,
};
assert!(larger.can_hold(&smaller));
}
#[test]
fn smaller_cannot_hold_larger() {
let larger = Rectangle {
width: 8,
height: 7,
};
let smaller = Rectangle {
width: 5,
height: 1,
};
assert!(!smaller.can_hold(&larger));
}
}Поскольку правильный результат функции can_hold в этом случае – false,
нужно отрицать этот результат перед передачей в макрос assert!. В результате
наш тест пройдет, если can_hold вернет false:
$ cargo test
Compiling rectangle v0.1.0 (file:///projects/rectangle)
Finished `test` profile [unoptimized + debuginfo] target(s) in 0.66s
Running unittests src/lib.rs (target/debug/deps/rectangle-6584c4561e48942e)
running 2 tests
test tests::larger_can_hold_smaller ... ok
test tests::smaller_cannot_hold_larger ... ok
test result: ok. 2 passed; 0 failed; 0 ignored; 0 measured; 0 filtered out; finished in 0.00s
Doc-tests rectangle
running 0 tests
test result: ok. 0 passed; 0 failed; 0 ignored; 0 measured; 0 filtered out; finished in 0.00s
Два теста проходят! Теперь посмотрим, что произойдет с результатами тестов,
если мы внесем ошибку в код. Изменим реализацию метода can_hold, заменив
знак «больше» (>) на знак «меньше» (<) при сравнении ширины:
#[derive(Debug)]
struct Rectangle {
width: u32,
height: u32,
}
// --snip--
impl Rectangle {
fn can_hold(&self, other: &Rectangle) -> bool {
self.width < other.width && self.height > other.height
}
}
#[cfg(test)]
mod tests {
use super::*;
#[test]
fn larger_can_hold_smaller() {
let larger = Rectangle {
width: 8,
height: 7,
};
let smaller = Rectangle {
width: 5,
height: 1,
};
assert!(larger.can_hold(&smaller));
}
#[test]
fn smaller_cannot_hold_larger() {
let larger = Rectangle {
width: 8,
height: 7,
};
let smaller = Rectangle {
width: 5,
height: 1,
};
assert!(!smaller.can_hold(&larger));
}
}Теперь запуск тестов дает следующий результат:
$ cargo test
Compiling rectangle v0.1.0 (file:///projects/rectangle)
Finished `test` profile [unoptimized + debuginfo] target(s) in 0.66s
Running unittests src/lib.rs (target/debug/deps/rectangle-6584c4561e48942e)
running 2 tests
test tests::larger_can_hold_smaller ... FAILED
test tests::smaller_cannot_hold_larger ... ok
failures:
---- tests::larger_can_hold_smaller stdout ----
thread 'tests::larger_can_hold_smaller' panicked at src/lib.rs:28:9:
assertion failed: larger.can_hold(&smaller)
note: run with `RUST_BACKTRACE=1` environment variable to display a backtrace
failures:
tests::larger_can_hold_smaller
test result: FAILED. 1 passed; 1 failed; 0 ignored; 0 measured; 0 filtered out; finished in 0.00s
error: test failed, to rerun pass `--lib`
Наши тесты поймали ошибку! Поскольку larger.width равна 8, а
smaller.width равна 5, сравнение ширины в can_hold теперь возвращает
false: 8 не меньше 5.
Проверка равенства с помощью assert_eq! и assert_ne!
Распространенный способ проверить функциональность – сравнить результат
тестируемого кода со значением, которое вы ожидаете получить. Это можно
сделать с помощью макроса assert!, передав ему выражение с оператором ==.
Однако такая проверка встречается настолько часто, что стандартная библиотека
предоставляет пару макросов – assert_eq! и assert_ne!, – чтобы выполнять
ее удобнее. Эти макросы сравнивают два аргумента на равенство или неравенство
соответственно. Если проверка провалится, они также напечатают оба
значения, благодаря чему проще увидеть, почему тест не прошел; в отличие от
них, макрос assert! только сообщает, что получил значение false для
выражения ==, не печатая значения, которые привели к false.
В листинге 11-7 мы пишем функцию с именем add_two, которая прибавляет 2 к
своему параметру, а затем тестируем ее с помощью макроса assert_eq!.
pub fn add_two(a: u64) -> u64 {
a + 2
}
#[cfg(test)]
mod tests {
use super::*;
#[test]
fn it_adds_two() {
let result = add_two(2);
assert_eq!(result, 4);
}
}add_two с помощью макроса assert_eq!Проверим, что тест проходит!
$ cargo test
Compiling adder v0.1.0 (file:///projects/adder)
Finished `test` profile [unoptimized + debuginfo] target(s) in 0.58s
Running unittests src/lib.rs (target/debug/deps/adder-92948b65e88960b4)
running 1 test
test tests::it_adds_two ... ok
test result: ok. 1 passed; 0 failed; 0 ignored; 0 measured; 0 filtered out; finished in 0.00s
Doc-tests adder
running 0 tests
test result: ok. 0 passed; 0 failed; 0 ignored; 0 measured; 0 filtered out; finished in 0.00s
Мы создаем переменную с именем result, которая хранит результат вызова
add_two(2). Затем передаем result и 4 как аргументы макросу
assert_eq!. Строка вывода для этого теста – test tests::it_adds_two ... ok, и текст ok указывает, что тест прошел!
Внесем ошибку в код, чтобы увидеть, как выглядит assert_eq!, когда тест не
проходит. Измените реализацию функции add_two, чтобы она вместо этого
прибавляла 3:
pub fn add_two(a: u64) -> u64 {
a + 3
}
#[cfg(test)]
mod tests {
use super::*;
#[test]
fn it_adds_two() {
let result = add_two(2);
assert_eq!(result, 4);
}
}Снова запустите тесты:
$ cargo test
Compiling adder v0.1.0 (file:///projects/adder)
Finished `test` profile [unoptimized + debuginfo] target(s) in 0.61s
Running unittests src/lib.rs (target/debug/deps/adder-92948b65e88960b4)
running 1 test
test tests::it_adds_two ... FAILED
failures:
---- tests::it_adds_two stdout ----
thread 'tests::it_adds_two' panicked at src/lib.rs:12:9:
assertion `left == right` failed
left: 5
right: 4
note: run with `RUST_BACKTRACE=1` environment variable to display a backtrace
failures:
tests::it_adds_two
test result: FAILED. 0 passed; 1 failed; 0 ignored; 0 measured; 0 filtered out; finished in 0.00s
error: test failed, to rerun pass `--lib`
Наш тест поймал ошибку! Тест tests::it_adds_two провалился, и сообщение
говорит, что провалившаяся проверка была left == right, а также показывает
значения left и right. Это сообщение помогает начать отладку: аргумент
left, где был результат вызова add_two(2), равен 5, а аргумент right
равен 4. Можно представить, насколько это особенно полезно, когда идет много
тестов.
Обратите внимание, что в некоторых языках и тестовых фреймворках параметры
функций проверки равенства называются expected и actual, и порядок
указания аргументов важен. Однако в Rust они называются left и right, и
порядок, в котором мы указываем ожидаемое значение и значение, произведенное
кодом, не важен. Мы могли бы записать утверждение в этом тесте как
assert_eq!(4, result), что привело бы к тому же сообщению об ошибке, где
показано assertion `left == right` failed.
Макрос assert_ne! пройдет, если два переданных ему значения не равны, и
провалится, если они равны. Этот макрос наиболее полезен в случаях, когда мы
не уверены, каким значение будет, но точно знаем, каким оно не должно
быть. Например, если мы тестируем функцию, которая гарантированно каким-то
образом изменяет свой вход, но то, как именно вход меняется, зависит от дня
недели, когда мы запускаем тесты, лучшим утверждением может быть то, что вывод
функции не равен входу.
Под капотом макросы assert_eq! и assert_ne! используют операторы == и
!= соответственно. Когда утверждения проваливаются, эти макросы печатают
свои аргументы с помощью отладочного форматирования, а значит сравниваемые
значения должны реализовывать трейты PartialEq и Debug. Все примитивные
типы и большинство типов стандартной библиотеки реализуют эти трейты. Для
структур и enum, которые вы определяете сами, нужно реализовать PartialEq,
чтобы утверждать равенство таких типов. Также нужно реализовать Debug, чтобы
печатать значения при провале утверждения. Поскольку оба трейта являются
выводимыми, как упоминалось в листинге 5-12 главы 5, обычно достаточно
добавить аннотацию #[derive(PartialEq, Debug)] к определению структуры или
enum. Подробнее об этих и других выводимых трейтах см. приложение C,
«Выводимые трейты».
Добавление собственных сообщений об ошибках
К сообщениям о сбое можно добавить собственное сообщение как необязательные
аргументы макросов assert!, assert_eq! и assert_ne!. Любые аргументы,
указанные после обязательных, передаются макросу format! (он обсуждался в
разделе «Конкатенация с помощью + или
format!» главы 8), поэтому можно передать
строку формата с заполнителями {} и значения для этих заполнителей.
Собственные сообщения полезны для документирования смысла проверки; когда
тест проваливается, вам будет проще понять, в чем проблема с кодом.
Например, допустим, у нас есть функция, которая приветствует людей по имени, и мы хотим проверить, что имя, переданное в функцию, присутствует в выводе:
Файл: src/lib.rs
pub fn greeting(name: &str) -> String {
format!("Hello {name}!")
}
#[cfg(test)]
mod tests {
use super::*;
#[test]
fn greeting_contains_name() {
let result = greeting("Carol");
assert!(result.contains("Carol"));
}
}Требования к этой программе еще не согласованы, и мы почти уверены, что текст
Hello в начале приветствия изменится. Мы решили, что не хотим обновлять тест
при изменении требований, поэтому вместо проверки точного равенства значению,
возвращаемому функцией greeting, мы просто утверждаем, что вывод содержит
текст входного параметра.
Теперь внесем ошибку в этот код, изменив greeting так, чтобы она исключала
name, и посмотрим, как выглядит сообщение о провале теста по умолчанию:
pub fn greeting(name: &str) -> String {
String::from("Hello!")
}
#[cfg(test)]
mod tests {
use super::*;
#[test]
fn greeting_contains_name() {
let result = greeting("Carol");
assert!(result.contains("Carol"));
}
}Запуск этого теста дает следующий результат:
$ cargo test
Compiling greeter v0.1.0 (file:///projects/greeter)
Finished `test` profile [unoptimized + debuginfo] target(s) in 0.91s
Running unittests src/lib.rs (target/debug/deps/greeter-170b942eb5bf5e3a)
running 1 test
test tests::greeting_contains_name ... FAILED
failures:
---- tests::greeting_contains_name stdout ----
thread 'tests::greeting_contains_name' panicked at src/lib.rs:12:9:
assertion failed: result.contains("Carol")
note: run with `RUST_BACKTRACE=1` environment variable to display a backtrace
failures:
tests::greeting_contains_name
test result: FAILED. 0 passed; 1 failed; 0 ignored; 0 measured; 0 filtered out; finished in 0.00s
error: test failed, to rerun pass `--lib`
Этот результат только показывает, что проверка провалилась, и указывает
строку, на которой она находится. Более полезное сообщение о сбое напечатало
бы значение, возвращенное функцией greeting. Добавим собственное сообщение об
ошибке, составленное из строки формата с заполнителем, заполненным фактическим
значением, которое мы получили от функции greeting:
pub fn greeting(name: &str) -> String {
String::from("Hello!")
}
#[cfg(test)]
mod tests {
use super::*;
#[test]
fn greeting_contains_name() {
let result = greeting("Carol");
assert!(
result.contains("Carol"),
"Greeting did not contain name, value was `{result}`"
);
}
}Теперь при запуске теста мы получим более информативное сообщение об ошибке:
$ cargo test
Compiling greeter v0.1.0 (file:///projects/greeter)
Finished `test` profile [unoptimized + debuginfo] target(s) in 0.93s
Running unittests src/lib.rs (target/debug/deps/greeter-170b942eb5bf5e3a)
running 1 test
test tests::greeting_contains_name ... FAILED
failures:
---- tests::greeting_contains_name stdout ----
thread 'tests::greeting_contains_name' panicked at src/lib.rs:12:9:
Greeting did not contain name, value was `Hello!`
note: run with `RUST_BACKTRACE=1` environment variable to display a backtrace
failures:
tests::greeting_contains_name
test result: FAILED. 0 passed; 1 failed; 0 ignored; 0 measured; 0 filtered out; finished in 0.00s
error: test failed, to rerun pass `--lib`
Мы видим значение, которое действительно получили, прямо в выводе теста; это поможет отладить, что произошло, вместо того чтобы только гадать, чего мы ожидали.
Проверка паник с помощью should_panic
Помимо проверки возвращаемых значений важно проверять, что наш код обрабатывает
ошибочные условия так, как мы ожидаем. Например, рассмотрим тип Guess,
который мы создали в главе 9, листинге 9-13. Другой код, использующий Guess,
полагается на гарантию, что экземпляры Guess будут содержать только значения
от 1 до 100. Мы можем написать тест, который гарантирует, что попытка создать
экземпляр Guess со значением вне этого диапазона вызовет панику.
Мы делаем это, добавляя атрибут should_panic к тестовой функции. Тест
проходит, если код внутри функции паникует; тест проваливается, если код
внутри функции не паникует.
Листинг 11-8 показывает тест, который проверяет, что ошибочные условия
Guess::new возникают тогда, когда мы ожидаем.
pub struct Guess {
value: i32,
}
impl Guess {
pub fn new(value: i32) -> Guess {
if value < 1 || value > 100 {
panic!("Guess value must be between 1 and 100, got {value}.");
}
Guess { value }
}
}
#[cfg(test)]
mod tests {
use super::*;
#[test]
#[should_panic]
fn greater_than_100() {
Guess::new(200);
}
}panic!Мы помещаем атрибут #[should_panic] после атрибута #[test] и перед
тестовой функцией, к которой он применяется. Посмотрим на результат, когда
этот тест проходит:
$ cargo test
Compiling guessing_game v0.1.0 (file:///projects/guessing_game)
Finished `test` profile [unoptimized + debuginfo] target(s) in 0.58s
Running unittests src/lib.rs (target/debug/deps/guessing_game-57d70c3acb738f4d)
running 1 test
test tests::greater_than_100 - should panic ... ok
test result: ok. 1 passed; 0 failed; 0 ignored; 0 measured; 0 filtered out; finished in 0.00s
Doc-tests guessing_game
running 0 tests
test result: ok. 0 passed; 0 failed; 0 ignored; 0 measured; 0 filtered out; finished in 0.00s
Выглядит хорошо! Теперь внесем ошибку в код, удалив условие, по которому
функция new должна паниковать, если значение больше 100:
pub struct Guess {
value: i32,
}
// --snip--
impl Guess {
pub fn new(value: i32) -> Guess {
if value < 1 {
panic!("Guess value must be between 1 and 100, got {value}.");
}
Guess { value }
}
}
#[cfg(test)]
mod tests {
use super::*;
#[test]
#[should_panic]
fn greater_than_100() {
Guess::new(200);
}
}Когда мы запустим тест из листинга 11-8, он провалится:
$ cargo test
Compiling guessing_game v0.1.0 (file:///projects/guessing_game)
Finished `test` profile [unoptimized + debuginfo] target(s) in 0.62s
Running unittests src/lib.rs (target/debug/deps/guessing_game-57d70c3acb738f4d)
running 1 test
test tests::greater_than_100 - should panic ... FAILED
failures:
---- tests::greater_than_100 stdout ----
note: test did not panic as expected at src/lib.rs:21:8
failures:
tests::greater_than_100
test result: FAILED. 0 passed; 1 failed; 0 ignored; 0 measured; 0 filtered out; finished in 0.00s
error: test failed, to rerun pass `--lib`
В этом случае мы не получаем особенно полезного сообщения, но когда смотрим на
тестовую функцию, видим, что она аннотирована #[should_panic]. Полученный
сбой означает, что код в тестовой функции не вызвал панику.
Тесты, использующие should_panic, могут быть неточными. Тест с
should_panic пройдет даже если он паникует по причине, отличной от той,
которую мы ожидали. Чтобы сделать тесты с should_panic точнее, можно
добавить к атрибуту should_panic необязательный параметр expected.
Тестовая обвязка проверит, что сообщение о сбое содержит предоставленный
текст. Например, рассмотрим измененный код для Guess в листинге 11-9, где
функция new паникует с разными сообщениями в зависимости от того, слишком
мало значение или слишком велико.
pub struct Guess {
value: i32,
}
// --snip--
impl Guess {
pub fn new(value: i32) -> Guess {
if value < 1 {
panic!(
"Guess value must be greater than or equal to 1, got {value}."
);
} else if value > 100 {
panic!(
"Guess value must be less than or equal to 100, got {value}."
);
}
Guess { value }
}
}
#[cfg(test)]
mod tests {
use super::*;
#[test]
#[should_panic(expected = "less than or equal to 100")]
fn greater_than_100() {
Guess::new(200);
}
}panic! с сообщением паники, содержащим указанную подстрокуЭтот тест пройдет, потому что значение, которое мы поместили в параметр
expected атрибута should_panic, является подстрокой сообщения, с которым
паникует функция Guess::new. Мы могли бы указать все ожидаемое сообщение
паники целиком; в этом случае это было бы Guess value must be less than or equal to 100, got 200. Что именно указывать, зависит от того, какая часть
сообщения паники уникальна или динамична и насколько точным вы хотите сделать
тест. В этом случае подстроки сообщения паники достаточно, чтобы убедиться,
что код в тестовой функции выполняет ветку else if value > 100.
Чтобы увидеть, что происходит, когда тест should_panic с сообщением
expected проваливается, снова внесем ошибку в код, поменяв местами тела
блоков if value < 1 и else if value > 100:
pub struct Guess {
value: i32,
}
impl Guess {
pub fn new(value: i32) -> Guess {
if value < 1 {
panic!(
"Guess value must be less than or equal to 100, got {value}."
);
} else if value > 100 {
panic!(
"Guess value must be greater than or equal to 1, got {value}."
);
}
Guess { value }
}
}
#[cfg(test)]
mod tests {
use super::*;
#[test]
#[should_panic(expected = "less than or equal to 100")]
fn greater_than_100() {
Guess::new(200);
}
}На этот раз при запуске тест should_panic провалится:
$ cargo test
Compiling guessing_game v0.1.0 (file:///projects/guessing_game)
Finished `test` profile [unoptimized + debuginfo] target(s) in 0.66s
Running unittests src/lib.rs (target/debug/deps/guessing_game-57d70c3acb738f4d)
running 1 test
test tests::greater_than_100 - should panic ... FAILED
failures:
---- tests::greater_than_100 stdout ----
thread 'tests::greater_than_100' panicked at src/lib.rs:12:13:
Guess value must be greater than or equal to 1, got 200.
note: run with `RUST_BACKTRACE=1` environment variable to display a backtrace
note: panic did not contain expected string
panic message: "Guess value must be greater than or equal to 1, got 200."
expected substring: "less than or equal to 100"
failures:
tests::greater_than_100
test result: FAILED. 0 passed; 1 failed; 0 ignored; 0 measured; 0 filtered out; finished in 0.00s
error: test failed, to rerun pass `--lib`
Сообщение о провале указывает, что этот тест действительно запаниковал, как мы
и ожидали, но сообщение паники не содержало ожидаемую строку less than or equal to 100. Сообщение паники, которое мы получили в этом случае, было
Guess value must be greater than or equal to 1, got 200. Теперь можно начать
выяснять, где находится ошибка!
Использование Result<T, E> в тестах
До сих пор все наши тесты паниковали при провале. Мы также можем писать тесты,
которые используют Result<T, E>! Вот тест из листинга 11-1, переписанный для
использования Result<T, E> и возврата Err вместо паники:
pub fn add(left: u64, right: u64) -> u64 {
left + right
}
#[cfg(test)]
mod tests {
use super::*;
#[test]
fn it_works() -> Result<(), String> {
let result = add(2, 2);
if result == 4 {
Ok(())
} else {
Err(String::from("two plus two does not equal four"))
}
}
}Теперь функция it_works имеет возвращаемый тип Result<(), String>. В теле
функции вместо вызова макроса assert_eq! мы возвращаем Ok(()), когда тест
проходит, и Err со String внутри, когда тест проваливается.
Написание тестов, возвращающих Result<T, E>, позволяет использовать оператор
вопросительного знака в теле тестов. Это бывает удобным способом писать тесты,
которые должны провалиться, если любая операция внутри них возвращает вариант
Err.
Нельзя использовать аннотацию #[should_panic] для тестов, которые используют
Result<T, E>. Чтобы утверждать, что операция возвращает вариант Err, не
используйте оператор вопросительного знака для значения Result<T, E>.
Вместо этого используйте assert!(value.is_err()).
Теперь, когда вы знаете несколько способов писать тесты, посмотрим, что
происходит при запуске тестов, и изучим разные параметры, которые можно
использовать с cargo test.
Управление запуском тестов
Управление запуском тестов
Так же как cargo run компилирует код, а затем запускает получившийся
бинарный файл, cargo test компилирует код в тестовом режиме и запускает
получившийся тестовый бинарный файл. По умолчанию бинарный файл, созданный
cargo test, запускает все тесты параллельно и перехватывает вывод,
сгенерированный во время выполнения тестов. Благодаря этому вывод не
показывается сразу, а информацию о результатах тестов читать проще. Однако вы
можете указать параметры командной строки, чтобы изменить это поведение по
умолчанию.
Некоторые параметры командной строки предназначены для cargo test, а
некоторые – для получившегося тестового бинарного файла. Чтобы разделить эти
два вида аргументов, сначала перечисляют аргументы для cargo test, затем
ставят разделитель --, а после него указывают аргументы для тестового
бинарного файла. Команда cargo test --help показывает параметры, которые
можно использовать с cargo test, а команда cargo test -- --help показывает
параметры, которые можно использовать после разделителя. Эти параметры также
описаны в разделе «Tests» книги The rustc Book.
Параллельный или последовательный запуск тестов
Когда вы запускаете несколько тестов, по умолчанию они выполняются параллельно с использованием потоков. Это означает, что они завершаются быстрее, а вы получаете обратную связь раньше. Поскольку тесты выполняются одновременно, нужно убедиться, что они не зависят друг от друга и от какого-либо общего состояния, включая общую среду, например текущий рабочий каталог или переменные окружения.
Например, допустим, каждый из ваших тестов запускает код, который создает на диске файл с именем test-output.txt и записывает в него какие-то данные. Затем каждый тест читает данные из этого файла и проверяет, что файл содержит конкретное значение, причем в каждом тесте это значение разное. Поскольку тесты выполняются одновременно, один тест может перезаписать файл в промежутке между тем, как другой тест записывает файл и читает его. Второй тест тогда провалится не потому, что код неверен, а потому что тесты помешали друг другу при параллельном выполнении. Одно решение – убедиться, что каждый тест пишет в отдельный файл; другое – запускать тесты по одному.
Если вы не хотите запускать тесты параллельно или хотите точнее управлять
числом используемых потоков, можно передать тестовому бинарному файлу флаг
--test-threads и число потоков, которое вы хотите использовать. Посмотрите на
следующий пример:
$ cargo test -- --test-threads=1
Мы устанавливаем число тестовых потоков равным 1, тем самым сообщая
программе не использовать параллелизм. Запуск тестов в одном потоке займет
больше времени, чем параллельный запуск, но тесты не будут мешать друг другу,
если разделяют состояние.
Отображение вывода функций
По умолчанию, если тест проходит, тестовая библиотека Rust перехватывает все,
что было напечатано в стандартный вывод. Например, если мы вызываем println!
в тесте и тест проходит, мы не увидим вывод println! в терминале; мы увидим
только строку, которая сообщает, что тест прошел. Если тест провалится, мы
увидим все, что было напечатано в стандартный вывод, вместе с остальным
сообщением о сбое.
В качестве примера в листинге 11-10 есть простая функция, которая печатает значение своего параметра и возвращает 10, а также тест, который проходит, и тест, который проваливается.
fn prints_and_returns_10(a: i32) -> i32 {
println!("I got the value {a}");
10
}
#[cfg(test)]
mod tests {
use super::*;
#[test]
fn this_test_will_pass() {
let value = prints_and_returns_10(4);
assert_eq!(value, 10);
}
#[test]
fn this_test_will_fail() {
let value = prints_and_returns_10(8);
assert_eq!(value, 5);
}
}println!Когда мы запускаем эти тесты с помощью cargo test, видим следующий вывод:
$ cargo test
Compiling silly-function v0.1.0 (file:///projects/silly-function)
Finished `test` profile [unoptimized + debuginfo] target(s) in 0.58s
Running unittests src/lib.rs (target/debug/deps/silly_function-160869f38cff9166)
running 2 tests
test tests::this_test_will_fail ... FAILED
test tests::this_test_will_pass ... ok
failures:
---- tests::this_test_will_fail stdout ----
I got the value 8
thread 'tests::this_test_will_fail' panicked at src/lib.rs:19:9:
assertion `left == right` failed
left: 10
right: 5
note: run with `RUST_BACKTRACE=1` environment variable to display a backtrace
failures:
tests::this_test_will_fail
test result: FAILED. 1 passed; 1 failed; 0 ignored; 0 measured; 0 filtered out; finished in 0.00s
error: test failed, to rerun pass `--lib`
Обратите внимание: нигде в этом выводе мы не видим I got the value 4,
которое печатается при выполнении проходящего теста. Этот вывод был
перехвачен. Вывод провалившегося теста, I got the value 8, появляется в
разделе сводки тестового вывода, где также показана причина сбоя теста.
Если мы хотим видеть напечатанные значения и для проходящих тестов, можно
сказать Rust также показывать вывод успешных тестов с помощью --show-output:
$ cargo test -- --show-output
Когда мы снова запускаем тесты из листинга 11-10 с флагом --show-output, мы
видим такой вывод:
$ cargo test -- --show-output
Compiling silly-function v0.1.0 (file:///projects/silly-function)
Finished `test` profile [unoptimized + debuginfo] target(s) in 0.60s
Running unittests src/lib.rs (target/debug/deps/silly_function-160869f38cff9166)
running 2 tests
test tests::this_test_will_fail ... FAILED
test tests::this_test_will_pass ... ok
successes:
---- tests::this_test_will_pass stdout ----
I got the value 4
successes:
tests::this_test_will_pass
failures:
---- tests::this_test_will_fail stdout ----
I got the value 8
thread 'tests::this_test_will_fail' panicked at src/lib.rs:19:9:
assertion `left == right` failed
left: 10
right: 5
note: run with `RUST_BACKTRACE=1` environment variable to display a backtrace
failures:
tests::this_test_will_fail
test result: FAILED. 1 passed; 1 failed; 0 ignored; 0 measured; 0 filtered out; finished in 0.00s
error: test failed, to rerun pass `--lib`
Запуск подмножества тестов по имени
Запуск полного набора тестов иногда может занимать много времени. Если вы
работаете над кодом в конкретной области, возможно, вам захочется запускать
только тесты, относящиеся к этому коду. Вы можете выбрать, какие тесты
запустить, передав cargo test имя или имена нужных тестов как аргумент.
Чтобы показать, как запускать подмножество тестов, сначала создадим три теста
для функции add_two, как показано в листинге 11-11, а затем выберем, какие
из них запускать.
pub fn add_two(a: u64) -> u64 {
a + 2
}
#[cfg(test)]
mod tests {
use super::*;
#[test]
fn add_two_and_two() {
let result = add_two(2);
assert_eq!(result, 4);
}
#[test]
fn add_three_and_two() {
let result = add_two(3);
assert_eq!(result, 5);
}
#[test]
fn one_hundred() {
let result = add_two(100);
assert_eq!(result, 102);
}
}Если запустить тесты без аргументов, как мы видели ранее, все тесты будут запущены параллельно:
$ cargo test
Compiling adder v0.1.0 (file:///projects/adder)
Finished `test` profile [unoptimized + debuginfo] target(s) in 0.62s
Running unittests src/lib.rs (target/debug/deps/adder-92948b65e88960b4)
running 3 tests
test tests::add_three_and_two ... ok
test tests::add_two_and_two ... ok
test tests::one_hundred ... ok
test result: ok. 3 passed; 0 failed; 0 ignored; 0 measured; 0 filtered out; finished in 0.00s
Doc-tests adder
running 0 tests
test result: ok. 0 passed; 0 failed; 0 ignored; 0 measured; 0 filtered out; finished in 0.00s
Запуск отдельных тестов
Мы можем передать имя любой тестовой функции в cargo test, чтобы запустить
только этот тест:
$ cargo test one_hundred
Compiling adder v0.1.0 (file:///projects/adder)
Finished `test` profile [unoptimized + debuginfo] target(s) in 0.69s
Running unittests src/lib.rs (target/debug/deps/adder-92948b65e88960b4)
running 1 test
test tests::one_hundred ... ok
test result: ok. 1 passed; 0 failed; 0 ignored; 0 measured; 2 filtered out; finished in 0.00s
Запустился только тест с именем one_hundred; два других теста не совпали с
этим именем. Тестовый вывод сообщает, что у нас были и другие тесты, которые
не запускались, показывая в конце 2 filtered out.
Указать имена нескольких тестов таким способом нельзя: будет использовано
только первое значение, переданное cargo test. Но есть способ запустить
несколько тестов.
Фильтрация для запуска нескольких тестов
Можно указать часть имени теста, и будет запущен любой тест, имя которого
совпадает с этим значением. Например, поскольку имена двух наших тестов
содержат add, мы можем запустить эти два теста командой cargo test add:
$ cargo test add
Compiling adder v0.1.0 (file:///projects/adder)
Finished `test` profile [unoptimized + debuginfo] target(s) in 0.61s
Running unittests src/lib.rs (target/debug/deps/adder-92948b65e88960b4)
running 2 tests
test tests::add_three_and_two ... ok
test tests::add_two_and_two ... ok
test result: ok. 2 passed; 0 failed; 0 ignored; 0 measured; 1 filtered out; finished in 0.00s
Эта команда запустила все тесты, в имени которых есть add, и отфильтровала
тест с именем one_hundred. Также обратите внимание, что модуль, в котором
находится тест, становится частью имени теста, поэтому можно запустить все
тесты в модуле, отфильтровав по имени модуля.
Игнорирование тестов, если они не запрошены явно
Иногда несколько конкретных тестов могут выполняться очень долго, поэтому вы
можете исключить их из большинства запусков cargo test. Вместо того чтобы
перечислять в аргументах все тесты, которые вы хотите запустить, можно
пометить долгие тесты атрибутом ignore, чтобы исключить их, как показано
здесь:
Файл: src/lib.rs
pub fn add(left: u64, right: u64) -> u64 {
left + right
}
#[cfg(test)]
mod tests {
use super::*;
#[test]
fn it_works() {
let result = add(2, 2);
assert_eq!(result, 4);
}
#[test]
#[ignore]
fn expensive_test() {
// code that takes an hour to run
}
}После #[test] мы добавляем строку #[ignore] к тесту, который хотим
исключить. Теперь, когда мы запускаем тесты, it_works выполняется, а
expensive_test – нет:
$ cargo test
Compiling adder v0.1.0 (file:///projects/adder)
Finished `test` profile [unoptimized + debuginfo] target(s) in 0.60s
Running unittests src/lib.rs (target/debug/deps/adder-92948b65e88960b4)
running 2 tests
test tests::expensive_test ... ignored
test tests::it_works ... ok
test result: ok. 1 passed; 0 failed; 1 ignored; 0 measured; 0 filtered out; finished in 0.00s
Doc-tests adder
running 0 tests
test result: ok. 0 passed; 0 failed; 0 ignored; 0 measured; 0 filtered out; finished in 0.00s
Функция expensive_test указана как ignored. Если мы хотим запустить только
игнорируемые тесты, можно использовать cargo test -- --ignored:
$ cargo test -- --ignored
Compiling adder v0.1.0 (file:///projects/adder)
Finished `test` profile [unoptimized + debuginfo] target(s) in 0.61s
Running unittests src/lib.rs (target/debug/deps/adder-92948b65e88960b4)
running 1 test
test tests::expensive_test ... ok
test result: ok. 1 passed; 0 failed; 0 ignored; 0 measured; 1 filtered out; finished in 0.00s
Doc-tests adder
running 0 tests
test result: ok. 0 passed; 0 failed; 0 ignored; 0 measured; 0 filtered out; finished in 0.00s
Управляя тем, какие тесты запускаются, вы можете быстрее получать результаты
cargo test. Когда наступит момент проверить результаты тестов ignored и у
вас будет время дождаться их завершения, можно запустить команду cargo test -- --ignored.
Если вы хотите запустить все тесты, независимо от того, игнорируются они или нет, можно выполнить команду cargo test -- --include-ignored.
Организация тестов
Организация тестов
Как упоминалось в начале главы, тестирование – сложная дисциплина, и разные люди используют разную терминологию и по-разному их организуют. Сообщество Rust делит тесты на две основные категории: модульные тесты и интеграционные тесты. Модульные тесты небольшие и более сфокусированные: они проверяют по одному модулю изолированно и могут тестировать приватные интерфейсы. Интеграционные тесты полностью внешние по отношению к вашей библиотеке и используют ваш код так же, как любой другой внешний код: только через публичный интерфейс, при этом потенциально задействуя несколько модулей в одном тесте.
Важно писать оба вида тестов, чтобы убедиться, что части вашей библиотеки делают то, что вы от них ожидаете, как по отдельности, так и вместе.
Модульные тесты
Цель модульных тестов – проверять каждую единицу кода в изоляции от
остального кода, чтобы быстро определить, где код работает ожидаемо, а где нет.
Модульные тесты размещают в каталоге src, в каждом файле рядом с кодом,
который они тестируют. По соглашению в каждом файле создают модуль с именем
tests, содержащий тестовые функции, и аннотируют этот модуль с помощью
cfg(test).
Модуль tests и #[cfg(test)]
Аннотация #[cfg(test)] у модуля tests сообщает Rust, что тестовый код
нужно компилировать и запускать только при выполнении cargo test, а не при
выполнении cargo build. Это экономит время компиляции, когда нужно только
собрать библиотеку, и уменьшает размер полученного скомпилированного артефакта,
потому что тесты в него не включаются. Вы увидите, что интеграционные тесты
находятся в другом каталоге, поэтому им не нужна аннотация #[cfg(test)].
Однако модульные тесты находятся в тех же файлах, что и код, поэтому вы будете
использовать #[cfg(test)], чтобы указать, что они не должны включаться в
скомпилированный результат.
Вспомните: когда в первом разделе этой главы мы сгенерировали новый проект
adder, Cargo сгенерировал для нас такой код:
Файл: src/lib.rs
pub fn add(left: u64, right: u64) -> u64 {
left + right
}
#[cfg(test)]
mod tests {
use super::*;
#[test]
fn it_works() {
let result = add(2, 2);
assert_eq!(result, 4);
}
}В автоматически сгенерированном модуле tests атрибут cfg означает
configuration и сообщает Rust, что следующий элемент должен включаться только
при заданном параметре конфигурации. В этом случае параметр конфигурации –
test, который Rust предоставляет для компиляции и запуска тестов. Благодаря
атрибуту cfg Cargo компилирует наш тестовый код только если мы явно
запускаем тесты командой cargo test. Это касается и всех вспомогательных
функций, которые могут находиться внутри этого модуля, а не только функций,
аннотированных #[test].
Тестирование приватных функций
В сообществе тестирования идут споры о том, следует ли напрямую тестировать
приватные функции, а некоторые языки затрудняют или вообще запрещают
тестирование приватных функций. Независимо от того, какой идеологии
тестирования вы придерживаетесь, правила приватности Rust позволяют тестировать
приватные функции. Рассмотрим код в листинге 11-12 с приватной функцией
internal_adder.
pub fn add_two(a: u64) -> u64 {
internal_adder(a, 2)
}
fn internal_adder(left: u64, right: u64) -> u64 {
left + right
}
#[cfg(test)]
mod tests {
use super::*;
#[test]
fn internal() {
let result = internal_adder(2, 2);
assert_eq!(result, 4);
}
}Обратите внимание, что функция internal_adder не помечена как pub. Тесты
– это обычный код Rust, а модуль tests – просто еще один модуль. Как мы
обсуждали в разделе «Пути для ссылки на элемент в дереве модулей», элементы в дочерних модулях могут использовать элементы своих
родительских модулей. В этом тесте мы вводим все элементы, принадлежащие
родителю модуля tests, в область видимости с помощью use super::*, и затем
тест может вызвать internal_adder. Если вы считаете, что приватные функции
не следует тестировать, Rust ни к чему вас не принуждает.
Интеграционные тесты
В Rust интеграционные тесты полностью внешние по отношению к вашей библиотеке. Они используют библиотеку так же, как любой другой код, а значит могут вызывать только функции, входящие в публичный API библиотеки. Их цель – проверить, правильно ли многие части библиотеки работают вместе. Единицы кода, которые корректно работают сами по себе, могут иметь проблемы при интеграции, поэтому покрытие интегрированного кода тестами тоже важно. Чтобы создать интеграционные тесты, сначала нужен каталог tests.
Каталог tests
Мы создаем каталог tests на верхнем уровне каталога проекта, рядом с src. Cargo знает, что файлы интеграционных тестов нужно искать в этом каталоге. Затем мы можем создать сколько угодно тестовых файлов, и Cargo скомпилирует каждый из них как отдельный крейт.
Создадим интеграционный тест. Оставив код из листинга 11-12 в файле src/lib.rs, создайте каталог tests и новый файл с именем tests/integration_test.rs. Структура каталогов должна выглядеть так:
adder
├── Cargo.lock
├── Cargo.toml
├── src
│ └── lib.rs
└── tests
└── integration_test.rs
Введите код из листинга 11-13 в файл tests/integration_test.rs.
use adder::add_two;
#[test]
fn it_adds_two() {
let result = add_two(2);
assert_eq!(result, 4);
}adderКаждый файл в каталоге tests является отдельным крейтом, поэтому нам нужно
вводить нашу библиотеку в область видимости каждого тестового крейта. По этой
причине в начало кода мы добавляем use adder::add_two;, что не требовалось в
модульных тестах.
Нам не нужно аннотировать какой-либо код в tests/integration_test.rs с
помощью #[cfg(test)]. Cargo особым образом обрабатывает каталог tests и
компилирует файлы в нем только при выполнении cargo test. Теперь запустите
cargo test:
$ cargo test
Compiling adder v0.1.0 (file:///projects/adder)
Finished `test` profile [unoptimized + debuginfo] target(s) in 1.31s
Running unittests src/lib.rs (target/debug/deps/adder-1082c4b063a8fbe6)
running 1 test
test tests::internal ... ok
test result: ok. 1 passed; 0 failed; 0 ignored; 0 measured; 0 filtered out; finished in 0.00s
Running tests/integration_test.rs (target/debug/deps/integration_test-1082c4b063a8fbe6)
running 1 test
test it_adds_two ... ok
test result: ok. 1 passed; 0 failed; 0 ignored; 0 measured; 0 filtered out; finished in 0.00s
Doc-tests adder
running 0 tests
test result: ok. 0 passed; 0 failed; 0 ignored; 0 measured; 0 filtered out; finished in 0.00s
Три раздела вывода включают модульные тесты, интеграционный тест и тесты документации. Обратите внимание: если какой-либо тест в разделе провалится, следующие разделы запускаться не будут. Например, если провалится модульный тест, вывода для интеграционных тестов и тестов документации не будет, потому что они запускаются только если все модульные тесты проходят.
Первый раздел для модульных тестов такой же, как мы уже видели: одна строка
для каждого модульного теста (один из них называется internal, мы добавили
его в листинге 11-12), а затем строка сводки для модульных тестов.
Раздел интеграционных тестов начинается со строки Running tests/integration_test.rs. Далее идет строка для каждой тестовой функции в
этом интеграционном тесте и строка сводки результатов интеграционного теста
прямо перед началом раздела Doc-tests adder.
У каждого файла интеграционного теста есть собственный раздел, поэтому если мы добавим больше файлов в каталог tests, разделов интеграционных тестов станет больше.
Мы по-прежнему можем запустить конкретную функцию интеграционного теста,
указав имя тестовой функции как аргумент cargo test. Чтобы запустить все
тесты в конкретном файле интеграционных тестов, используйте аргумент --test
команды cargo test, а после него укажите имя файла:
$ cargo test --test integration_test
Compiling adder v0.1.0 (file:///projects/adder)
Finished `test` profile [unoptimized + debuginfo] target(s) in 0.64s
Running tests/integration_test.rs (target/debug/deps/integration_test-82e7799c1bc62298)
running 1 test
test it_adds_two ... ok
test result: ok. 1 passed; 0 failed; 0 ignored; 0 measured; 0 filtered out; finished in 0.00s
Эта команда запускает только тесты из файла tests/integration_test.rs.
Подмодули в интеграционных тестах
По мере добавления интеграционных тестов вы можете захотеть создать больше файлов в каталоге tests, чтобы лучше их организовать; например, можно группировать тестовые функции по проверяемой функциональности. Как упоминалось ранее, каждый файл в каталоге tests компилируется как отдельный крейт. Это полезно для создания отдельных областей видимости, которые точнее имитируют то, как конечные пользователи будут использовать ваш крейт. Однако это означает, что файлы в каталоге tests ведут себя иначе, чем файлы в src, о чем вы узнали в главе 7 при обсуждении разделения кода на модули и файлы.
Различие в поведении файлов каталога tests заметнее всего, когда у вас есть
набор вспомогательных функций для использования в нескольких файлах
интеграционных тестов, и вы пытаетесь следовать шагам из раздела «Разделение
модулей на разные файлы» главы
7, чтобы вынести их в общий модуль. Например, если мы создадим
tests/common.rs и поместим в него функцию с именем setup, то сможем
добавить в setup код, который хотим вызывать из нескольких тестовых функций
в нескольких тестовых файлах:
Файл: tests/common.rs
pub fn setup() {
// setup code specific to your library's tests would go here
}Когда мы снова запустим тесты, увидим в тестовом выводе новый раздел для файла
common.rs, хотя этот файл не содержит тестовых функций, и мы нигде не
вызывали функцию setup:
$ cargo test
Compiling adder v0.1.0 (file:///projects/adder)
Finished `test` profile [unoptimized + debuginfo] target(s) in 0.89s
Running unittests src/lib.rs (target/debug/deps/adder-92948b65e88960b4)
running 1 test
test tests::internal ... ok
test result: ok. 1 passed; 0 failed; 0 ignored; 0 measured; 0 filtered out; finished in 0.00s
Running tests/common.rs (target/debug/deps/common-92948b65e88960b4)
running 0 tests
test result: ok. 0 passed; 0 failed; 0 ignored; 0 measured; 0 filtered out; finished in 0.00s
Running tests/integration_test.rs (target/debug/deps/integration_test-92948b65e88960b4)
running 1 test
test it_adds_two ... ok
test result: ok. 1 passed; 0 failed; 0 ignored; 0 measured; 0 filtered out; finished in 0.00s
Doc-tests adder
running 0 tests
test result: ok. 0 passed; 0 failed; 0 ignored; 0 measured; 0 filtered out; finished in 0.00s
Появление common в результатах тестов со строкой running 0 tests – не то,
чего мы хотели. Мы просто хотели поделиться кодом с другими файлами
интеграционных тестов. Чтобы common не появлялся в тестовом выводе, вместо
tests/common.rs создадим tests/common/mod.rs. Теперь каталог проекта
выглядит так:
├── Cargo.lock
├── Cargo.toml
├── src
│ └── lib.rs
└── tests
├── common
│ └── mod.rs
└── integration_test.rs
Это старое соглашение об именовании, которое Rust тоже понимает и о котором мы
упоминали в разделе «Альтернативные пути к файлам»
главы 7. Такое имя файла сообщает Rust, что модуль common не следует
рассматривать как файл интеграционного теста. Когда мы перенесем код функции
setup в tests/common/mod.rs и удалим файл tests/common.rs, раздел в
тестовом выводе больше не появится. Файлы в подкаталогах каталога tests не
компилируются как отдельные крейты и не получают разделов в тестовом выводе.
После создания tests/common/mod.rs мы можем использовать его как модуль из
любого файла интеграционных тестов. Вот пример вызова функции setup из теста
it_adds_two в tests/integration_test.rs:
Файл: tests/integration_test.rs
use adder::add_two;
mod common;
#[test]
fn it_adds_two() {
common::setup();
let result = add_two(2);
assert_eq!(result, 4);
}Обратите внимание, что объявление mod common; такое же, как объявление
модуля, которое мы показывали в листинге 7-21. Затем в тестовой функции мы
можем вызвать функцию common::setup().
Интеграционные тесты для бинарных крейтов
Если наш проект является бинарным крейтом, который содержит только файл
src/main.rs и не имеет файла src/lib.rs, мы не можем создать
интеграционные тесты в каталоге tests и ввести функции, определенные в файле
src/main.rs, в область видимости с помощью инструкции use. Только
библиотечные крейты предоставляют функции, которые могут использовать другие
крейты; бинарные крейты предназначены для самостоятельного запуска.
Это одна из причин, по которой проекты Rust, предоставляющие бинарный файл,
имеют простой файл src/main.rs, вызывающий логику, которая находится в файле
src/lib.rs. При такой структуре интеграционные тесты могут тестировать
библиотечный крейт с помощью use, чтобы сделать важную функциональность
доступной. Если важная функциональность работает, небольшое количество кода в
файле src/main.rs тоже будет работать, и это небольшое количество кода не
нужно тестировать.
Итоги
Возможности тестирования Rust дают способ указать, как должен работать код, чтобы он продолжал работать ожидаемо даже после изменений. Модульные тесты проверяют разные части библиотеки по отдельности и могут тестировать приватные детали реализации. Интеграционные тесты проверяют, что многие части библиотеки правильно работают вместе, и используют публичный API библиотеки, проверяя код так же, как его будет использовать внешний код. Хотя система типов Rust и правила владения помогают предотвратить некоторые виды ошибок, тесты все равно важны для уменьшения логических ошибок, связанных с ожидаемым поведением вашего кода.
Объединим знания, полученные в этой и предыдущих главах, и поработаем над проектом!
I/O-проект: создание программы командной строки
Эта глава одновременно повторяет многие навыки, которые вы уже изучили, и знакомит с еще несколькими возможностями стандартной библиотеки. Мы создадим инструмент командной строки, который работает с файлами и вводом-выводом командной строки, чтобы попрактиковаться в некоторых концепциях Rust, уже имеющихся в вашем арсенале.
Скорость Rust, безопасность, сборка в единый бинарный файл и
кроссплатформенная поддержка делают его отличным языком для создания
инструментов командной строки. Поэтому в этом проекте мы сделаем собственную
версию классического поискового инструмента командной строки grep; его
название происходит от английского globally search a regular
expression and print. В самом простом случае grep ищет указанную
строку в указанном файле. Для этого
grep принимает в аргументах путь к файлу и строку. Затем он читает файл,
находит в нем строки, содержащие переданную строку, и печатает эти строки.
По ходу дела мы покажем, как сделать так, чтобы наш инструмент командной строки
использовал возможности терминала, которые используют многие другие
инструменты командной строки. Мы прочитаем значение переменной окружения, чтобы
позволить пользователю настраивать поведение нашего инструмента. Мы также будем
печатать сообщения об ошибках в стандартный поток ошибок (stderr), а не в
стандартный вывод (stdout), чтобы, например, пользователь мог перенаправить
успешный вывод в файл и при этом продолжать видеть сообщения об ошибках на
экране.
Один участник сообщества Rust, Andrew Gallant, уже создал полнофункциональную
и очень быструю версию grep под названием ripgrep. По сравнению с ней наша
версия будет довольно простой, но эта глава даст вам часть базовых знаний,
необходимых для понимания реального проекта вроде ripgrep.
Наш проект grep объединит несколько концепций, которые вы уже изучили:
- Организация кода (глава 7)
- Использование векторов и строк (глава 8)
- Обработка ошибок (глава 9)
- Использование трейтов и времен жизни там, где это уместно (глава 10)
- Написание тестов (глава 11)
Мы также кратко познакомимся с замыканиями, итераторами и трейт-объектами, которые подробно рассматриваются в главе 13 и главе 18.
Получение аргументов командной строки
Прием аргументов командной строки
Создадим новый проект, как обычно, с помощью cargo new. Назовем его
minigrep, чтобы отличать от инструмента grep, который уже может быть
установлен в вашей системе:
$ cargo new minigrep
Created binary (application) `minigrep` project
$ cd minigrep
Первая задача – сделать так, чтобы minigrep принимал два аргумента
командной строки: путь к файлу и строку, которую нужно искать. То есть мы
хотим иметь возможность запускать нашу программу с помощью cargo run, затем
ставить два дефиса, чтобы показать, что последующие аргументы предназначены для
нашей программы, а не для cargo, после чего указывать строку для поиска и
путь к файлу, в котором нужно искать:
$ cargo run -- searchstring example-filename.txt
Сейчас программа, созданная cargo new, не умеет обрабатывать переданные ей
аргументы. Некоторые существующие библиотеки на
crates.io помогают писать программы, принимающие
аргументы командной строки, но поскольку вы только изучаете эту концепцию,
реализуем такую возможность самостоятельно.
Чтение значений аргументов
Чтобы minigrep мог читать значения аргументов командной строки, которые мы
ему передаем, понадобится функция std::env::args из стандартной библиотеки
Rust. Эта функция возвращает итератор по аргументам командной строки,
переданным minigrep. Полностью итераторы мы рассмотрим в главе
13. Сейчас нужно знать о них только две вещи: итераторы
создают последовательность значений, а метод collect можно вызвать для
итератора, чтобы превратить его в коллекцию, например в вектор, содержащий все
элементы, которые выдает итератор.
Код в листинге 12-1 позволяет вашей программе minigrep прочитать любые
переданные ей аргументы командной строки, а затем собрать эти значения в
вектор.
use std::env;
fn main() {
let args: Vec<String> = env::args().collect();
dbg!(args);
}Сначала мы вводим модуль std::env в область видимости с помощью инструкции
use, чтобы пользоваться его функцией args. Обратите внимание, что функция
std::env::args вложена в два уровня модулей. Как мы обсуждали в главе
7, если нужная функция вложена больше чем в
один модуль, мы предпочитаем вводить в область видимости родительский модуль, а
не саму функцию. Так нам проще использовать другие функции из std::env.
Кроме того, это менее двусмысленно, чем добавить use std::env::args, а затем
вызывать функцию просто как args, потому что args легко принять за функцию,
определенную в текущем модуле.
Функция args и недопустимый Unicode
Обратите внимание, что std::env::args запаникует, если какой-либо аргумент
содержит недопустимый Unicode. Если вашей программе нужно принимать
аргументы, содержащие недопустимый Unicode, используйте вместо нее
std::env::args_os. Эта функция возвращает итератор, который выдает значения
OsString вместо значений String. Здесь мы выбрали std::env::args для
простоты, потому что значения OsString различаются в зависимости от
платформы и работать с ними сложнее, чем со значениями String.
В первой строке main мы вызываем env::args и сразу используем collect,
чтобы превратить итератор в вектор со всеми значениями, которые он выдает.
Функция collect умеет создавать разные виды коллекций, поэтому мы явно
аннотируем тип args, чтобы указать, что нам нужен вектор строк. Хотя в Rust
очень редко приходится аннотировать типы, collect – одна из функций, где
это часто нужно делать: Rust не может сам вывести, какую именно коллекцию вы
хотите получить.
Наконец, мы печатаем вектор с помощью отладочного макроса. Попробуем сначала запустить код без аргументов, а затем с двумя аргументами:
$ cargo run
Compiling minigrep v0.1.0 (file:///projects/minigrep)
Finished `dev` profile [unoptimized + debuginfo] target(s) in 0.61s
Running `target/debug/minigrep`
[src/main.rs:5:5] args = [
"target/debug/minigrep",
]
$ cargo run -- needle haystack
Compiling minigrep v0.1.0 (file:///projects/minigrep)
Finished `dev` profile [unoptimized + debuginfo] target(s) in 1.57s
Running `target/debug/minigrep needle haystack`
[src/main.rs:5:5] args = [
"target/debug/minigrep",
"needle",
"haystack",
]
Обратите внимание, что первое значение в векторе – "target/debug/minigrep",
то есть имя нашего бинарного файла. Это совпадает с поведением списка
аргументов в C и позволяет программам использовать имя, под которым они были
запущены. Часто удобно иметь доступ к имени программы, если нужно напечатать
его в сообщениях или изменить поведение программы в зависимости от того, через
какой псевдоним командной строки она была вызвана. Но для целей этой главы мы
проигнорируем это значение и сохраним только два нужных нам аргумента.
Сохранение значений аргументов в переменные
Теперь программа умеет получать доступ к значениям, указанным как аргументы командной строки. Нам нужно сохранить значения двух аргументов в переменных, чтобы использовать их в остальной части программы. Мы делаем это в листинге 12-2.
use std::env;
fn main() {
let args: Vec<String> = env::args().collect();
let query = &args[1];
let file_path = &args[2];
println!("Searching for {query}");
println!("In file {file_path}");
}Как мы увидели при печати вектора, имя программы занимает первое значение в
векторе, args[0], поэтому аргументы начинаются с индекса 1. Первый аргумент,
который принимает minigrep, – строка, которую мы ищем, поэтому мы помещаем
ссылку на первый аргумент в переменную query. Второй аргумент будет путем до
файла, поэтому мы помещаем ссылку на второй аргумент в переменную file_path.
Мы временно печатаем значения этих переменных, чтобы убедиться, что код
работает так, как мы ожидаем. Снова запустим программу с аргументами test и
sample.txt:
$ cargo run -- test sample.txt
Compiling minigrep v0.1.0 (file:///projects/minigrep)
Finished `dev` profile [unoptimized + debuginfo] target(s) in 0.0s
Running `target/debug/minigrep test sample.txt`
Searching for test
In file sample.txt
Отлично, программа работает! Значения нужных нам аргументов сохраняются в правильные переменные. Позже мы добавим обработку ошибок для некоторых потенциально ошибочных ситуаций, например когда пользователь не передал аргументы; пока проигнорируем эту ситуацию и вместо этого перейдем к добавлению возможности чтения файла.
Чтение файла
Чтение файла
Теперь добавим возможность читать файл, указанный в аргументе file_path.
Сначала нам нужен пример файла, на котором можно это проверить: используем файл
с небольшим объемом текста на нескольких строках и с несколькими повторяющимися
словами. В листинге 12-3 приведено стихотворение Эмили Дикинсон, которое
хорошо подойдет! Создайте файл с именем poem.txt в корне проекта и введите в
него стихотворение “I’m Nobody! Who are you?”
I'm nobody! Who are you?
Are you nobody, too?
Then there's a pair of us - don't tell!
They'd banish us, you know.
How dreary to be somebody!
How public, like a frog
To tell your name the livelong day
To an admiring bog!
Когда текст будет на месте, отредактируйте src/main.rs и добавьте код для чтения файла, как показано в листинге 12-4.
use std::env;
use std::fs;
fn main() {
// --snip--
let args: Vec<String> = env::args().collect();
let query = &args[1];
let file_path = &args[2];
println!("Searching for {query}");
println!("In file {file_path}");
let contents = fs::read_to_string(file_path)
.expect("Should have been able to read the file");
println!("With text:\n{contents}");
}Сначала мы вводим в область видимости нужную часть стандартной библиотеки с
помощью инструкции use: для работы с файлами нам нужен std::fs.
В main новое выражение fs::read_to_string принимает file_path, открывает
этот файл и возвращает значение типа std::io::Result<String>, содержащее
содержимое файла.
После этого мы снова добавляем временный вызов println!, который печатает
значение contents после чтения файла, чтобы проверить, что программа пока
работает правильно.
Запустим этот код с любой строкой в качестве первого аргумента командной строки (потому что часть с поиском мы еще не реализовали) и файлом poem.txt в качестве второго аргумента:
$ cargo run -- the poem.txt
Compiling minigrep v0.1.0 (file:///projects/minigrep)
Finished `dev` profile [unoptimized + debuginfo] target(s) in 0.0s
Running `target/debug/minigrep the poem.txt`
Searching for the
In file poem.txt
With text:
I'm nobody! Who are you?
Are you nobody, too?
Then there's a pair of us - don't tell!
They'd banish us, you know.
How dreary to be somebody!
How public, like a frog
To tell your name the livelong day
To an admiring bog!
Отлично! Код прочитал, а затем напечатал содержимое файла. Но у него есть
несколько недостатков. Сейчас функция main отвечает за несколько вещей:
обычно функции понятнее и проще поддерживать, если каждая функция отвечает
только за одну идею. Другая проблема в том, что мы обрабатываем ошибки не так
хорошо, как могли бы. Программа пока маленькая, поэтому эти недостатки не
создают большой проблемы, но по мере роста программы их будет труднее исправить
чисто. Хорошая практика – начинать рефакторинг на ранних этапах разработки,
потому что меньшие объемы кода рефакторить намного проще. Этим мы займемся
дальше.
Рефакторинг для улучшения модульности и обработки ошибок
Рефакторинг для улучшения модульности и обработки ошибок
Чтобы улучшить нашу программу, мы исправим четыре проблемы, связанные со
структурой программы и с тем, как она обрабатывает возможные ошибки. Во-первых,
сейчас функция main выполняет две задачи: разбирает аргументы и читает файлы.
По мере роста программы количество отдельных задач, которыми занимается
функция main, будет увеличиваться. Чем больше обязанностей получает функция,
тем труднее рассуждать о ней, тестировать ее и изменять так, чтобы не сломать
одну из ее частей. Лучше разделять функциональность так, чтобы каждая функция
отвечала за одну задачу.
Эта проблема также связана со второй: хотя query и file_path являются
переменными конфигурации нашей программы, такие переменные, как contents,
используются для выполнения логики программы. Чем длиннее становится main,
тем больше переменных нам придется вводить в область видимости; чем больше
переменных находится в области видимости, тем сложнее отслеживать назначение
каждой из них. Лучше сгруппировать переменные конфигурации в одну структуру,
чтобы их назначение было понятно.
Третья проблема в том, что мы использовали expect, чтобы напечатать сообщение
об ошибке, когда чтение файла завершается неудачей, но это сообщение просто
выводит Should have been able to read the file. Чтение файла может не
удаться по разным причинам: например, файл может отсутствовать или у нас может
не быть разрешения на его открытие. Сейчас, независимо от ситуации, мы
напечатали бы одно и то же сообщение об ошибке для всего, а значит, не дали бы
пользователю никакой полезной информации!
В-четвертых, мы используем expect для обработки ошибки, и если пользователь
запустит нашу программу, не указав достаточно аргументов, он получит от Rust
ошибку index out of bounds, которая не объясняет проблему достаточно ясно.
Лучше, чтобы весь код обработки ошибок находился в одном месте: тогда будущим
сопровождающим придется обращаться только к одному участку кода, если логику
обработки ошибок понадобится изменить. Если весь код обработки ошибок будет в
одном месте, это также поможет нам печатать сообщения, понятные конечным
пользователям.
Решим эти четыре проблемы с помощью рефакторинга проекта.
Разделение ответственностей в бинарных проектах
Организационная проблема, когда на функцию main возлагается ответственность
за несколько задач, часто встречается во многих бинарных проектах. Поэтому
многие программисты на Rust считают полезным разделять отдельные
ответственности бинарной программы, когда функция main начинает разрастаться.
Этот процесс состоит из следующих шагов:
- Разделить программу на файл main.rs и файл lib.rs и переместить логику программы в lib.rs.
- Пока логика разбора аргументов командной строки остается небольшой, она может
оставаться в функции
main. - Когда логика разбора аргументов командной строки начинает усложняться,
вынести ее из функции
mainв другие функции или типы.
После этого процесса обязанности, которые остаются в функции main, должны
быть ограничены следующим:
- Вызов логики разбора командной строки со значениями аргументов
- Настройка любой другой конфигурации
- Вызов функции
runв lib.rs - Обработка ошибки, если
runвернет ошибку
Этот шаблон связан с разделением ответственностей: main.rs отвечает за запуск
программы, а lib.rs отвечает за всю логику выполняемой задачи. Поскольку
функцию main нельзя тестировать напрямую, такая структура позволяет
тестировать всю логику программы, переместив ее из функции main. Код,
оставшийся в функции main, будет достаточно маленьким, чтобы проверить его
правильность чтением. Переработаем нашу программу, следуя этому процессу.
Извлечение парсера аргументов
Мы вынесем функциональность разбора аргументов в функцию, которую будет
вызывать main. В листинге 12-5 показано новое начало функции main, которое
вызывает новую функцию parse_config; ее мы определим в src/main.rs.
use std::env;
use std::fs;
fn main() {
let args: Vec<String> = env::args().collect();
let (query, file_path) = parse_config(&args);
// --snip--
println!("Searching for {query}");
println!("In file {file_path}");
let contents = fs::read_to_string(file_path)
.expect("Should have been able to read the file");
println!("With text:\n{contents}");
}
fn parse_config(args: &[String]) -> (&str, &str) {
let query = &args[1];
let file_path = &args[2];
(query, file_path)
}parse_config из mainМы по-прежнему собираем аргументы командной строки в вектор, но вместо того
чтобы присваивать значение аргумента с индексом 1 переменной query, а
значение аргумента с индексом 2 переменной file_path внутри функции main,
мы передаем весь вектор функции parse_config. Затем функция parse_config
содержит логику, определяющую, какой аргумент в какую переменную попадает, и
передает значения обратно в main. Мы все еще создаем переменные query и
file_path в main, но main больше не отвечает за то, как аргументы
командной строки сопоставляются с переменными.
Для нашей небольшой программы такая переработка может показаться избыточной, но мы выполняем рефакторинг маленькими последовательными шагами. После этого изменения снова запустите программу, чтобы убедиться, что разбор аргументов по-прежнему работает. Полезно часто проверять продвижение вперед: так легче находить причину проблем, когда они возникают.
Группировка значений конфигурации
Мы можем сделать еще один небольшой шаг, чтобы дополнительно улучшить функцию
parse_config. Сейчас мы возвращаем кортеж, но затем сразу снова разбиваем
этот кортеж на отдельные части. Это признак того, что у нас, возможно, еще нет
подходящей абстракции.
Другой признак, показывающий, что есть место для улучшения, – это часть
config в имени parse_config: она подразумевает, что два возвращаемых
значения связаны между собой и оба являются частью одного значения
конфигурации. Сейчас мы не передаем этот смысл в структуре данных, кроме как
группируя два значения в кортеж; вместо этого поместим оба значения в одну
структуру и дадим каждому полю структуры осмысленное имя. Это упростит будущим
сопровождающим кода понимание того, как разные значения связаны друг с другом
и каково их назначение.
В листинге 12-6 показаны улучшения функции parse_config.
use std::env;
use std::fs;
fn main() {
let args: Vec<String> = env::args().collect();
let config = parse_config(&args);
println!("Searching for {}", config.query);
println!("In file {}", config.file_path);
let contents = fs::read_to_string(config.file_path)
.expect("Should have been able to read the file");
// --snip--
println!("With text:\n{contents}");
}
struct Config {
query: String,
file_path: String,
}
fn parse_config(args: &[String]) -> Config {
let query = args[1].clone();
let file_path = args[2].clone();
Config { query, file_path }
}parse_config, чтобы она возвращала экземпляр структуры ConfigМы добавили структуру с именем Config, определенную с полями query и
file_path. Сигнатура parse_config теперь показывает, что она возвращает
значение Config. В теле parse_config, где раньше мы возвращали строковые
срезы, ссылающиеся на значения String в args, теперь мы определяем
Config так, чтобы она содержала собственные значения String. Переменная
args в main является владельцем значений аргументов и только позволяет
функции parse_config заимствовать их; это значит, что мы нарушили бы правила
заимствования Rust, если бы Config попыталась забрать владение значениями из
args.
Есть несколько способов управлять данными String; самый простой, хотя и
несколько неэффективный путь, – вызвать метод clone для этих значений. Это
сделает полную копию данных, которой будет владеть экземпляр Config, что
требует больше времени и памяти, чем хранение ссылки на строковые данные.
Однако клонирование данных также делает наш код очень простым, потому что нам
не нужно управлять временами жизни ссылок; в этой ситуации отказаться от
небольшой части производительности ради простоты – разумный компромисс.
Компромиссы использования clone
Многие разработчики Rust склонны избегать использования clone для исправления
проблем владения из-за его стоимости во время выполнения. В
главе 13 вы узнаете, как использовать более
эффективные методы в таких ситуациях. Но сейчас нормально скопировать
несколько строк, чтобы продолжать двигаться вперед, потому что вы сделаете
эти копии только один раз, а путь к файлу и строка запроса очень малы. Лучше
иметь рабочую программу, которая немного неэффективна, чем пытаться
гипероптимизировать код при первом проходе. Когда вы станете опытнее в Rust,
будет проще сразу начинать с самого эффективного решения, но пока совершенно
допустимо вызвать clone.
Мы обновили main: теперь она помещает экземпляр Config, возвращенный
parse_config, в переменную с именем config. Также мы обновили код, который
раньше использовал отдельные переменные query и file_path, чтобы теперь он
использовал поля структуры Config.
Теперь наш код яснее показывает, что query и file_path связаны и что их
назначение – настраивать работу программы. Любой код, использующий эти
значения, знает, что их нужно искать в экземпляре config, в полях, названных
по их назначению.
Создание конструктора для Config
До сих пор мы извлекли из main логику, отвечающую за разбор аргументов
командной строки, и поместили ее в функцию parse_config. Это помогло нам
увидеть, что значения query и file_path связаны между собой и что эта
связь должна быть выражена в нашем коде. Затем мы добавили структуру Config,
чтобы назвать связанное назначение query и file_path и чтобы функция
parse_config могла возвращать имена значений как имена полей структуры.
Итак, теперь, когда назначение функции parse_config – создать экземпляр
Config, мы можем превратить parse_config из обычной функции в функцию с
именем new, связанную со структурой Config. Это сделает код более
идиоматичным. Мы можем создавать экземпляры типов из стандартной библиотеки,
например String, вызывая String::new. Точно так же, превратив
parse_config в функцию new, связанную с Config, мы сможем создавать
экземпляры Config, вызывая Config::new. В листинге 12-7 показаны
изменения, которые нужно внести.
use std::env;
use std::fs;
fn main() {
let args: Vec<String> = env::args().collect();
let config = Config::new(&args);
println!("Searching for {}", config.query);
println!("In file {}", config.file_path);
let contents = fs::read_to_string(config.file_path)
.expect("Should have been able to read the file");
println!("With text:\n{contents}");
// --snip--
}
// --snip--
struct Config {
query: String,
file_path: String,
}
impl Config {
fn new(args: &[String]) -> Config {
let query = args[1].clone();
let file_path = args[2].clone();
Config { query, file_path }
}
}parse_config в Config::newМы обновили main: там, где раньше вызывалась parse_config, теперь
вызывается Config::new. Мы изменили имя parse_config на new и переместили
ее в блок impl, который связывает функцию new с Config. Попробуйте снова
скомпилировать этот код, чтобы убедиться, что он работает.
Исправление обработки ошибок
Теперь займемся исправлением обработки ошибок. Вспомните, что попытка получить
значения из вектора args по индексу 1 или 2 приведет к панике программы, если
вектор содержит меньше трех элементов. Попробуйте запустить программу без
аргументов; это будет выглядеть так:
$ cargo run
Compiling minigrep v0.1.0 (file:///projects/minigrep)
Finished `dev` profile [unoptimized + debuginfo] target(s) in 0.0s
Running `target/debug/minigrep`
thread 'main' panicked at src/main.rs:27:21:
index out of bounds: the len is 1 but the index is 1
note: run with `RUST_BACKTRACE=1` environment variable to display a backtrace
Строка index out of bounds: the len is 1 but the index is 1 – это сообщение
об ошибке, предназначенное для программистов. Оно не поможет конечным
пользователям понять, что им нужно сделать иначе. Исправим это.
Улучшение сообщения об ошибке
В листинге 12-8 мы добавляем в функцию new проверку, которая удостоверится,
что срез достаточно длинный, прежде чем обращаться к индексам 1 и 2. Если срез
недостаточно длинный, программа паникует и выводит более понятное сообщение об
ошибке.
use std::env;
use std::fs;
fn main() {
let args: Vec<String> = env::args().collect();
let config = Config::new(&args);
println!("Searching for {}", config.query);
println!("In file {}", config.file_path);
let contents = fs::read_to_string(config.file_path)
.expect("Should have been able to read the file");
println!("With text:\n{contents}");
}
struct Config {
query: String,
file_path: String,
}
impl Config {
// --snip--
fn new(args: &[String]) -> Config {
if args.len() < 3 {
panic!("not enough arguments");
}
// --snip--
let query = args[1].clone();
let file_path = args[2].clone();
Config { query, file_path }
}
}Этот код похож на функцию Guess::new, которую мы написали в листинге
9-13, где мы вызывали panic!, когда
аргумент value выходил за диапазон допустимых значений. Здесь, вместо
проверки диапазона значений, мы проверяем, что длина args не меньше 3, и
оставшаяся часть функции может работать, исходя из предположения, что это
условие выполнено. Если в args меньше трех элементов, это условие будет
true, и мы вызываем макрос panic!, чтобы немедленно завершить программу.
Добавив эти несколько строк кода в new, снова запустим программу без
аргументов и посмотрим, как теперь выглядит ошибка:
$ cargo run
Compiling minigrep v0.1.0 (file:///projects/minigrep)
Finished `dev` profile [unoptimized + debuginfo] target(s) in 0.0s
Running `target/debug/minigrep`
thread 'main' panicked at src/main.rs:26:13:
not enough arguments
note: run with `RUST_BACKTRACE=1` environment variable to display a backtrace
Этот вывод лучше: теперь у нас есть разумное сообщение об ошибке. Однако в нем
также есть лишняя информация, которую мы не хотим показывать пользователям.
Возможно, прием, который мы использовали в листинге 9-13, не лучший для этого
случая: вызов panic! больше подходит для проблемы в программе, чем для
проблемы использования, как обсуждалось в главе 9.
Вместо этого мы используем другой прием, о котором вы узнали в главе 9, –
возврат Result, который указывает либо на
успех, либо на ошибку.
Возврат Result вместо вызова panic!
Вместо этого мы можем вернуть значение Result, которое в случае успеха будет
содержать экземпляр Config, а в случае ошибки будет описывать проблему. Мы
также изменим имя функции с new на build, потому что многие программисты
ожидают, что функции new никогда не завершаются ошибкой. Когда
Config::build взаимодействует с main, мы можем использовать тип
Result, чтобы подать сигнал о возникшей проблеме. Затем мы можем изменить
main так, чтобы она превращала вариант Err в более практичную ошибку для
пользователей, без окружающего текста про thread 'main' и RUST_BACKTRACE,
который возникает при вызове panic!.
В листинге 12-9 показаны изменения, которые нужно внести в возвращаемое
значение функции, теперь называемой Config::build, и в тело функции, чтобы
она возвращала Result. Обратите внимание, что этот код не скомпилируется,
пока мы не обновим также main; это мы сделаем в следующем листинге.
use std::env;
use std::fs;
fn main() {
let args: Vec<String> = env::args().collect();
let config = Config::new(&args);
println!("Searching for {}", config.query);
println!("In file {}", config.file_path);
let contents = fs::read_to_string(config.file_path)
.expect("Should have been able to read the file");
println!("With text:\n{contents}");
}
struct Config {
query: String,
file_path: String,
}
impl Config {
fn build(args: &[String]) -> Result<Config, &'static str> {
if args.len() < 3 {
return Err("not enough arguments");
}
let query = args[1].clone();
let file_path = args[2].clone();
Ok(Config { query, file_path })
}
}Result из Config::buildНаша функция build возвращает Result с экземпляром Config в случае успеха
и строковым литералом в случае ошибки. Наши значения ошибок всегда будут
строковыми литералами с временем жизни 'static.
Мы внесли два изменения в тело функции: вместо вызова panic!, когда
пользователь не передает достаточно аргументов, мы теперь возвращаем значение
Err, а возвращаемое значение Config обернули в Ok. Эти изменения
приводят функцию в соответствие с ее новой сигнатурой типа.
Возврат значения Err из Config::build позволяет функции main обработать
значение Result, возвращенное функцией build, и чище завершить процесс в
случае ошибки.
Вызов Config::build и обработка ошибок
Чтобы обработать случай ошибки и напечатать удобное для пользователя
сообщение, нам нужно обновить main, чтобы она обрабатывала Result,
возвращаемый Config::build, как показано в листинге 12-10. Мы также уберем
ответственность за завершение инструмента командной строки с ненулевым кодом
ошибки у panic! и вместо этого реализуем ее вручную. Ненулевой статус
завершения – это соглашение, которое сообщает процессу, вызвавшему нашу
программу, что программа завершилась с состоянием ошибки.
use std::env;
use std::fs;
use std::process;
fn main() {
let args: Vec<String> = env::args().collect();
let config = Config::build(&args).unwrap_or_else(|err| {
println!("Problem parsing arguments: {err}");
process::exit(1);
});
// --snip--
println!("Searching for {}", config.query);
println!("In file {}", config.file_path);
let contents = fs::read_to_string(config.file_path)
.expect("Should have been able to read the file");
println!("With text:\n{contents}");
}
struct Config {
query: String,
file_path: String,
}
impl Config {
fn build(args: &[String]) -> Result<Config, &'static str> {
if args.len() < 3 {
return Err("not enough arguments");
}
let query = args[1].clone();
let file_path = args[2].clone();
Ok(Config { query, file_path })
}
}Config не удалосьВ этом листинге мы использовали метод, который еще не рассматривали подробно:
unwrap_or_else, определенный стандартной библиотекой для Result<T, E>.
Использование unwrap_or_else позволяет нам определить собственную обработку
ошибок без panic!. Если Result содержит значение Ok, поведение этого
метода похоже на unwrap: он возвращает внутреннее значение, обернутое в
Ok. Однако если значение является Err, этот метод вызывает код в замыкании:
это анонимная функция, которую мы определяем и передаем как аргумент в
unwrap_or_else. Замыкания мы подробнее рассмотрим в главе 13.
Сейчас вам достаточно знать, что unwrap_or_else передаст внутреннее значение
Err, которым в этом случае является статическая строка "not enough arguments", добавленная нами в листинге 12-9, в наше замыкание через аргумент
err, указанный между вертикальными чертами. Код в замыкании затем сможет
использовать значение err при выполнении.
Мы добавили новую строку use, чтобы ввести process из стандартной
библиотеки в область видимости. Код в замыкании, который будет выполнен в
случае ошибки, состоит всего из двух строк: мы печатаем значение err, а затем
вызываем process::exit. Функция process::exit немедленно остановит
программу и вернет число, переданное как код статуса завершения. Это похоже на
обработку на основе panic!, которую мы использовали в листинге 12-8, но
теперь мы больше не получаем весь лишний вывод. Попробуем:
$ cargo run
Compiling minigrep v0.1.0 (file:///projects/minigrep)
Finished `dev` profile [unoptimized + debuginfo] target(s) in 0.48s
Running `target/debug/minigrep`
Problem parsing arguments: not enough arguments
Отлично! Этот вывод гораздо дружелюбнее для наших пользователей.
Извлечение логики из main
Теперь, когда мы закончили рефакторинг разбора конфигурации, перейдем к логике
программы. Как мы говорили в разделе «Разделение ответственностей в бинарных
проектах», мы
извлечем функцию с именем run, которая будет содержать всю логику, сейчас
находящуюся в функции main и не связанную с настройкой конфигурации или
обработкой ошибок. Когда мы закончим, функция main будет краткой, и ее легко
будет проверить простым чтением, а для всей остальной логики мы сможем писать
тесты.
В листинге 12-11 показано небольшое последовательное улучшение: извлечение
функции run.
use std::env;
use std::fs;
use std::process;
fn main() {
// --snip--
let args: Vec<String> = env::args().collect();
let config = Config::build(&args).unwrap_or_else(|err| {
println!("Problem parsing arguments: {err}");
process::exit(1);
});
println!("Searching for {}", config.query);
println!("In file {}", config.file_path);
run(config);
}
fn run(config: Config) {
let contents = fs::read_to_string(config.file_path)
.expect("Should have been able to read the file");
println!("With text:\n{contents}");
}
// --snip--
struct Config {
query: String,
file_path: String,
}
impl Config {
fn build(args: &[String]) -> Result<Config, &'static str> {
if args.len() < 3 {
return Err("not enough arguments");
}
let query = args[1].clone();
let file_path = args[2].clone();
Ok(Config { query, file_path })
}
}run, содержащей остальную логику программыФункция run теперь содержит всю оставшуюся логику из main, начиная с
чтения файла. Функция run принимает экземпляр Config как аргумент.
Возврат ошибок из run
Теперь, когда оставшаяся логика программы отделена в функцию run, мы можем
улучшить обработку ошибок так же, как сделали это с Config::build в листинге
12-9. Вместо того чтобы позволять программе паниковать из-за вызова expect,
функция run будет возвращать Result<T, E>, когда что-то пойдет не так. Это
позволит нам дальше объединять логику обработки ошибок в main и делать это
удобным для пользователя способом. В листинге 12-12 показаны изменения,
которые нужно внести в сигнатуру и тело run.
use std::env;
use std::fs;
use std::process;
use std::error::Error;
// --snip--
fn main() {
let args: Vec<String> = env::args().collect();
let config = Config::build(&args).unwrap_or_else(|err| {
println!("Problem parsing arguments: {err}");
process::exit(1);
});
println!("Searching for {}", config.query);
println!("In file {}", config.file_path);
run(config);
}
fn run(config: Config) -> Result<(), Box<dyn Error>> {
let contents = fs::read_to_string(config.file_path)?;
println!("With text:\n{contents}");
Ok(())
}
struct Config {
query: String,
file_path: String,
}
impl Config {
fn build(args: &[String]) -> Result<Config, &'static str> {
if args.len() < 3 {
return Err("not enough arguments");
}
let query = args[1].clone();
let file_path = args[2].clone();
Ok(Config { query, file_path })
}
}run, чтобы она возвращала ResultЗдесь мы сделали три важных изменения. Во-первых, мы изменили возвращаемый тип
функции run на Result<(), Box<dyn Error>>. Раньше эта функция возвращала
единичный тип, (), и мы сохраняем его как значение, возвращаемое в случае
Ok.
Для типа ошибки мы использовали трейт-объект Box<dyn Error> (и ввели
std::error::Error в область видимости с помощью инструкции use в начале).
Мы рассмотрим трейт-объекты в главе 18. Пока просто
знайте, что Box<dyn Error> означает: функция вернет тип, реализующий трейт
Error, но нам не нужно указывать, каким конкретным типом будет возвращаемое
значение. Это дает нам гибкость возвращать значения ошибок, которые могут быть
разных типов в разных случаях ошибки. Ключевое слово dyn – сокращение от
dynamic.
Во-вторых, мы удалили вызов expect в пользу оператора ?, о котором говорили
в главе 9. Вместо того чтобы вызывать
panic! при ошибке, ? вернет значение ошибки из текущей функции, чтобы его
обработал вызывающий код.
В-третьих, функция run теперь возвращает значение Ok в случае успеха. В
сигнатуре мы объявили успешный тип функции run как (), поэтому нам нужно
обернуть значение единичного типа в Ok. Синтаксис Ok(()) сначала может
выглядеть немного странно. Но использование () таким образом – идиоматичный
способ показать, что мы вызываем run только ради побочных эффектов; она не
возвращает значение, которое нам нужно.
Когда вы запустите этот код, он скомпилируется, но выведет предупреждение:
$ cargo run -- the poem.txt
Compiling minigrep v0.1.0 (file:///projects/minigrep)
warning: unused `Result` that must be used
--> src/main.rs:19:5
|
19 | run(config);
| ^^^^^^^^^^^
|
= note: this `Result` may be an `Err` variant, which should be handled
= note: `#[warn(unused_must_use)]` on by default
help: use `let _ = ...` to ignore the resulting value
|
19 | let _ = run(config);
| +++++++
warning: `minigrep` (bin "minigrep") generated 1 warning
Finished `dev` profile [unoptimized + debuginfo] target(s) in 0.71s
Running `target/debug/minigrep the poem.txt`
Searching for the
In file poem.txt
With text:
I'm nobody! Who are you?
Are you nobody, too?
Then there's a pair of us - don't tell!
They'd banish us, you know.
How dreary to be somebody!
How public, like a frog
To tell your name the livelong day
To an admiring bog!
Rust сообщает, что наш код проигнорировал значение Result, а значение
Result может указывать на возникшую ошибку. Но мы не проверяем, была ошибка
или нет, и компилятор напоминает, что мы, вероятно, хотели добавить сюда код
обработки ошибок! Исправим эту проблему.
Обработка ошибок, возвращенных из run, в main
Мы проверим наличие ошибок и обработаем их приемом, похожим на тот, который
использовали с Config::build в листинге 12-10, но с небольшим отличием:
Имя файла: src/main.rs
use std::env;
use std::error::Error;
use std::fs;
use std::process;
fn main() {
// --snip--
let args: Vec<String> = env::args().collect();
let config = Config::build(&args).unwrap_or_else(|err| {
println!("Problem parsing arguments: {err}");
process::exit(1);
});
println!("Searching for {}", config.query);
println!("In file {}", config.file_path);
if let Err(e) = run(config) {
println!("Application error: {e}");
process::exit(1);
}
}
fn run(config: Config) -> Result<(), Box<dyn Error>> {
let contents = fs::read_to_string(config.file_path)?;
println!("With text:\n{contents}");
Ok(())
}
struct Config {
query: String,
file_path: String,
}
impl Config {
fn build(args: &[String]) -> Result<Config, &'static str> {
if args.len() < 3 {
return Err("not enough arguments");
}
let query = args[1].clone();
let file_path = args[2].clone();
Ok(Config { query, file_path })
}
}Мы используем if let, а не unwrap_or_else, чтобы проверить, возвращает ли
run значение Err, и вызвать process::exit(1), если это так. Функция
run не возвращает значение, которое мы хотели бы unwrap таким же образом,
как Config::build возвращает экземпляр Config. Поскольку в случае успеха
run возвращает (), нас интересует только обнаружение ошибки, поэтому нам не
нужен unwrap_or_else, чтобы вернуть распакованное значение, которым все равно
было бы только ().
Тела if let и функций unwrap_or_else в обоих случаях одинаковы: мы печатаем
ошибку и завершаем программу.
Разделение кода на библиотечный крейт
Наш проект minigrep пока выглядит хорошо! Теперь мы разделим файл
src/main.rs и поместим часть кода в файл src/lib.rs. Так мы сможем
тестировать код и получим файл src/main.rs с меньшим количеством
обязанностей.
Определим код, отвечающий за поиск текста, в src/lib.rs, а не в
src/main.rs. Это позволит нам (или кому угодно еще, кто использует нашу
библиотеку minigrep) вызывать функцию поиска из большего числа контекстов,
чем только из бинарного файла minigrep.
Сначала определим сигнатуру функции search в src/lib.rs, как показано в
листинге 12-13, с телом, которое вызывает макрос unimplemented!. Мы объясним
сигнатуру подробнее, когда заполним реализацию.
pub fn search<'a>(query: &str, contents: &'a str) -> Vec<&'a str> {
unimplemented!();
}search в src/lib.rsМы использовали ключевое слово pub в определении функции, чтобы обозначить
search как часть публичного API нашего библиотечного крейта. Теперь у нас
есть библиотечный крейт, который мы можем использовать из бинарного крейта и
который можем тестировать!
Теперь нужно ввести код, определенный в src/lib.rs, в область видимости бинарного крейта в src/main.rs и вызвать его, как показано в листинге 12-14.
use std::env;
use std::error::Error;
use std::fs;
use std::process;
// --snip--
use minigrep::search;
fn main() {
// --snip--
let args: Vec<String> = env::args().collect();
let config = Config::build(&args).unwrap_or_else(|err| {
println!("Problem parsing arguments: {err}");
process::exit(1);
});
if let Err(e) = run(config) {
println!("Application error: {e}");
process::exit(1);
}
}
// --snip--
struct Config {
query: String,
file_path: String,
}
impl Config {
fn build(args: &[String]) -> Result<Config, &'static str> {
if args.len() < 3 {
return Err("not enough arguments");
}
let query = args[1].clone();
let file_path = args[2].clone();
Ok(Config { query, file_path })
}
}
fn run(config: Config) -> Result<(), Box<dyn Error>> {
let contents = fs::read_to_string(config.file_path)?;
for line in search(&config.query, &contents) {
println!("{line}");
}
Ok(())
}search библиотечного крейта minigrep в src/main.rsМы добавляем строку use minigrep::search, чтобы ввести функцию search из
библиотечного крейта в область видимости бинарного крейта. Затем в функции
run, вместо того чтобы печатать содержимое файла, мы вызываем функцию
search и передаем ей значения config.query и contents как аргументы.
После этого run использует цикл for, чтобы напечатать каждую строку,
возвращенную из search и совпавшую с запросом. Сейчас также подходящее время
удалить вызовы println! в функции main, которые показывали запрос и путь к
файлу, чтобы наша программа печатала только результаты поиска (если ошибок не
произошло).
Обратите внимание, что функция поиска будет собирать все результаты в вектор, который она возвращает, прежде чем начнется какая-либо печать. Такая реализация может медленно показывать результаты при поиске в больших файлах, потому что результаты не печатаются по мере нахождения; возможный способ исправить это с помощью итераторов мы обсудим в главе 13.
Уф! Это был большой объем работы, но мы подготовили основу для дальнейшего успеха. Теперь обрабатывать ошибки намного проще, а код стал более модульным. Почти вся наша дальнейшая работа будет выполняться в src/lib.rs.
Воспользуемся этой новой модульностью и сделаем то, что было бы трудно со старым кодом, но легко с новым: напишем несколько тестов!
Добавление функциональности с помощью разработки через тестирование (TDD)
Добавление функциональности с помощью разработки через тестирование
Теперь, когда логика поиска находится в src/lib.rs отдельно от функции
main, писать тесты для основной функциональности нашего кода стало намного
проще. Мы можем напрямую вызывать функции с разными аргументами и проверять
возвращаемые значения, не запуская наш бинарный файл из командной строки.
В этом разделе мы добавим логику поиска в программу minigrep, используя
процесс разработки через тестирование (test-driven development, TDD), который
состоит из следующих шагов:
- Напишите тест, который завершается неудачей, и запустите его, чтобы убедиться, что он завершается неудачей именно по ожидаемой причине.
- Напишите или измените ровно столько кода, сколько нужно, чтобы новый тест прошел.
- Проведите рефакторинг только что добавленного или измененного кода и убедитесь, что тесты продолжают проходить.
- Повторите, начиная с шага 1!
Хотя TDD – всего лишь один из многих способов писать программы, он может помогать направлять проектирование кода. Если писать тест до кода, который должен заставить этот тест пройти, это помогает поддерживать высокое покрытие тестами на протяжении всего процесса.
Через тесты мы реализуем функциональность, которая будет фактически искать
строку запроса в содержимом файла и создавать список строк, совпадающих с
запросом. Мы добавим эту функциональность в функцию с именем search.
Написание падающего теста
В src/lib.rs мы добавим модуль tests с тестовой функцией, как делали в
главе 11. Тестовая функция задает поведение,
которое мы хотим получить от функции search: она будет принимать запрос и
текст для поиска и возвращать только те строки из текста, которые содержат
запрос. В листинге 12-15 показан этот тест.
pub fn search<'a>(query: &str, contents: &'a str) -> Vec<&'a str> {
unimplemented!();
}
// --snip--
#[cfg(test)]
mod tests {
use super::*;
#[test]
fn one_result() {
let query = "duct";
let contents = "\
Rust:
safe, fast, productive.
Pick three.";
assert_eq!(vec!["safe, fast, productive."], search(query, contents));
}
}search, описывающего функциональность, которую мы хотим иметьЭтот тест ищет строку "duct". Текст, в котором мы ищем, состоит из трех
строк, и только одна из них содержит "duct" (обратите внимание: обратная
косая черта после открывающей двойной кавычки говорит Rust не вставлять символ
новой строки в начало содержимого этого строкового литерала). Мы утверждаем,
что значение, возвращаемое функцией search, содержит только ту строку,
которую мы ожидаем.
Если мы запустим этот тест сейчас, он завершится неудачей, потому что макрос
unimplemented! паникует с сообщением “not implemented”. Следуя принципам
TDD, мы сделаем небольшой шаг: добавим ровно столько кода, чтобы вызов функции
в тесте больше не приводил к панике. Для этого определим функцию search так,
чтобы она всегда возвращала пустой вектор, как показано в листинге 12-16.
После этого тест должен скомпилироваться и завершиться неудачей, потому что
пустой вектор не совпадает с вектором, содержащим строку "safe, fast, productive.".
pub fn search<'a>(query: &str, contents: &'a str) -> Vec<&'a str> {
vec![]
}
#[cfg(test)]
mod tests {
use super::*;
#[test]
fn one_result() {
let query = "duct";
let contents = "\
Rust:
safe, fast, productive.
Pick three.";
assert_eq!(vec!["safe, fast, productive."], search(query, contents));
}
}search, чтобы ее вызов не приводил к паникеТеперь обсудим, почему в сигнатуре search нужно явно определить время жизни
'a и использовать его с аргументом contents и возвращаемым значением.
Вспомните из главы 10, что параметры времен
жизни указывают, время жизни какого аргумента связано со временем жизни
возвращаемого значения. В этом случае мы указываем, что возвращаемый вектор
должен содержать строковые срезы, которые ссылаются на срезы аргумента
contents (а не аргумента query).
Другими словами, мы говорим Rust, что данные, возвращаемые функцией search,
будут жить так же долго, как данные, переданные в функцию search через
аргумент contents. Это важно! Данные, на которые ссылается срез, должны быть
действительными, чтобы ссылка была действительной; если компилятор решит, что
мы создаем строковые срезы из query, а не из contents, он выполнит
проверки безопасности неправильно.
Если мы забудем аннотации времен жизни и попробуем скомпилировать эту функцию, то получим такую ошибку:
$ cargo build
Compiling minigrep v0.1.0 (file:///projects/minigrep)
error[E0106]: missing lifetime specifier
--> src/lib.rs:1:51
|
1 | pub fn search(query: &str, contents: &str) -> Vec<&str> {
| ---- ---- ^ expected named lifetime parameter
|
= help: this function's return type contains a borrowed value, but the signature does not say whether it is borrowed from `query` or `contents`
help: consider introducing a named lifetime parameter
|
1 | pub fn search<'a>(query: &'a str, contents: &'a str) -> Vec<&'a str> {
| ++++ ++ ++ ++
For more information about this error, try `rustc --explain E0106`.
error: could not compile `minigrep` (lib) due to 1 previous error
Rust не может знать, какой из двух параметров нужен нам для выходного значения,
поэтому мы должны сказать ему это явно. Обратите внимание, что текст справки
предлагает указать один и тот же параметр времени жизни для всех параметров и
выходного типа, но это неверно! Поскольку contents – это параметр, который
содержит весь наш текст, а вернуть мы хотим части этого текста, совпадающие с
запросом, мы знаем, что только contents должен быть связан с возвращаемым
значением с помощью синтаксиса времен жизни.
Другие языки программирования не требуют связывать аргументы с возвращаемыми значениями в сигнатуре, но со временем эта практика станет привычнее. Возможно, вы захотите сравнить этот пример с примерами из раздела «Проверка ссылок с помощью времен жизни» в главе 10.
Написание кода, чтобы тест прошел
Сейчас наш тест завершается неудачей, потому что мы всегда возвращаем пустой
вектор. Чтобы исправить это и реализовать search, наша программа должна
выполнить следующие шаги:
- Пройти по каждой строке содержимого.
- Проверить, содержит ли строка нашу строку запроса.
- Если содержит, добавить ее в список возвращаемых значений.
- Если не содержит, ничего не делать.
- Вернуть список совпавших результатов.
Разберем каждый шаг, начав с обхода строк.
Обход строк с помощью метода lines
В Rust есть удобный метод для построчного обхода строк, который так и
называется – lines. Он работает так, как показано в листинге 12-17.
Обратите внимание, что этот код пока не скомпилируется.
pub fn search<'a>(query: &str, contents: &'a str) -> Vec<&'a str> {
for line in contents.lines() {
// do something with line
}
}
#[cfg(test)]
mod tests {
use super::*;
#[test]
fn one_result() {
let query = "duct";
let contents = "\
Rust:
safe, fast, productive.
Pick three.";
assert_eq!(vec!["safe, fast, productive."], search(query, contents));
}
}contentsМетод lines возвращает итератор. Мы подробно поговорим об итераторах в
главе 13. Но вспомните, что вы уже видели
такой способ использования итератора в листинге 3-5,
где мы использовали цикл for с итератором, чтобы выполнить код для каждого
элемента коллекции.
Поиск запроса в каждой строке
Далее мы проверим, содержит ли текущая строка нашу строку запроса. К счастью,
у строк есть удобный метод contains, который делает это за нас! Добавьте
вызов метода contains в функцию search, как показано в листинге 12-18.
Обратите внимание, что этот код пока все еще не скомпилируется.
pub fn search<'a>(query: &str, contents: &'a str) -> Vec<&'a str> {
for line in contents.lines() {
if line.contains(query) {
// do something with line
}
}
}
#[cfg(test)]
mod tests {
use super::*;
#[test]
fn one_result() {
let query = "duct";
let contents = "\
Rust:
safe, fast, productive.
Pick three.";
assert_eq!(vec!["safe, fast, productive."], search(query, contents));
}
}queryСейчас мы постепенно наращиваем функциональность. Чтобы код скомпилировался, нужно вернуть значение из тела функции, как мы и указали в ее сигнатуре.
Сохранение совпавших строк
Чтобы завершить эту функцию, нам нужен способ сохранить совпавшие строки,
которые мы хотим вернуть. Для этого можно создать изменяемый вектор перед
циклом for и вызвать метод push, чтобы сохранить line в векторе. После
цикла for мы возвращаем вектор, как показано в листинге 12-19.
pub fn search<'a>(query: &str, contents: &'a str) -> Vec<&'a str> {
let mut results = Vec::new();
for line in contents.lines() {
if line.contains(query) {
results.push(line);
}
}
results
}
#[cfg(test)]
mod tests {
use super::*;
#[test]
fn one_result() {
let query = "duct";
let contents = "\
Rust:
safe, fast, productive.
Pick three.";
assert_eq!(vec!["safe, fast, productive."], search(query, contents));
}
}Теперь функция search должна возвращать только строки, содержащие query, и
наш тест должен пройти. Запустим тест:
$ cargo test
Compiling minigrep v0.1.0 (file:///projects/minigrep)
Finished `test` profile [unoptimized + debuginfo] target(s) in 1.22s
Running unittests src/lib.rs (target/debug/deps/minigrep-9cd200e5fac0fc94)
running 1 test
test tests::one_result ... ok
test result: ok. 1 passed; 0 failed; 0 ignored; 0 measured; 0 filtered out; finished in 0.00s
Running unittests src/main.rs (target/debug/deps/minigrep-9cd200e5fac0fc94)
running 0 tests
test result: ok. 0 passed; 0 failed; 0 ignored; 0 measured; 0 filtered out; finished in 0.00s
Doc-tests minigrep
running 0 tests
test result: ok. 0 passed; 0 failed; 0 ignored; 0 measured; 0 filtered out; finished in 0.00s
Наш тест прошел, значит, мы знаем, что все работает!
На этом этапе мы могли бы рассмотреть возможности для рефакторинга реализации функции поиска, сохраняя прохождение тестов и ту же функциональность. Код в функции поиска не так уж плох, но он не использует некоторые полезные возможности итераторов. Мы вернемся к этому примеру в главе 13, где подробно изучим итераторы, и посмотрим, как его улучшить.
Теперь вся программа должна работать! Попробуем ее сначала со словом, которое должно вернуть ровно одну строку из стихотворения Эмили Дикинсон: frog.
$ cargo run -- frog poem.txt
Compiling minigrep v0.1.0 (file:///projects/minigrep)
Finished `dev` profile [unoptimized + debuginfo] target(s) in 0.38s
Running `target/debug/minigrep frog poem.txt`
How public, like a frog
Отлично! Теперь попробуем слово, которое совпадет с несколькими строками, например body:
$ cargo run -- body poem.txt
Compiling minigrep v0.1.0 (file:///projects/minigrep)
Finished `dev` profile [unoptimized + debuginfo] target(s) in 0.0s
Running `target/debug/minigrep body poem.txt`
I'm nobody! Who are you?
Are you nobody, too?
How dreary to be somebody!
И наконец, убедимся, что мы не получаем ни одной строки, когда ищем слово, которого вообще нет в стихотворении, например monomorphization:
$ cargo run -- monomorphization poem.txt
Compiling minigrep v0.1.0 (file:///projects/minigrep)
Finished `dev` profile [unoptimized + debuginfo] target(s) in 0.0s
Running `target/debug/minigrep monomorphization poem.txt`
Прекрасно! Мы создали собственную мини-версию классического инструмента и много узнали о том, как структурировать приложения. Также мы немного узнали о файловом вводе и выводе, временах жизни, тестировании и разборе командной строки.
Чтобы завершить этот проект, мы кратко покажем, как работать с переменными окружения и как печатать в стандартный поток ошибок: и то и другое полезно, когда вы пишете программы командной строки.
Работа с переменными окружения
Работа с переменными окружения
Мы улучшим бинарный файл minigrep, добавив дополнительную возможность:
настройку регистронезависимого поиска, которую пользователь сможет включить
через переменную окружения. Мы могли бы сделать эту возможность параметром
командной строки и требовать, чтобы пользователи вводили его каждый раз, когда
хотят его применить, но, сделав его переменной окружения, мы позволяем
пользователям установить переменную окружения один раз и сделать все их поиски
в этом сеансе терминала регистронезависимыми.
Написание падающего теста для регистронезависимого поиска
Сначала мы добавим в библиотеку minigrep новую функцию
search_case_insensitive, которая будет вызываться, когда переменная окружения
имеет значение. Мы продолжим следовать процессу TDD, поэтому первый шаг снова
состоит в том, чтобы написать падающий тест. Мы добавим новый тест для новой
функции search_case_insensitive и переименуем старый тест из one_result в
case_sensitive, чтобы прояснить различия между двумя тестами, как показано в
листинге 12-20.
pub fn search<'a>(query: &str, contents: &'a str) -> Vec<&'a str> {
let mut results = Vec::new();
for line in contents.lines() {
if line.contains(query) {
results.push(line);
}
}
results
}
#[cfg(test)]
mod tests {
use super::*;
#[test]
fn case_sensitive() {
let query = "duct";
let contents = "\
Rust:
safe, fast, productive.
Pick three.
Duct tape.";
assert_eq!(vec!["safe, fast, productive."], search(query, contents));
}
#[test]
fn case_insensitive() {
let query = "rUsT";
let contents = "\
Rust:
safe, fast, productive.
Pick three.
Trust me.";
assert_eq!(
vec!["Rust:", "Trust me."],
search_case_insensitive(query, contents)
);
}
}Обратите внимание, что мы также изменили contents в старом тесте. Мы
добавили новую строку с текстом "Duct tape.", используя заглавную D,
которая не должна совпадать с запросом "duct", когда мы выполняем поиск с
учетом регистра. Такое изменение старого теста помогает убедиться, что мы
случайно не сломаем уже реализованную функциональность поиска с учетом
регистра. Этот тест должен проходить сейчас и должен продолжать проходить,
пока мы работаем над регистронезависимым поиском.
Новый тест для регистро_независимого_ поиска использует "rUsT" как запрос. В
функции search_case_insensitive, которую мы собираемся добавить, запрос
"rUsT" должен совпасть со строкой, содержащей "Rust:" с заглавной R, и
со строкой "Trust me.", хотя регистр в обеих строках отличается от запроса.
Это наш падающий тест, и он не скомпилируется, потому что мы еще не определили
функцию search_case_insensitive. Можете добавить каркас реализации, который
всегда возвращает пустой вектор, подобно тому, как мы сделали для функции
search в листинге 12-16, чтобы увидеть, как тест компилируется и падает.
Реализация функции search_case_insensitive
Функция search_case_insensitive, показанная в листинге 12-21, будет почти
такой же, как функция search. Единственная разница в том, что мы приведем
query и каждую line к нижнему регистру, чтобы, независимо от регистра
входных аргументов, они имели один и тот же регистр, когда мы проверяем,
содержит ли строка запрос.
pub fn search<'a>(query: &str, contents: &'a str) -> Vec<&'a str> {
let mut results = Vec::new();
for line in contents.lines() {
if line.contains(query) {
results.push(line);
}
}
results
}
pub fn search_case_insensitive<'a>(
query: &str,
contents: &'a str,
) -> Vec<&'a str> {
let query = query.to_lowercase();
let mut results = Vec::new();
for line in contents.lines() {
if line.to_lowercase().contains(&query) {
results.push(line);
}
}
results
}
#[cfg(test)]
mod tests {
use super::*;
#[test]
fn case_sensitive() {
let query = "duct";
let contents = "\
Rust:
safe, fast, productive.
Pick three.
Duct tape.";
assert_eq!(vec!["safe, fast, productive."], search(query, contents));
}
#[test]
fn case_insensitive() {
let query = "rUsT";
let contents = "\
Rust:
safe, fast, productive.
Pick three.
Trust me.";
assert_eq!(
vec!["Rust:", "Trust me."],
search_case_insensitive(query, contents)
);
}
}search_case_insensitive, которая приводит запрос и строку к нижнему регистру перед их сравнениемСначала мы приводим строку query к нижнему регистру и сохраняем ее в новой
переменной с тем же именем, затеняя исходную query. Вызов to_lowercase для
запроса необходим, чтобы независимо от того, равен ли запрос пользователя
"rust", "RUST", "Rust" или "rUsT", мы обрабатывали его так, как если
бы это было "rust", и не учитывали регистр. Хотя to_lowercase обработает
базовый Unicode, он не будет точен на 100 процентов. Если бы мы писали
настоящее приложение, здесь стоило бы сделать немного больше работы, но этот
раздел о переменных окружения, а не о Unicode, поэтому здесь мы оставим все как
есть.
Обратите внимание, что теперь query является String, а не строковым срезом,
потому что вызов to_lowercase создает новые данные, а не ссылается на уже
существующие. Возьмем запрос "rUsT" как пример: этот строковый срез не
содержит строчные u или t, которые мы могли бы использовать, поэтому нам
нужно выделить новую String, содержащую "rust". Когда теперь мы передаем
query как аргумент методу contains, нам нужно добавить амперсанд, потому
что сигнатура contains определена так, чтобы принимать строковый срез.
Затем мы добавляем вызов to_lowercase для каждой line, чтобы привести все
символы к нижнему регистру. Теперь, когда мы преобразовали line и query к
нижнему регистру, мы найдем совпадения независимо от регистра запроса.
Посмотрим, проходят ли тесты с этой реализацией:
$ cargo test
Compiling minigrep v0.1.0 (file:///projects/minigrep)
Finished `test` profile [unoptimized + debuginfo] target(s) in 1.33s
Running unittests src/lib.rs (target/debug/deps/minigrep-9cd200e5fac0fc94)
running 2 tests
test tests::case_insensitive ... ok
test tests::case_sensitive ... ok
test result: ok. 2 passed; 0 failed; 0 ignored; 0 measured; 0 filtered out; finished in 0.00s
Running unittests src/main.rs (target/debug/deps/minigrep-9cd200e5fac0fc94)
running 0 tests
test result: ok. 0 passed; 0 failed; 0 ignored; 0 measured; 0 filtered out; finished in 0.00s
Doc-tests minigrep
running 0 tests
test result: ok. 0 passed; 0 failed; 0 ignored; 0 measured; 0 filtered out; finished in 0.00s
Отлично! Они прошли. Теперь вызовем новую функцию
search_case_insensitive из функции run. Сначала мы добавим параметр
конфигурации в структуру Config, чтобы переключаться между поиском с учетом
регистра и регистронезависимым поиском. Добавление этого поля вызовет ошибки
компилятора, потому что мы пока нигде не инициализируем это поле:
Имя файла: src/main.rs
use std::env;
use std::error::Error;
use std::fs;
use std::process;
use minigrep::{search, search_case_insensitive};
// --snip--
fn main() {
let args: Vec<String> = env::args().collect();
let config = Config::build(&args).unwrap_or_else(|err| {
println!("Problem parsing arguments: {err}");
process::exit(1);
});
if let Err(e) = run(config) {
println!("Application error: {e}");
process::exit(1);
}
}
pub struct Config {
pub query: String,
pub file_path: String,
pub ignore_case: bool,
}
impl Config {
fn build(args: &[String]) -> Result<Config, &'static str> {
if args.len() < 3 {
return Err("not enough arguments");
}
let query = args[1].clone();
let file_path = args[2].clone();
Ok(Config { query, file_path })
}
}
fn run(config: Config) -> Result<(), Box<dyn Error>> {
let contents = fs::read_to_string(config.file_path)?;
let results = if config.ignore_case {
search_case_insensitive(&config.query, &contents)
} else {
search(&config.query, &contents)
};
for line in results {
println!("{line}");
}
Ok(())
}Мы добавили поле ignore_case, которое хранит булево значение. Далее функция
run должна проверять значение поля ignore_case и на его основе решать,
вызывать функцию search или функцию search_case_insensitive, как показано
в листинге 12-22. Этот код пока все еще не скомпилируется.
use std::env;
use std::error::Error;
use std::fs;
use std::process;
use minigrep::{search, search_case_insensitive};
// --snip--
fn main() {
let args: Vec<String> = env::args().collect();
let config = Config::build(&args).unwrap_or_else(|err| {
println!("Problem parsing arguments: {err}");
process::exit(1);
});
if let Err(e) = run(config) {
println!("Application error: {e}");
process::exit(1);
}
}
pub struct Config {
pub query: String,
pub file_path: String,
pub ignore_case: bool,
}
impl Config {
fn build(args: &[String]) -> Result<Config, &'static str> {
if args.len() < 3 {
return Err("not enough arguments");
}
let query = args[1].clone();
let file_path = args[2].clone();
Ok(Config { query, file_path })
}
}
fn run(config: Config) -> Result<(), Box<dyn Error>> {
let contents = fs::read_to_string(config.file_path)?;
let results = if config.ignore_case {
search_case_insensitive(&config.query, &contents)
} else {
search(&config.query, &contents)
};
for line in results {
println!("{line}");
}
Ok(())
}search, либо search_case_insensitive на основе значения в config.ignore_caseНаконец, нам нужно проверить переменную окружения. Функции для работы с
переменными окружения находятся в модуле env стандартной библиотеки, который
уже находится в области видимости в начале src/main.rs. Мы используем
функцию var из модуля env, чтобы проверить, задано ли какое-либо значение
для переменной окружения с именем IGNORE_CASE, как показано в листинге 12-23.
use std::env;
use std::error::Error;
use std::fs;
use std::process;
use minigrep::{search, search_case_insensitive};
fn main() {
let args: Vec<String> = env::args().collect();
let config = Config::build(&args).unwrap_or_else(|err| {
println!("Problem parsing arguments: {err}");
process::exit(1);
});
if let Err(e) = run(config) {
println!("Application error: {e}");
process::exit(1);
}
}
pub struct Config {
pub query: String,
pub file_path: String,
pub ignore_case: bool,
}
impl Config {
fn build(args: &[String]) -> Result<Config, &'static str> {
if args.len() < 3 {
return Err("not enough arguments");
}
let query = args[1].clone();
let file_path = args[2].clone();
let ignore_case = env::var("IGNORE_CASE").is_ok();
Ok(Config {
query,
file_path,
ignore_case,
})
}
}
fn run(config: Config) -> Result<(), Box<dyn Error>> {
let contents = fs::read_to_string(config.file_path)?;
let results = if config.ignore_case {
search_case_insensitive(&config.query, &contents)
} else {
search(&config.query, &contents)
};
for line in results {
println!("{line}");
}
Ok(())
}IGNORE_CASEЗдесь мы создаем новую переменную ignore_case. Чтобы задать ее значение, мы
вызываем функцию env::var и передаем ей имя переменной окружения
IGNORE_CASE. Функция env::var возвращает Result, который будет успешным
вариантом Ok, содержащим значение переменной окружения, если переменная
окружения задана каким-либо значением. Она вернет вариант Err, если
переменная окружения не задана.
Мы используем метод is_ok для Result, чтобы проверить, задана ли переменная
окружения; это значит, что программа должна выполнить регистронезависимый
поиск. Если переменная окружения IGNORE_CASE ничем не задана, is_ok
вернет false, и программа выполнит поиск с учетом регистра. Нас не
интересует значение переменной окружения, важно только, задана она или нет,
поэтому мы проверяем is_ok, а не используем unwrap, expect или какие-либо
другие методы для Result, которые мы уже видели.
Мы передаем значение из переменной ignore_case в экземпляр Config, чтобы
функция run могла прочитать это значение и решить, вызывать
search_case_insensitive или search, как мы реализовали в листинге 12-22.
Попробуем! Сначала запустим нашу программу без заданной переменной окружения и
с запросом to, который должен совпасть с любой строкой, содержащей слово
to полностью в нижнем регистре:
$ cargo run -- to poem.txt
Compiling minigrep v0.1.0 (file:///projects/minigrep)
Finished `dev` profile [unoptimized + debuginfo] target(s) in 0.0s
Running `target/debug/minigrep to poem.txt`
Are you nobody, too?
How dreary to be somebody!
Похоже, это по-прежнему работает! Теперь запустим программу с IGNORE_CASE,
заданной равной 1, но с тем же запросом to:
$ IGNORE_CASE=1 cargo run -- to poem.txt
Если вы используете PowerShell, вам нужно задать переменную окружения и запустить программу отдельными командами:
PS> $Env:IGNORE_CASE=1; cargo run -- to poem.txt
Это сохранит IGNORE_CASE до конца сеанса вашей оболочки. Ее можно убрать с
помощью командлета Remove-Item:
PS> Remove-Item Env:IGNORE_CASE
Мы должны получить строки, которые содержат to и могут иметь заглавные буквы:
Are you nobody, too?
How dreary to be somebody!
To tell your name the livelong day
To an admiring bog!
Превосходно, мы также получили строки, содержащие To! Наша программа
minigrep теперь умеет выполнять регистронезависимый поиск, управляемый
переменной окружения. Теперь вы знаете, как управлять параметрами, заданными
либо через аргументы командной строки, либо через переменные окружения.
Некоторые программы позволяют использовать и аргументы, и переменные окружения для одной и той же конфигурации. В таких случаях программы решают, что из них имеет приоритет. В качестве самостоятельного упражнения попробуйте управлять чувствительностью к регистру либо через аргумент командной строки, либо через переменную окружения. Решите, что должно иметь приоритет, аргумент командной строки или переменная окружения, если программа запущена так, что один вариант задает поиск с учетом регистра, а другой – игнорирование регистра.
Модуль std::env содержит намного больше полезных возможностей для работы с
переменными окружения: посмотрите его документацию, чтобы узнать, что
доступно.
Перенаправление ошибок в стандартный поток ошибок (stderr)
Перенаправление ошибок в стандартный поток ошибок
Сейчас мы записываем весь наш вывод в терминал с помощью макроса println!. В
большинстве терминалов есть два вида вывода: стандартный вывод (stdout) для
общей информации и стандартный поток ошибок (stderr) для сообщений об
ошибках. Это различие позволяет пользователям направлять успешный вывод
программы в файл, но при этом продолжать печатать сообщения об ошибках на
экран.
Макрос println! способен печатать только в стандартный вывод, поэтому для
печати в стандартный поток ошибок нам нужно использовать что-то другое.
Проверка того, куда записываются ошибки
Сначала посмотрим, как содержимое, печатаемое minigrep, сейчас записывается
в стандартный вывод, включая любые сообщения об ошибках, которые мы вместо
этого хотим записывать в стандартный поток ошибок. Мы сделаем это, перенаправив
поток стандартного вывода в файл и намеренно вызвав ошибку. Поток стандартных
ошибок мы перенаправлять не будем, поэтому любое содержимое, отправленное в
стандартный поток ошибок, продолжит отображаться на экране.
От программ командной строки ожидается, что они отправляют сообщения об ошибках в стандартный поток ошибок, чтобы мы все равно могли видеть сообщения об ошибках на экране, даже если перенаправим поток стандартного вывода в файл. Сейчас наша программа ведет себя неправильно: мы увидим, что она сохраняет вывод сообщения об ошибке в файл!
Чтобы продемонстрировать это поведение, мы запустим программу с > и путем к
файлу output.txt, в который хотим перенаправить поток стандартного вывода.
Мы не будем передавать аргументы, что должно вызвать ошибку:
$ cargo run > output.txt
Синтаксис > говорит оболочке записать содержимое стандартного вывода в
output.txt вместо экрана. Мы не увидели ожидаемое сообщение об ошибке на
экране, значит, оно должно было оказаться в файле. Вот что содержит
output.txt:
Problem parsing arguments: not enough arguments
Да, наше сообщение об ошибке печатается в стандартный вывод. Гораздо полезнее, чтобы такие сообщения об ошибках печатались в стандартный поток ошибок: тогда в файл попадут только данные успешного запуска. Мы это изменим.
Печать ошибок в стандартный поток ошибок
Мы используем код из листинга 12-24, чтобы изменить способ печати сообщений об
ошибках. Благодаря рефакторингу, который мы выполнили ранее в этой главе, весь
код, печатающий сообщения об ошибках, находится в одной функции, main.
Стандартная библиотека предоставляет макрос eprintln!, который печатает в
стандартный поток ошибок, поэтому изменим два места, где мы вызывали
println! для печати ошибок, чтобы вместо него использовать eprintln!.
use std::env;
use std::error::Error;
use std::fs;
use std::process;
use minigrep::{search, search_case_insensitive};
fn main() {
let args: Vec<String> = env::args().collect();
let config = Config::build(&args).unwrap_or_else(|err| {
eprintln!("Problem parsing arguments: {err}");
process::exit(1);
});
if let Err(e) = run(config) {
eprintln!("Application error: {e}");
process::exit(1);
}
}
pub struct Config {
pub query: String,
pub file_path: String,
pub ignore_case: bool,
}
impl Config {
fn build(args: &[String]) -> Result<Config, &'static str> {
if args.len() < 3 {
return Err("not enough arguments");
}
let query = args[1].clone();
let file_path = args[2].clone();
let ignore_case = env::var("IGNORE_CASE").is_ok();
Ok(Config {
query,
file_path,
ignore_case,
})
}
}
fn run(config: Config) -> Result<(), Box<dyn Error>> {
let contents = fs::read_to_string(config.file_path)?;
let results = if config.ignore_case {
search_case_insensitive(&config.query, &contents)
} else {
search(&config.query, &contents)
};
for line in results {
println!("{line}");
}
Ok(())
}eprintln!Теперь снова запустим программу тем же способом: без аргументов и с
перенаправлением стандартного вывода с помощью >:
$ cargo run > output.txt
Problem parsing arguments: not enough arguments
Теперь мы видим ошибку на экране, а output.txt ничего не содержит; именно такого поведения мы ожидаем от программ командной строки.
Снова запустим программу с аргументами, которые не вызывают ошибку, но все еще перенаправим стандартный вывод в файл:
$ cargo run -- to poem.txt > output.txt
Мы не увидим вывода в терминале, а output.txt будет содержать наши результаты:
Имя файла: output.txt
Are you nobody, too?
How dreary to be somebody!
Это показывает, что теперь мы используем стандартный вывод для успешного вывода и стандартный поток ошибок для вывода ошибок, как и следует.
Итоги
В этой главе мы повторили некоторые важные концепции, которые вы уже изучили,
и рассмотрели, как выполнять распространенные операции ввода-вывода в Rust.
Используя аргументы командной строки, файлы, переменные окружения и макрос
eprintln! для печати ошибок, вы теперь готовы писать приложения командной
строки. В сочетании с концепциями из предыдущих глав ваш код будет хорошо
организован, будет эффективно хранить данные в подходящих структурах данных,
аккуратно обрабатывать ошибки и будет хорошо протестирован.
Далее мы изучим некоторые возможности Rust, на которые повлияли функциональные языки: замыкания и итераторы.
Возможности функциональных языков: итераторы и замыкания
Дизайн Rust вобрал в себя идеи из многих существующих языков и техник, и одно из значительных влияний – функциональное программирование. Программирование в функциональном стиле часто включает использование функций как значений: передачу их в аргументах, возврат из других функций, присваивание переменным для последующего выполнения и так далее.
В этой главе мы не будем спорить о том, что является функциональным программированием, а что нет. Вместо этого мы обсудим некоторые возможности Rust, похожие на возможности многих языков, которые часто называют функциональными.
Если точнее, мы рассмотрим:
- Замыкания, конструкцию, похожую на функцию, которую можно сохранить в переменной
- Итераторы, способ обработки последовательности элементов
- Как использовать замыкания и итераторы для улучшения проекта ввода-вывода из главы 12
- Производительность замыканий и итераторов (спойлер: они быстрее, чем вы можете подумать!)
Мы уже рассмотрели некоторые другие возможности Rust, такие как сопоставление с образцом и enum, на которые также повлиял функциональный стиль. Поскольку освоение замыканий и итераторов – важная часть написания быстрого, идиоматичного кода на Rust, мы посвятим им всю эту главу.
Замыкания
Замыкания
Замыкания Rust – это анонимные функции, которые можно сохранить в переменной или передать как аргументы другим функциям. Вы можете создать замыкание в одном месте, а затем вызвать его в другом, чтобы выполнить его в другом контексте. В отличие от функций, замыкания могут захватывать значения из области видимости, в которой они определены. Мы покажем, как эти возможности замыканий позволяют повторно использовать код и настраивать поведение.
Захват окружения
Сначала мы рассмотрим, как использовать замыкания для захвата значений из окружения, в котором они определены, чтобы использовать эти значения позже. Сценарий такой: время от времени наша компания по продаже футболок в рамках рекламной акции раздает эксклюзивную футболку ограниченной серии кому-нибудь из нашей рассылки. Люди из рассылки могут при желании добавить в свой профиль любимый цвет. Если у человека, выбранного для бесплатной футболки, указан любимый цвет, он получает футболку этого цвета. Если человек не указал любимый цвет, он получает футболку того цвета, которого у компании сейчас больше всего.
Есть много способов реализовать это. Для этого примера мы будем использовать
enum с именем ShirtColor, у которого есть варианты Red и Blue (для
простоты мы ограничим количество доступных цветов). Запасы компании мы
представим структурой Inventory, у которой есть поле shirts, содержащее
Vec<ShirtColor> с цветами футболок, которые сейчас есть в наличии. Метод
giveaway, определенный для Inventory, получает необязательное предпочтение
цвета футболки победителя и возвращает цвет футболки, которую он получит. Эта
настройка показана в листинге 13-1.
#[derive(Debug, PartialEq, Copy, Clone)]
enum ShirtColor {
Red,
Blue,
}
struct Inventory {
shirts: Vec<ShirtColor>,
}
impl Inventory {
fn giveaway(&self, user_preference: Option<ShirtColor>) -> ShirtColor {
user_preference.unwrap_or_else(|| self.most_stocked())
}
fn most_stocked(&self) -> ShirtColor {
let mut num_red = 0;
let mut num_blue = 0;
for color in &self.shirts {
match color {
ShirtColor::Red => num_red += 1,
ShirtColor::Blue => num_blue += 1,
}
}
if num_red > num_blue {
ShirtColor::Red
} else {
ShirtColor::Blue
}
}
}
fn main() {
let store = Inventory {
shirts: vec![ShirtColor::Blue, ShirtColor::Red, ShirtColor::Blue],
};
let user_pref1 = Some(ShirtColor::Red);
let giveaway1 = store.giveaway(user_pref1);
println!(
"The user with preference {:?} gets {:?}",
user_pref1, giveaway1
);
let user_pref2 = None;
let giveaway2 = store.giveaway(user_pref2);
println!(
"The user with preference {:?} gets {:?}",
user_pref2, giveaway2
);
}В store, определенном в main, осталось две синие футболки и одна красная,
которые можно раздать в этой акции с ограниченной серией. Мы вызываем метод
giveaway для пользователя, предпочитающего красную футболку, и для
пользователя без каких-либо предпочтений.
Повторим: этот код можно было бы реализовать многими способами, и здесь, чтобы
сфокусироваться на замыканиях, мы придерживаемся уже изученных вами концепций,
за исключением тела метода giveaway, где используется замыкание. В методе
giveaway мы получаем пользовательское предпочтение как параметр типа
Option<ShirtColor> и вызываем метод unwrap_or_else для user_preference.
Метод unwrap_or_else для Option<T>
определен стандартной библиотекой. Он принимает один аргумент: замыкание без
аргументов, которое возвращает значение T (того же типа, который хранится в
варианте Some у Option<T>, в этом случае ShirtColor). Если Option<T> –
это вариант Some, unwrap_or_else возвращает значение из Some. Если
Option<T> – это вариант None, unwrap_or_else вызывает замыкание и
возвращает значение, возвращенное замыканием.
Мы указываем выражение замыкания || self.most_stocked() как аргумент для
unwrap_or_else. Это замыкание само не принимает параметров (если бы у
замыкания были параметры, они находились бы между двумя вертикальными чертами).
Тело замыкания вызывает self.most_stocked(). Мы определяем замыкание здесь,
а реализация unwrap_or_else выполнит это замыкание позже, если результат
понадобится.
Запуск этого кода печатает следующее:
$ cargo run
Compiling shirt-company v0.1.0 (file:///projects/shirt-company)
Finished `dev` profile [unoptimized + debuginfo] target(s) in 0.27s
Running `target/debug/shirt-company`
The user with preference Some(Red) gets Red
The user with preference None gets Blue
Один интересный момент здесь в том, что мы передали замыкание, которое вызывает
self.most_stocked() для текущего экземпляра Inventory. Стандартной
библиотеке не нужно было ничего знать ни о типах Inventory или ShirtColor,
которые мы определили, ни о логике, которую мы хотим использовать в этом
сценарии. Замыкание захватывает неизменяемую ссылку на экземпляр Inventory в
self и передает ее вместе с указанным нами кодом в метод unwrap_or_else.
Функции, с другой стороны, не способны захватывать свое окружение таким
образом.
Вывод и аннотирование типов замыканий
Между функциями и замыканиями есть и другие различия. Замыкания обычно не
требуют аннотировать типы параметров или возвращаемого значения так, как это
делают функции fn. Аннотации типов обязательны для функций, потому что типы
являются частью явного интерфейса, открытого вашим пользователям. Жестко
определить этот интерфейс важно, чтобы все соглашались, значения каких типов
функция использует и возвращает. Замыкания, с другой стороны, не используются
в таком открытом интерфейсе: они хранятся в переменных и используются без
именования и раскрытия пользователям нашей библиотеки.
Замыкания обычно короткие и уместны только в узком контексте, а не в любом произвольном сценарии. В этих ограниченных контекстах компилятор может вывести типы параметров и возвращаемый тип, подобно тому как он умеет выводить типы большинства переменных (есть редкие случаи, когда компилятору тоже нужны аннотации типов замыканий).
Как и с переменными, мы можем добавить аннотации типов, если хотим повысить явность и ясность ценой большей многословности, чем строго необходимо. Аннотирование типов для замыкания выглядело бы как определение, показанное в листинге 13-2. В этом примере мы определяем замыкание и сохраняем его в переменной, а не определяем замыкание в том месте, где передаем его как аргумент, как делали в листинге 13-1.
use std::thread;
use std::time::Duration;
fn generate_workout(intensity: u32, random_number: u32) {
let expensive_closure = |num: u32| -> u32 {
println!("calculating slowly...");
thread::sleep(Duration::from_secs(2));
num
};
if intensity < 25 {
println!("Today, do {} pushups!", expensive_closure(intensity));
println!("Next, do {} situps!", expensive_closure(intensity));
} else {
if random_number == 3 {
println!("Take a break today! Remember to stay hydrated!");
} else {
println!(
"Today, run for {} minutes!",
expensive_closure(intensity)
);
}
}
}
fn main() {
let simulated_user_specified_value = 10;
let simulated_random_number = 7;
generate_workout(simulated_user_specified_value, simulated_random_number);
}С добавленными аннотациями типов синтаксис замыканий больше похож на синтаксис функций. Здесь для сравнения мы определяем функцию, которая добавляет 1 к своему параметру, и замыкание с тем же поведением. Мы добавили пробелы, чтобы выровнять соответствующие части. Это показывает, как синтаксис замыканий похож на синтаксис функций, за исключением использования вертикальных черт и объема синтаксиса, который является необязательным:
fn add_one_v1 (x: u32) -> u32 { x + 1 }
let add_one_v2 = |x: u32| -> u32 { x + 1 };
let add_one_v3 = |x| { x + 1 };
let add_one_v4 = |x| x + 1 ;Первая строка показывает определение функции, а вторая – полностью
аннотированное определение замыкания. В третьей строке мы убираем аннотации
типов из определения замыкания. В четвертой строке мы убираем фигурные скобки:
они необязательны, потому что тело замыкания содержит только одно выражение.
Все эти определения допустимы и при вызове дадут одно и то же поведение.
Строки add_one_v3 и add_one_v4 требуют, чтобы замыкания были использованы
для компиляции, потому что типы будут выведены из их использования. Это похоже на
то, как let v = Vec::new(); требует либо аннотации типа, либо вставки
значений какого-то типа в Vec, чтобы Rust смог вывести тип.
Для определений замыканий компилятор выведет один конкретный тип для каждого
параметра и для возвращаемого значения. Например, в листинге 13-3 показано
определение короткого замыкания, которое просто возвращает значение,
полученное как параметр. Это замыкание не очень полезно, кроме целей данного
примера. Обратите внимание, что мы не добавили никаких аннотаций типов в
определение. Поскольку аннотаций типов нет, мы можем вызвать замыкание с любым
типом; здесь мы сделали это с String при первом вызове. Если затем мы
попробуем вызвать example_closure с целым числом, получим ошибку.
fn main() {
let example_closure = |x| x;
let s = example_closure(String::from("hello"));
let n = example_closure(5);
}Компилятор выдает такую ошибку:
$ cargo run
Compiling closure-example v0.1.0 (file:///projects/closure-example)
error[E0308]: mismatched types
--> src/main.rs:5:29
|
5 | let n = example_closure(5);
| --------------- ^ expected `String`, found integer
| |
| arguments to this function are incorrect
|
note: expected because the closure was earlier called with an argument of type `String`
--> src/main.rs:4:29
|
4 | let s = example_closure(String::from("hello"));
| --------------- ^^^^^^^^^^^^^^^^^^^^^ expected because this argument is of type `String`
| |
| in this closure call
note: closure parameter defined here
--> src/main.rs:2:28
|
2 | let example_closure = |x| x;
| ^
help: try using a conversion method
|
5 | let n = example_closure(5.to_string());
| ++++++++++++
For more information about this error, try `rustc --explain E0308`.
error: could not compile `closure-example` (bin "closure-example") due to 1 previous error
Когда мы впервые вызываем example_closure со значением String, компилятор
выводит, что тип x и возвращаемый тип замыкания – String. Затем эти типы
закрепляются за замыканием в example_closure, и мы получаем ошибку типа,
когда далее пытаемся использовать другой тип с тем же замыканием.
Захват ссылок или перемещение владения
Замыкания могут захватывать значения из своего окружения тремя способами, которые напрямую соответствуют трем способам, которыми функция может принять параметр: неизменяемое заимствование, изменяемое заимствование и получение владения. Замыкание решает, какой из этих способов использовать, исходя из того, что тело функции делает с захваченными значениями.
В листинге 13-4 мы определяем замыкание, которое захватывает неизменяемую
ссылку на вектор с именем list, потому что ему нужна только неизменяемая
ссылка, чтобы напечатать значение.
fn main() {
let list = vec![1, 2, 3];
println!("Before defining closure: {list:?}");
let only_borrows = || println!("From closure: {list:?}");
println!("Before calling closure: {list:?}");
only_borrows();
println!("After calling closure: {list:?}");
}Этот пример также показывает, что переменная может быть связана с определением замыкания, и позже мы можем вызвать замыкание, используя имя переменной и скобки, как если бы имя переменной было именем функции.
Поскольку у нас может быть несколько неизменяемых ссылок на list
одновременно, list все еще доступен из кода до определения замыкания, после
определения замыкания, но до его вызова, и после вызова замыкания. Этот код
компилируется, запускается и печатает:
$ cargo run
Compiling closure-example v0.1.0 (file:///projects/closure-example)
Finished `dev` profile [unoptimized + debuginfo] target(s) in 0.43s
Running `target/debug/closure-example`
Before defining closure: [1, 2, 3]
Before calling closure: [1, 2, 3]
From closure: [1, 2, 3]
After calling closure: [1, 2, 3]
Далее, в листинге 13-5, мы изменяем тело замыкания так, чтобы оно добавляло
элемент в вектор list. Теперь замыкание захватывает изменяемую ссылку.
fn main() {
let mut list = vec![1, 2, 3];
println!("Before defining closure: {list:?}");
let mut borrows_mutably = || list.push(7);
borrows_mutably();
println!("After calling closure: {list:?}");
}Этот код компилируется, запускается и печатает:
$ cargo run
Compiling closure-example v0.1.0 (file:///projects/closure-example)
Finished `dev` profile [unoptimized + debuginfo] target(s) in 0.43s
Running `target/debug/closure-example`
Before defining closure: [1, 2, 3]
After calling closure: [1, 2, 3, 7]
Обратите внимание, что между определением и вызовом замыкания borrows_mutably
больше нет println!: когда borrows_mutably определено, оно захватывает
изменяемую ссылку на list. Мы больше не используем замыкание после его
вызова, поэтому изменяемое заимствование заканчивается. Между определением
замыкания и его вызовом неизменяемое заимствование для печати не разрешено,
потому что при наличии изменяемого заимствования никакие другие заимствования
не разрешены. Попробуйте добавить туда println! и посмотреть, какое
сообщение об ошибке вы получите!
Если вы хотите заставить замыкание забрать владение значениями, которые оно
использует из окружения, даже если телу замыкания строго не требуется владение,
можно использовать ключевое слово move перед списком параметров.
Этот прием в основном полезен при передаче замыкания новому потоку, чтобы
переместить данные и сделать их принадлежащими новому потоку. Мы подробно
обсудим потоки и причины их использования в главе 16, когда будем говорить о
конкурентности, но пока кратко рассмотрим создание нового потока с помощью
замыкания, которому нужно ключевое слово move. В листинге 13-6 показан
листинг 13-4, измененный так, чтобы печатать вектор в новом потоке, а не в
главном потоке.
use std::thread;
fn main() {
let list = vec![1, 2, 3];
println!("Before defining closure: {list:?}");
thread::spawn(move || println!("From thread: {list:?}"))
.join()
.unwrap();
}move, чтобы заставить замыкание для потока забрать владение listМы создаем новый поток, передавая потоку замыкание для выполнения как аргумент.
Тело замыкания печатает список. В листинге 13-4 замыкание захватывало list
только через неизменяемую ссылку, потому что это минимальный объем доступа к
list, необходимый для печати. В этом примере, хотя телу замыкания по-прежнему
нужна только неизменяемая ссылка, нам нужно указать, что list должен быть
перемещен в замыкание, поставив ключевое слово move в начало определения
замыкания. Если бы главный поток выполнил больше операций перед вызовом join
для нового потока, новый поток мог бы завершиться до завершения остальной
части главного потока или главный поток мог бы завершиться первым. Если бы
главный поток сохранил владение list, но завершился раньше нового потока и
удалил list, неизменяемая ссылка в потоке стала бы недействительной. Поэтому
компилятор требует переместить list в замыкание, переданное новому потоку,
чтобы ссылка была действительной. Попробуйте убрать ключевое слово move или
использовать list в главном потоке после определения замыкания, чтобы
увидеть, какие ошибки компилятора вы получите!
Перемещение захваченных значений из замыканий
После того как замыкание захватило ссылку или захватило владение значением из окружения, где оно определено (тем самым влияя на то, что, если что-то вообще, перемещается в замыкание), код в теле замыкания определяет, что происходит со ссылками или значениями, когда замыкание вычисляется позже (тем самым влияя на то, что, если что-то вообще, перемещается из замыкания).
Тело замыкания может делать любое из следующего: переместить захваченное значение из замыкания, изменить захваченное значение, не перемещать и не изменять значение или вообще ничего не захватывать из окружения.
То, как замыкание захватывает и обрабатывает значения из окружения, влияет на
то, какие трейты реализует замыкание; а трейты – это способ, которым функции
и структуры могут указать, какие виды замыканий они могут использовать.
Замыкания автоматически реализуют один, два или все три из этих трейтов Fn
по нарастающей, в зависимости от того, как тело замыкания обрабатывает
значения:
FnOnceприменяется к замыканиям, которые можно вызвать один раз. Все замыкания реализуют как минимум этот трейт, потому что все замыкания можно вызвать. Замыкание, которое перемещает захваченные значения из своего тела, реализует толькоFnOnceи ни один из других трейтовFn, потому что его можно вызвать только один раз.FnMutприменяется к замыканиям, которые не перемещают захваченные значения из своего тела, но могут изменять захваченные значения. Такие замыкания можно вызвать больше одного раза.Fnприменяется к замыканиям, которые не перемещают захваченные значения из своего тела и не изменяют захваченные значения, а также к замыканиям, которые ничего не захватывают из окружения. Такие замыкания можно вызвать больше одного раза без изменения их окружения, что важно в случаях вроде многократного одновременного вызова замыкания.
Посмотрим на определение метода unwrap_or_else для Option<T>, который мы
использовали в листинге 13-1:
impl<T> Option<T> {
pub fn unwrap_or_else<F>(self, f: F) -> T
where
F: FnOnce() -> T
{
match self {
Some(x) => x,
None => f(),
}
}
}Вспомните, что T – это обобщенный тип, представляющий тип значения в
варианте Some у Option. Этот тип T также является возвращаемым типом
функции unwrap_or_else: код, который вызывает unwrap_or_else для
Option<String>, например, получит String.
Далее обратите внимание, что у функции unwrap_or_else есть дополнительный
обобщенный параметр типа F. Тип F – это тип параметра с именем f, то
есть замыкания, которое мы предоставляем при вызове unwrap_or_else.
Ограничение трейта, указанное для обобщенного типа F, – это
FnOnce() -> T, что означает: значение типа F должно быть возможно вызвать
один раз, оно не принимает аргументов и возвращает T. Использование FnOnce в ограничении
трейта выражает ограничение, что unwrap_or_else не будет вызывать f больше
одного раза. В теле unwrap_or_else видно, что если Option содержит Some,
f не будет вызвано. Если Option содержит None, f будет вызвано один
раз. Поскольку все замыкания реализуют FnOnce, unwrap_or_else принимает все
три вида замыканий и настолько гибок, насколько это возможно.
Примечание: если то, что мы хотим сделать, не требует захвата значения из окружения, мы можем использовать имя функции вместо замыкания там, где нам нужно что-то, реализующее один из трейтов
Fn. Например, для значенияOption<Vec<T>>можно вызватьunwrap_or_else(Vec::new), чтобы получить новый пустой вектор, если значение равноNone. Компилятор автоматически реализует для определения функции тот из трейтовFn, который применим.
Теперь посмотрим на метод стандартной библиотеки sort_by_key, определенный
для срезов, чтобы увидеть, чем он отличается от unwrap_or_else и почему
sort_by_key использует FnMut, а не FnOnce, в ограничении трейта.
Замыкание получает один аргумент в виде ссылки на текущий рассматриваемый
элемент среза и возвращает значение типа K, которое можно упорядочить. Эта
функция полезна, когда вы хотите отсортировать срез по определенному атрибуту
каждого элемента. В листинге 13-7 у нас есть список экземпляров Rectangle, и
мы используем sort_by_key, чтобы упорядочить их по атрибуту width от
меньшего к большему.
#[derive(Debug)]
struct Rectangle {
width: u32,
height: u32,
}
fn main() {
let mut list = [
Rectangle { width: 10, height: 1 },
Rectangle { width: 3, height: 5 },
Rectangle { width: 7, height: 12 },
];
list.sort_by_key(|r| r.width);
println!("{list:#?}");
}sort_by_key для упорядочивания прямоугольников по ширинеЭтот код печатает:
$ cargo run
Compiling rectangles v0.1.0 (file:///projects/rectangles)
Finished `dev` profile [unoptimized + debuginfo] target(s) in 0.41s
Running `target/debug/rectangles`
[
Rectangle {
width: 3,
height: 5,
},
Rectangle {
width: 7,
height: 12,
},
Rectangle {
width: 10,
height: 1,
},
]
Причина, по которой sort_by_key определен так, чтобы принимать замыкание
FnMut, состоит в том, что он вызывает замыкание несколько раз: по одному разу
для каждого элемента среза. Замыкание |r| r.width ничего не захватывает, не
изменяет и не перемещает из своего окружения, поэтому оно удовлетворяет
требованиям ограничения трейта.
Напротив, в листинге 13-8 показан пример замыкания, которое реализует только
трейт FnOnce, потому что оно перемещает значение из окружения. Компилятор не
позволит использовать это замыкание с sort_by_key.
#[derive(Debug)]
struct Rectangle {
width: u32,
height: u32,
}
fn main() {
let mut list = [
Rectangle { width: 10, height: 1 },
Rectangle { width: 3, height: 5 },
Rectangle { width: 7, height: 12 },
];
let mut sort_operations = vec![];
let value = String::from("closure called");
list.sort_by_key(|r| {
sort_operations.push(value);
r.width
});
println!("{list:#?}");
}FnOnce с sort_by_keyЭто искусственный, запутанный способ (который не работает) попытаться
посчитать, сколько раз sort_by_key вызывает замыкание при сортировке list.
Этот код пытается выполнить подсчет, добавляя value – String из окружения
замыкания – в вектор sort_operations. Замыкание захватывает value, а
затем перемещает value из замыкания, передавая владение value вектору
sort_operations. Это замыкание можно вызвать один раз; попытка вызвать его
во второй раз не сработала бы, потому что value больше не было бы в
окружении, чтобы снова добавить его в sort_operations! Поэтому это замыкание
реализует только FnOnce. Когда мы пытаемся скомпилировать этот код, получаем
ошибку, что value нельзя переместить из замыкания, потому что замыкание
должно реализовывать FnMut:
$ cargo run
Compiling rectangles v0.1.0 (file:///projects/rectangles)
error[E0507]: cannot move out of `value`, a captured variable in an `FnMut` closure
--> src/main.rs:18:30
|
15 | let value = String::from("closure called");
| ----- ------------------------------ move occurs because `value` has type `String`, which does not implement the `Copy` trait
| |
| captured outer variable
16 |
17 | list.sort_by_key(|r| {
| --- captured by this `FnMut` closure
18 | sort_operations.push(value);
| ^^^^^ `value` is moved here
|
help: consider cloning the value if the performance cost is acceptable
|
18 | sort_operations.push(value.clone());
| ++++++++
For more information about this error, try `rustc --explain E0507`.
error: could not compile `rectangles` (bin "rectangles") due to 1 previous error
Ошибка указывает на строку в теле замыкания, которая перемещает value из
окружения. Чтобы исправить это, нужно изменить тело замыкания так, чтобы оно
не перемещало значения из окружения. Хранение счетчика в окружении и
увеличение его значения в теле замыкания – более прямой способ посчитать,
сколько раз вызывается замыкание. Замыкание в листинге 13-9 работает с
sort_by_key, потому что оно захватывает только изменяемую ссылку на счетчик
num_sort_operations и поэтому может быть вызвано больше одного раза.
#[derive(Debug)]
struct Rectangle {
width: u32,
height: u32,
}
fn main() {
let mut list = [
Rectangle { width: 10, height: 1 },
Rectangle { width: 3, height: 5 },
Rectangle { width: 7, height: 12 },
];
let mut num_sort_operations = 0;
list.sort_by_key(|r| {
num_sort_operations += 1;
r.width
});
println!("{list:#?}, sorted in {num_sort_operations} operations");
}FnMut с sort_by_key разрешено.Трейты Fn важны при определении или использовании функций либо типов, которые
используют замыкания. В следующем разделе мы обсудим итераторы. Многие методы
итераторов принимают аргументы-замыкания, поэтому держите эти подробности о
замыканиях в уме, пока мы продолжаем!
Обработка последовательности элементов с помощью итераторов
Обработка последовательности элементов с помощью итераторов
Шаблон итератора позволяет выполнять некоторую задачу над последовательностью элементов по очереди. Итератор отвечает за логику перебора каждого элемента и за определение момента, когда последовательность закончилась. Когда вы используете итераторы, вам не нужно заново реализовывать эту логику самостоятельно.
В Rust итераторы ленивые: они не имеют эффекта, пока вы не вызовете методы,
которые потребляют итератор, чтобы его использовать. Например, код в листинге
13-10 создает итератор по элементам вектора v1, вызывая метод iter,
определенный для Vec<T>. Сам по себе этот код не делает ничего полезного.
fn main() {
let v1 = vec![1, 2, 3];
let v1_iter = v1.iter();
}Итератор сохраняется в переменной v1_iter. После создания итератора мы можем
использовать его разными способами. В листинге 3-5 мы перебирали массив с
помощью цикла for, чтобы выполнить некоторый код для каждого его элемента.
Под капотом это неявно создавало, а затем потребляло итератор, но до этого
момента мы не разбирали подробно, как именно это работает.
В примере из листинга 13-11 мы отделяем создание итератора от использования
итератора в цикле for. Когда цикл for вызывается с использованием
итератора в v1_iter, каждый элемент итератора используется в одной итерации
цикла, которая печатает каждое значение.
fn main() {
let v1 = vec![1, 2, 3];
let v1_iter = v1.iter();
for val in v1_iter {
println!("Got: {val}");
}
}forВ языках, где стандартные библиотеки не предоставляют итераторы, вы, скорее всего, написали бы ту же функциональность, начав с переменной с индексом 0, используя эту переменную для индексации вектора и получения значения, а затем увеличивая значение переменной в цикле, пока оно не достигнет общего числа элементов в векторе.
Итераторы обрабатывают всю эту логику за вас, уменьшая количество повторяемого кода, в котором потенциально можно ошибиться. Итераторы дают больше гибкости: вы можете использовать одну и ту же логику со многими разными видами последовательностей, а не только со структурами данных, в которые можно индексироваться, как в векторы. Рассмотрим, как итераторы это делают.
Трейт Iterator и метод next
Все итераторы реализуют трейт с именем Iterator, определенный в стандартной
библиотеке. Определение трейта выглядит так:
#![allow(unused)]
fn main() {
pub trait Iterator {
type Item;
fn next(&mut self) -> Option<Self::Item>;
// methods with default implementations elided
}
}Обратите внимание, что это определение использует новый синтаксис: type Item
и Self::Item, которые определяют связанный тип для этого трейта. Мы подробно
поговорим о связанных типах в главе 20. Пока вам нужно знать только то, что
этот код говорит: реализация трейта Iterator требует также определить тип
Item, и этот тип Item используется в возвращаемом типе метода next.
Другими словами, тип Item будет типом, возвращаемым из итератора.
Трейт Iterator требует от реализующих его типов определить только один метод:
метод next, который возвращает по одному элементу итератора за раз,
обернутому в Some, а когда итерация завершена, возвращает None.
Мы можем вызывать метод next у итераторов напрямую; листинг 13-12 показывает,
какие значения возвращаются при повторных вызовах next у итератора,
созданного из вектора.
#[cfg(test)]
mod tests {
#[test]
fn iterator_demonstration() {
let v1 = vec![1, 2, 3];
let mut v1_iter = v1.iter();
assert_eq!(v1_iter.next(), Some(&1));
assert_eq!(v1_iter.next(), Some(&2));
assert_eq!(v1_iter.next(), Some(&3));
assert_eq!(v1_iter.next(), None);
}
}next у итератораОбратите внимание, что нам пришлось сделать v1_iter изменяемым: вызов метода
next у итератора изменяет внутреннее состояние, которое итератор использует,
чтобы отслеживать свое положение в последовательности. Другими словами, этот
код потребляет, или расходует, итератор. Каждый вызов next забирает один
элемент из итератора. Когда мы использовали цикл for, нам не нужно было
делать v1_iter изменяемым, потому что цикл забрал владение v1_iter и
сделал его изменяемым за кулисами.
Также обратите внимание, что значения, которые мы получаем из вызовов next,
являются неизменяемыми ссылками на значения в векторе. Метод iter создает
итератор по неизменяемым ссылкам. Если мы хотим создать итератор, который
забирает владение v1 и возвращает собственные значения, можно вызвать
into_iter вместо iter. Аналогично, если мы хотим итерироваться по
изменяемым ссылкам, можно вызвать iter_mut вместо iter.
Методы, которые потребляют итератор
У трейта Iterator есть множество разных методов с реализациями по умолчанию,
предоставленными стандартной библиотекой; вы можете узнать об этих методах в
документации API стандартной библиотеки для трейта Iterator. Некоторые из
этих методов вызывают метод next в своем определении, поэтому при реализации
трейта Iterator требуется реализовать метод next.
Методы, которые вызывают next, называются потребляющими адаптерами, потому
что их вызов расходует итератор. Один пример – метод sum, который забирает
владение итератором и проходит по элементам, многократно вызывая next, тем
самым потребляя итератор. По мере перебора он добавляет каждый элемент к
накапливаемой сумме и возвращает сумму, когда итерация завершена. В листинге
13-13 есть тест, иллюстрирующий использование метода sum.
#[cfg(test)]
mod tests {
#[test]
fn iterator_sum() {
let v1 = vec![1, 2, 3];
let v1_iter = v1.iter();
let total: i32 = v1_iter.sum();
assert_eq!(total, 6);
}
}sum для получения суммы всех элементов итератораМы не можем использовать v1_iter после вызова sum, потому что sum
забирает владение итератором, для которого он вызывается.
Методы, которые создают другие итераторы
Адаптеры итераторов – это методы, определенные для трейта Iterator, которые
не потребляют итератор. Вместо этого они создают другие итераторы, изменяя
какой-либо аспект исходного итератора.
В листинге 13-14 показан пример вызова метода-адаптера итератора map, который
принимает замыкание, вызываемое для каждого элемента по мере перебора. Метод
map возвращает новый итератор, который создает измененные элементы.
Замыкание здесь создает новый итератор, в котором каждый элемент из вектора
будет увеличен на 1.
fn main() {
let v1: Vec<i32> = vec![1, 2, 3];
v1.iter().map(|x| x + 1);
}map для создания нового итератораОднако этот код выводит предупреждение:
$ cargo run
Compiling iterators v0.1.0 (file:///projects/iterators)
warning: unused `Map` that must be used
--> src/main.rs:4:5
|
4 | v1.iter().map(|x| x + 1);
| ^^^^^^^^^^^^^^^^^^^^^^^^
|
= note: iterators are lazy and do nothing unless consumed
= note: `#[warn(unused_must_use)]` on by default
help: use `let _ = ...` to ignore the resulting value
|
4 | let _ = v1.iter().map(|x| x + 1);
| +++++++
warning: `iterators` (bin "iterators") generated 1 warning
Finished `dev` profile [unoptimized + debuginfo] target(s) in 0.47s
Running `target/debug/iterators`
Код в листинге 13-14 ничего не делает; указанное нами замыкание ни разу не вызывается. Предупреждение напоминает почему: адаптеры итераторов ленивые, и здесь нам нужно потребить итератор.
Чтобы исправить это предупреждение и потребить итератор, мы используем метод
collect, который использовали с env::args в листинге 12-1. Этот метод
потребляет итератор и собирает получившиеся значения в тип данных коллекции.
В листинге 13-15 мы собираем результаты перебора итератора, возвращенного
вызовом map, в вектор. В итоге этот вектор будет содержать каждый элемент из
исходного вектора, увеличенный на 1.
fn main() {
let v1: Vec<i32> = vec![1, 2, 3];
let v2: Vec<_> = v1.iter().map(|x| x + 1).collect();
assert_eq!(v2, vec![2, 3, 4]);
}map для создания нового итератора, а затем вызов метода collect, чтобы потребить новый итератор и создать векторПоскольку map принимает замыкание, мы можем указать любую операцию, которую
хотим выполнить над каждым элементом. Это отличный пример того, как замыкания
позволяют настраивать некоторое поведение, повторно используя поведение
итерации, предоставляемое трейтом Iterator.
Вы можете выстраивать цепочки из нескольких вызовов адаптеров итераторов, чтобы выполнять сложные действия читаемым способом. Но поскольку все итераторы ленивые, вам нужно вызвать один из методов-потребляющих адаптеров, чтобы получить результаты вызовов адаптеров итераторов.
Замыкания, которые захватывают свое окружение
Многие адаптеры итераторов принимают замыкания как аргументы, и обычно замыкания, которые мы указываем как аргументы для адаптеров итераторов, будут замыканиями, захватывающими свое окружение.
Для этого примера мы используем метод filter, который принимает замыкание.
Замыкание получает элемент из итератора и возвращает bool. Если замыкание
возвращает true, значение будет включено в итерацию, создаваемую filter.
Если замыкание возвращает false, значение не будет включено.
В листинге 13-16 мы используем filter с замыканием, которое захватывает
переменную shoe_size из своего окружения, чтобы итерироваться по коллекции
экземпляров структуры Shoe. Оно вернет только обувь указанного размера.
#[derive(PartialEq, Debug)]
struct Shoe {
size: u32,
style: String,
}
fn shoes_in_size(shoes: Vec<Shoe>, shoe_size: u32) -> Vec<Shoe> {
shoes.into_iter().filter(|s| s.size == shoe_size).collect()
}
#[cfg(test)]
mod tests {
use super::*;
#[test]
fn filters_by_size() {
let shoes = vec![
Shoe {
size: 10,
style: String::from("sneaker"),
},
Shoe {
size: 13,
style: String::from("sandal"),
},
Shoe {
size: 10,
style: String::from("boot"),
},
];
let in_my_size = shoes_in_size(shoes, 10);
assert_eq!(
in_my_size,
vec![
Shoe {
size: 10,
style: String::from("sneaker")
},
Shoe {
size: 10,
style: String::from("boot")
},
]
);
}
}filter с замыканием, которое захватывает shoe_sizeФункция shoes_in_size принимает владение вектором обуви и размер обуви как
параметры. Она возвращает вектор, содержащий только обувь указанного размера.
В теле shoes_in_size мы вызываем into_iter, чтобы создать итератор,
забирающий владение вектором. Затем мы вызываем filter, чтобы адаптировать
этот итератор в новый итератор, содержащий только элементы, для которых
замыкание возвращает true.
Замыкание захватывает параметр shoe_size из окружения и сравнивает значение с
размером каждой обуви, оставляя только обувь указанного размера. Наконец,
вызов collect собирает значения, возвращенные адаптированным итератором, в
вектор, который возвращается функцией.
Тест показывает, что когда мы вызываем shoes_in_size, мы получаем обратно
только обувь того же размера, который указали.
Улучшение нашего проекта ввода-вывода
Улучшение нашего проекта ввода-вывода
С новыми знаниями об итераторах мы можем улучшить проект ввода-вывода из
главы 12, используя итераторы, чтобы сделать некоторые места в коде яснее и
кратче. Посмотрим, как итераторы могут улучшить нашу реализацию функции
Config::build и функции search.
Удаление clone с помощью итератора
В листинге 12-6 мы добавили код, который брал срез значений String и создавал
экземпляр структуры Config, индексируясь в срез и клонируя значения, что
позволяло структуре Config владеть этими значениями. В листинге 13-17 мы
воспроизвели реализацию функции Config::build такой, какой она была в
листинге 12-23.
use std::env;
use std::error::Error;
use std::fs;
use std::process;
use minigrep::{search, search_case_insensitive};
fn main() {
let args: Vec<String> = env::args().collect();
let config = Config::build(&args).unwrap_or_else(|err| {
println!("Problem parsing arguments: {err}");
process::exit(1);
});
if let Err(e) = run(config) {
println!("Application error: {e}");
process::exit(1);
}
}
pub struct Config {
pub query: String,
pub file_path: String,
pub ignore_case: bool,
}
impl Config {
fn build(args: &[String]) -> Result<Config, &'static str> {
if args.len() < 3 {
return Err("not enough arguments");
}
let query = args[1].clone();
let file_path = args[2].clone();
let ignore_case = env::var("IGNORE_CASE").is_ok();
Ok(Config {
query,
file_path,
ignore_case,
})
}
}
fn run(config: Config) -> Result<(), Box<dyn Error>> {
let contents = fs::read_to_string(config.file_path)?;
let results = if config.ignore_case {
search_case_insensitive(&config.query, &contents)
} else {
search(&config.query, &contents)
};
for line in results {
println!("{line}");
}
Ok(())
}Config::build из листинга 12-23Тогда мы сказали не беспокоиться о неэффективных вызовах clone, потому что
уберем их в будущем. Что ж, это время настало!
Здесь нам был нужен clone, потому что в параметре args у нас есть срез с
элементами String, но функция build не владеет args. Чтобы вернуть
владение экземпляром Config, нам пришлось клонировать значения из полей
query и file_path структуры Config, чтобы экземпляр Config мог владеть
своими значениями.
С новыми знаниями об итераторах мы можем изменить функцию build так, чтобы
она принимала владение итератором в качестве аргумента вместо заимствования
среза. Мы будем использовать функциональность итератора вместо кода, который
проверяет длину среза и индексируется в конкретные позиции. Это сделает
понятнее, что делает функция Config::build, потому что доступ к значениям
будет происходить через итератор.
После того как Config::build будет принимать владение итератором и перестанет
использовать операции индексирования, которые заимствуют, мы сможем перемещать
значения String из итератора в Config, вместо того чтобы вызывать clone и
создавать новое выделение памяти.
Прямое использование возвращенного итератора
Откройте файл src/main.rs вашего проекта ввода-вывода, который должен выглядеть так:
Имя файла: src/main.rs
use std::env;
use std::error::Error;
use std::fs;
use std::process;
use minigrep::{search, search_case_insensitive};
fn main() {
let args: Vec<String> = env::args().collect();
let config = Config::build(&args).unwrap_or_else(|err| {
eprintln!("Problem parsing arguments: {err}");
process::exit(1);
});
// --snip--
if let Err(e) = run(config) {
eprintln!("Application error: {e}");
process::exit(1);
}
}
pub struct Config {
pub query: String,
pub file_path: String,
pub ignore_case: bool,
}
impl Config {
fn build(args: &[String]) -> Result<Config, &'static str> {
if args.len() < 3 {
return Err("not enough arguments");
}
let query = args[1].clone();
let file_path = args[2].clone();
let ignore_case = env::var("IGNORE_CASE").is_ok();
Ok(Config {
query,
file_path,
ignore_case,
})
}
}
fn run(config: Config) -> Result<(), Box<dyn Error>> {
let contents = fs::read_to_string(config.file_path)?;
let results = if config.ignore_case {
search_case_insensitive(&config.query, &contents)
} else {
search(&config.query, &contents)
};
for line in results {
println!("{line}");
}
Ok(())
}Сначала мы изменим начало функции main, которое у нас было в листинге 12-24,
на код из листинга 13-18, который на этот раз использует итератор. Этот код не
скомпилируется, пока мы также не обновим Config::build.
use std::env;
use std::error::Error;
use std::fs;
use std::process;
use minigrep::{search, search_case_insensitive};
fn main() {
let config = Config::build(env::args()).unwrap_or_else(|err| {
eprintln!("Problem parsing arguments: {err}");
process::exit(1);
});
// --snip--
if let Err(e) = run(config) {
eprintln!("Application error: {e}");
process::exit(1);
}
}
pub struct Config {
pub query: String,
pub file_path: String,
pub ignore_case: bool,
}
impl Config {
fn build(args: &[String]) -> Result<Config, &'static str> {
if args.len() < 3 {
return Err("not enough arguments");
}
let query = args[1].clone();
let file_path = args[2].clone();
let ignore_case = env::var("IGNORE_CASE").is_ok();
Ok(Config {
query,
file_path,
ignore_case,
})
}
}
fn run(config: Config) -> Result<(), Box<dyn Error>> {
let contents = fs::read_to_string(config.file_path)?;
let results = if config.ignore_case {
search_case_insensitive(&config.query, &contents)
} else {
search(&config.query, &contents)
};
for line in results {
println!("{line}");
}
Ok(())
}env::args в Config::buildФункция env::args возвращает итератор! Вместо того чтобы собирать значения
итератора в вектор, а затем передавать срез в Config::build, теперь мы
напрямую передаем владение итератором, возвращенным из env::args, в
Config::build.
Далее нужно обновить определение Config::build. Изменим сигнатуру
Config::build, чтобы она выглядела как в листинге 13-19. Этот код все еще не
скомпилируется, потому что нам нужно обновить тело функции.
use std::env;
use std::error::Error;
use std::fs;
use std::process;
use minigrep::{search, search_case_insensitive};
fn main() {
let config = Config::build(env::args()).unwrap_or_else(|err| {
eprintln!("Problem parsing arguments: {err}");
process::exit(1);
});
if let Err(e) = run(config) {
eprintln!("Application error: {e}");
process::exit(1);
}
}
pub struct Config {
pub query: String,
pub file_path: String,
pub ignore_case: bool,
}
impl Config {
fn build(
mut args: impl Iterator<Item = String>,
) -> Result<Config, &'static str> {
// --snip--
if args.len() < 3 {
return Err("not enough arguments");
}
let query = args[1].clone();
let file_path = args[2].clone();
let ignore_case = env::var("IGNORE_CASE").is_ok();
Ok(Config {
query,
file_path,
ignore_case,
})
}
}
fn run(config: Config) -> Result<(), Box<dyn Error>> {
let contents = fs::read_to_string(config.file_path)?;
let results = if config.ignore_case {
search_case_insensitive(&config.query, &contents)
} else {
search(&config.query, &contents)
};
for line in results {
println!("{line}");
}
Ok(())
}Config::build, чтобы она ожидала итераторДокументация стандартной библиотеки для функции env::args показывает, что
тип возвращаемого ею итератора – std::env::Args, и этот тип реализует трейт
Iterator и возвращает значения String.
Мы обновили сигнатуру функции Config::build так, что параметр args имеет
обобщенный тип с ограничениями трейта impl Iterator<Item = String> вместо
&[String]. Это использование синтаксиса impl Trait, который мы обсуждали в
разделе «Использование трейтов как параметров»
главы 10, означает, что args может быть любым типом, который реализует трейт
Iterator и возвращает элементы String.
Поскольку мы принимаем владение args и будем изменять args, итерируясь по
нему, мы можем добавить ключевое слово mut в описание параметра args, чтобы
сделать его изменяемым.
Использование методов трейта Iterator
Далее мы исправим тело Config::build. Поскольку args реализует трейт
Iterator, мы знаем, что можем вызвать у него метод next! Листинг 13-20
обновляет код из листинга 12-23, чтобы использовать метод next.
use std::env;
use std::error::Error;
use std::fs;
use std::process;
use minigrep::{search, search_case_insensitive};
fn main() {
let config = Config::build(env::args()).unwrap_or_else(|err| {
eprintln!("Problem parsing arguments: {err}");
process::exit(1);
});
if let Err(e) = run(config) {
eprintln!("Application error: {e}");
process::exit(1);
}
}
pub struct Config {
pub query: String,
pub file_path: String,
pub ignore_case: bool,
}
impl Config {
fn build(
mut args: impl Iterator<Item = String>,
) -> Result<Config, &'static str> {
args.next();
let query = match args.next() {
Some(arg) => arg,
None => return Err("Didn't get a query string"),
};
let file_path = match args.next() {
Some(arg) => arg,
None => return Err("Didn't get a file path"),
};
let ignore_case = env::var("IGNORE_CASE").is_ok();
Ok(Config {
query,
file_path,
ignore_case,
})
}
}
fn run(config: Config) -> Result<(), Box<dyn Error>> {
let contents = fs::read_to_string(config.file_path)?;
let results = if config.ignore_case {
search_case_insensitive(&config.query, &contents)
} else {
search(&config.query, &contents)
};
for line in results {
println!("{line}");
}
Ok(())
}Config::build для использования методов итератораПомните, что первое значение в возвращаемом значении env::args – это имя
программы. Мы хотим проигнорировать его и перейти к следующему значению,
поэтому сначала вызываем next и ничего не делаем с возвращаемым значением.
Затем мы вызываем next, чтобы получить значение, которое хотим поместить в
поле query структуры Config. Если next возвращает Some, мы используем
match, чтобы извлечь значение. Если он возвращает None, это означает, что
было передано недостаточно аргументов, и мы досрочно возвращаем значение Err.
То же самое мы делаем для значения file_path.
Прояснение кода с помощью адаптеров итераторов
Мы также можем воспользоваться итераторами в функции search нашего проекта
ввода-вывода, которая воспроизведена здесь в листинге 13-21 такой, какой она
была в листинге 12-19.
pub fn search<'a>(query: &str, contents: &'a str) -> Vec<&'a str> {
let mut results = Vec::new();
for line in contents.lines() {
if line.contains(query) {
results.push(line);
}
}
results
}
#[cfg(test)]
mod tests {
use super::*;
#[test]
fn one_result() {
let query = "duct";
let contents = "\
Rust:
safe, fast, productive.
Pick three.";
assert_eq!(vec!["safe, fast, productive."], search(query, contents));
}
}search из листинга 12-19Мы можем написать этот код более кратко, используя методы адаптеров итераторов.
Это также позволяет избежать промежуточного изменяемого вектора results.
Стиль функционального программирования предпочитает минимизировать объем
изменяемого состояния, чтобы сделать код яснее. Удаление изменяемого состояния
может позволить в будущем улучшить поиск так, чтобы он выполнялся параллельно,
потому что нам не пришлось бы управлять конкурентным доступом к вектору
results. Листинг 13-22 показывает это изменение.
pub fn search<'a>(query: &str, contents: &'a str) -> Vec<&'a str> {
contents
.lines()
.filter(|line| line.contains(query))
.collect()
}
pub fn search_case_insensitive<'a>(
query: &str,
contents: &'a str,
) -> Vec<&'a str> {
let query = query.to_lowercase();
let mut results = Vec::new();
for line in contents.lines() {
if line.to_lowercase().contains(&query) {
results.push(line);
}
}
results
}
#[cfg(test)]
mod tests {
use super::*;
#[test]
fn case_sensitive() {
let query = "duct";
let contents = "\
Rust:
safe, fast, productive.
Pick three.
Duct tape.";
assert_eq!(vec!["safe, fast, productive."], search(query, contents));
}
#[test]
fn case_insensitive() {
let query = "rUsT";
let contents = "\
Rust:
safe, fast, productive.
Pick three.
Trust me.";
assert_eq!(
vec!["Rust:", "Trust me."],
search_case_insensitive(query, contents)
);
}
}searchВспомните, что назначение функции search – вернуть все строки из contents,
которые содержат query. Подобно примеру с filter в листинге 13-16, этот
код использует адаптер filter, чтобы оставить только те строки, для которых
line.contains(query) возвращает true. Затем мы собираем совпавшие строки в
другой вектор с помощью collect. Гораздо проще! Можете внести такое же
изменение, чтобы использовать методы итераторов и в функции
search_case_insensitive.
Для дальнейшего улучшения верните итератор из функции search, убрав вызов
collect и изменив возвращаемый тип на impl Iterator<Item = &'a str>, чтобы
функция стала адаптером итератора. Обратите внимание, что вам также нужно будет
обновить тесты! Выполните поиск по большому файлу с помощью вашего инструмента
minigrep до и после этого изменения, чтобы увидеть разницу в поведении. До
этого изменения программа не будет печатать результаты, пока не соберет их
все, но после изменения результаты будут печататься по мере нахождения каждой
совпавшей строки, потому что цикл for в функции run сможет воспользоваться
ленивостью итератора.
Выбор между циклами и итераторами
Следующий логичный вопрос – какой стиль стоит выбрать в собственном коде и почему: исходную реализацию из листинга 13-21 или версию с использованием итераторов из листинга 13-22 (если предположить, что мы собираем все результаты перед возвратом, а не возвращаем итератор). Большинство программистов Rust предпочитает использовать стиль итераторов. Поначалу к нему немного сложнее привыкнуть, но когда вы почувствуете разные адаптеры итераторов и поймете, что они делают, итераторы могут стать проще для понимания. Вместо возни с разными частями цикла и построением новых векторов код фокусируется на высокоуровневой цели цикла. Это абстрагирует часть обычного кода, так что проще увидеть концепции, уникальные для этого кода, например условие фильтрации, которое должен пройти каждый элемент итератора.
Но действительно ли эти две реализации эквивалентны? Интуитивное предположение может быть таким: более низкоуровневый цикл будет быстрее. Поговорим о производительности.
Производительность: циклы против итераторов
Производительность циклов и итераторов
Чтобы определить, использовать циклы или итераторы, нужно знать, какая
реализация быстрее: версия функции search с явным циклом for или версия с
итераторами.
Мы запустили бенчмарк, загрузив все содержимое The Adventures of Sherlock
Holmes сэра Артура Конан Дойла в String и выполнив поиск слова the в
содержимом. Вот результаты бенчмарка для версии search, использующей цикл
for, и версии, использующей итераторы:
test bench_search_for ... bench: 19,620,300 ns/iter (+/- 915,700)
test bench_search_iter ... bench: 19,234,900 ns/iter (+/- 657,200)
У двух реализаций похожая производительность! Мы не будем объяснять код бенчмарка здесь, потому что цель не в том, чтобы доказать эквивалентность двух версий, а в том, чтобы получить общее представление о том, как эти две реализации сравниваются по производительности.
Для более всестороннего бенчмарка стоит проверить разные тексты разного
размера в качестве contents, разные слова и слова разной длины в качестве
query, а также всевозможные другие варианты. Суть вот в чем: итераторы, хотя
и являются высокоуровневой абстракцией, компилируются примерно в тот же код,
как если бы вы сами написали низкоуровневый код. Итераторы – одна из
абстракций с нулевой стоимостью Rust: мы имеем в виду, что использование
абстракции не добавляет накладных расходов во время выполнения. Это похоже на
то, как Бьерн Страуструп, первоначальный проектировщик и реализатор C++,
определяет нулевые накладные расходы в своем докладе “Foundations of C++” на
ETAPS в 2012 году:
В целом реализации C++ следуют принципу нулевых накладных расходов: за то, чем вы не пользуетесь, вы не платите. И далее: то, чем вы пользуетесь, вы не смогли бы написать вручную лучше.
Во многих случаях код Rust, использующий итераторы, компилируется в тот же ассемблерный код, который вы написали бы вручную. Оптимизации вроде разворачивания циклов и устранения проверок границ при доступе к массиву применяются и делают итоговый код чрезвычайно эффективным. Теперь, когда вы это знаете, можете использовать итераторы и замыкания без страха! Они делают код похожим на более высокоуровневый, но не накладывают за это штрафа производительности во время выполнения.
Итоги
Замыкания и итераторы – возможности Rust, вдохновленные идеями языков функционального программирования. Они помогают Rust ясно выражать высокоуровневые идеи с низкоуровневой производительностью. Реализации замыканий и итераторов устроены так, что производительность во время выполнения не страдает. Это часть цели Rust – стремиться предоставлять абстракции с нулевой стоимостью.
Теперь, когда мы улучшили выразительность нашего проекта ввода-вывода,
рассмотрим еще несколько возможностей cargo, которые помогут нам поделиться
проектом с миром.
Подробнее о Cargo и Crates.io
До сих пор мы использовали только самые базовые возможности Cargo, чтобы собирать, запускать и тестировать наш код, но он умеет гораздо больше. В этой главе мы обсудим некоторые другие, более продвинутые возможности Cargo, чтобы показать, как делать следующее:
- Настраивать сборку через профили выпуска.
- Публиковать библиотеки на crates.io.
- Организовывать большие проекты с помощью рабочих пространств.
- Устанавливать бинарные файлы с crates.io.
- Расширять Cargo с помощью пользовательских команд.
Cargo умеет еще больше, чем функциональность, которую мы рассматриваем в этой главе, поэтому для полного объяснения всех его возможностей смотрите документацию Cargo.
Настройка сборок с помощью профилей выпуска
Настройка сборок с помощью профилей выпуска
В Rust профили выпуска – это предопределенные настраиваемые профили с разными конфигурациями, которые позволяют программисту лучше контролировать различные параметры компиляции кода. Каждый профиль настраивается независимо от других.
У Cargo есть два основных профиля: профиль dev, который Cargo использует при
запуске cargo build, и профиль release, который Cargo использует при
запуске cargo build --release. Профиль dev определен с хорошими значениями
по умолчанию для разработки, а профиль release имеет хорошие значения по
умолчанию для release-сборок.
Эти имена профилей могут быть знакомы вам по выводу ваших сборок:
$ cargo build
Finished `dev` profile [unoptimized + debuginfo] target(s) in 0.00s
$ cargo build --release
Finished `release` profile [optimized] target(s) in 0.32s
dev и release – это те самые разные профили, которые использует
компилятор.
У Cargo есть настройки по умолчанию для каждого профиля; они применяются, если
вы явно не добавили разделы [profile.*] в файл Cargo.toml проекта. Добавляя
разделы [profile.*] для любого профиля, который хотите настроить, вы
переопределяете любую часть настроек по умолчанию. Например, вот значения по
умолчанию для настройки opt-level у профилей dev и release:
Имя файла: Cargo.toml
[profile.dev]
opt-level = 0
[profile.release]
opt-level = 3
Настройка opt-level управляет количеством оптимизаций, которые Rust применит
к вашему коду, в диапазоне от 0 до 3. Применение большего числа оптимизаций
увеличивает время компиляции, поэтому если вы находитесь в процессе разработки
и часто компилируете код, вам понадобится меньше оптимизаций, чтобы компиляция
шла быстрее, даже если итоговый код будет работать медленнее. Поэтому значение
opt-level по умолчанию для dev равно 0. Когда вы готовы выпустить код,
лучше потратить больше времени на компиляцию. В режиме выпуска вы
скомпилируете программу только один раз, но запускать скомпилированную
программу будете много раз, поэтому режим выпуска обменивает более долгое
время компиляции на более быстрый код. Именно поэтому значение opt-level по
умолчанию для профиля release равно 3.
Вы можете переопределить настройку по умолчанию, добавив для нее другое значение в Cargo.toml. Например, если мы хотим использовать уровень оптимизации 1 в профиле разработки, можно добавить эти две строки в файл Cargo.toml нашего проекта:
Имя файла: Cargo.toml
[profile.dev]
opt-level = 1
Этот код переопределяет настройку по умолчанию 0. Теперь, когда мы запускаем
cargo build, Cargo будет использовать значения по умолчанию для профиля
dev плюс нашу настройку opt-level. Поскольку мы установили opt-level в
1, Cargo применит больше оптимизаций, чем по умолчанию, но не так много, как
в release-сборке.
Полный список параметров конфигурации и значений по умолчанию для каждого профиля смотрите в документации Cargo.
Публикация крейта в Crates.io
Публикация крейта на Crates.io
Мы использовали пакеты с crates.io как зависимости нашего проекта, но вы также можете делиться своим кодом с другими людьми, публикуя собственные пакеты. Реестр крейтов на crates.io распространяет исходный код ваших пакетов, поэтому в основном на нем размещают код с открытым исходным кодом.
В Rust и Cargo есть возможности, которые помогают людям легче находить и использовать опубликованный вами пакет. Далее мы поговорим о некоторых из этих возможностей, а затем объясним, как опубликовать пакет.
Создание полезных комментариев документации
Точное документирование ваших пакетов поможет другим пользователям понять, как
и когда их использовать, поэтому стоит потратить время на написание
документации. В главе 3 мы обсуждали, как комментировать код Rust с помощью
двух косых черт, //. В Rust также есть особый вид комментариев для
документации, удобно называемый комментарием документации, который генерирует
HTML-документацию. HTML отображает содержимое комментариев документации для
элементов публичного API, предназначенное для программистов, которым интересно
узнать, как использовать ваш крейт, а не как он реализован.
Комментарии документации используют три косые черты, ///, вместо двух и
поддерживают синтаксис Markdown для форматирования текста. Размещайте
комментарии документации прямо перед элементом, который они документируют. В
листинге 14-1 показаны комментарии документации для функции add_one в крейте
с именем my_crate.
/// Adds one to the number given.
///
/// # Examples
///
/// ```
/// let arg = 5;
/// let answer = my_crate::add_one(arg);
///
/// assert_eq!(6, answer);
/// ```
pub fn add_one(x: i32) -> i32 {
x + 1
}Здесь мы даем описание того, что делает функция add_one, начинаем раздел с
заголовком Examples, а затем приводим код, показывающий, как использовать
функцию add_one. Мы можем сгенерировать HTML-документацию из этого
комментария документации, запустив cargo doc. Эта команда запускает
инструмент rustdoc, поставляемый вместе с Rust, и помещает сгенерированную
HTML-документацию в каталог target/doc.
Для удобства запуск cargo doc --open соберет HTML для документации текущего
крейта (а также документацию всех зависимостей вашего крейта) и откроет
результат в веб-браузере. Перейдите к функции add_one, и вы увидите, как
отображается текст из комментариев документации, как показано на рисунке 14-1.
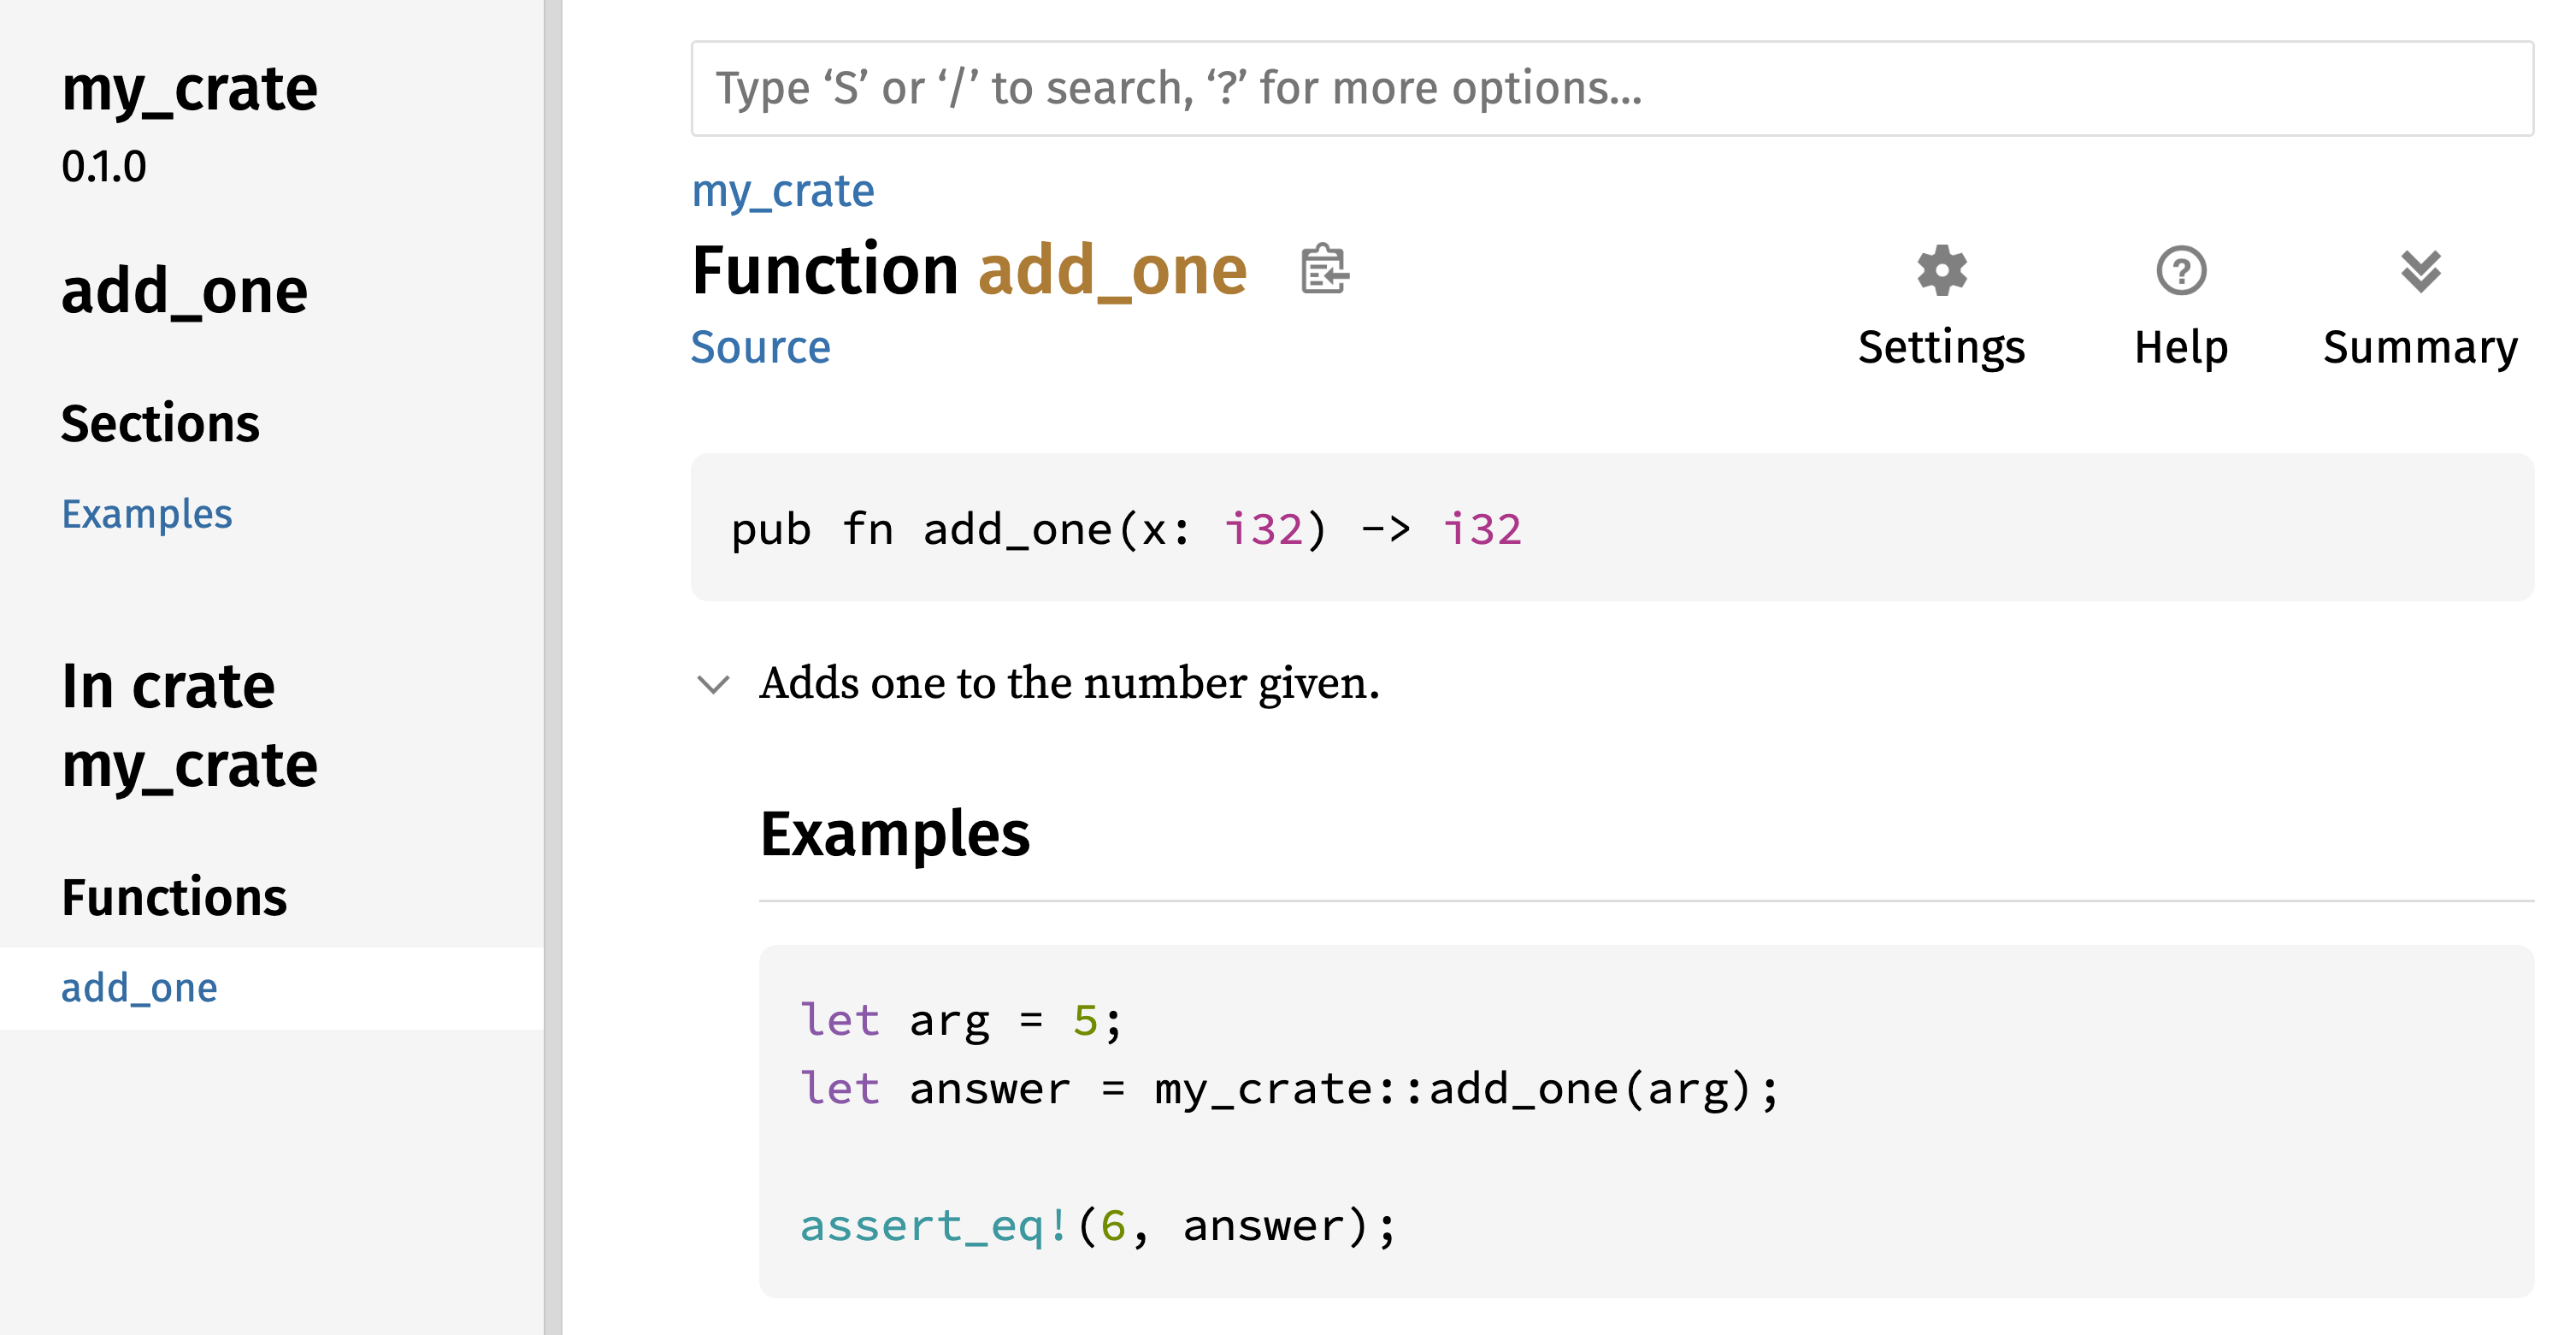
Рисунок 14-1: HTML-документация для функции
add_one
Часто используемые разделы
Мы использовали Markdown-заголовок # Examples в листинге 14-1, чтобы создать
раздел в HTML с названием “Examples.” Вот некоторые другие разделы, которые
авторы крейтов часто используют в своей документации:
- Panics: сценарии, в которых документируемая функция может запаниковать. Вызывающий код, который не хочет, чтобы его программа паниковала, должен убедиться, что не вызывает функцию в таких ситуациях.
- Errors: если функция возвращает
Result, описание видов ошибок, которые могут возникнуть, и условий, которые могут привести к возврату этих ошибок, может быть полезно вызывающему коду, чтобы он мог писать код для обработки разных видов ошибок разными способами. - Safety: если вызов функции является
unsafe(мы обсудим небезопасность в главе 20), должен быть раздел, объясняющий, почему функция небезопасна, и описывающий инварианты, которые функция ожидает от вызывающего кода.
Большинству комментариев документации не нужны все эти разделы, но это хороший контрольный список, который напоминает, о каких аспектах вашего кода пользователи захотят знать.
Комментарии документации как тесты
Добавление блоков с примером кода в комментарии документации может помочь
показать, как использовать вашу библиотеку, и дает дополнительный бонус: запуск
cargo test будет запускать примеры кода из вашей документации как тесты!
Нет ничего лучше документации с примерами. Но нет ничего хуже примеров, которые
не работают, потому что код изменился после написания документации. Если мы
запустим cargo test с документацией для функции add_one из листинга 14-1,
то увидим в результатах тестов раздел, похожий на этот:
Doc-tests my_crate
running 1 test
test src/lib.rs - add_one (line 5) ... ok
test result: ok. 1 passed; 0 failed; 0 ignored; 0 measured; 0 filtered out; finished in 0.27s
Теперь, если мы изменим либо функцию, либо пример так, что assert_eq! в
примере запаникует, и снова запустим cargo test, мы увидим, что
документационные тесты обнаружат рассинхронизацию между примером и кодом!
Комментарии для содержащих элементов
Стиль комментария документации //! добавляет документацию к элементу, который
содержит комментарии, а не к элементам, следующим за комментариями. Обычно
мы используем такие doc-комментарии внутри корневого файла крейта (src/lib.rs
по соглашению) или внутри модуля, чтобы документировать крейт или модуль в
целом.
Например, чтобы добавить документацию, описывающую назначение крейта
my_crate, который содержит функцию add_one, мы добавляем комментарии
документации, начинающиеся с //!, в начало файла src/lib.rs, как показано
в листинге 14-2.
//! # My Crate
//!
//! `my_crate` is a collection of utilities to make performing certain
//! calculations more convenient.
/// Adds one to the number given.
// --snip--
///
/// # Examples
///
/// ```
/// let arg = 5;
/// let answer = my_crate::add_one(arg);
///
/// assert_eq!(6, answer);
/// ```
pub fn add_one(x: i32) -> i32 {
x + 1
}my_crate в целомОбратите внимание, что после последней строки, начинающейся с //!, нет кода.
Поскольку мы начали комментарии с //!, а не с ///, мы документируем
элемент, который содержит этот комментарий, а не элемент, следующий за этим
комментарием. В данном случае этот элемент – файл src/lib.rs, являющийся
корнем крейта. Эти комментарии описывают весь крейт.
Когда мы запускаем cargo doc --open, эти комментарии отображаются на главной
странице документации для my_crate над списком публичных элементов крейта,
как показано на рисунке 14-2.
Комментарии документации внутри элементов особенно полезны для описания крейтов и модулей. Используйте их, чтобы объяснить общее назначение контейнера и помочь пользователям понять организацию крейта.
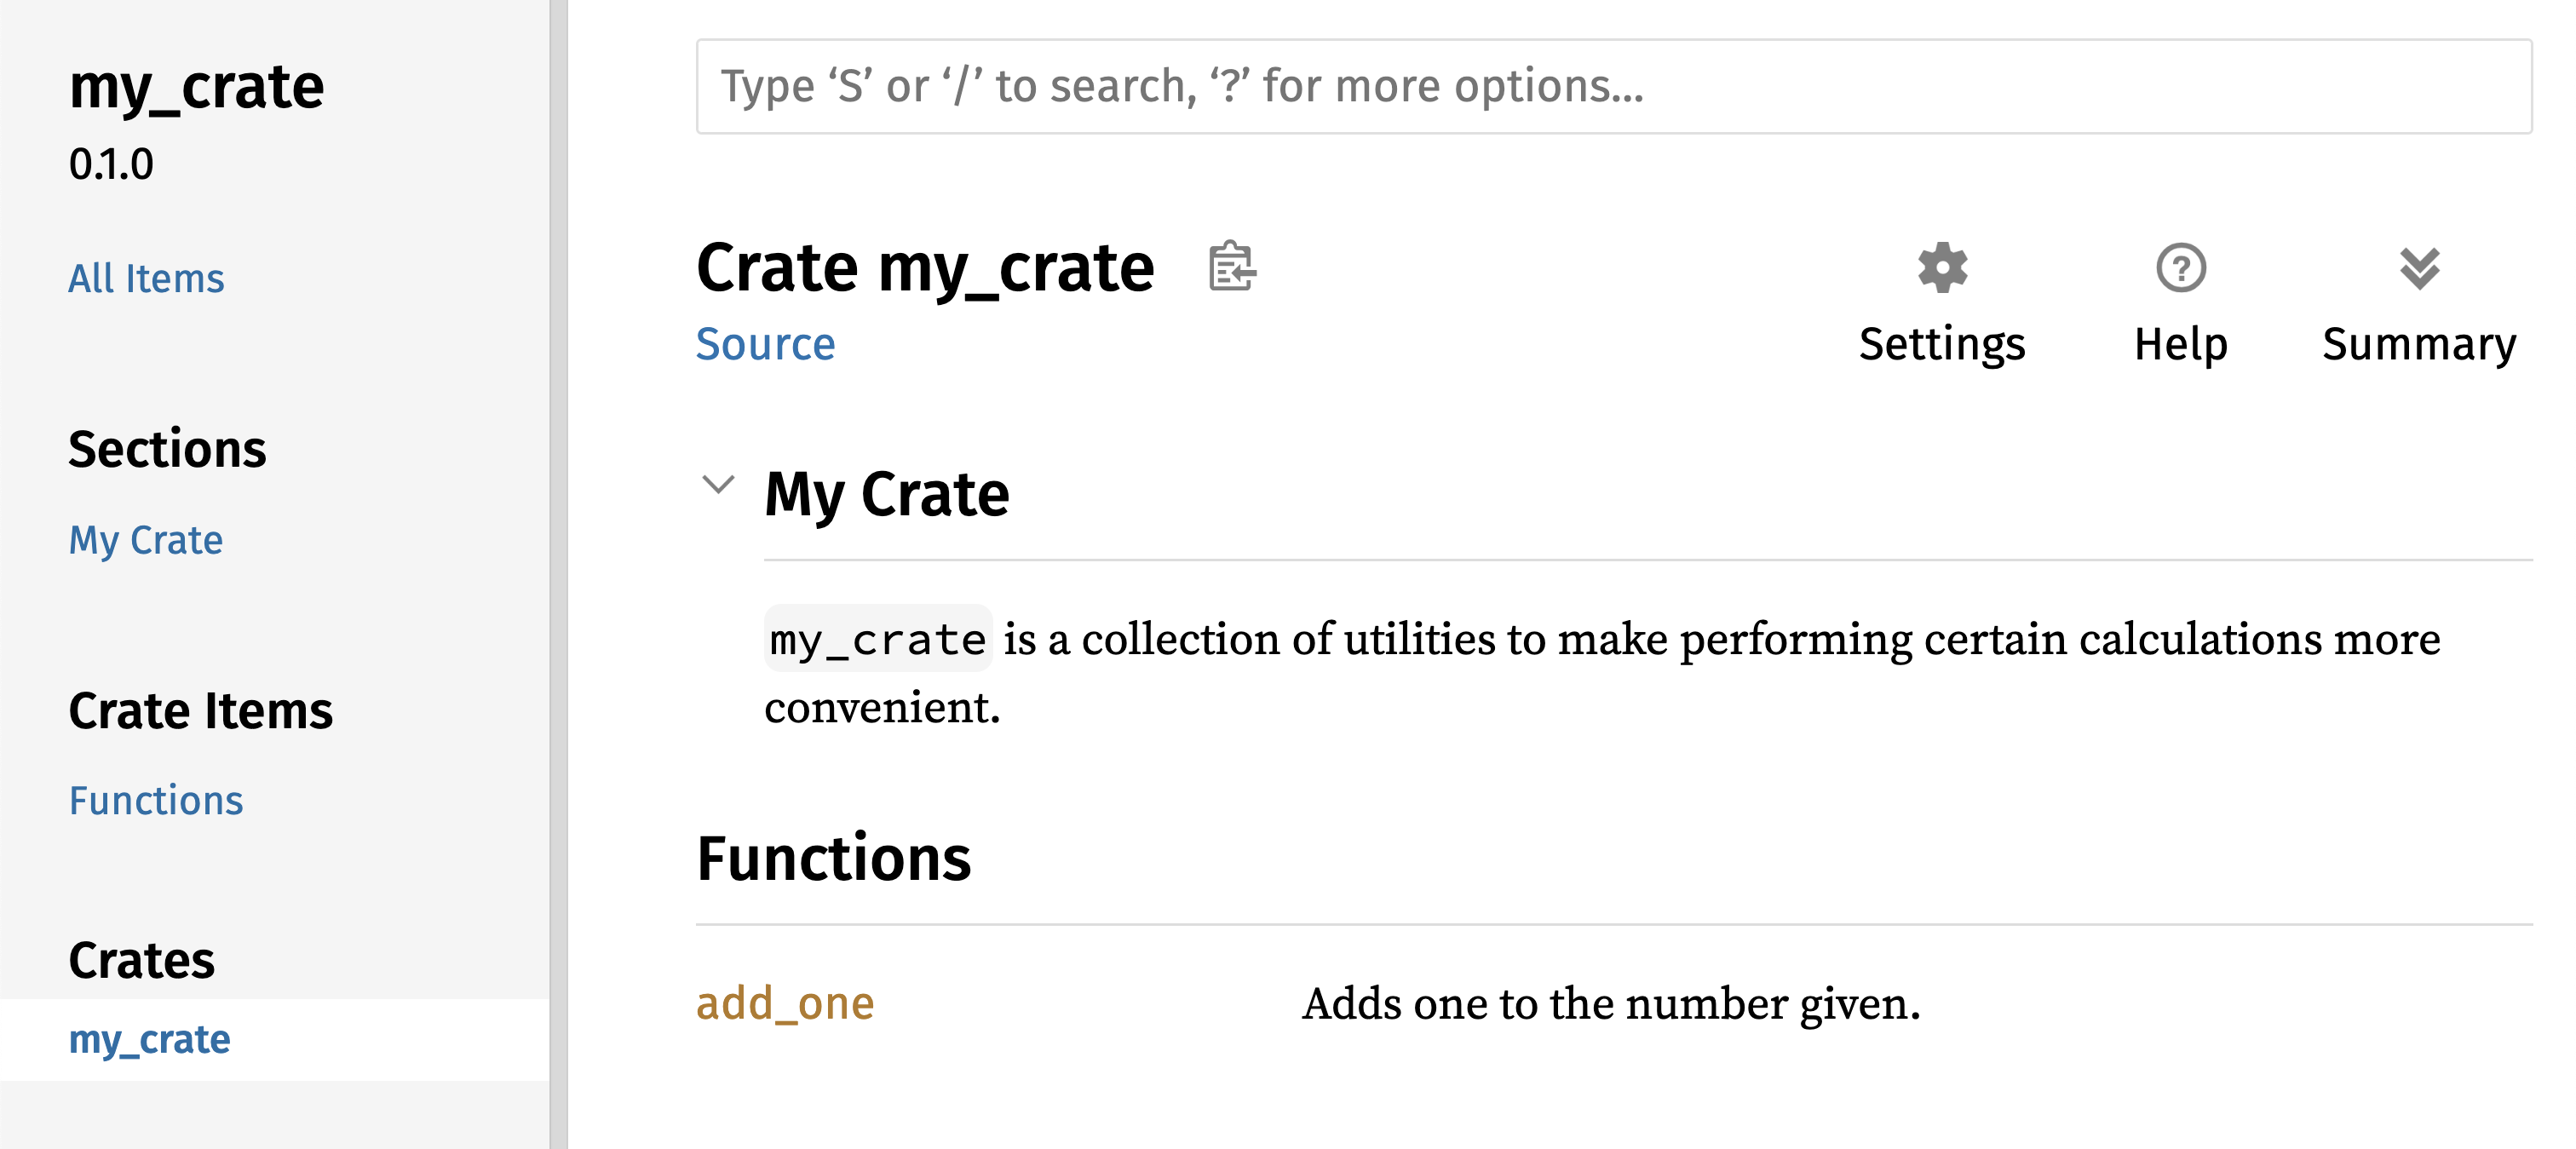
Рисунок 14-2: Отрисованная документация для my_crate,
включающая комментарий, описывающий крейт в целом
Экспорт удобного публичного API
Структура вашего публичного API – важное соображение при публикации крейта. Люди, использующие ваш крейт, знакомы с его структурой хуже вас и могут столкнуться с трудностями при поиске нужных им частей, если у вашего крейта большая иерархия модулей.
В главе 7 мы рассмотрели, как делать элементы публичными с помощью ключевого
слова pub и как вводить элементы в область видимости с помощью ключевого
слова use. Однако структура, которая кажется вам разумной во время
разработки крейта, может быть не очень удобной для ваших пользователей.
Возможно, вы захотите организовать структуры в иерархию из нескольких уровней,
но тогда людям, которые хотят использовать тип, определенный глубоко в
иерархии, может быть трудно узнать, что этот тип существует. Их также может
раздражать необходимость писать use my_crate::some_module::another_module::UsefulType; вместо use my_crate::UsefulType;.
Хорошая новость в том, что если структура неудобна для использования из
другой библиотеки, вам не нужно перестраивать внутреннюю организацию:
вместо этого вы можете реэкспортировать элементы, чтобы создать публичную
структуру, отличающуюся от вашей приватной структуры, с помощью pub use.
Реэкспорт берет публичный элемент в одном месте и делает его публичным в
другом месте, как если бы он был определен там.
Например, допустим, мы создали библиотеку с именем art для моделирования
художественных понятий. Внутри этой библиотеки есть два модуля: модуль kinds,
содержащий два enum с именами PrimaryColor и SecondaryColor, и модуль
utils, содержащий функцию с именем mix, как показано в листинге 14-3.
//! # Art
//!
//! A library for modeling artistic concepts.
pub mod kinds {
/// The primary colors according to the RYB color model.
pub enum PrimaryColor {
Red,
Yellow,
Blue,
}
/// The secondary colors according to the RYB color model.
pub enum SecondaryColor {
Orange,
Green,
Purple,
}
}
pub mod utils {
use crate::kinds::*;
/// Combines two primary colors in equal amounts to create
/// a secondary color.
pub fn mix(c1: PrimaryColor, c2: PrimaryColor) -> SecondaryColor {
// --snip--
unimplemented!();
}
}art с элементами, организованными в модули kinds и utilsНа рисунке 14-3 показано, как выглядела бы главная страница документации для
этого крейта, сгенерированная cargo doc.
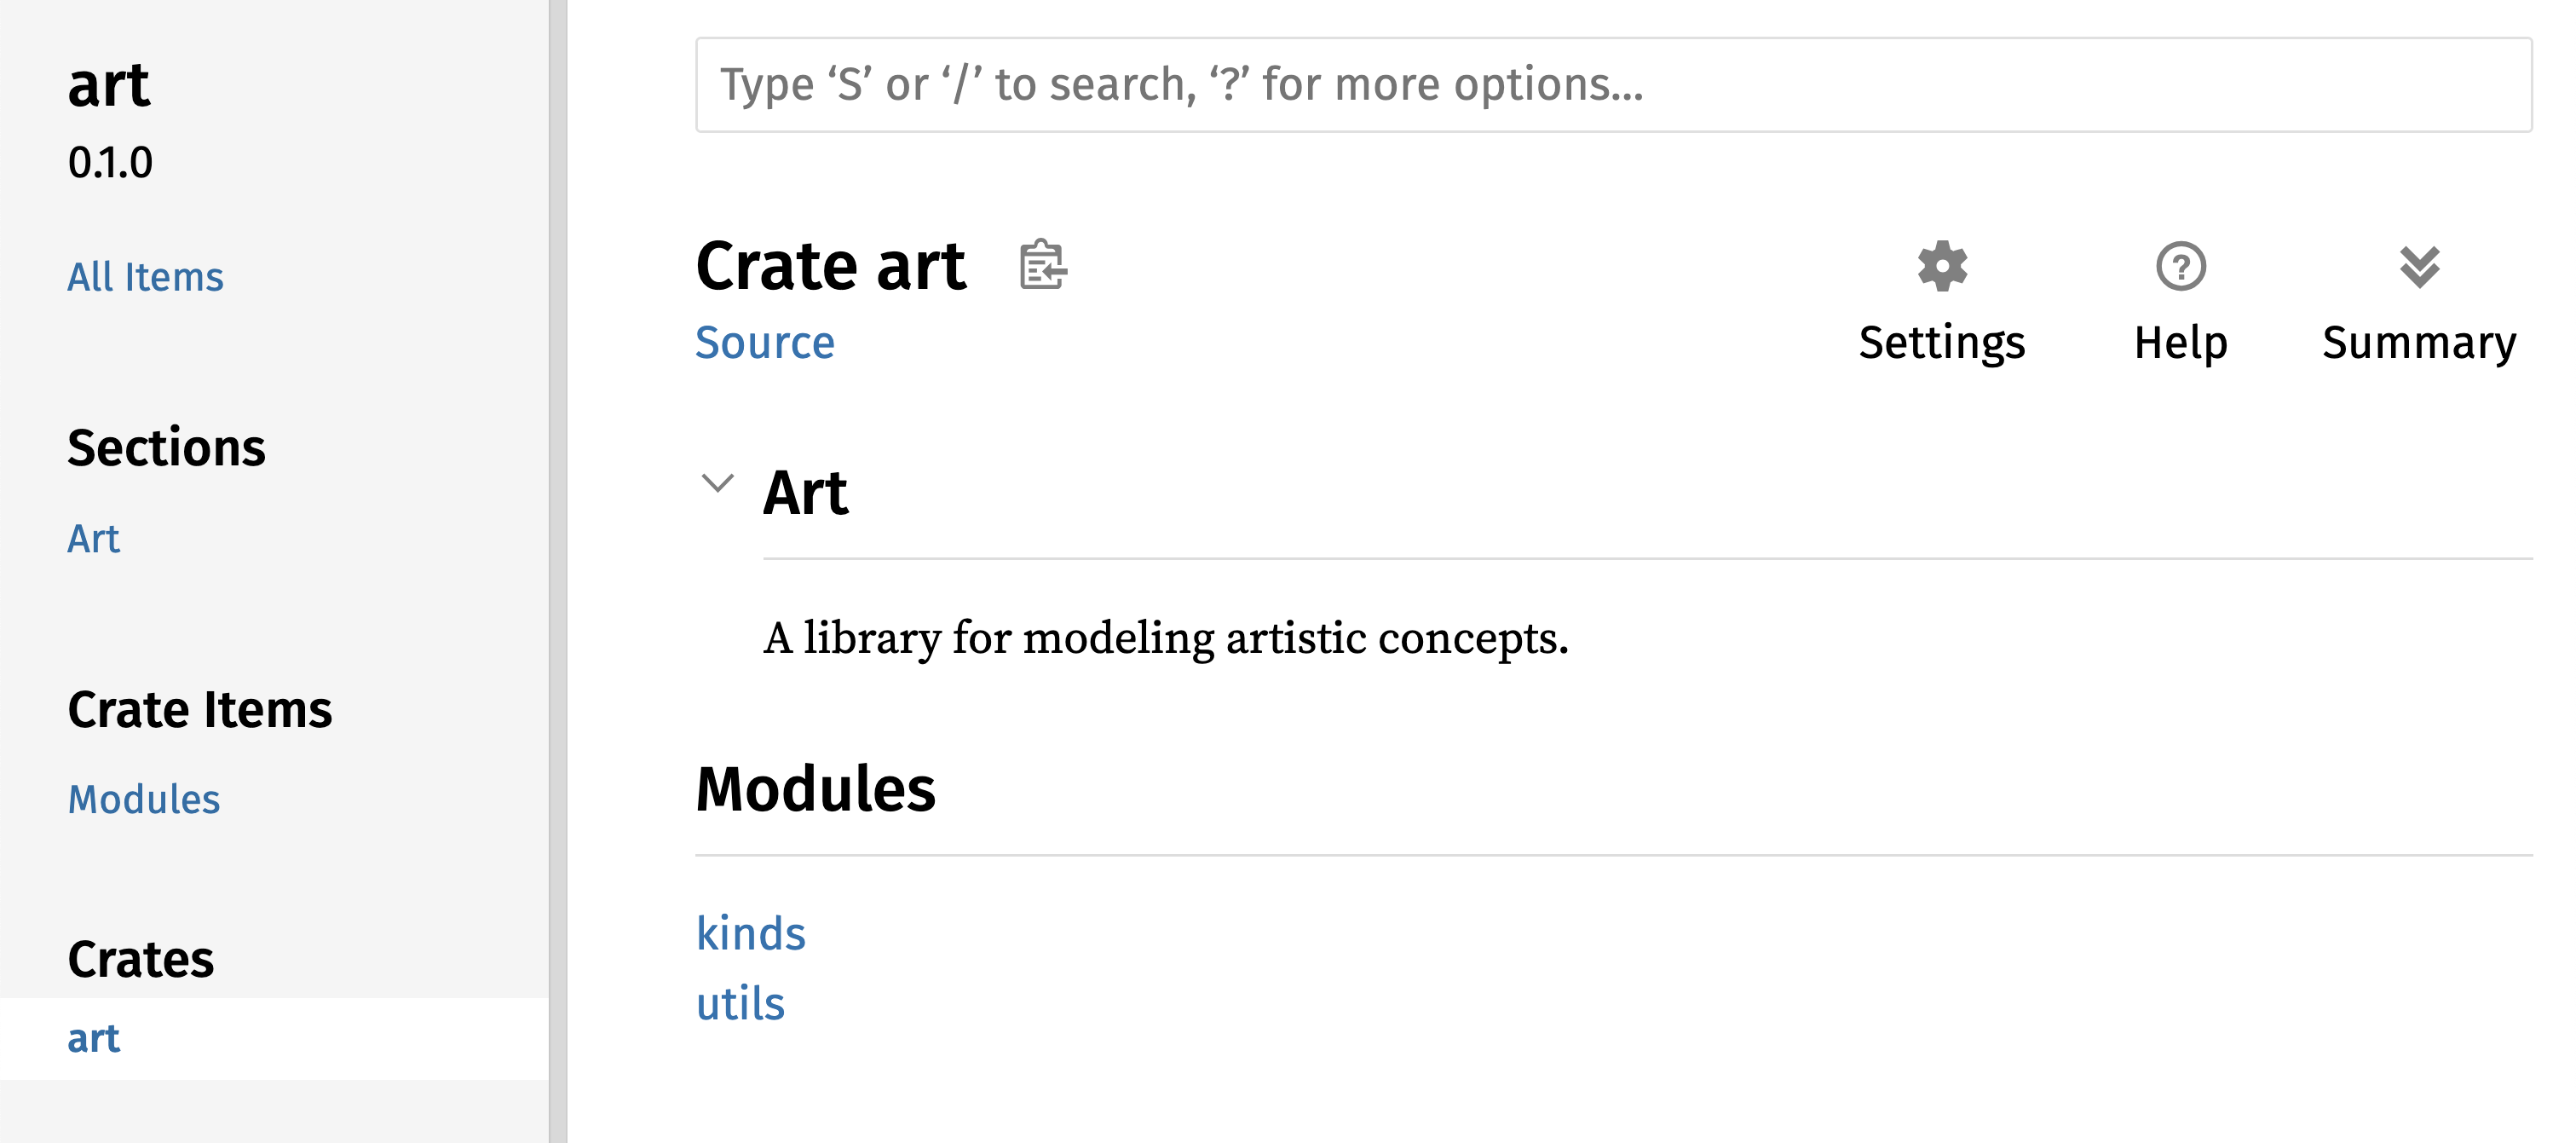
Рисунок 14-3: Главная страница документации для art,
где перечислены модули kinds и utils
Обратите внимание, что типы PrimaryColor и SecondaryColor не перечислены на
главной странице, как и функция mix. Чтобы увидеть их, нужно щелкнуть
kinds и utils.
Другому крейту, который зависит от этой библиотеки, понадобятся инструкции
use, вводящие элементы из art в область видимости и указывающие текущую
структуру модулей. В листинге 14-4 показан пример крейта, который использует
элементы PrimaryColor и mix из крейта art.
use art::kinds::PrimaryColor;
use art::utils::mix;
fn main() {
let red = PrimaryColor::Red;
let yellow = PrimaryColor::Yellow;
mix(red, yellow);
}art с экспортированной внутренней структуройАвтору кода в листинге 14-4, который использует крейт art, пришлось выяснить,
что PrimaryColor находится в модуле kinds, а mix – в модуле utils.
Структура модулей крейта art более важна для разработчиков, работающих над
крейтом art, чем для тех, кто его использует. Внутренняя структура не
содержит полезной информации для человека, который пытается понять, как
использовать крейт art; скорее она вызывает путаницу, потому что
разработчикам, использующим крейт, приходится выяснять, где искать, и
указывать имена модулей в инструкциях use.
Чтобы убрать внутреннюю организацию из публичного API, мы можем изменить код
крейта art из листинга 14-3 и добавить инструкции pub use, чтобы
реэкспортировать элементы на верхнем уровне, как показано в листинге 14-5.
//! # Art
//!
//! A library for modeling artistic concepts.
pub use self::kinds::PrimaryColor;
pub use self::kinds::SecondaryColor;
pub use self::utils::mix;
pub mod kinds {
// --snip--
/// The primary colors according to the RYB color model.
pub enum PrimaryColor {
Red,
Yellow,
Blue,
}
/// The secondary colors according to the RYB color model.
pub enum SecondaryColor {
Orange,
Green,
Purple,
}
}
pub mod utils {
// --snip--
use crate::kinds::*;
/// Combines two primary colors in equal amounts to create
/// a secondary color.
pub fn mix(c1: PrimaryColor, c2: PrimaryColor) -> SecondaryColor {
SecondaryColor::Orange
}
}pub use для реэкспорта элементовДокументация API, которую cargo doc сгенерирует для этого крейта, теперь
будет перечислять реэкспорты на главной странице и давать ссылки на них, как
показано на рисунке 14-4, благодаря чему типы PrimaryColor и SecondaryColor
и функцию mix будет проще найти.
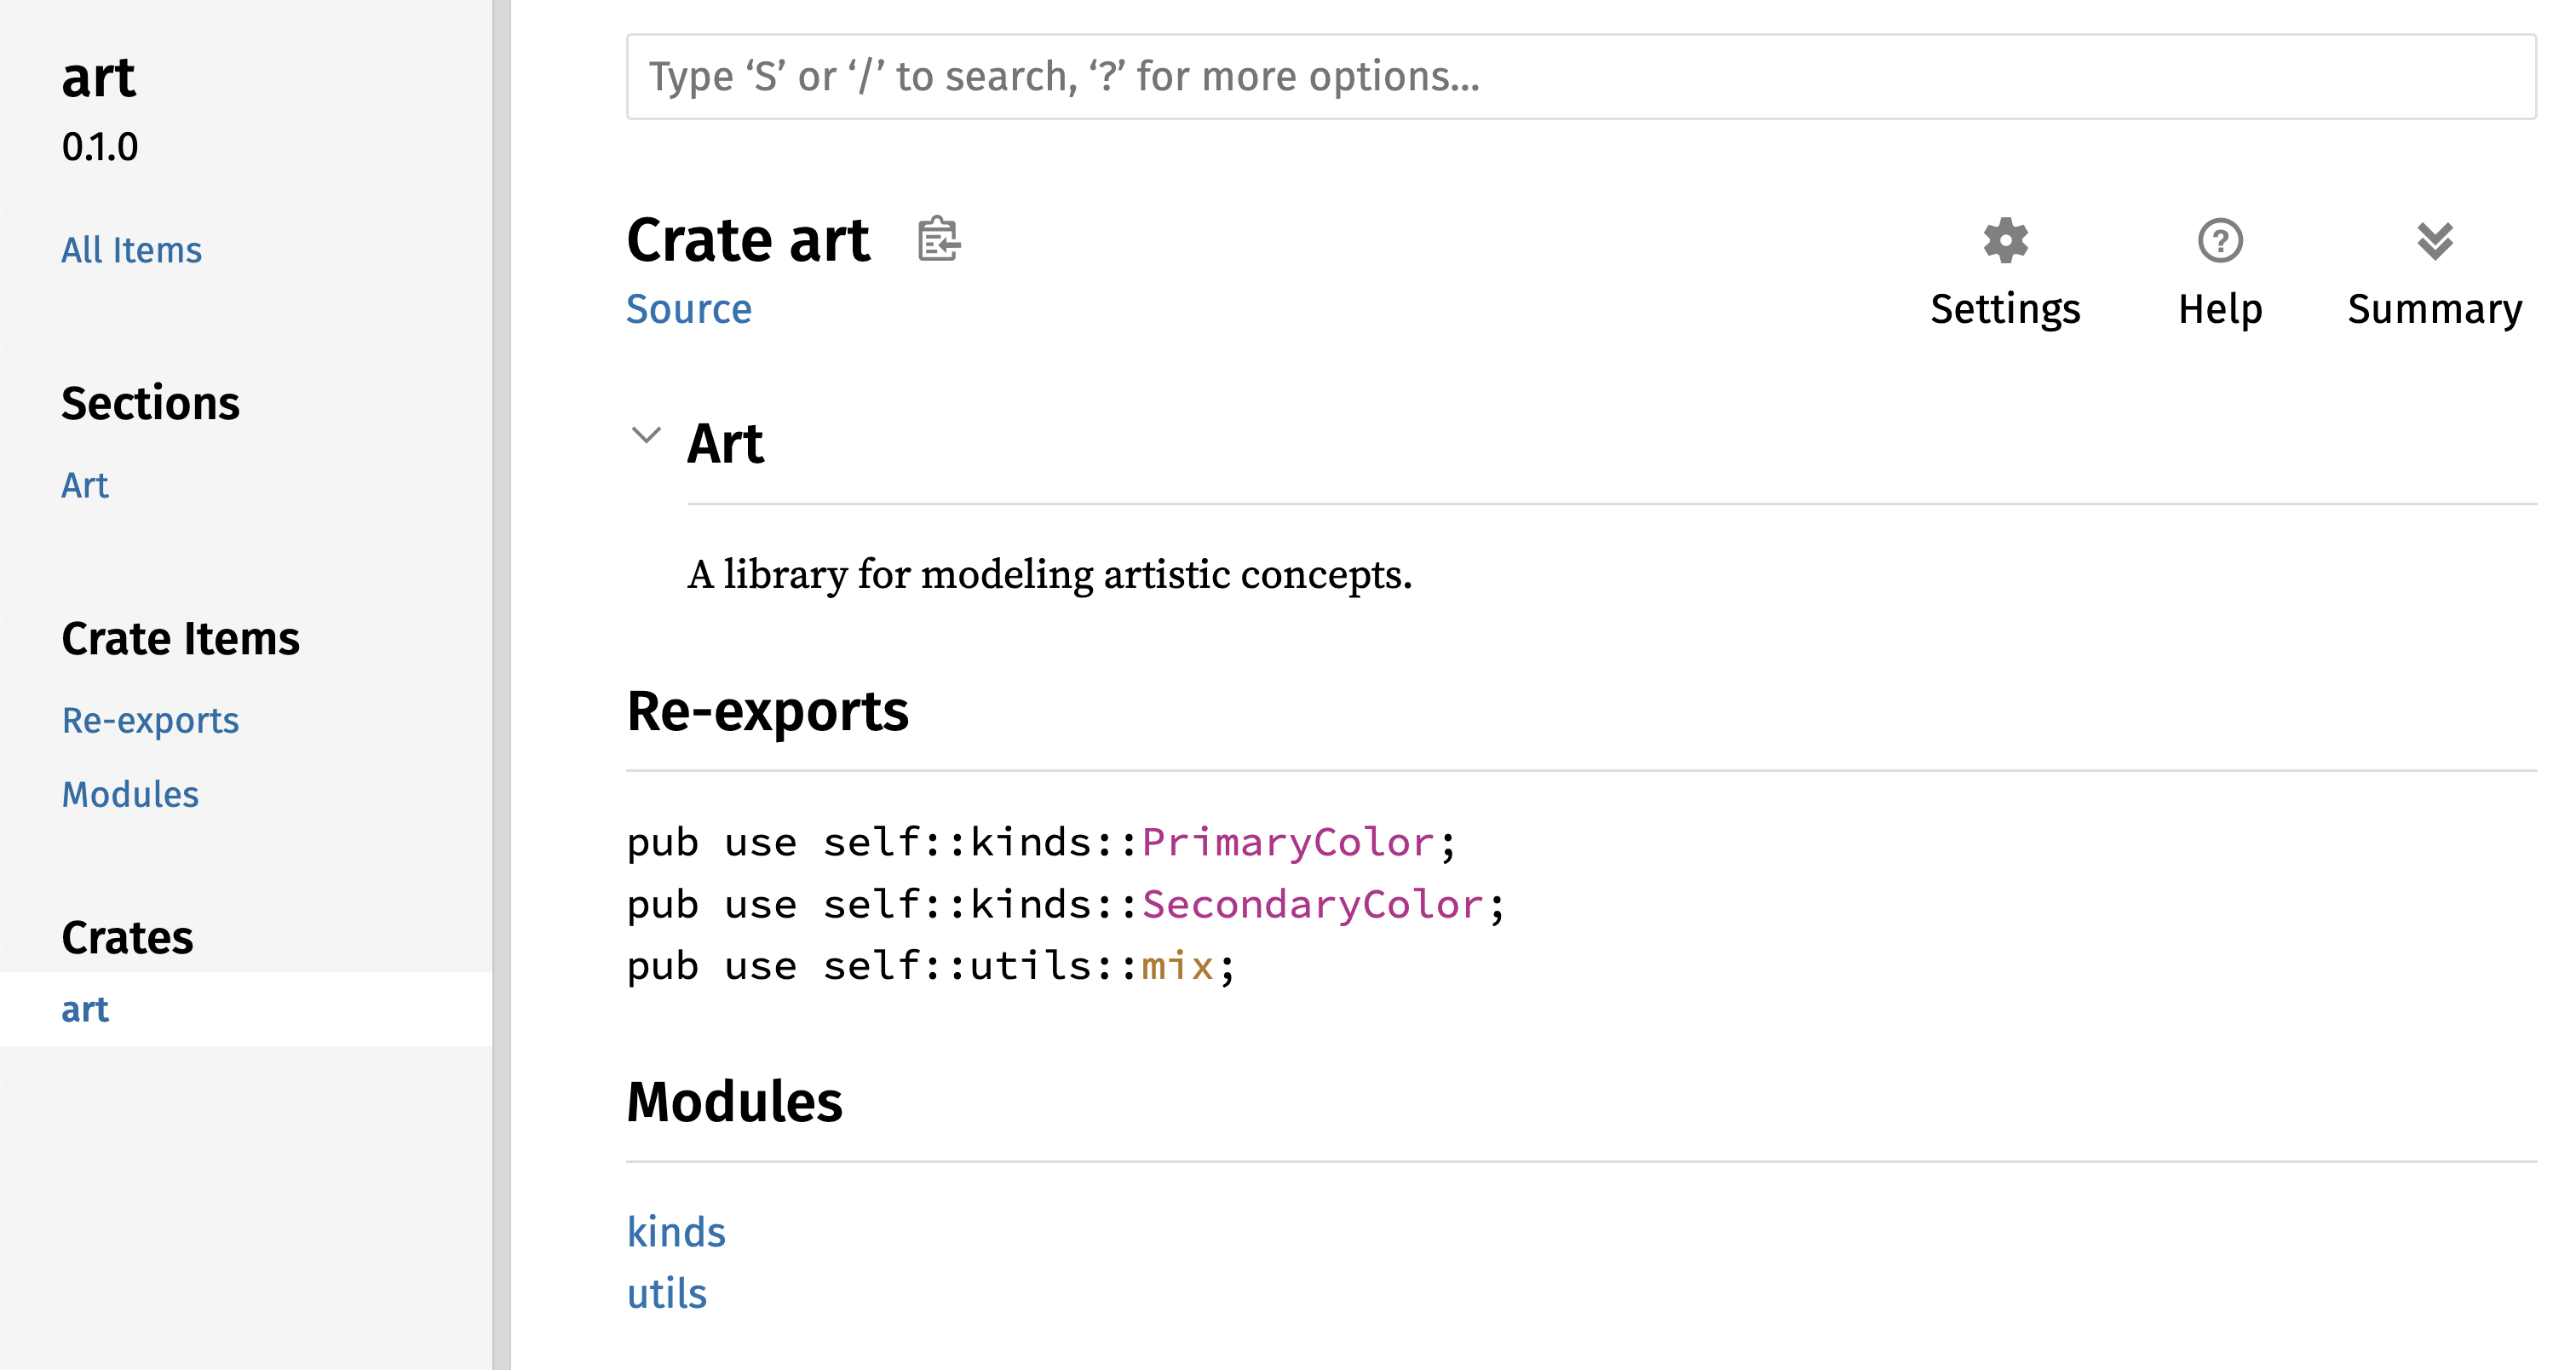
Рисунок 14-4: Главная страница документации для art,
где перечислены реэкспорты
Пользователи крейта art все еще могут видеть и использовать внутреннюю
структуру из листинга 14-3, как показано в листинге 14-4, или могут
использовать более удобную структуру из листинга 14-5, как показано в листинге
14-6.
use art::PrimaryColor;
use art::mix;
fn main() {
// --snip--
let red = PrimaryColor::Red;
let yellow = PrimaryColor::Yellow;
mix(red, yellow);
}artВ случаях, когда есть много вложенных модулей, реэкспорт типов на верхнем
уровне с помощью pub use может заметно улучшить опыт людей, использующих
крейт. Еще одно распространенное применение pub use – реэкспортировать
определения зависимости в текущем крейте, чтобы сделать определения этой
зависимости частью публичного API вашего крейта.
Создание полезной структуры публичного API – больше искусство, чем наука, и
вы можете итеративно искать API, который лучше всего подходит вашим
пользователям. Выбор pub use дает гибкость в том, как вы внутренне
структурируете крейт, и отделяет эту внутреннюю структуру от того, что вы
представляете пользователям. Посмотрите код некоторых установленных вами
крейтов, чтобы увидеть, отличается ли их внутренняя структура от публичного
API.
Настройка учетной записи Crates.io
Прежде чем публиковать крейты, нужно создать учетную запись на
crates.io и получить API-токен. Для этого
перейдите на главную страницу crates.io и
войдите через учетную запись GitHub. (Учетная запись GitHub сейчас является
требованием, но сайт может поддержать другие способы создания учетной записи в
будущем.) После входа перейдите в настройки учетной записи по адресу
https://crates.io/me/ и получите свой
API-ключ. Затем выполните команду cargo login и вставьте API-ключ, когда вас
попросят, например так:
$ cargo login
abcdefghijklmnopqrstuvwxyz012345
Эта команда сообщит Cargo ваш API-токен и сохранит его локально в ~/.cargo/credentials.toml. Обратите внимание, что этот токен является секретом: не делитесь им ни с кем. Если вы по какой-либо причине поделились им с кем-то, нужно отозвать его и сгенерировать новый токен на crates.io.
Добавление метаданных в новый крейт
Допустим, у вас есть крейт, который вы хотите опубликовать. Перед публикацией
нужно добавить некоторые метаданные в раздел [package] файла Cargo.toml
этого крейта.
Вашему крейту понадобится уникальное имя. Пока вы работаете над крейтом
локально, можете назвать его как угодно. Однако имена крейтов на
crates.io выдаются в порядке очереди.
Когда имя крейта уже занято, никто другой не сможет опубликовать крейт с этим
именем. Перед попыткой опубликовать крейт выполните поиск по имени, которое
хотите использовать. Если имя уже использовано, нужно найти другое имя и
изменить поле name в файле Cargo.toml в разделе [package], чтобы
использовать новое имя для публикации, например так:
Имя файла: Cargo.toml
[package]
name = "guessing_game"
Даже если вы выбрали уникальное имя, при запуске cargo publish для публикации
крейта на этом этапе вы получите предупреждение, а затем ошибку:
$ cargo publish
Updating crates.io index
warning: manifest has no description, license, license-file, documentation, homepage or repository.
See https://doc.rust-lang.org/cargo/reference/manifest.html#package-metadata for more info.
--snip--
error: failed to publish to registry at https://crates.io
Caused by:
the remote server responded with an error (status 400 Bad Request): missing or empty metadata fields: description, license. Please see https://doc.rust-lang.org/cargo/reference/manifest.html for more information on configuring these fields
Это приводит к ошибке, потому что отсутствует важная информация: описание и
лицензия обязательны, чтобы люди знали, что делает ваш крейт и на каких
условиях они могут его использовать. В Cargo.toml добавьте описание всего в
одно-два предложения, потому что оно появится вместе с вашим крейтом в
результатах поиска. Для поля license нужно указать значение идентификатора
лицензии. Software Package Data Exchange (SPDX) от Linux Foundation
перечисляет идентификаторы, которые можно использовать для этого значения.
Например, чтобы указать, что вы лицензировали крейт с использованием лицензии
MIT, добавьте идентификатор MIT:
Имя файла: Cargo.toml
[package]
name = "guessing_game"
license = "MIT"
Если вы хотите использовать лицензию, которой нет в SPDX, нужно поместить
текст этой лицензии в файл, включить файл в проект, а затем использовать
license-file, чтобы указать имя этого файла вместо ключа license.
Рекомендации о том, какая лицензия подходит вашему проекту, выходят за рамки
этой книги. Многие люди в сообществе Rust лицензируют свои проекты так же, как
Rust, используя двойную лицензию MIT OR Apache-2.0. Эта практика показывает,
что вы также можете указать несколько идентификаторов лицензий, разделенных
OR, чтобы у проекта было несколько лицензий.
После добавления уникального имени, версии, описания и лицензии файл Cargo.toml для проекта, готового к публикации, может выглядеть так:
Имя файла: Cargo.toml
[package]
name = "guessing_game"
version = "0.1.0"
edition = "2024"
description = "A fun game where you guess what number the computer has chosen."
license = "MIT OR Apache-2.0"
[dependencies]
Документация Cargo описывает другие метаданные, которые можно указать, чтобы другим было проще находить и использовать ваш крейт.
Публикация на Crates.io
Теперь, когда вы создали учетную запись, сохранили API-токен, выбрали имя для крейта и указали обязательные метаданные, вы готовы к публикации! Публикация крейта загружает конкретную версию на crates.io, чтобы другие могли ее использовать.
Будьте осторожны, потому что публикация постоянна. Версию нельзя перезаписать, а код нельзя удалить, кроме некоторых обстоятельств. Одна из главных целей Crates.io – быть постоянным архивом кода, чтобы сборки всех проектов, зависящих от крейтов с crates.io, продолжали работать. Разрешение удалять версии сделало бы выполнение этой цели невозможным. Однако количество версий крейта, которые вы можете опубликовать, не ограничено.
Снова выполните команду cargo publish. Теперь она должна завершиться успешно:
$ cargo publish
Updating crates.io index
Packaging guessing_game v0.1.0 (file:///projects/guessing_game)
Packaged 6 files, 1.2KiB (895.0B compressed)
Verifying guessing_game v0.1.0 (file:///projects/guessing_game)
Compiling guessing_game v0.1.0
(file:///projects/guessing_game/target/package/guessing_game-0.1.0)
Finished `dev` profile [unoptimized + debuginfo] target(s) in 0.19s
Uploading guessing_game v0.1.0 (file:///projects/guessing_game)
Uploaded guessing_game v0.1.0 to registry `crates-io`
note: waiting for `guessing_game v0.1.0` to be available at registry
`crates-io`.
You may press ctrl-c to skip waiting; the crate should be available shortly.
Published guessing_game v0.1.0 at registry `crates-io`
Поздравляем! Теперь вы поделились своим кодом с сообществом Rust, и любой сможет легко добавить ваш крейт как зависимость своего проекта.
Публикация новой версии существующего крейта
Когда вы внесли изменения в крейт и готовы выпустить новую версию, измените
значение version, указанное в файле Cargo.toml, и опубликуйте крейт снова.
Используйте правила семантического версионирования, чтобы решить,
какой следующий номер версии подходит с учетом видов внесенных изменений.
Затем выполните cargo publish, чтобы загрузить новую версию.
Вывод версий из использования на Crates.io
Хотя вы не можете удалить предыдущие версии крейта, вы можете запретить будущим проектам добавлять их как новую зависимость. Это полезно, когда версия крейта по той или иной причине сломана. В таких ситуациях Cargo поддерживает вывод версии крейта из использования, или yank.
Yank версии не дает новым проектам зависеть от этой версии, но позволяет всем существующим проектам, которые уже зависят от нее, продолжать работу. По сути, yank означает, что все проекты с Cargo.lock не сломаются, а любые будущие файлы Cargo.lock не будут использовать выведенную из использования версию.
Чтобы вывести версию крейта из использования, в каталоге ранее опубликованного
крейта выполните cargo yank и укажите версию, которую хотите вывести. Например,
если мы опубликовали крейт с именем guessing_game версии 1.0.1 и хотим
вывести ее из использования, то в каталоге проекта guessing_game выполним
следующее:
$ cargo yank --vers 1.0.1
Updating crates.io index
Yank guessing_game@1.0.1
Добавив к команде --undo, вы также можете отменить yank и снова разрешить
проектам начинать зависеть от этой версии:
$ cargo yank --vers 1.0.1 --undo
Updating crates.io index
Unyank guessing_game@1.0.1
Yank не удаляет никакой код. Например, он не может удалить случайно загруженные секреты. Если это произошло, нужно немедленно сбросить эти секреты.
Рабочие пространства Cargo
Рабочие пространства Cargo
В главе 12 мы создали пакет, который включал бинарный крейт и библиотечный крейт. По мере развития проекта вы можете обнаружить, что библиотечный крейт продолжает расти, и захотите дальше разделить пакет на несколько библиотечных крейтов. Cargo предлагает возможность под названием рабочие пространства, которая помогает управлять несколькими связанными пакетами, разрабатываемыми совместно.
Создание рабочего пространства
Рабочее пространство – это набор пакетов, которые совместно используют один
и тот же Cargo.lock и каталог вывода. Создадим проект с рабочим
пространством: мы будем использовать простой код, чтобы сосредоточиться на
структуре рабочего пространства. Есть несколько способов структурировать
рабочее пространство, поэтому мы покажем один распространенный способ. У нас
будет рабочее пространство с одним бинарным крейтом и двумя библиотеками.
Бинарный крейт, который будет предоставлять основную функциональность, будет
зависеть от двух библиотек. Одна библиотека будет предоставлять функцию
add_one, а другая – функцию add_two. Эти три крейта будут частью одного
рабочего пространства. Начнем с создания нового каталога для рабочего
пространства:
$ mkdir add
$ cd add
Далее в каталоге add мы создаем файл Cargo.toml, который будет настраивать
все рабочее пространство. В этом файле не будет раздела [package]. Вместо
этого он начнется с раздела [workspace], который позволит нам добавлять
участников в рабочее пространство. Мы также явно используем самую новую и
лучшую версию алгоритма разрешения зависимостей Cargo в нашем рабочем пространстве, установив
значение resolver в "3":
Имя файла: Cargo.toml
[workspace]
resolver = "3"
Далее мы создадим бинарный крейт adder, выполнив cargo new внутри каталога
add:
$ cargo new adder
Created binary (application) `adder` package
Adding `adder` as member of workspace at `file:///projects/add`
Запуск cargo new внутри рабочего пространства также автоматически добавляет
только что созданный пакет в ключ members в определении [workspace] в
Cargo.toml рабочего пространства, вот так:
[workspace]
resolver = "3"
members = ["adder"]
На этом этапе мы можем собрать рабочее пространство, выполнив cargo build.
Файлы в вашем каталоге add должны выглядеть так:
├── Cargo.lock
├── Cargo.toml
├── adder
│ ├── Cargo.toml
│ └── src
│ └── main.rs
└── target
У рабочего пространства есть один каталог target на верхнем уровне, в который
помещаются скомпилированные артефакты; у пакета adder нет собственного
каталога target. Даже если бы мы выполнили cargo build изнутри каталога
adder, скомпилированные артефакты все равно оказались бы в add/target, а
не в add/adder/target. Cargo так структурирует каталог target в рабочем
пространстве, потому что крейты в рабочем пространстве предназначены для
зависимости друг от друга. Если бы у каждого крейта был собственный каталог
target, каждому крейту пришлось бы перекомпилировать каждый из других
крейтов в рабочем пространстве, чтобы поместить артефакты в свой собственный
каталог target. Совместно используя один каталог target, крейты могут
избежать ненужной пересборки.
Создание второго пакета в рабочем пространстве
Далее создадим еще один пакет-участник в рабочем пространстве и назовем его
add_one. Сгенерируйте новый библиотечный крейт с именем add_one:
$ cargo new add_one --lib
Created library `add_one` package
Adding `add_one` as member of workspace at `file:///projects/add`
Теперь Cargo.toml верхнего уровня будет включать путь add_one в список
members:
Имя файла: Cargo.toml
[workspace]
resolver = "3"
members = ["adder", "add_one"]
Теперь в вашем каталоге add должны быть такие каталоги и файлы:
├── Cargo.lock
├── Cargo.toml
├── add_one
│ ├── Cargo.toml
│ └── src
│ └── lib.rs
├── adder
│ ├── Cargo.toml
│ └── src
│ └── main.rs
└── target
В файл add_one/src/lib.rs добавим функцию add_one:
Имя файла: add_one/src/lib.rs
pub fn add_one(x: i32) -> i32 {
x + 1
}Теперь пакет adder с нашим бинарным крейтом может зависеть от пакета
add_one, содержащего нашу библиотеку. Сначала нужно добавить зависимость по
пути от add_one в adder/Cargo.toml.
Имя файла: adder/Cargo.toml
[dependencies]
add_one = { path = "../add_one" }
Cargo не предполагает, что крейты в рабочем пространстве будут зависеть друг от друга, поэтому нам нужно явно указать отношения зависимостей.
Далее используем функцию add_one (из крейта add_one) в крейте adder.
Откройте файл adder/src/main.rs и измените функцию main, чтобы она
вызывала функцию add_one, как в листинге 14-7.
fn main() {
let num = 10;
println!("Hello, world! {num} plus one is {}!", add_one::add_one(num));
}add_one из крейта adderСоберем рабочее пространство, выполнив cargo build в каталоге add верхнего
уровня!
$ cargo build
Compiling add_one v0.1.0 (file:///projects/add/add_one)
Compiling adder v0.1.0 (file:///projects/add/adder)
Finished `dev` profile [unoptimized + debuginfo] target(s) in 0.22s
Чтобы запустить бинарный крейт из каталога add, можно указать, какой пакет в
рабочем пространстве мы хотим запустить, используя аргумент -p и имя пакета
с cargo run:
$ cargo run -p adder
Finished `dev` profile [unoptimized + debuginfo] target(s) in 0.00s
Running `target/debug/adder`
Hello, world! 10 plus one is 11!
Это запускает код из adder/src/main.rs, который зависит от крейта add_one.
Зависимость от внешнего пакета
Обратите внимание, что у рабочего пространства есть только один файл
Cargo.lock на верхнем уровне, а не отдельный Cargo.lock в каталоге каждого
крейта. Это гарантирует, что все крейты используют одну и ту же версию всех
зависимостей. Если мы добавим пакет rand в файлы adder/Cargo.toml и
add_one/Cargo.toml, Cargo сведет обе эти зависимости к одной версии rand
и запишет ее в один Cargo.lock. Если все крейты в рабочем пространстве
используют одни и те же зависимости, крейты всегда будут совместимы друг с
другом. Добавим крейт rand в раздел [dependencies] файла
add_one/Cargo.toml, чтобы использовать крейт rand в крейте add_one:
Имя файла: add_one/Cargo.toml
[dependencies]
rand = "0.8.5"
Теперь мы можем добавить use rand; в файл add_one/src/lib.rs, и сборка
всего рабочего пространства командой cargo build в каталоге add загрузит и
скомпилирует крейт rand. Мы получим одно предупреждение, потому что не
обращаемся к rand, который ввели в область видимости:
$ cargo build
Updating crates.io index
Downloaded rand v0.8.5
--snip--
Compiling rand v0.8.5
Compiling add_one v0.1.0 (file:///projects/add/add_one)
warning: unused import: `rand`
--> add_one/src/lib.rs:1:5
|
1 | use rand;
| ^^^^
|
= note: `#[warn(unused_imports)]` on by default
warning: `add_one` (lib) generated 1 warning (run `cargo fix --lib -p add_one` to apply 1 suggestion)
Compiling adder v0.1.0 (file:///projects/add/adder)
Finished `dev` profile [unoptimized + debuginfo] target(s) in 0.95s
Теперь Cargo.lock верхнего уровня содержит информацию о зависимости add_one
от rand. Однако, хотя rand используется где-то в рабочем пространстве, мы
не можем использовать его в других крейтах рабочего пространства, если также не
добавим rand в их файлы Cargo.toml. Например, если мы добавим use rand;
в файл adder/src/main.rs для пакета adder, получим ошибку:
$ cargo build
--snip--
Compiling adder v0.1.0 (file:///projects/add/adder)
error[E0432]: unresolved import `rand`
--> adder/src/main.rs:2:5
|
2 | use rand;
| ^^^^ no external crate `rand`
Чтобы исправить это, отредактируйте файл Cargo.toml для пакета adder и
укажите, что rand также является его зависимостью. Сборка пакета adder
добавит rand в список зависимостей adder в Cargo.lock, но дополнительные
копии rand загружены не будут. Cargo проследит, чтобы каждый крейт в каждом
пакете рабочего пространства, использующий пакет rand, использовал одну и ту
же версию, пока они указывают совместимые версии rand; это экономит место и
гарантирует, что крейты рабочего пространства будут совместимы друг с другом.
Если крейты в рабочем пространстве указывают несовместимые версии одной и той же зависимости, Cargo разрешит каждую из них, но все равно постарается разрешить как можно меньше версий.
Добавление теста в рабочее пространство
В качестве еще одного улучшения добавим тест функции add_one::add_one внутри
крейта add_one:
Имя файла: add_one/src/lib.rs
pub fn add_one(x: i32) -> i32 {
x + 1
}
#[cfg(test)]
mod tests {
use super::*;
#[test]
fn it_works() {
assert_eq!(3, add_one(2));
}
}Теперь выполните cargo test в каталоге add верхнего уровня. Запуск
cargo test в рабочем пространстве, структурированном таким образом, выполнит тесты
для всех крейтов в рабочем пространстве:
$ cargo test
Compiling add_one v0.1.0 (file:///projects/add/add_one)
Compiling adder v0.1.0 (file:///projects/add/adder)
Finished `test` profile [unoptimized + debuginfo] target(s) in 0.20s
Running unittests src/lib.rs (target/debug/deps/add_one-93c49ee75dc46543)
running 1 test
test tests::it_works ... ok
test result: ok. 1 passed; 0 failed; 0 ignored; 0 measured; 0 filtered out; finished in 0.00s
Running unittests src/main.rs (target/debug/deps/adder-3a47283c568d2b6a)
running 0 tests
test result: ok. 0 passed; 0 failed; 0 ignored; 0 measured; 0 filtered out; finished in 0.00s
Doc-tests add_one
running 0 tests
test result: ok. 0 passed; 0 failed; 0 ignored; 0 measured; 0 filtered out; finished in 0.00s
Первый раздел вывода показывает, что тест it_works в крейте add_one
прошел. Следующий раздел показывает, что в крейте adder найдено ноль тестов,
а последний раздел показывает, что в крейте add_one найдено ноль
документационных тестов.
Мы также можем запускать тесты для одного конкретного крейта в рабочем
пространстве из каталога верхнего уровня, используя флаг -p и указывая имя
крейта, который хотим тестировать:
$ cargo test -p add_one
Finished `test` profile [unoptimized + debuginfo] target(s) in 0.00s
Running unittests src/lib.rs (target/debug/deps/add_one-93c49ee75dc46543)
running 1 test
test tests::it_works ... ok
test result: ok. 1 passed; 0 failed; 0 ignored; 0 measured; 0 filtered out; finished in 0.00s
Doc-tests add_one
running 0 tests
test result: ok. 0 passed; 0 failed; 0 ignored; 0 measured; 0 filtered out; finished in 0.00s
Этот вывод показывает, что cargo test запустил только тесты для крейта
add_one и не запускал тесты крейта adder.
Если вы публикуете крейты из рабочего пространства на
crates.io, каждый крейт в рабочем
пространстве нужно публиковать отдельно. Как и с cargo test, мы можем
опубликовать конкретный крейт в нашем рабочем пространстве, используя флаг
-p и указывая имя крейта, который хотим опубликовать.
Для дополнительной практики добавьте крейт add_two в это рабочее пространство
так же, как крейт add_one!
По мере роста проекта подумайте об использовании рабочего пространства: оно позволяет работать с более маленькими и понятными компонентами, чем один большой комок кода. Кроме того, хранение крейтов в рабочем пространстве может упростить координацию между крейтами, если они часто изменяются одновременно.
Установка бинарных файлов с помощью cargo install
Установка бинарных файлов с помощью cargo install
Команда cargo install позволяет локально устанавливать и использовать
бинарные крейты. Она не предназначена для замены системных пакетов; ее цель –
дать разработчикам Rust удобный способ устанавливать инструменты, которыми
другие поделились на crates.io. Обратите
внимание, что установить можно только пакеты, у которых есть бинарные цели.
Бинарная цель – это запускаемая программа, которая создается, если в крейте
есть файл src/main.rs или другой файл, указанный как бинарный, в отличие от
библиотечной цели, которая сама по себе не запускается, но подходит для
включения в другие программы. Обычно в файле README крейта есть информация о
том, является ли крейт библиотекой, имеет ли бинарную цель или и то и другое.
Все бинарные файлы, установленные с помощью cargo install, сохраняются в
папке bin корня установки. Если вы установили Rust с помощью rustup.rs и не
имеете пользовательских настроек, этот каталог будет $HOME/.cargo/bin.
Убедитесь, что этот каталог находится в вашем $PATH, чтобы можно было
запускать программы, установленные с помощью cargo install.
Например, в главе 12 мы упоминали, что существует реализация инструмента
grep на Rust под названием ripgrep для поиска в файлах. Чтобы установить
ripgrep, можно выполнить следующее:
$ cargo install ripgrep
Updating crates.io index
Downloaded ripgrep v14.1.1
Downloaded 1 crate (213.6 KB) in 0.40s
Installing ripgrep v14.1.1
--snip--
Compiling grep v0.3.2
Finished `release` profile [optimized + debuginfo] target(s) in 6.73s
Installing ~/.cargo/bin/rg
Installed package `ripgrep v14.1.1` (executable `rg`)
Предпоследняя строка вывода показывает расположение и имя установленного
бинарного файла; в случае ripgrep это rg. Если каталог установки находится
в вашем $PATH, как упоминалось ранее, затем вы можете выполнить rg --help и
начать использовать более быстрый инструмент для поиска в файлах, написанный в
духе Rust!
Расширение Cargo с помощью пользовательских команд
Расширение Cargo с помощью пользовательских команд
Cargo спроектирован так, чтобы вы могли расширять его новыми подкомандами без
изменения самого Cargo. Если бинарный файл в вашем $PATH называется
cargo-something, вы можете запустить его как подкоманду Cargo, выполнив
cargo something. Такие пользовательские команды также перечисляются при
выполнении cargo --list. Возможность использовать cargo install для
установки расширений, а затем запускать их так же, как встроенные инструменты
Cargo, – очень удобное преимущество дизайна Cargo!
Итоги
Обмен кодом с помощью Cargo и crates.io – часть того, что делает экосистему Rust полезной для множества разных задач. Стандартная библиотека Rust маленькая и стабильная, но крейтами легко делиться, пользоваться и улучшать их в темпе, отличном от темпа развития языка. Не стесняйтесь делиться полезным для вас кодом на crates.io; вполне вероятно, что он будет полезен и кому-то еще!
Умные указатели
Указатель – это общее понятие для переменной, которая содержит адрес в памяти.
Этот адрес ссылается, или “указывает”, на какие-то другие данные. Самый
распространенный вид указателя в Rust – это ссылка, о которой вы узнали в
главе 4. Ссылки обозначаются символом & и заимствуют значение, на которое
указывают. У них нет никаких особых возможностей, кроме ссылки на данные, и
они не имеют накладных расходов.
Умные указатели, с другой стороны, – это структуры данных, которые ведут себя как указатель, но также имеют дополнительные метаданные и возможности. Концепция умных указателей не уникальна для Rust: умные указатели появились в C++ и существуют также в других языках. В стандартной библиотеке Rust определено несколько умных указателей, которые предоставляют функциональность сверх той, что дают ссылки. Чтобы изучить общую концепцию, мы рассмотрим несколько разных примеров умных указателей, включая тип умного указателя с подсчетом ссылок. Такой указатель позволяет данным иметь нескольких владельцев, отслеживая количество владельцев и очищая данные, когда владельцев больше не остается.
В Rust, с его концепцией владения и заимствования, есть еще одно различие между ссылками и умными указателями: ссылки только заимствуют данные, тогда как во многих случаях умные указатели владеют данными, на которые указывают.
Умные указатели обычно реализуются с помощью структур. В отличие от обычной
структуры, умные указатели реализуют трейты Deref и Drop. Трейт Deref
позволяет экземпляру структуры умного указателя вести себя как ссылка, чтобы
вы могли писать код, работающий и со ссылками, и с умными указателями. Трейт
Drop позволяет настраивать код, который выполняется, когда экземпляр умного
указателя выходит из области видимости. В этой главе мы обсудим оба этих
трейта и покажем, почему они важны для умных указателей.
Поскольку шаблон умного указателя – это общий шаблон проектирования, часто используемый в Rust, эта глава не будет охватывать все существующие умные указатели. У многих библиотек есть собственные умные указатели, и вы даже можете написать свой. Мы рассмотрим самые распространенные умные указатели в стандартной библиотеке:
Box<T>для выделения значений в кучеRc<T>, тип с подсчетом ссылок, который делает возможным множественное владениеRef<T>иRefMut<T>, доступные черезRefCell<T>, тип, который обеспечивает правила заимствования во время выполнения, а не во время компиляции
Кроме того, мы рассмотрим шаблон внутренней изменяемости, при котором неизменяемый тип предоставляет API для изменения внутреннего значения. Мы также обсудим циклы ссылок: как они могут приводить к утечкам памяти и как их предотвращать.
Приступим!
Использование Box<T> для указания на данные в куче
Использование Box<T> для указания на данные в куче
Самый простой умный указатель – это box, тип которого записывается как
Box<T>. Боксы позволяют хранить данные в куче, а не в стеке. В стеке
остается указатель на данные в куче. Обратитесь к главе 4, чтобы вспомнить
разницу между стеком и кучей.
У боксов нет накладных расходов производительности, кроме хранения данных в куче вместо стека. Но и дополнительных возможностей у них немного. Чаще всего вы будете использовать их в таких ситуациях:
- Когда у вас есть тип, размер которого не может быть известен во время компиляции, и вы хотите использовать значение этого типа в контексте, где требуется точный размер
- Когда у вас есть большой объем данных, и вы хотите передать владение, но убедиться, что данные при этом не будут скопированы
- Когда вы хотите владеть значением, и вам важно только, что это тип, реализующий определенный трейт, а не конкретный тип
Мы покажем первую ситуацию в разделе «Разрешение рекурсивных типов с помощью боксов». Во втором случае передача владения большим объемом данных может занимать много времени, потому что данные копируются в стеке. Чтобы повысить производительность в такой ситуации, можно хранить большой объем данных в куче внутри бокса. Тогда по стеку будет копироваться только небольшой объем данных указателя, а данные, на которые он ссылается, останутся в одном месте в куче. Третий случай известен как трейт-объект, и ему посвящен раздел «Использование трейт-объектов для абстрагирования общего поведения» в главе 18. Так что знания из этого раздела вы снова примените там!
Хранение данных в куче
Перед тем как обсуждать вариант использования Box<T> для хранения в куче, мы
рассмотрим синтаксис и то, как взаимодействовать со значениями, хранящимися
внутри Box<T>.
В листинге 15-1 показано, как использовать box, чтобы сохранить значение i32
в куче.
fn main() {
let b = Box::new(5);
println!("b = {b}");
}i32 в куче с помощью boxМы определяем переменную b, значение которой – Box, указывающий на
значение 5, размещенное в куче. Эта программа напечатает b = 5; в этом
случае мы можем обращаться к данным в боксе примерно так же, как если бы эти
данные находились в стеке. Как и любое значение во владении, когда box выходит
из области видимости, как b в конце main, он будет освобожден. Освобождение
происходит и для бокса (хранящегося в стеке), и для данных, на которые он
указывает (хранящихся в куче).
Помещать одно-единственное значение в кучу не очень полезно, поэтому сами по
себе боксы таким способом используются нечасто. Значения вроде одного i32
уместнее хранить в стеке, где они хранятся по умолчанию, в большинстве
ситуаций. Рассмотрим случай, когда боксы позволяют определять типы, которые
без боксов определить было бы нельзя.
Разрешение рекурсивных типов с помощью боксов
Значение рекурсивного типа может содержать другое значение того же типа как часть самого себя. Рекурсивные типы создают проблему, потому что Rust должен знать во время компиляции, сколько места занимает тип. Однако вложение значений рекурсивных типов теоретически может продолжаться бесконечно, поэтому Rust не может знать, сколько места нужно значению. Поскольку боксы имеют известный размер, мы можем разрешить рекурсивные типы, вставив box в определение рекурсивного типа.
В качестве примера рекурсивного типа рассмотрим cons-список. Это тип данных, часто встречающийся в языках функционального программирования. Тип cons-списка, который мы определим, прост, если не считать рекурсии; поэтому концепции из примера, с которым мы будем работать, пригодятся всякий раз, когда вы столкнетесь с более сложными ситуациями, включающими рекурсивные типы.
Понимание cons-списка
Cons-список – это структура данных, происходящая из языка программирования
Lisp и его диалектов; она состоит из вложенных пар и является Lisp-версией
связного списка. Название происходит от функции cons (сокращение от
construct function) в Lisp, которая создает новую пару из двух своих
аргументов. Вызывая cons для пары, состоящей из значения и другой пары, мы
можем строить cons-списки из рекурсивных пар.
Например, вот псевдокодовое представление cons-списка, содержащего список
1, 2, 3, где каждая пара заключена в скобки:
(1, (2, (3, Nil)))
Каждый элемент cons-списка содержит два элемента: значение текущего элемента и
следующий элемент. Последний элемент списка содержит только значение с именем
Nil без следующего элемента. Cons-список создается рекурсивными вызовами
функции cons. Каноническое имя для обозначения базового случая рекурсии –
Nil. Обратите внимание, что это не то же самое, что понятие “null” или “nil”,
обсуждавшееся в главе 6, где речь шла о недопустимом или отсутствующем
значении.
Cons-список не является часто используемой структурой данных в Rust. Чаще
всего, когда у вас есть список элементов в Rust, лучше использовать Vec<T>.
Другие, более сложные рекурсивные типы данных полезны в разных ситуациях, но
начав в этой главе с cons-списка, мы можем без лишних отвлечений изучить,
как боксы позволяют определять рекурсивный тип данных.
Листинг 15-2 содержит определение enum для cons-списка. Обратите внимание, что
этот код пока не скомпилируется, потому что тип List не имеет известного
размера, что мы и покажем.
enum List {
Cons(i32, List),
Nil,
}
fn main() {}i32Примечание: для целей этого примера мы реализуем cons-список, который хранит только значения
i32. Мы могли бы реализовать его с помощью обобщений, как обсуждали в главе 10, чтобы определить тип cons-списка, способный хранить значения любого типа.
Использование типа List для хранения списка 1, 2, 3 выглядело бы как код
из листинга 15-3.
enum List {
Cons(i32, List),
Nil,
}
// --snip--
use crate::List::{Cons, Nil};
fn main() {
let list = Cons(1, Cons(2, Cons(3, Nil)));
}List для хранения списка 1, 2, 3Первое значение Cons хранит 1 и другое значение List. Это значение
List является еще одним значением Cons, которое хранит 2 и другое
значение List. Это значение List является еще одним значением Cons,
которое хранит 3 и значение List, наконец равное Nil, нерекурсивному
варианту, обозначающему конец списка.
Если мы попробуем скомпилировать код из листинга 15-3, получим ошибку, показанную в листинге 15-4.
$ cargo run
Compiling cons-list v0.1.0 (file:///projects/cons-list)
error[E0072]: recursive type `List` has infinite size
--> src/main.rs:1:1
|
1 | enum List {
| ^^^^^^^^^
2 | Cons(i32, List),
| ---- recursive without indirection
|
help: insert some indirection (e.g., a `Box`, `Rc`, or `&`) to break the cycle
|
2 | Cons(i32, Box<List>),
| ++++ +
error[E0391]: cycle detected when computing when `List` needs drop
--> src/main.rs:1:1
|
1 | enum List {
| ^^^^^^^^^
|
= note: ...which immediately requires computing when `List` needs drop again
= note: cycle used when computing whether `List` needs drop
= note: see https://rustc-dev-guide.rust-lang.org/overview.html#queries and https://rustc-dev-guide.rust-lang.org/query.html for more information
Some errors have detailed explanations: E0072, E0391.
For more information about an error, try `rustc --explain E0072`.
error: could not compile `cons-list` (bin "cons-list") due to 2 previous errors
Ошибка показывает, что этот тип “имеет бесконечный размер”. Причина в том, что
мы определили List с рекурсивным вариантом: он напрямую хранит другое
значение самого себя. В результате Rust не может понять, сколько места нужно
для хранения значения List. Разберем, почему возникает эта ошибка. Сначала
посмотрим, как Rust решает, сколько места нужно для хранения значения
нерекурсивного типа.
Вычисление размера нерекурсивного типа
Вспомните enum Message, который мы определили в листинге 6-2, когда
обсуждали определения enum в главе 6:
enum Message {
Quit,
Move { x: i32, y: i32 },
Write(String),
ChangeColor(i32, i32, i32),
}
fn main() {}Чтобы определить, сколько места выделить для значения Message, Rust проходит
по каждому варианту и смотрит, какой вариант требует больше всего места. Rust
видит, что Message::Quit не требует места, Message::Move требует достаточно
места для хранения двух значений i32 и так далее. Поскольку будет
использоваться только один вариант, максимум места, который понадобится
значению Message, – это место, нужное для хранения самого большого из его
вариантов.
Сравните это с тем, что происходит, когда Rust пытается определить, сколько
места нужно рекурсивному типу, такому как enum List в листинге 15-2.
Компилятор начинает с варианта Cons, который хранит значение типа i32 и
значение типа List. Поэтому Cons требует места объемом, равным размеру i32
плюс размер List. Чтобы выяснить, сколько памяти нужно типу List,
компилятор смотрит на варианты, начиная с варианта Cons. Вариант Cons
хранит значение типа i32 и значение типа List, и этот процесс продолжается
бесконечно, как показано на рисунке 15-1.
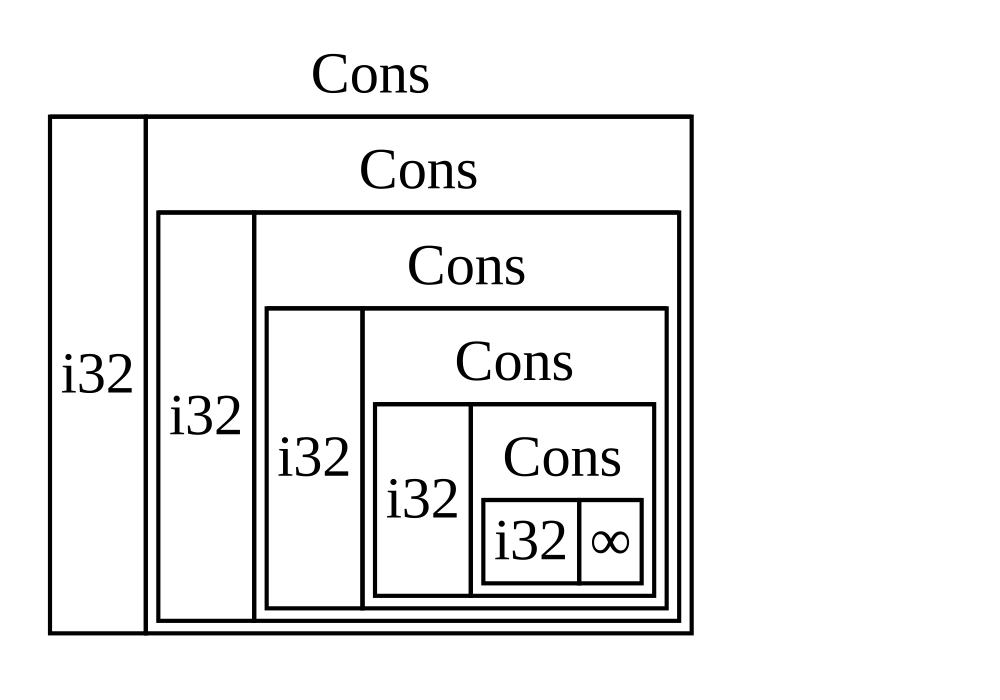
Рисунок 15-1: Бесконечный List, состоящий из
бесконечных вариантов Cons
Получение рекурсивного типа с известным размером
Поскольку Rust не может понять, сколько места выделить для рекурсивно определенных типов, компилятор выдает ошибку с такой полезной подсказкой:
help: insert some indirection (e.g., a `Box`, `Rc`, or `&`) to break the cycle
|
2 | Cons(i32, Box<List>),
| ++++ +
В этой подсказке косвенный доступ означает, что вместо хранения значения напрямую нам следует изменить структуру данных так, чтобы она хранила значение косвенно: через указатель на значение.
Поскольку Box<T> – это указатель, Rust всегда знает, сколько места нужно
Box<T>: размер указателя не меняется в зависимости от объема данных, на
которые он указывает. Это значит, что мы можем поместить Box<T> внутрь
варианта Cons вместо другого значения List напрямую. Box<T> будет
указывать на следующее значение List, которое будет находиться в куче, а не
внутри варианта Cons. Концептуально у нас по-прежнему есть список, созданный
из списков, содержащих другие списки, но эта реализация теперь больше похожа
на размещение элементов рядом друг с другом, а не друг внутри друга.
Мы можем изменить определение enum List из листинга 15-2 и использование
List из листинга 15-3 на код из листинга 15-5, который скомпилируется.
enum List {
Cons(i32, Box<List>),
Nil,
}
use crate::List::{Cons, Nil};
fn main() {
let list = Cons(1, Box::new(Cons(2, Box::new(Cons(3, Box::new(Nil))))));
}List, использующее Box<T>, чтобы иметь известный размерВарианту Cons нужен размер i32 плюс место для хранения указателя
бокса. Вариант Nil не хранит значений, поэтому ему нужно меньше места в
стеке, чем варианту Cons. Теперь мы знаем, что любое значение List займет
размер i32 плюс размер указателя бокса. Используя box, мы разорвали
бесконечную рекурсивную цепочку, поэтому компилятор может вычислить размер,
который нужен для хранения значения List. На рисунке 15-2 показано, как
теперь выглядит вариант Cons.
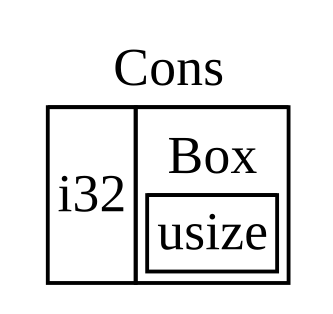
Рисунок 15-2: List не имеет бесконечного размера,
потому что Cons хранит Box
Боксы предоставляют только косвенность и выделение памяти в куче; у них нет других особых возможностей, подобных тем, что мы увидим у других типов умных указателей. У них также нет накладных расходов производительности, которые создают эти особые возможности, поэтому они могут быть полезны в случаях вроде cons-списка, где косвенность – единственная нужная нам возможность. В главе 18 мы рассмотрим больше вариантов использования боксов.
Тип Box<T> является умным указателем, потому что он реализует трейт Deref,
который позволяет обрабатывать значения Box<T> как ссылки. Когда значение
Box<T> выходит из области видимости, данные в куче, на которые указывает box,
также очищаются благодаря реализации трейта Drop. Эти два трейта будут еще
важнее для функциональности, предоставляемой другими типами умных указателей,
которые мы обсудим в оставшейся части этой главы. Рассмотрим эти два трейта
подробнее.
Использование умных указателей как обычных ссылок
Обращение с умными указателями как с обычными ссылками
Реализация трейта Deref позволяет настраивать поведение оператора
разыменования * (не путайте его с оператором умножения или glob-оператором).
Реализовав Deref так, чтобы с умным указателем можно было обращаться как с
обычной ссылкой, вы можете писать код, который работает со ссылками, и
использовать этот код также с умными указателями.
Сначала посмотрим, как оператор разыменования работает с обычными ссылками.
Затем попробуем определить собственный тип, который ведет себя как Box<T>, и
увидим, почему оператор разыменования не работает как ссылка для нашего нового
типа. Мы изучим, как реализация трейта Deref позволяет умным указателям
работать аналогично ссылкам. Затем рассмотрим возможность Rust,
называемую deref-преобразованием, и то, как она позволяет работать и со
ссылками, и с умными указателями.
Следование по ссылке к значению
Обычная ссылка – это разновидность указателя, а указатель можно представлять
как стрелку к значению, хранящемуся где-то еще. В листинге 15-6 мы создаем
ссылку на значение i32, а затем используем оператор разыменования, чтобы
пройти по ссылке к значению.
fn main() {
let x = 5;
let y = &x;
assert_eq!(5, x);
assert_eq!(5, *y);
}i32Переменная x содержит значение i32, равное 5. Мы присваиваем y ссылку
на x. Мы можем утверждать, что x равна 5. Однако если мы хотим сделать
утверждение о значении в y, нужно использовать *y, чтобы пройти по ссылке
к значению, на которое она указывает (то есть разыменовать ее), и компилятор
смог сравнить фактическое значение. Разыменовав y, мы получаем доступ к
целочисленному значению, на которое указывает y, и можем сравнить его с 5.
Если вместо этого попробовать написать assert_eq!(5, y);, мы получим такую
ошибку компиляции:
$ cargo run
Compiling deref-example v0.1.0 (file:///projects/deref-example)
error[E0277]: can't compare `{integer}` with `&{integer}`
--> src/main.rs:6:5
|
6 | assert_eq!(5, y);
| ^^^^^^^^^^^^^^^^ no implementation for `{integer} == &{integer}`
|
= help: the trait `PartialEq<&{integer}>` is not implemented for `{integer}`
= note: this error originates in the macro `assert_eq` (in Nightly builds, run with -Z macro-backtrace for more info)
For more information about this error, try `rustc --explain E0277`.
error: could not compile `deref-example` (bin "deref-example") due to 1 previous error
Сравнивать число и ссылку на число нельзя, потому что это разные типы. Нужно использовать оператор разыменования, чтобы пройти по ссылке к значению, на которое она указывает.
Использование Box<T> как ссылки
Мы можем переписать код из листинга 15-6 так, чтобы использовать Box<T>
вместо ссылки; оператор разыменования, примененный к Box<T> в листинге 15-7,
работает так же, как оператор разыменования, примененный к ссылке в листинге
15-6.
fn main() {
let x = 5;
let y = Box::new(x);
assert_eq!(5, x);
assert_eq!(5, *y);
}Box<i32>Главное различие между листингом 15-7 и листингом 15-6 в том, что здесь мы
присваиваем y экземпляр бокса, указывающий на скопированное значение x, а
не ссылку, указывающую на значение x. В последнем утверждении мы можем
использовать оператор разыменования, чтобы пройти по указателю бокса так же,
как мы делали это, когда y была ссылкой. Далее мы изучим, что особенного в
Box<T> и что позволяет использовать с ним оператор разыменования, определив
собственный тип бокса.
Определение собственного умного указателя
Создадим тип-обертку, похожий на тип Box<T> из стандартной библиотеки, чтобы
увидеть, как типы умных указателей по умолчанию ведут себя иначе, чем ссылки.
Затем посмотрим, как добавить возможность использовать оператор
разыменования.
Примечание: между типом
MyBox<T>, который мы сейчас создадим, и настоящимBox<T>есть одно важное различие: наша версия не будет хранить данные в куче. В этом примере мы сосредоточены наDeref, поэтому то, где именно хранятся данные, менее важно, чем поведение, похожее на указатель.
Тип Box<T> в конечном счете определен как кортежная структура с одним
элементом, поэтому листинг 15-8 определяет тип MyBox<T> таким же образом. Мы
также определим функцию new, чтобы она соответствовала функции new,
определенной для Box<T>.
struct MyBox<T>(T);
impl<T> MyBox<T> {
fn new(x: T) -> MyBox<T> {
MyBox(x)
}
}
fn main() {}MyBox<T>Мы определяем структуру с именем MyBox и объявляем обобщенный параметр T,
потому что хотим, чтобы наш тип хранил значения любого типа. Тип MyBox – это
кортежная структура с одним элементом типа T. Функция MyBox::new принимает
один параметр типа T и возвращает экземпляр MyBox, содержащий переданное
значение.
Попробуем добавить функцию main из листинга 15-7 к листингу 15-8 и изменить
ее так, чтобы она использовала определенный нами тип MyBox<T> вместо
Box<T>. Код в листинге 15-9 не скомпилируется, потому что Rust не знает, как
разыменовывать MyBox.
struct MyBox<T>(T);
impl<T> MyBox<T> {
fn new(x: T) -> MyBox<T> {
MyBox(x)
}
}
fn main() {
let x = 5;
let y = MyBox::new(x);
assert_eq!(5, x);
assert_eq!(5, *y);
}MyBox<T> так же, как мы использовали ссылки и Box<T>Вот получившаяся ошибка компиляции:
$ cargo run
Compiling deref-example v0.1.0 (file:///projects/deref-example)
error[E0614]: type `MyBox<{integer}>` cannot be dereferenced
--> src/main.rs:14:19
|
14 | assert_eq!(5, *y);
| ^^ can't be dereferenced
For more information about this error, try `rustc --explain E0614`.
error: could not compile `deref-example` (bin "deref-example") due to 1 previous error
Наш тип MyBox<T> нельзя разыменовать, потому что мы не реализовали для него
такую возможность. Чтобы включить разыменование с помощью оператора *, мы
реализуем трейт Deref.
Реализация трейта Deref
Как обсуждалось в разделе «Реализация трейта для типа»
главы 10, чтобы реализовать трейт, нужно предоставить реализации обязательных
методов трейта. Трейт Deref, предоставляемый стандартной библиотекой,
требует реализовать один метод с именем deref, который заимствует self и
возвращает ссылку на внутренние данные. Листинг 15-10 содержит реализацию
Deref, которую нужно добавить к определению MyBox<T>.
use std::ops::Deref;
impl<T> Deref for MyBox<T> {
type Target = T;
fn deref(&self) -> &Self::Target {
&self.0
}
}
struct MyBox<T>(T);
impl<T> MyBox<T> {
fn new(x: T) -> MyBox<T> {
MyBox(x)
}
}
fn main() {
let x = 5;
let y = MyBox::new(x);
assert_eq!(5, x);
assert_eq!(5, *y);
}Deref для MyBox<T>Синтаксис type Target = T; определяет связанный тип для трейта Deref.
Связанные типы – это немного другой способ объявить обобщенный параметр, но
сейчас вам не нужно о них беспокоиться; мы рассмотрим их подробнее в главе 20.
Мы заполняем тело метода deref выражением &self.0, чтобы deref возвращал
ссылку на значение, к которому мы хотим получить доступ с помощью оператора
*; вспомните из раздела «Создание различных типов с помощью кортежных
структур» главы 5, что .0 получает доступ к
первому значению в кортежной структуре. Функция main из листинга 15-9,
которая вызывает * для значения MyBox<T>, теперь компилируется, а
утверждения проходят успешно!
Без трейта Deref компилятор может разыменовывать только ссылки &. Метод
deref дает компилятору возможность взять значение любого типа, реализующего
Deref, и вызвать метод deref, чтобы получить ссылку, которую он уже умеет
разыменовывать.
Когда мы ввели *y в листинге 15-9, за кулисами Rust фактически выполнил
такой код:
*(y.deref())Rust заменяет оператор * вызовом метода deref, а затем обычным
разыменованием, чтобы нам не приходилось думать, нужно ли вызывать метод
deref. Эта возможность Rust позволяет писать код, который работает одинаково
независимо от того, есть ли у нас обычная ссылка или тип, реализующий Deref.
Причина, по которой метод deref возвращает ссылку на значение, а обычное
разыменование за скобками в *(y.deref()) все еще необходимо, связана с
системой владения. Если бы метод deref возвращал значение напрямую, а не
ссылку на значение, значение было бы перемещено из self. В этом случае, как
и в большинстве случаев использования оператора разыменования, мы не хотим
забирать владение внутренним значением внутри MyBox<T>.
Обратите внимание, что оператор * заменяется вызовом метода deref, а затем
вызовом оператора * только один раз при каждом использовании * в коде.
Поскольку подстановка оператора * не рекурсирует бесконечно, в итоге мы
получаем данные типа i32, что соответствует 5 в assert_eq! из листинга
15-9.
Использование deref-преобразования в функциях и методах
Deref-преобразование преобразует ссылку на тип, реализующий трейт Deref, в
ссылку на другой тип. Например, deref-преобразование может преобразовать
&String в &str, потому что String реализует трейт Deref так, что он
возвращает &str. Deref-преобразование – это удобство, которое Rust
выполняет для аргументов функций и методов, и оно работает только с типами,
реализующими трейт Deref. Оно происходит автоматически, когда мы передаем
ссылку на значение определенного типа как аргумент функции или метода, но этот
тип не совпадает с типом параметра в определении функции или метода.
Последовательность вызовов метода deref преобразует предоставленный нами тип
в тип, который нужен параметру.
Deref-преобразование было добавлено в Rust, чтобы программистам, пишущим
вызовы функций и методов, не приходилось добавлять так много явных ссылок и
разыменований с помощью & и *. Возможность deref-преобразования также
позволяет писать больше кода, который может работать как со ссылками, так и с
умными указателями.
Чтобы увидеть deref-преобразование в действии, используем тип MyBox<T>,
который мы определили в листинге 15-8, а также реализацию Deref, добавленную
в листинге 15-10. Листинг 15-11 показывает определение функции, у которой есть
параметр строкового среза.
fn hello(name: &str) {
println!("Hello, {name}!");
}
fn main() {}hello с параметром name типа &strМы можем вызвать функцию hello со строковым срезом в качестве аргумента,
например hello("Rust");. Deref-преобразование позволяет вызвать hello со
ссылкой на значение типа MyBox<String>, как показано в листинге 15-12.
use std::ops::Deref;
impl<T> Deref for MyBox<T> {
type Target = T;
fn deref(&self) -> &T {
&self.0
}
}
struct MyBox<T>(T);
impl<T> MyBox<T> {
fn new(x: T) -> MyBox<T> {
MyBox(x)
}
}
fn hello(name: &str) {
println!("Hello, {name}!");
}
fn main() {
let m = MyBox::new(String::from("Rust"));
hello(&m);
}hello со ссылкой на значение MyBox<String>, который работает благодаря deref-преобразованиюЗдесь мы вызываем функцию hello с аргументом &m, который является ссылкой
на значение MyBox<String>. Поскольку мы реализовали трейт Deref для
MyBox<T> в листинге 15-10, Rust может превратить &MyBox<String> в &String
вызовом deref. Стандартная библиотека предоставляет реализацию Deref для
String, которая возвращает строковый срез, и это указано в документации API
для Deref. Rust снова вызывает deref, чтобы превратить &String в &str,
что соответствует определению функции hello.
Если бы Rust не реализовывал deref-преобразование, для вызова hello со
значением типа &MyBox<String> нам пришлось бы написать код из листинга 15-13
вместо кода из листинга 15-12.
use std::ops::Deref;
impl<T> Deref for MyBox<T> {
type Target = T;
fn deref(&self) -> &T {
&self.0
}
}
struct MyBox<T>(T);
impl<T> MyBox<T> {
fn new(x: T) -> MyBox<T> {
MyBox(x)
}
}
fn hello(name: &str) {
println!("Hello, {name}!");
}
fn main() {
let m = MyBox::new(String::from("Rust"));
hello(&(*m)[..]);
}(*m) разыменовывает MyBox<String> в String. Затем & и [..] берут
строковый срез от String, равный всей строке, чтобы соответствовать
сигнатуре hello. Этот код без deref-преобразований сложнее читать, писать и
понимать из-за всех этих символов. Deref-преобразование позволяет Rust
обрабатывать эти преобразования автоматически.
Когда трейт Deref определен для участвующих типов, Rust проанализирует типы
и использует Deref::deref столько раз, сколько необходимо, чтобы получить
ссылку, соответствующую типу параметра. Количество вставок Deref::deref
определяется во время компиляции, поэтому использование deref-преобразования
не приводит к затратам во время выполнения!
Обработка deref-преобразования с изменяемыми ссылками
Подобно тому как вы используете трейт Deref, чтобы переопределить оператор
* для неизменяемых ссылок, вы можете использовать трейт DerefMut, чтобы
переопределить оператор * для изменяемых ссылок.
Rust выполняет deref-преобразование, когда находит типы и реализации трейтов в трех случаях:
- Из
&Tв&U, когдаT: Deref<Target=U> - Из
&mut Tв&mut U, когдаT: DerefMut<Target=U> - Из
&mut Tв&U, когдаT: Deref<Target=U>
Первые два случая одинаковы, за исключением того, что во втором участвует
изменяемость. Первый случай означает: если у вас есть &T, а T реализует
Deref в некоторый тип U, вы можете прозрачно получить &U. Второй случай
означает, что такое же deref-преобразование происходит для изменяемых ссылок.
Третий случай сложнее: Rust также преобразует изменяемую ссылку в неизменяемую. Но обратное невозможно: неизменяемые ссылки никогда не преобразуются в изменяемые ссылки. Из-за правил заимствования, если у вас есть изменяемая ссылка, эта изменяемая ссылка должна быть единственной ссылкой на эти данные (иначе программа не скомпилируется). Преобразование одной изменяемой ссылки в одну неизменяемую ссылку никогда не нарушит правила заимствования. Преобразование неизменяемой ссылки в изменяемую потребовало бы, чтобы исходная неизменяемая ссылка была единственной неизменяемой ссылкой на эти данные, но правила заимствования этого не гарантируют. Поэтому Rust не может предполагать, что преобразование неизменяемой ссылки в изменяемую возможно.
Выполнение кода при очистке с помощью трейта Drop
Выполнение кода при очистке с помощью трейта Drop
Второй трейт, важный для паттерна умного указателя, – это Drop. Он
позволяет настраивать, что происходит, когда значение вот-вот выйдет из
области видимости. Вы можете предоставить реализацию трейта Drop для любого
типа, и этот код можно использовать для освобождения ресурсов, таких как файлы
или сетевые соединения.
Мы вводим Drop в контексте умных указателей, потому что функциональность
трейта Drop почти всегда используется при реализации умного указателя.
Например, когда Box<T> удаляется, он освобождает место в куче, на которое
указывает box.
В некоторых языках для некоторых типов программист должен вызывать код освобождения памяти или ресурсов каждый раз, когда заканчивает использовать экземпляр этих типов. Примеры включают файловые дескрипторы, сокеты и блокировки. Если программист забудет это сделать, система может оказаться перегруженной и аварийно завершить работу. В Rust вы можете указать, что определенный фрагмент кода должен выполняться всякий раз, когда значение выходит из области видимости, и компилятор автоматически вставит этот код. В результате вам не нужно следить за тем, чтобы размещать код очистки везде в программе, где заканчивается использование экземпляра определенного типа, и при этом вы все равно не допустите утечки ресурсов!
Вы указываете код, который должен выполняться при выходе значения из области
видимости, реализуя трейт Drop. Трейт Drop требует реализовать один метод
с именем drop, который принимает изменяемую ссылку на self. Чтобы увидеть,
когда Rust вызывает drop, пока реализуем drop с операторами println!.
Листинг 15-14 показывает структуру CustomSmartPointer, единственная
пользовательская функциональность которой состоит в том, что она напечатает
Dropping CustomSmartPointer!, когда экземпляр выйдет из области видимости, и
тем самым покажет, когда Rust выполняет метод drop.
struct CustomSmartPointer {
data: String,
}
impl Drop for CustomSmartPointer {
fn drop(&mut self) {
println!("Dropping CustomSmartPointer with data `{}`!", self.data);
}
}
fn main() {
let c = CustomSmartPointer {
data: String::from("my stuff"),
};
let d = CustomSmartPointer {
data: String::from("other stuff"),
};
println!("CustomSmartPointers created");
}CustomSmartPointer, реализующая трейт Drop, где мы разместили бы код очисткиТрейт Drop включен в прелюдию, поэтому нам не нужно вводить его в область
видимости. Мы реализуем трейт Drop для CustomSmartPointer и предоставляем
реализацию метода drop, который вызывает println!. Тело метода drop –
это место, куда вы поместили бы любую логику, которую хотите выполнить, когда
экземпляр вашего типа выходит из области видимости. Здесь мы печатаем текст,
чтобы наглядно показать, когда Rust вызовет drop.
В main мы создаем два экземпляра CustomSmartPointer, а затем печатаем
CustomSmartPointers created. В конце main наши экземпляры
CustomSmartPointer выйдут из области видимости, и Rust вызовет код, который
мы поместили в метод drop, напечатав наше последнее сообщение. Обратите
внимание, что нам не нужно было явно вызывать метод drop.
Когда мы запустим эту программу, увидим следующий вывод:
$ cargo run
Compiling drop-example v0.1.0 (file:///projects/drop-example)
Finished `dev` profile [unoptimized + debuginfo] target(s) in 0.60s
Running `target/debug/drop-example`
CustomSmartPointers created
Dropping CustomSmartPointer with data `other stuff`!
Dropping CustomSmartPointer with data `my stuff`!
Rust автоматически вызвал для нас drop, когда наши экземпляры вышли из
области видимости, и выполнил указанный нами код. Переменные удаляются в
порядке, обратном их созданию, поэтому d был удален раньше c. Цель этого
примера – наглядно показать, как работает метод drop; обычно вы бы указали
код очистки, который должен выполнить ваш тип, а не сообщение для печати.
К сожалению, отключить автоматическое поведение drop непросто.
Отключать drop обычно и не нужно: весь смысл трейта Drop в том, что он
обрабатывается автоматически. Однако иногда может понадобиться очистить
значение раньше. Один пример – использование умных указателей, управляющих
блокировками: вам может понадобиться принудительно вызвать метод drop,
который освобождает блокировку, чтобы другой код в той же области видимости
смог получить эту блокировку. Rust не позволяет вручную вызывать метод drop
трейта Drop; вместо этого, если вы хотите принудительно удалить значение до
конца его области видимости, нужно вызвать функцию std::mem::drop,
предоставляемую стандартной библиотекой.
Попытка вручную вызвать метод drop трейта Drop, изменив функцию main из
листинга 15-14, не сработает, как показано в листинге 15-15.
struct CustomSmartPointer {
data: String,
}
impl Drop for CustomSmartPointer {
fn drop(&mut self) {
println!("Dropping CustomSmartPointer with data `{}`!", self.data);
}
}
fn main() {
let c = CustomSmartPointer {
data: String::from("some data"),
};
println!("CustomSmartPointer created");
c.drop();
println!("CustomSmartPointer dropped before the end of main");
}drop из трейта Drop для ранней очисткиКогда мы попробуем скомпилировать этот код, получим такую ошибку:
$ cargo run
Compiling drop-example v0.1.0 (file:///projects/drop-example)
error[E0040]: explicit use of destructor method
--> src/main.rs:16:7
|
16 | c.drop();
| ^^^^ explicit destructor calls not allowed
|
help: consider using `drop` function
|
16 - c.drop();
16 + drop(c);
|
For more information about this error, try `rustc --explain E0040`.
error: could not compile `drop-example` (bin "drop-example") due to 1 previous error
Это сообщение об ошибке говорит, что нам не разрешено явно вызывать drop.
Сообщение об ошибке использует термин деструктор, который в программировании
в общем смысле означает функцию, очищающую экземпляр. Деструктор аналогичен
конструктору, который создает экземпляр. Функция drop в Rust – один
конкретный деструктор.
Rust не позволяет явно вызывать drop, потому что Rust все равно
автоматически вызвал бы drop для значения в конце main. Это привело бы к
ошибке двойного освобождения, потому что Rust попытался бы очистить одно и то
же значение дважды.
Мы не можем отключить автоматическую вставку drop, когда значение выходит из
области видимости, и не можем явно вызвать метод drop. Поэтому, если нам
нужно принудительно очистить значение раньше, мы используем функцию
std::mem::drop.
Функция std::mem::drop отличается от метода drop в трейте Drop. Мы
вызываем ее, передавая в качестве аргумента значение, которое хотим
принудительно удалить. Функция находится в прелюдии, поэтому мы можем изменить
main в листинге 15-15 так, чтобы вызвать функцию drop, как показано в
листинге 15-16.
struct CustomSmartPointer {
data: String,
}
impl Drop for CustomSmartPointer {
fn drop(&mut self) {
println!("Dropping CustomSmartPointer with data `{}`!", self.data);
}
}
fn main() {
let c = CustomSmartPointer {
data: String::from("some data"),
};
println!("CustomSmartPointer created");
drop(c);
println!("CustomSmartPointer dropped before the end of main");
}std::mem::drop для явного удаления значения до выхода из области видимостиЗапуск этого кода напечатает следующее:
$ cargo run
Compiling drop-example v0.1.0 (file:///projects/drop-example)
Finished `dev` profile [unoptimized + debuginfo] target(s) in 0.73s
Running `target/debug/drop-example`
CustomSmartPointer created
Dropping CustomSmartPointer with data `some data`!
CustomSmartPointer dropped before the end of main
Текст Dropping CustomSmartPointer with data `some data`! печатается между
текстом CustomSmartPointer created и CustomSmartPointer dropped before the end of main, показывая, что код метода drop вызывается для удаления c в
этот момент.
Вы можете разными способами использовать код, указанный в реализации трейта
Drop, чтобы сделать очистку удобной и безопасной: например, с его помощью
можно создать собственный распределитель памяти! С трейтом Drop и системой
владения Rust вам не нужно помнить об очистке, потому что Rust делает это
автоматически.
Вам также не нужно беспокоиться о проблемах, возникающих из-за случайной
очистки значений, которые все еще используются: система владения, которая
следит за тем, чтобы ссылки всегда были допустимыми, также гарантирует, что
drop вызывается только один раз, когда значение больше не используется.
Теперь, когда мы рассмотрели Box<T> и некоторые характеристики умных
указателей, посмотрим на еще несколько умных указателей, определенных в
стандартной библиотеке.
Rc<T> — умный указатель с подсчётом ссылок
Rc<T>, умный указатель с подсчетом ссылок
В большинстве случаев владение понятно: вы точно знаете, какая переменная владеет данным значением. Однако бывают случаи, когда у одного значения может быть несколько владельцев. Например, в структурах данных графов несколько ребер могут указывать на один и тот же узел, и концептуально этот узел принадлежит всем ребрам, которые на него указывают. Узел не должен очищаться, пока на него указывают какие-либо ребра и, следовательно, пока у него есть владельцы.
Множественное владение нужно включать явно с помощью типа Rust Rc<T>, что
является сокращением от reference counting (подсчет ссылок). Тип Rc<T>
отслеживает количество ссылок на значение, чтобы определить, используется ли
значение все еще. Если ссылок на значение нет, значение можно очистить, и при
этом ни одна ссылка не станет недопустимой.
Представьте Rc<T> как телевизор в общей комнате. Когда один человек входит,
чтобы посмотреть телевизор, он включает его. Другие могут зайти в комнату и
тоже смотреть телевизор. Когда последний человек выходит из комнаты, он
выключает телевизор, потому что тот больше не используется. Если кто-то
выключит телевизор, пока другие все еще его смотрят, оставшиеся зрители будут
недовольны!
Мы используем тип Rc<T>, когда хотим разместить некоторые данные в куче,
чтобы несколько частей нашей программы могли читать эти данные, и не можем во
время компиляции определить, какая часть завершит их использование последней.
Если бы мы знали, какая часть завершит работу последней, мы могли бы просто
сделать эту часть владельцем данных, и обычные правила владения, проверяемые
во время компиляции, вступили бы в силу.
Обратите внимание, что Rc<T> предназначен только для однопоточных сценариев.
Когда мы будем обсуждать конкурентность в главе 16, мы рассмотрим, как
выполнять подсчет ссылок в многопоточных программах.
Совместное использование данных
Вернемся к нашему примеру cons-списка из листинга 15-5. Напомним, что мы
определили его с помощью Box<T>. На этот раз мы создадим два списка, которые
оба совместно владеют третьим списком. Концептуально это выглядит похоже на
рисунок 15-3.
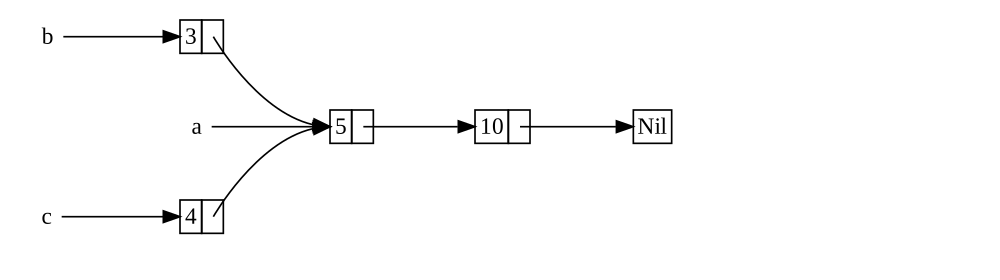
Рисунок 15-3: два списка, b и c, совместно владеют
третьим списком, a
Мы создадим список a, содержащий 5, а затем 10. Потом создадим еще два
списка: b, который начинается с 3, и c, который начинается с 4. Оба
списка, b и c, затем продолжатся первым списком a, содержащим 5 и
10. Другими словами, оба списка будут совместно использовать первый список,
содержащий 5 и 10.
Попытка реализовать этот сценарий с помощью нашего определения List с
Box<T> не сработает, как показано в листинге 15-17.
enum List {
Cons(i32, Box<List>),
Nil,
}
use crate::List::{Cons, Nil};
fn main() {
let a = Cons(5, Box::new(Cons(10, Box::new(Nil))));
let b = Cons(3, Box::new(a));
let c = Cons(4, Box::new(a));
}Box<T>, которые пытаются совместно владеть третьим спискомКогда мы компилируем этот код, получаем такую ошибку:
$ cargo run
Compiling cons-list v0.1.0 (file:///projects/cons-list)
error[E0382]: use of moved value: `a`
--> src/main.rs:11:30
|
9 | let a = Cons(5, Box::new(Cons(10, Box::new(Nil))));
| - move occurs because `a` has type `List`, which does not implement the `Copy` trait
10 | let b = Cons(3, Box::new(a));
| - value moved here
11 | let c = Cons(4, Box::new(a));
| ^ value used here after move
|
note: if `List` implemented `Clone`, you could clone the value
--> src/main.rs:1:1
|
1 | enum List {
| ^^^^^^^^^ consider implementing `Clone` for this type
...
10 | let b = Cons(3, Box::new(a));
| - you could clone this value
For more information about this error, try `rustc --explain E0382`.
error: could not compile `cons-list` (bin "cons-list") due to 1 previous error
Варианты Cons владеют данными, которые они хранят, поэтому, когда мы создаем
список b, a перемещается в b, и b становится владельцем a. Затем,
когда мы пытаемся снова использовать a при создании c, это не разрешается,
потому что a уже был перемещен.
Мы могли бы изменить определение Cons, чтобы он хранил ссылки, но тогда нам
пришлось бы указывать параметры времени жизни. Указывая параметры времени
жизни, мы бы задавали, что каждый элемент в списке будет жить как минимум
столько же, сколько весь список. Это верно для элементов и списков в листинге
15-17, но не для любого сценария.
Вместо этого мы изменим определение List, чтобы использовать Rc<T> вместо
Box<T>, как показано в листинге 15-18. Теперь каждый вариант Cons будет
хранить значение и Rc<T>, указывающий на List. Когда мы создаем b, вместо
того чтобы забрать владение a, мы клонируем Rc<List>, который хранится в
a, тем самым увеличивая количество ссылок с одной до двух и позволяя a и
b совместно владеть данными в этом Rc<List>. Мы также клонируем a при
создании c, увеличивая количество ссылок с двух до трех. Каждый раз, когда
мы вызываем Rc::clone, счетчик ссылок на данные внутри Rc<List>
увеличивается, и данные не будут очищены, пока на них не останется ни одной
ссылки.
enum List {
Cons(i32, Rc<List>),
Nil,
}
use crate::List::{Cons, Nil};
use std::rc::Rc;
fn main() {
let a = Rc::new(Cons(5, Rc::new(Cons(10, Rc::new(Nil)))));
let b = Cons(3, Rc::clone(&a));
let c = Cons(4, Rc::clone(&a));
}List, использующее Rc<T>Нам нужно добавить оператор use, чтобы ввести Rc<T> в область видимости,
потому что его нет в прелюдии. В main мы создаем список, содержащий 5 и
10, и сохраняем его в новом Rc<List> в a. Затем, когда мы создаем b и
c, мы вызываем функцию Rc::clone и передаем ей в качестве аргумента ссылку
на Rc<List> из a.
Мы могли бы вызвать a.clone() вместо Rc::clone(&a), но соглашение Rust в
этом случае – использовать Rc::clone. Реализация Rc::clone не делает
глубокую копию всех данных, как это делают реализации clone у большинства
типов. Вызов Rc::clone только увеличивает счетчик ссылок, что занимает мало
времени. Глубокое копирование данных может занимать много времени. Используя
Rc::clone для подсчета ссылок, мы можем визуально различать виды
клонирования, выполняющие глубокое копирование, и виды клонирования, которые
увеличивают счетчик ссылок. Когда мы ищем проблемы производительности в коде,
нам нужно учитывать только клонирования с глубоким копированием, а вызовы
Rc::clone можно не принимать во внимание.
Клонирование для увеличения счетчика ссылок
Изменим наш рабочий пример из листинга 15-18, чтобы увидеть, как меняются
счетчики ссылок при создании и удалении ссылок на Rc<List> в a.
В листинге 15-19 мы изменим main так, чтобы вокруг списка c была внутренняя
область видимости; тогда мы сможем увидеть, как меняется счетчик ссылок, когда
c выходит из области видимости.
enum List {
Cons(i32, Rc<List>),
Nil,
}
use crate::List::{Cons, Nil};
use std::rc::Rc;
// --snip--
fn main() {
let a = Rc::new(Cons(5, Rc::new(Cons(10, Rc::new(Nil)))));
println!("count after creating a = {}", Rc::strong_count(&a));
let b = Cons(3, Rc::clone(&a));
println!("count after creating b = {}", Rc::strong_count(&a));
{
let c = Cons(4, Rc::clone(&a));
println!("count after creating c = {}", Rc::strong_count(&a));
}
println!("count after c goes out of scope = {}", Rc::strong_count(&a));
}В каждой точке программы, где меняется счетчик ссылок, мы печатаем счетчик
ссылок, который получаем вызовом функции Rc::strong_count. Эта функция
называется strong_count, а не count, потому что у типа Rc<T> также есть
weak_count; мы увидим, для чего используется weak_count, в разделе
«Предотвращение циклов ссылок с помощью Weak<T>».
Этот код печатает следующее:
$ cargo run
Compiling cons-list v0.1.0 (file:///projects/cons-list)
Finished `dev` profile [unoptimized + debuginfo] target(s) in 0.45s
Running `target/debug/cons-list`
count after creating a = 1
count after creating b = 2
count after creating c = 3
count after c goes out of scope = 2
Мы видим, что Rc<List> в a имеет начальный счетчик ссылок, равный 1; затем
каждый раз, когда мы вызываем clone, счетчик увеличивается на 1. Когда c
выходит из области видимости, счетчик уменьшается на 1. Нам не нужно вызывать
функцию для уменьшения счетчика ссылок так же, как нужно вызывать Rc::clone
для его увеличения: реализация трейта Drop автоматически уменьшает счетчик
ссылок, когда значение Rc<T> выходит из области видимости.
В этом примере мы не видим, что когда b, а затем a выходят из области
видимости в конце main, счетчик становится равным 0, и Rc<List> полностью
очищается. Использование Rc<T> позволяет одному значению иметь несколько
владельцев, а счетчик гарантирует, что значение остается допустимым, пока
существует хотя бы один из владельцев.
Через неизменяемые ссылки Rc<T> позволяет нескольким частям вашей программы
совместно использовать данные только для чтения. Если бы Rc<T> позволял вам
также иметь несколько изменяемых ссылок, вы могли бы нарушить одно из правил
заимствования, обсуждавшихся в главе 4: несколько изменяемых заимствований
одного и того же места могут привести к гонкам данных и несогласованности. Но
возможность изменять данные очень полезна! В следующем разделе мы обсудим
паттерн внутренней изменяемости и тип RefCell<T>, который можно использовать
в сочетании с Rc<T>, чтобы работать с этим ограничением неизменяемости.
RefCell<T> и паттерн внутренней изменяемости
RefCell<T> и паттерн внутренней изменяемости
Внутренняя изменяемость – это паттерн проектирования в Rust, который
позволяет изменять данные даже тогда, когда на эти данные есть неизменяемые
ссылки; обычно правила заимствования запрещают такое действие. Чтобы изменять
данные, этот паттерн использует unsafe-код внутри структуры данных, чтобы
ослабить обычные правила Rust, управляющие изменением и заимствованием.
Небезопасный код сообщает компилятору, что мы проверяем правила вручную, а не
полагаемся на то, что компилятор проверит их за нас; подробнее мы обсудим
небезопасный код в главе 20.
Мы можем использовать типы, применяющие паттерн внутренней изменяемости, только
когда можем гарантировать, что правила заимствования будут соблюдены во время
выполнения, даже если компилятор не может этого гарантировать. Используемый
unsafe-код при этом обернут в безопасный API, а внешний тип по-прежнему
остается неизменяемым.
Изучим эту концепцию на примере типа RefCell<T>, который следует паттерну
внутренней изменяемости.
Проверка правил заимствования во время выполнения
В отличие от Rc<T>, тип RefCell<T> представляет единоличное владение
данными, которые он хранит. Что же отличает RefCell<T> от типа вроде
Box<T>? Вспомните правила заимствования, которые вы изучили в главе 4:
- В любой момент времени у вас может быть либо одна изменяемая ссылка, либо любое количество неизменяемых ссылок (но не то и другое одновременно).
- Ссылки всегда должны быть допустимыми.
Со ссылками и Box<T> инварианты правил заимствования проверяются во время
компиляции. С RefCell<T> эти инварианты проверяются во время выполнения.
Со ссылками, если вы нарушите эти правила, вы получите ошибку компилятора. С
RefCell<T>, если вы нарушите эти правила, ваша программа вызовет панику и
завершится.
Преимущества проверки правил заимствования во время компиляции в том, что ошибки будут обнаружены раньше в процессе разработки, и это не влияет на производительность во время выполнения, потому что весь анализ уже выполнен заранее. По этим причинам проверка правил заимствования во время компиляции – лучший выбор в большинстве случаев, и именно поэтому это поведение в Rust используется по умолчанию.
Преимущество проверки правил заимствования во время выполнения состоит в том, что становятся разрешены некоторые безопасные с точки зрения памяти сценарии, которые были бы запрещены проверками во время компиляции. Статический анализ, такой как компилятор Rust, по своей природе консервативен. Некоторые свойства кода невозможно определить, анализируя код: самый известный пример – проблема остановки, которая выходит за рамки этой книги, но является интересной темой для изучения.
Поскольку некоторый анализ невозможен, если компилятор Rust не может быть
уверен, что код соблюдает правила владения, он может отклонить корректную
программу; в этом смысле он консервативен. Если бы Rust принимал некорректную
программу, пользователи не смогли бы доверять гарантиям, которые дает Rust.
Однако если Rust отклоняет корректную программу, программисту это доставляет
неудобство, но ничего катастрофического не происходит. Тип RefCell<T>
полезен, когда вы уверены, что ваш код следует правилам заимствования, но
компилятор не способен это понять и гарантировать.
Подобно Rc<T>, RefCell<T> предназначен только для однопоточных сценариев и
даст ошибку компиляции, если вы попробуете использовать его в многопоточном
контексте. О том, как получить функциональность RefCell<T> в многопоточной
программе, мы поговорим в главе 16.
Вот краткое напоминание о причинах выбирать Box<T>, Rc<T> или
RefCell<T>:
Rc<T>допускает нескольких владельцев одних и тех же данных; уBox<T>иRefCell<T>владелец один.Box<T>допускает неизменяемые или изменяемые заимствования, проверяемые во время компиляции;Rc<T>допускает только неизменяемые заимствования, проверяемые во время компиляции;RefCell<T>допускает неизменяемые или изменяемые заимствования, проверяемые во время выполнения.- Поскольку
RefCell<T>допускает изменяемые заимствования, проверяемые во время выполнения, вы можете изменять значение внутриRefCell<T>, даже когда самRefCell<T>неизменяем.
Изменение значения внутри неизменяемого значения – это паттерн внутренней изменяемости. Рассмотрим ситуацию, в которой внутренняя изменяемость полезна, и разберем, как она возможна.
Использование внутренней изменяемости
Одно из следствий правил заимствования состоит в том, что когда у вас есть неизменяемое значение, вы не можете заимствовать его как изменяемое. Например, этот код не скомпилируется:
fn main() {
let x = 5;
let y = &mut x;
}Если бы вы попытались скомпилировать этот код, то получили бы следующую ошибку:
$ cargo run
Compiling borrowing v0.1.0 (file:///projects/borrowing)
error[E0596]: cannot borrow `x` as mutable, as it is not declared as mutable
--> src/main.rs:3:13
|
3 | let y = &mut x;
| ^^^^^^ cannot borrow as mutable
|
help: consider changing this to be mutable
|
2 | let mut x = 5;
| +++
For more information about this error, try `rustc --explain E0596`.
error: could not compile `borrowing` (bin "borrowing") due to 1 previous error
Однако бывают ситуации, когда значению полезно изменять себя в своих методах,
но для остального кода выглядеть неизменяемым. Код вне методов значения не
смог бы изменять это значение. Использование RefCell<T> – один из способов
получить возможность внутренней изменяемости, но RefCell<T> не обходит
правила заимствования полностью: проверщик заимствований в компиляторе
допускает такую внутреннюю изменяемость, а правила заимствования вместо этого
проверяются во время выполнения. Если вы нарушите правила, вы получите
panic!, а не ошибку компилятора.
Разберем практический пример, где можно использовать RefCell<T> для
изменения неизменяемого значения, и увидим, почему это полезно.
Тестирование с mock-объектами
Иногда во время тестирования программист использует один тип вместо другого, чтобы наблюдать определенное поведение и утверждать, что оно реализовано правильно. Такой замещающий тип называется тестовым дублером. Думайте о нем как о дублере в кино, где человек заменяет актера для выполнения особенно сложной сцены. Тестовые дублеры заменяют другие типы при запуске тестов. Mock-объекты – это конкретные виды тестовых дублеров, которые записывают, что происходит во время теста, чтобы вы могли утверждать, что были выполнены правильные действия.
В Rust нет объектов в том же смысле, в каком объекты есть в других языках, и в стандартной библиотеке Rust нет встроенной функциональности mock-объектов, как в некоторых других языках. Однако вы вполне можете создать структуру, которая будет служить тем же целям, что и mock-объект.
Вот сценарий, который мы будем тестировать: мы создадим библиотеку, которая отслеживает значение относительно максимального значения и отправляет сообщения в зависимости от того, насколько текущее значение близко к максимальному. Например, такую библиотеку можно использовать, чтобы следить за квотой пользователя на количество разрешенных ему вызовов API.
Наша библиотека будет предоставлять только функциональность отслеживания того,
насколько значение близко к максимуму и какие сообщения в какие моменты нужно
отправлять. Ожидается, что приложения, использующие нашу библиотеку,
предоставят механизм отправки сообщений: приложение может показать сообщение
пользователю напрямую, отправить электронное письмо, отправить текстовое
сообщение или сделать что-то еще. Библиотеке не нужно знать эти подробности.
Ей нужно только что-то, что реализует предоставляемый нами трейт с именем
Messenger. Листинг 15-20 показывает код библиотеки.
pub trait Messenger {
fn send(&self, msg: &str);
}
pub struct LimitTracker<'a, T: Messenger> {
messenger: &'a T,
value: usize,
max: usize,
}
impl<'a, T> LimitTracker<'a, T>
where
T: Messenger,
{
pub fn new(messenger: &'a T, max: usize) -> LimitTracker<'a, T> {
LimitTracker {
messenger,
value: 0,
max,
}
}
pub fn set_value(&mut self, value: usize) {
self.value = value;
let percentage_of_max = self.value as f64 / self.max as f64;
if percentage_of_max >= 1.0 {
self.messenger.send("Error: You are over your quota!");
} else if percentage_of_max >= 0.9 {
self.messenger
.send("Urgent warning: You've used up over 90% of your quota!");
} else if percentage_of_max >= 0.75 {
self.messenger
.send("Warning: You've used up over 75% of your quota!");
}
}
}Одна важная часть этого кода состоит в том, что трейт Messenger имеет один
метод с именем send, который принимает неизменяемую ссылку на self и текст
сообщения. Этот трейт – интерфейс, который должен реализовать наш mock-объект,
чтобы mock можно было использовать так же, как реальный объект. Другая важная
часть в том, что мы хотим протестировать поведение метода set_value у
LimitTracker. Мы можем менять то, что передаем в параметр value, но
set_value ничего не возвращает, чтобы мы могли делать утверждения по
возвращенному значению. Мы хотим иметь возможность сказать: если мы создаем
LimitTracker с чем-то, что реализует трейт Messenger, и конкретным
значением max, то messenger получает команду отправить подходящие сообщения,
когда мы передаем разные числа для value.
Нам нужен mock-объект, который вместо отправки электронного письма или
текстового сообщения при вызове send будет только отслеживать сообщения,
которые ему сказано отправить. Мы можем создать новый экземпляр mock-объекта,
создать LimitTracker, использующий mock-объект, вызвать метод set_value у
LimitTracker, а затем проверить, что mock-объект содержит ожидаемые
сообщения. Листинг 15-21 показывает попытку реализовать mock-объект именно для
этого, но проверщик заимствований ее не разрешит.
pub trait Messenger {
fn send(&self, msg: &str);
}
pub struct LimitTracker<'a, T: Messenger> {
messenger: &'a T,
value: usize,
max: usize,
}
impl<'a, T> LimitTracker<'a, T>
where
T: Messenger,
{
pub fn new(messenger: &'a T, max: usize) -> LimitTracker<'a, T> {
LimitTracker {
messenger,
value: 0,
max,
}
}
pub fn set_value(&mut self, value: usize) {
self.value = value;
let percentage_of_max = self.value as f64 / self.max as f64;
if percentage_of_max >= 1.0 {
self.messenger.send("Error: You are over your quota!");
} else if percentage_of_max >= 0.9 {
self.messenger
.send("Urgent warning: You've used up over 90% of your quota!");
} else if percentage_of_max >= 0.75 {
self.messenger
.send("Warning: You've used up over 75% of your quota!");
}
}
}
#[cfg(test)]
mod tests {
use super::*;
struct MockMessenger {
sent_messages: Vec<String>,
}
impl MockMessenger {
fn new() -> MockMessenger {
MockMessenger {
sent_messages: vec![],
}
}
}
impl Messenger for MockMessenger {
fn send(&self, message: &str) {
self.sent_messages.push(String::from(message));
}
}
#[test]
fn it_sends_an_over_75_percent_warning_message() {
let mock_messenger = MockMessenger::new();
let mut limit_tracker = LimitTracker::new(&mock_messenger, 100);
limit_tracker.set_value(80);
assert_eq!(mock_messenger.sent_messages.len(), 1);
}
}MockMessenger, которую не разрешает проверщик заимствованийЭтот тестовый код определяет структуру MockMessenger, у которой есть поле
sent_messages с Vec значений String для отслеживания сообщений, которые
ей сказано отправить. Мы также определяем связанную функцию new, чтобы было
удобно создавать новые значения MockMessenger, начинающие с пустого списка
сообщений. Затем мы реализуем трейт Messenger для MockMessenger, чтобы
можно было передать MockMessenger в LimitTracker. В определении метода
send мы берем сообщение, переданное как параметр, и сохраняем его в списке
sent_messages у MockMessenger.
В тесте мы проверяем, что происходит, когда LimitTracker получает команду
установить value в значение, которое больше 75 процентов от значения max.
Сначала мы создаем новый MockMessenger, который начнет с пустого списка
сообщений. Затем мы создаем новый LimitTracker и передаем ему ссылку на
новый MockMessenger и значение max, равное 100. Мы вызываем метод
set_value у LimitTracker со значением 80, что больше 75 процентов от
100. Затем мы утверждаем, что список сообщений, который отслеживает
MockMessenger, теперь должен содержать одно сообщение.
Однако у этого теста есть одна проблема, показанная здесь:
$ cargo test
Compiling limit-tracker v0.1.0 (file:///projects/limit-tracker)
error[E0596]: cannot borrow `self.sent_messages` as mutable, as it is behind a `&` reference
--> src/lib.rs:58:13
|
58 | self.sent_messages.push(String::from(message));
| ^^^^^^^^^^^^^^^^^^ `self` is a `&` reference, so the data it refers to cannot be borrowed as mutable
|
help: consider changing this to be a mutable reference in the `impl` method and the `trait` definition
|
2 ~ fn send(&mut self, msg: &str);
3 | }
...
56 | impl Messenger for MockMessenger {
57 ~ fn send(&mut self, message: &str) {
|
For more information about this error, try `rustc --explain E0596`.
error: could not compile `limit-tracker` (lib test) due to 1 previous error
Мы не можем изменить MockMessenger, чтобы отслеживать сообщения, потому что
метод send принимает неизменяемую ссылку на self. Мы также не можем
воспользоваться предложением из текста ошибки и использовать &mut self и в
методе impl, и в определении трейта. Мы не хотим менять трейт Messenger
только ради тестирования. Вместо этого нам нужно найти способ заставить наш
тестовый код корректно работать с существующим дизайном.
Это ситуация, в которой может помочь внутренняя изменяемость! Мы будем хранить
sent_messages внутри RefCell<T>, и тогда метод send сможет изменять
sent_messages, чтобы сохранять увиденные сообщения. Листинг 15-22 показывает,
как это выглядит.
pub trait Messenger {
fn send(&self, msg: &str);
}
pub struct LimitTracker<'a, T: Messenger> {
messenger: &'a T,
value: usize,
max: usize,
}
impl<'a, T> LimitTracker<'a, T>
where
T: Messenger,
{
pub fn new(messenger: &'a T, max: usize) -> LimitTracker<'a, T> {
LimitTracker {
messenger,
value: 0,
max,
}
}
pub fn set_value(&mut self, value: usize) {
self.value = value;
let percentage_of_max = self.value as f64 / self.max as f64;
if percentage_of_max >= 1.0 {
self.messenger.send("Error: You are over your quota!");
} else if percentage_of_max >= 0.9 {
self.messenger
.send("Urgent warning: You've used up over 90% of your quota!");
} else if percentage_of_max >= 0.75 {
self.messenger
.send("Warning: You've used up over 75% of your quota!");
}
}
}
#[cfg(test)]
mod tests {
use super::*;
use std::cell::RefCell;
struct MockMessenger {
sent_messages: RefCell<Vec<String>>,
}
impl MockMessenger {
fn new() -> MockMessenger {
MockMessenger {
sent_messages: RefCell::new(vec![]),
}
}
}
impl Messenger for MockMessenger {
fn send(&self, message: &str) {
self.sent_messages.borrow_mut().push(String::from(message));
}
}
#[test]
fn it_sends_an_over_75_percent_warning_message() {
// --snip--
let mock_messenger = MockMessenger::new();
let mut limit_tracker = LimitTracker::new(&mock_messenger, 100);
limit_tracker.set_value(80);
assert_eq!(mock_messenger.sent_messages.borrow().len(), 1);
}
}RefCell<T> для изменения внутреннего значения, когда внешнее значение считается неизменяемымТеперь поле sent_messages имеет тип RefCell<Vec<String>> вместо
Vec<String>. В функции new мы создаем новый экземпляр
RefCell<Vec<String>> вокруг пустого вектора.
В реализации метода send первый параметр по-прежнему является неизменяемым
заимствованием self, что соответствует определению трейта. Мы вызываем
borrow_mut у RefCell<Vec<String>> в self.sent_messages, чтобы получить
изменяемую ссылку на значение внутри RefCell<Vec<String>>, то есть на вектор.
Затем мы можем вызвать push для изменяемой ссылки на вектор, чтобы
отслеживать сообщения, отправленные во время теста.
Последнее изменение, которое нужно сделать, находится в утверждении: чтобы
посмотреть, сколько элементов во внутреннем векторе, мы вызываем borrow у
RefCell<Vec<String>>, чтобы получить неизменяемую ссылку на вектор.
Теперь, когда вы увидели, как использовать RefCell<T>, разберемся, как он
работает!
Отслеживание заимствований во время выполнения
Когда мы создаем неизменяемые и изменяемые ссылки, мы используем синтаксис &
и &mut соответственно. С RefCell<T> мы используем методы borrow и
borrow_mut, которые являются частью безопасного API, принадлежащего
RefCell<T>. Метод borrow возвращает тип умного указателя Ref<T>, а
borrow_mut возвращает тип умного указателя RefMut<T>. Оба типа реализуют
Deref, поэтому мы можем обращаться с ними как с обычными ссылками.
RefCell<T> отслеживает, сколько умных указателей Ref<T> и RefMut<T> в
данный момент активно. Каждый раз, когда мы вызываем borrow, RefCell<T>
увеличивает счетчик активных неизменяемых заимствований. Когда значение
Ref<T> выходит из области видимости, счетчик неизменяемых заимствований
уменьшается на 1. Как и правила заимствования во время компиляции,
RefCell<T> позволяет нам иметь много неизменяемых заимствований или одно
изменяемое заимствование в любой момент времени.
Если мы попытаемся нарушить эти правила, вместо ошибки компилятора, которую
получили бы со ссылками, реализация RefCell<T> вызовет панику во время
выполнения. Листинг 15-23 показывает изменение реализации send из листинга
15-22. Мы намеренно пытаемся создать два изменяемых заимствования, активных в
одной и той же области видимости, чтобы показать, что RefCell<T>
предотвращает это во время выполнения.
pub trait Messenger {
fn send(&self, msg: &str);
}
pub struct LimitTracker<'a, T: Messenger> {
messenger: &'a T,
value: usize,
max: usize,
}
impl<'a, T> LimitTracker<'a, T>
where
T: Messenger,
{
pub fn new(messenger: &'a T, max: usize) -> LimitTracker<'a, T> {
LimitTracker {
messenger,
value: 0,
max,
}
}
pub fn set_value(&mut self, value: usize) {
self.value = value;
let percentage_of_max = self.value as f64 / self.max as f64;
if percentage_of_max >= 1.0 {
self.messenger.send("Error: You are over your quota!");
} else if percentage_of_max >= 0.9 {
self.messenger
.send("Urgent warning: You've used up over 90% of your quota!");
} else if percentage_of_max >= 0.75 {
self.messenger
.send("Warning: You've used up over 75% of your quota!");
}
}
}
#[cfg(test)]
mod tests {
use super::*;
use std::cell::RefCell;
struct MockMessenger {
sent_messages: RefCell<Vec<String>>,
}
impl MockMessenger {
fn new() -> MockMessenger {
MockMessenger {
sent_messages: RefCell::new(vec![]),
}
}
}
impl Messenger for MockMessenger {
fn send(&self, message: &str) {
let mut one_borrow = self.sent_messages.borrow_mut();
let mut two_borrow = self.sent_messages.borrow_mut();
one_borrow.push(String::from(message));
two_borrow.push(String::from(message));
}
}
#[test]
fn it_sends_an_over_75_percent_warning_message() {
let mock_messenger = MockMessenger::new();
let mut limit_tracker = LimitTracker::new(&mock_messenger, 100);
limit_tracker.set_value(80);
assert_eq!(mock_messenger.sent_messages.borrow().len(), 1);
}
}RefCell<T> вызовет паникуМы создаем переменную one_borrow для умного указателя RefMut<T>,
возвращенного из borrow_mut. Затем таким же образом создаем еще одно
изменяемое заимствование в переменной two_borrow. Это создает две изменяемые
ссылки в одной области видимости, что не разрешено. Когда мы запустим тесты
для нашей библиотеки, код из листинга 15-23 скомпилируется без ошибок, но тест
завершится неудачей:
$ cargo test
Compiling limit-tracker v0.1.0 (file:///projects/limit-tracker)
Finished `test` profile [unoptimized + debuginfo] target(s) in 0.91s
Running unittests src/lib.rs (target/debug/deps/limit_tracker-e599811fa246dbde)
running 1 test
test tests::it_sends_an_over_75_percent_warning_message ... FAILED
failures:
---- tests::it_sends_an_over_75_percent_warning_message stdout ----
thread 'tests::it_sends_an_over_75_percent_warning_message' panicked at src/lib.rs:60:53:
RefCell already borrowed
note: run with `RUST_BACKTRACE=1` environment variable to display a backtrace
failures:
tests::it_sends_an_over_75_percent_warning_message
test result: FAILED. 0 passed; 1 failed; 0 ignored; 0 measured; 0 filtered out; finished in 0.00s
error: test failed, to rerun pass `--lib`
Обратите внимание, что код вызвал панику с сообщением already borrowed: BorrowMutError. Так RefCell<T> обрабатывает нарушения правил заимствования
во время выполнения.
Выбор обнаруживать ошибки заимствования во время выполнения, а не во время
компиляции, как мы сделали здесь, означает, что вы потенциально найдете ошибки
в коде позже в процессе разработки: возможно, только после развертывания кода
в рабочей среде. Кроме того, ваш код понесет небольшие издержки
производительности во время выполнения из-за отслеживания заимствований во
время выполнения, а не во время компиляции. Однако использование RefCell<T>
позволяет написать mock-объект, который может изменять себя, чтобы
отслеживать увиденные сообщения, пока вы используете его в контексте, где
разрешены только неизменяемые значения. Вы можете использовать RefCell<T>
несмотря на эти компромиссы, чтобы получить больше функциональности, чем дают
обычные ссылки.
Разрешение нескольких владельцев изменяемых данных
Обычный способ использовать RefCell<T> – сочетать его с Rc<T>. Вспомните,
что Rc<T> позволяет иметь нескольких владельцев некоторых данных, но дает
только неизменяемый доступ к этим данным. Если у вас есть Rc<T>, который
хранит RefCell<T>, вы можете получить значение, у которого может быть
несколько владельцев и которое вы можете изменять!
Например, вспомните пример cons-списка из листинга 15-18, где мы использовали
Rc<T>, чтобы позволить нескольким спискам совместно владеть другим списком.
Поскольку Rc<T> хранит только неизменяемые значения, мы не можем изменить ни
одно из значений в списке после его создания. Добавим RefCell<T> ради его
способности изменять значения в списках. Листинг 15-24 показывает, что,
используя RefCell<T> в определении Cons, мы можем изменить значение,
хранящееся во всех списках.
#[derive(Debug)]
enum List {
Cons(Rc<RefCell<i32>>, Rc<List>),
Nil,
}
use crate::List::{Cons, Nil};
use std::cell::RefCell;
use std::rc::Rc;
fn main() {
let value = Rc::new(RefCell::new(5));
let a = Rc::new(Cons(Rc::clone(&value), Rc::new(Nil)));
let b = Cons(Rc::new(RefCell::new(3)), Rc::clone(&a));
let c = Cons(Rc::new(RefCell::new(4)), Rc::clone(&a));
*value.borrow_mut() += 10;
println!("a after = {a:?}");
println!("b after = {b:?}");
println!("c after = {c:?}");
}Rc<RefCell<i32>> для создания List, который можно изменятьМы создаем значение, являющееся экземпляром Rc<RefCell<i32>>, и сохраняем
его в переменной с именем value, чтобы позже иметь к нему прямой доступ.
Затем мы создаем List в a с вариантом Cons, который хранит value. Нам
нужно клонировать value, чтобы и a, и value владели внутренним значением
5, а не передавать владение от value к a и не заставлять a заимствовать
из value.
Мы оборачиваем список a в Rc<T>, чтобы при создании списков b и c они
оба могли ссылаться на a, как мы делали в листинге 15-18.
После того как мы создали списки в a, b и c, мы хотим добавить 10 к
значению в value. Мы делаем это, вызывая borrow_mut у value, что
использует возможность автоматического разыменования, которую мы обсуждали в
разделе «Где оператор ->?» главы 5,
чтобы разыменовать Rc<T> до внутреннего значения RefCell<T>. Метод
borrow_mut возвращает умный указатель RefMut<T>, и мы используем для него
оператор разыменования, изменяя внутреннее значение.
Когда мы печатаем a, b и c, мы видим, что у всех них измененное значение
15, а не 5:
$ cargo run
Compiling cons-list v0.1.0 (file:///projects/cons-list)
Finished `dev` profile [unoptimized + debuginfo] target(s) in 0.63s
Running `target/debug/cons-list`
a after = Cons(RefCell { value: 15 }, Nil)
b after = Cons(RefCell { value: 3 }, Cons(RefCell { value: 15 }, Nil))
c after = Cons(RefCell { value: 4 }, Cons(RefCell { value: 15 }, Nil))
Этот прием довольно удобен! Используя RefCell<T>, мы имеем внешне
неизменяемое значение List. Но мы можем использовать методы RefCell<T>,
которые предоставляют доступ к его внутренней изменяемости, чтобы изменять
наши данные, когда это нужно. Проверки правил заимствования во время
выполнения защищают нас от гонок данных, и иногда стоит обменять немного
скорости на такую гибкость в структурах данных. Обратите внимание, что
RefCell<T> не работает для многопоточного кода! Mutex<T> – потокобезопасная
версия RefCell<T>, и мы обсудим Mutex<T> в главе 16.
Циклические ссылки могут приводить к утечкам памяти
Циклы ссылок могут приводить к утечкам памяти
Гарантии безопасности памяти Rust затрудняют, но не делают невозможным
случайное создание памяти, которая никогда не будет очищена (это известно как
утечка памяти). Полное предотвращение утечек памяти не входит в гарантии
Rust, а значит, утечки памяти в Rust безопасны с точки зрения памяти. Мы можем
увидеть, что Rust допускает утечки памяти, используя Rc<T> и RefCell<T>:
можно создать ссылки, в которых элементы ссылаются друг на друга по циклу. Это
создает утечки памяти, потому что счетчик ссылок каждого элемента в цикле
никогда не достигнет 0, и значения никогда не будут удалены.
Создание цикла ссылок
Посмотрим, как может возникнуть цикл ссылок и как его предотвратить, начав с
определения enum List и метода tail в листинге 15-25.
use crate::List::{Cons, Nil};
use std::cell::RefCell;
use std::rc::Rc;
#[derive(Debug)]
enum List {
Cons(i32, RefCell<Rc<List>>),
Nil,
}
impl List {
fn tail(&self) -> Option<&RefCell<Rc<List>>> {
match self {
Cons(_, item) => Some(item),
Nil => None,
}
}
}
fn main() {}RefCell<T>, чтобы мы могли изменять, на что ссылается вариант ConsМы используем еще один вариант определения List из листинга 15-5. Второй
элемент в варианте Cons теперь имеет тип RefCell<Rc<List>>, что означает:
вместо возможности изменять значение i32, как мы делали в листинге 15-24, мы
хотим изменять значение List, на которое указывает вариант Cons. Мы также
добавляем метод tail, чтобы было удобно получать доступ ко второму элементу,
если у нас есть вариант Cons.
В листинге 15-26 мы добавляем функцию main, которая использует определения
из листинга 15-25. Этот код создает список в a и список в b, который
указывает на список в a. Затем он изменяет список в a, чтобы тот указывал
на b, создавая цикл ссылок. По ходу дела есть операторы println!,
показывающие, какими являются счетчики ссылок в разные моменты этого процесса.
use crate::List::{Cons, Nil};
use std::cell::RefCell;
use std::rc::Rc;
#[derive(Debug)]
enum List {
Cons(i32, RefCell<Rc<List>>),
Nil,
}
impl List {
fn tail(&self) -> Option<&RefCell<Rc<List>>> {
match self {
Cons(_, item) => Some(item),
Nil => None,
}
}
}
fn main() {
let a = Rc::new(Cons(5, RefCell::new(Rc::new(Nil))));
println!("a initial rc count = {}", Rc::strong_count(&a));
println!("a next item = {:?}", a.tail());
let b = Rc::new(Cons(10, RefCell::new(Rc::clone(&a))));
println!("a rc count after b creation = {}", Rc::strong_count(&a));
println!("b initial rc count = {}", Rc::strong_count(&b));
println!("b next item = {:?}", b.tail());
if let Some(link) = a.tail() {
*link.borrow_mut() = Rc::clone(&b);
}
println!("b rc count after changing a = {}", Rc::strong_count(&b));
println!("a rc count after changing a = {}", Rc::strong_count(&a));
// Uncomment the next line to see that we have a cycle;
// it will overflow the stack.
// println!("a next item = {:?}", a.tail());
}List, указывающих друг на другаМы создаем экземпляр Rc<List>, содержащий значение List, в переменной a
с исходным списком 5, Nil. Затем мы создаем экземпляр Rc<List>, содержащий
другое значение List, в переменной b; он содержит значение 10 и
указывает на список в a.
Мы изменяем a так, чтобы он указывал на b вместо Nil, создавая цикл. Мы
делаем это с помощью метода tail, чтобы получить ссылку на
RefCell<Rc<List>> в a, которую помещаем в переменную link. Затем мы
используем метод borrow_mut у RefCell<Rc<List>>, чтобы изменить внутреннее
значение с Rc<List>, содержащего значение Nil, на Rc<List> из b.
Когда мы запустим этот код, оставив последний println! пока
закомментированным, получим такой вывод:
$ cargo run
Compiling cons-list v0.1.0 (file:///projects/cons-list)
Finished `dev` profile [unoptimized + debuginfo] target(s) in 0.53s
Running `target/debug/cons-list`
a initial rc count = 1
a next item = Some(RefCell { value: Nil })
a rc count after b creation = 2
b initial rc count = 1
b next item = Some(RefCell { value: Cons(5, RefCell { value: Nil }) })
b rc count after changing a = 2
a rc count after changing a = 2
Счетчик ссылок экземпляров Rc<List> и в a, и в b равен 2 после того, как
мы изменили список в a, чтобы он указывал на b. В конце main Rust удаляет
переменную b, что уменьшает счетчик ссылок экземпляра Rc<List> из b с 2
до 1. Память, которую Rc<List> занимает в куче, в этот момент не будет
удалена, потому что счетчик ссылок равен 1, а не 0. Затем Rust удаляет a,
что также уменьшает счетчик ссылок экземпляра Rc<List> из a с 2 до 1.
Память этого экземпляра тоже нельзя удалить, потому что другой экземпляр
Rc<List> все еще ссылается на него. Память, выделенная для списка, навсегда
останется неосвобожденной. Чтобы визуализировать этот цикл ссылок, мы создали
диаграмму на рисунке 15-4.
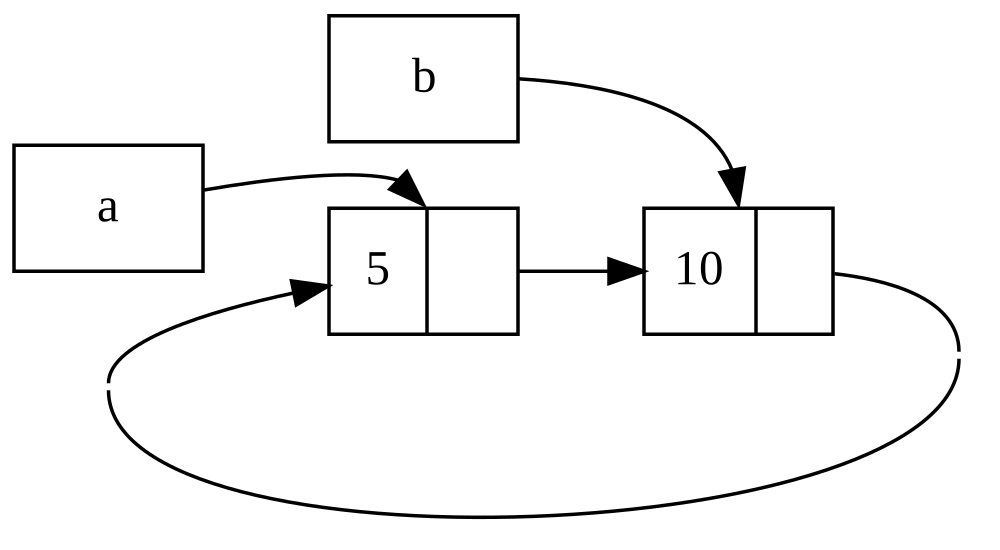
Рисунок 15-4: цикл ссылок из списков a и b,
указывающих друг на друга
Если раскомментировать последний println! и запустить программу, Rust
попытается напечатать этот цикл, где a указывает на b, b указывает на
a и так далее, пока не переполнится стек.
По сравнению с реальной программой последствия создания цикла ссылок в этом примере не слишком серьезны: сразу после создания цикла ссылок программа завершается. Однако если бы более сложная программа выделяла много памяти в цикле и долго удерживала ее, программа использовала бы больше памяти, чем ей нужно, и могла бы перегрузить систему, приведя к нехватке доступной памяти.
Создать циклы ссылок непросто, но все же возможно. Если у вас есть значения
RefCell<T>, содержащие значения Rc<T>, или похожие вложенные сочетания
типов с внутренней изменяемостью и подсчетом ссылок, вы должны убедиться, что
не создаете циклы; нельзя полагаться на Rust в их обнаружении. Создание цикла
ссылок было бы логической ошибкой в вашей программе, вероятность которой
следует уменьшать с помощью автоматизированных тестов, ревью кода и других
практик разработки программного обеспечения.
Другое решение для избегания циклов ссылок – реорганизовать структуры данных
так, чтобы одни ссылки выражали владение, а другие не выражали. В результате у
вас могут быть циклы, состоящие из одних отношений владения и других отношений
без владения, и только отношения владения будут влиять на то, может ли
значение быть удалено. В листинге 15-25 мы всегда хотим, чтобы варианты Cons
владели своим списком, поэтому реорганизовать структуру данных невозможно.
Рассмотрим пример с графами, состоящими из родительских и дочерних узлов,
чтобы увидеть, когда отношения без владения являются подходящим способом
предотвратить циклы ссылок.
Предотвращение циклов ссылок с помощью Weak<T>
До сих пор мы показали, что вызов Rc::clone увеличивает strong_count
экземпляра Rc<T>, а экземпляр Rc<T> очищается только в том случае, если его
strong_count равен 0. Вы также можете создать слабую ссылку на значение
внутри экземпляра Rc<T>, вызвав Rc::downgrade и передав ссылку на Rc<T>.
Сильные ссылки – это способ совместно владеть экземпляром Rc<T>. Слабые
ссылки не выражают отношение владения, и их счетчик не влияет на то, когда
экземпляр Rc<T> очищается. Они не приведут к циклу ссылок, потому что любой
цикл, включающий слабые ссылки, будет разорван, как только счетчик сильных
ссылок участвующих значений станет равен 0.
Когда вы вызываете Rc::downgrade, вы получаете умный указатель типа
Weak<T>. Вместо увеличения strong_count в экземпляре Rc<T> на 1 вызов
Rc::downgrade увеличивает weak_count на 1. Тип Rc<T> использует
weak_count, чтобы отслеживать, сколько ссылок Weak<T> существует, подобно
strong_count. Разница в том, что weak_count не должен быть равен 0, чтобы
экземпляр Rc<T> был очищен.
Поскольку значение, на которое ссылается Weak<T>, могло быть удалено, перед
любой работой со значением, на которое указывает Weak<T>, нужно убедиться,
что значение все еще существует. Для этого вызовите метод upgrade у
экземпляра Weak<T>, который вернет Option<Rc<T>>. Вы получите результат
Some, если значение Rc<T> еще не было удалено, и результат None, если
значение Rc<T> уже удалено. Поскольку upgrade возвращает Option<Rc<T>>,
Rust гарантирует, что случаи Some и None будут обработаны, и недопустимого
указателя не будет.
В качестве примера вместо списка, элементы которого знают только о следующем элементе, мы создадим дерево, элементы которого знают о своих дочерних элементах и родительских элементах.
Создание древовидной структуры данных
Для начала построим дерево с узлами, которые знают о своих дочерних узлах. Мы
создадим структуру с именем Node, которая хранит собственное значение i32,
а также ссылки на свои дочерние значения Node:
Имя файла: src/main.rs
use std::cell::RefCell;
use std::rc::Rc;
#[derive(Debug)]
struct Node {
value: i32,
children: RefCell<Vec<Rc<Node>>>,
}
fn main() {
let leaf = Rc::new(Node {
value: 3,
children: RefCell::new(vec![]),
});
let branch = Rc::new(Node {
value: 5,
children: RefCell::new(vec![Rc::clone(&leaf)]),
});
}Мы хотим, чтобы Node владел своими дочерними узлами, и хотим совместно
использовать это владение с переменными, чтобы получать прямой доступ к
каждому Node в дереве. Для этого мы определяем элементы Vec<T> как
значения типа Rc<Node>. Мы также хотим изменять, какие узлы являются
дочерними для другого узла, поэтому в children у нас есть RefCell<T>,
оборачивающий Vec<Rc<Node>>.
Далее мы используем наше определение структуры и создадим один экземпляр
Node с именем leaf, значением 3 и без дочерних узлов, а также другой
экземпляр с именем branch, значением 5 и leaf в качестве одного из его
дочерних узлов, как показано в листинге 15-27.
use std::cell::RefCell;
use std::rc::Rc;
#[derive(Debug)]
struct Node {
value: i32,
children: RefCell<Vec<Rc<Node>>>,
}
fn main() {
let leaf = Rc::new(Node {
value: 3,
children: RefCell::new(vec![]),
});
let branch = Rc::new(Node {
value: 5,
children: RefCell::new(vec![Rc::clone(&leaf)]),
});
}leaf без дочерних узлов и узла branch, у которого leaf является одним из дочерних узловМы клонируем Rc<Node> в leaf и сохраняем его в branch, что означает:
теперь у Node в leaf два владельца – leaf и branch. Мы можем перейти
от branch к leaf через branch.children, но нет способа перейти от leaf
к branch. Причина в том, что у leaf нет ссылки на branch, и он не знает,
что они связаны. Мы хотим, чтобы leaf знал, что branch является его
родителем. Сделаем это дальше.
Добавление ссылки от дочернего узла к родительскому
Чтобы дочерний узел знал о своем родителе, нужно добавить поле parent в
определение структуры Node. Сложность в том, чтобы решить, каким должен быть
тип parent. Мы знаем, что он не может содержать Rc<T>, потому что это
создало бы цикл ссылок, где leaf.parent указывает на branch, а
branch.children указывает на leaf, из-за чего их значения strong_count
никогда не стали бы равны 0.
Если посмотреть на отношения иначе, родительский узел должен владеть своими дочерними узлами: если родительский узел удаляется, его дочерние узлы тоже должны быть удалены. Однако дочерний узел не должен владеть своим родителем: если мы удалим дочерний узел, родитель все равно должен существовать. Это случай для слабых ссылок!
Поэтому вместо Rc<T> мы сделаем так, чтобы тип parent использовал
Weak<T>, а именно RefCell<Weak<Node>>. Теперь определение нашей структуры
Node выглядит так:
Имя файла: src/main.rs
use std::cell::RefCell;
use std::rc::{Rc, Weak};
#[derive(Debug)]
struct Node {
value: i32,
parent: RefCell<Weak<Node>>,
children: RefCell<Vec<Rc<Node>>>,
}
fn main() {
let leaf = Rc::new(Node {
value: 3,
parent: RefCell::new(Weak::new()),
children: RefCell::new(vec![]),
});
println!("leaf parent = {:?}", leaf.parent.borrow().upgrade());
let branch = Rc::new(Node {
value: 5,
parent: RefCell::new(Weak::new()),
children: RefCell::new(vec![Rc::clone(&leaf)]),
});
*leaf.parent.borrow_mut() = Rc::downgrade(&branch);
println!("leaf parent = {:?}", leaf.parent.borrow().upgrade());
}Узел сможет ссылаться на свой родительский узел, но не будет владеть своим
родителем. В листинге 15-28 мы обновляем main, чтобы использовать это новое
определение, и узел leaf получил способ ссылаться на своего родителя,
branch.
use std::cell::RefCell;
use std::rc::{Rc, Weak};
#[derive(Debug)]
struct Node {
value: i32,
parent: RefCell<Weak<Node>>,
children: RefCell<Vec<Rc<Node>>>,
}
fn main() {
let leaf = Rc::new(Node {
value: 3,
parent: RefCell::new(Weak::new()),
children: RefCell::new(vec![]),
});
println!("leaf parent = {:?}", leaf.parent.borrow().upgrade());
let branch = Rc::new(Node {
value: 5,
parent: RefCell::new(Weak::new()),
children: RefCell::new(vec![Rc::clone(&leaf)]),
});
*leaf.parent.borrow_mut() = Rc::downgrade(&branch);
println!("leaf parent = {:?}", leaf.parent.borrow().upgrade());
}leaf со слабой ссылкой на свой родительский узел branchСоздание узла leaf выглядит похоже на листинг 15-27, за исключением поля
parent: leaf начинает без родителя, поэтому мы создаем новый пустой
экземпляр ссылки Weak<Node>.
В этот момент, когда мы пытаемся получить ссылку на родителя leaf с помощью
метода upgrade, мы получаем значение None. Мы видим это в выводе первого
оператора println!:
leaf parent = None
Когда мы создаем узел branch, у него также будет новая ссылка Weak<Node> в
поле parent, потому что у branch нет родительского узла. При этом leaf
по-прежнему остается одним из дочерних узлов branch. После того как у нас
есть экземпляр Node в branch, мы можем изменить leaf, чтобы дать ему
ссылку Weak<Node> на его родителя. Мы используем метод borrow_mut у
RefCell<Weak<Node>> в поле parent у leaf, а затем используем функцию
Rc::downgrade, чтобы создать ссылку Weak<Node> на branch из Rc<Node> в
branch.
Когда мы снова печатаем родителя leaf, на этот раз получаем вариант Some,
содержащий branch: теперь leaf может получить доступ к своему родителю!
Когда мы печатаем leaf, мы также избегаем цикла, который в листинге 15-26 в
конечном счете приводил к переполнению стека; ссылки Weak<Node> печатаются
как (Weak):
leaf parent = Some(Node { value: 5, parent: RefCell { value: (Weak) },
children: RefCell { value: [Node { value: 3, parent: RefCell { value: (Weak) },
children: RefCell { value: [] } }] } })
Отсутствие бесконечного вывода указывает, что этот код не создал цикл ссылок.
Мы также можем понять это по значениям, которые получаем при вызове
Rc::strong_count и Rc::weak_count.
Визуализация изменений strong_count и weak_count
Посмотрим, как меняются значения strong_count и weak_count экземпляров
Rc<Node>, создав новую внутреннюю область видимости и переместив создание
branch в эту область. Так мы увидим, что происходит, когда branch создается
и затем удаляется при выходе из области видимости. Изменения показаны в
листинге 15-29.
use std::cell::RefCell;
use std::rc::{Rc, Weak};
#[derive(Debug)]
struct Node {
value: i32,
parent: RefCell<Weak<Node>>,
children: RefCell<Vec<Rc<Node>>>,
}
fn main() {
let leaf = Rc::new(Node {
value: 3,
parent: RefCell::new(Weak::new()),
children: RefCell::new(vec![]),
});
println!(
"leaf strong = {}, weak = {}",
Rc::strong_count(&leaf),
Rc::weak_count(&leaf),
);
{
let branch = Rc::new(Node {
value: 5,
parent: RefCell::new(Weak::new()),
children: RefCell::new(vec![Rc::clone(&leaf)]),
});
*leaf.parent.borrow_mut() = Rc::downgrade(&branch);
println!(
"branch strong = {}, weak = {}",
Rc::strong_count(&branch),
Rc::weak_count(&branch),
);
println!(
"leaf strong = {}, weak = {}",
Rc::strong_count(&leaf),
Rc::weak_count(&leaf),
);
}
println!("leaf parent = {:?}", leaf.parent.borrow().upgrade());
println!(
"leaf strong = {}, weak = {}",
Rc::strong_count(&leaf),
Rc::weak_count(&leaf),
);
}branch во внутренней области видимости и изучение счетчиков сильных и слабых ссылокПосле создания leaf его Rc<Node> имеет счетчик сильных ссылок 1 и счетчик
слабых ссылок 0. Во внутренней области видимости мы создаем branch и
связываем его с leaf; в этот момент, когда мы печатаем счетчики, Rc<Node>
в branch будет иметь счетчик сильных ссылок 1 и счетчик слабых ссылок 1
(из-за leaf.parent, указывающего на branch с помощью Weak<Node>). Когда
мы печатаем счетчики в leaf, мы увидим, что у него счетчик сильных ссылок
равен 2, потому что теперь branch хранит клон Rc<Node> из leaf в
branch.children, но счетчик слабых ссылок все еще равен 0.
Когда внутренняя область видимости заканчивается, branch выходит из области
видимости, и счетчик сильных ссылок Rc<Node> уменьшается до 0, поэтому его
Node удаляется. Счетчик слабых ссылок 1 из leaf.parent никак не влияет на
то, будет ли Node удален, поэтому утечки памяти не происходит!
Если мы попробуем получить доступ к родителю leaf после конца области
видимости, снова получим None. В конце программы Rc<Node> в leaf имеет
счетчик сильных ссылок 1 и счетчик слабых ссылок 0, потому что переменная
leaf теперь снова является единственной ссылкой на Rc<Node>.
Вся логика, которая управляет счетчиками и удалением значений, встроена в
Rc<T> и Weak<T> и их реализации трейта Drop. Указав в определении Node,
что отношение от дочернего узла к родителю должно быть ссылкой Weak<T>, вы
можете позволить родительским узлам указывать на дочерние узлы и наоборот, не
создавая цикла ссылок и утечек памяти.
Итоги
В этой главе мы рассмотрели, как использовать умные указатели, чтобы получать
другие гарантии и компромиссы по сравнению с теми, которые Rust по умолчанию
дает с обычными ссылками. Тип Box<T> имеет известный размер и указывает на
данные, выделенные в куче. Тип Rc<T> отслеживает количество ссылок на данные
в куче, чтобы у данных могло быть несколько владельцев. Тип RefCell<T> с его
внутренней изменяемостью дает нам тип, который можно использовать, когда нам
нужен неизменяемый тип, но нужно изменить внутреннее значение этого типа; он
также проверяет правила заимствования во время выполнения, а не во время
компиляции.
Мы также обсудили трейты Deref и Drop, которые обеспечивают значительную
часть функциональности умных указателей. Мы изучили циклы ссылок, которые
могут вызывать утечки памяти, и способы предотвращать их с помощью Weak<T>.
Если эта глава пробудила ваш интерес и вы хотите реализовать собственные умные указатели, загляните в «The Rustonomicon», где есть больше полезной информации.
Далее мы поговорим о конкурентности в Rust. Вы даже узнаете о нескольких новых умных указателях.
Бесстрашная конкурентность
Безопасная и эффективная обработка конкурентного программирования – еще одна из главных целей Rust. Конкурентное программирование, при котором разные части программы выполняются независимо, и параллельное программирование, при котором разные части программы выполняются в одно и то же время, становятся все более важными по мере того, как все больше компьютеров используют преимущества нескольких процессоров. Исторически программирование в таких контекстах было сложным и подверженным ошибкам. Rust надеется это изменить.
Сначала команда Rust считала, что обеспечение безопасности памяти и предотвращение проблем конкурентности – это две отдельные задачи, которые нужно решать разными методами. Со временем команда обнаружила, что системы владения и типов являются мощным набором инструментов, помогающим управлять безопасностью памяти и проблемами конкурентности! Используя владение и проверку типов, Rust превращает многие ошибки конкурентности в ошибки времени компиляции, а не времени выполнения. Поэтому вместо того чтобы тратить много времени на попытки воспроизвести точные обстоятельства, при которых возникает ошибка конкурентности во время выполнения, некорректный код откажется компилироваться и покажет ошибку с объяснением проблемы. В результате вы можете исправить код во время работы над ним, а не потенциально уже после его отправки в рабочую среду. Мы дали этому аспекту Rust прозвище бесстрашная конкурентность. Бесстрашная конкурентность позволяет писать код, свободный от неочевидных ошибок, и легко выполнять рефакторинг без внесения новых ошибок.
Примечание: ради простоты мы будем называть многие проблемы конкурентными, а не использовать более точную формулировку конкурентные и/или параллельные. В этой главе, пожалуйста, мысленно подставляйте конкурентные и/или параллельные всякий раз, когда мы используем конкурентные. В следующей главе, где различие будет иметь большее значение, мы будем точнее.
Многие языки категоричны в отношении решений, которые они предлагают для обработки проблем конкурентности. Например, в Erlang есть элегантная функциональность конкурентности с передачей сообщений, но только труднопонятные способы совместно использовать состояние между потоками. Поддержка только подмножества возможных решений – разумная стратегия для языков более высокого уровня, потому что язык более высокого уровня обещает выгоды от отказа от части контроля ради получения абстракций. Однако от языков более низкого уровня ожидается, что они предоставят решение с лучшей производительностью в любой конкретной ситуации и будут иметь меньше абстракций над оборудованием. Поэтому Rust предлагает разнообразные инструменты для моделирования задач тем способом, который подходит вашей ситуации и требованиям.
Вот темы, которые мы рассмотрим в этой главе:
- Как создавать потоки для одновременного выполнения нескольких фрагментов кода
- Конкурентность с передачей сообщений, при которой каналы отправляют сообщения между потоками
- Конкурентность с общим состоянием, при которой несколько потоков имеют доступ к некоторой части данных
- Трейты
SyncиSend, которые распространяют гарантии конкурентности Rust на пользовательские типы, а также на типы, предоставляемые стандартной библиотекой
Использование потоков для одновременного выполнения кода
Использование потоков для одновременного выполнения кода
В большинстве современных операционных систем код выполняемой программы запускается в процессе, и операционная система управляет несколькими процессами одновременно. Внутри программы у вас также могут быть независимые части, которые выполняются одновременно. Возможности, запускающие эти независимые части, называются потоками. Например, веб-сервер может иметь несколько потоков, чтобы отвечать более чем на один запрос одновременно.
Разделение вычислений в программе на несколько потоков для одновременного выполнения нескольких задач может улучшить производительность, но также добавляет сложность. Поскольку потоки могут выполняться одновременно, нет встроенной гарантии порядка, в котором будут выполняться части вашего кода в разных потоках. Это может привести к таким проблемам, как:
- Состояния гонки, при которых потоки обращаются к данным или ресурсам в несогласованном порядке
- Взаимные блокировки, при которых два потока ждут друг друга, не давая обоим потокам продолжить выполнение
- Ошибки, которые возникают только в определенных ситуациях и которые трудно надежно воспроизвести и исправить
Rust пытается смягчить негативные последствия использования потоков, но программирование в многопоточном контексте все равно требует тщательного обдумывания и структуры кода, отличающейся от программ, работающих в одном потоке.
Языки программирования реализуют потоки несколькими разными способами, и многие операционные системы предоставляют API, который язык программирования может вызывать для создания новых потоков. Стандартная библиотека Rust использует модель реализации потоков 1:1, при которой программа использует один поток операционной системы на один поток языка. Существуют крейты, которые реализуют другие модели потоков с иными компромиссами по сравнению с моделью 1:1. (Асинхронная система Rust, которую мы увидим в следующей главе, также предоставляет другой подход к конкурентности.)
Создание нового потока с помощью spawn
Чтобы создать новый поток, мы вызываем функцию thread::spawn и передаем ей
замыкание (мы говорили о замыканиях в главе 13), содержащее код, который
хотим выполнить в новом потоке. Пример в листинге 16-1 печатает один текст из
основного потока и другой текст из нового потока.
use std::thread;
use std::time::Duration;
fn main() {
thread::spawn(|| {
for i in 1..10 {
println!("hi number {i} from the spawned thread!");
thread::sleep(Duration::from_millis(1));
}
});
for i in 1..5 {
println!("hi number {i} from the main thread!");
thread::sleep(Duration::from_millis(1));
}
}Обратите внимание: когда основной поток программы Rust завершается, все порожденные потоки останавливаются независимо от того, закончили они выполнение или нет. Вывод этой программы каждый раз может немного отличаться, но будет похож на следующий:
hi number 1 from the main thread!
hi number 1 from the spawned thread!
hi number 2 from the main thread!
hi number 2 from the spawned thread!
hi number 3 from the main thread!
hi number 3 from the spawned thread!
hi number 4 from the main thread!
hi number 4 from the spawned thread!
hi number 5 from the spawned thread!
Вызовы thread::sleep заставляют поток остановить выполнение на короткое
время, позволяя запуститься другому потоку. Потоки, вероятно, будут
чередоваться, но это не гарантировано: все зависит от того, как ваша
операционная система планирует потоки. В этом запуске основной поток напечатал
первым, хотя оператор печати из порожденного потока находится в коде раньше. И
хотя мы сказали порожденному потоку печатать, пока i не станет равным 9,
он успел дойти только до 5, прежде чем основной поток завершился.
Если при запуске этого кода вы видите вывод только из основного потока или не видите никакого перекрытия, попробуйте увеличить числа в диапазонах, чтобы создать больше возможностей для операционной системы переключаться между потоками.
Ожидание завершения всех потоков
Код в листинге 16-1 не только чаще всего преждевременно останавливает порожденный поток из-за завершения основного потока, но и, поскольку нет гарантии порядка выполнения потоков, мы также не можем гарантировать, что порожденный поток вообще успеет выполниться!
Мы можем исправить проблему, при которой порожденный поток не запускается или
завершается преждевременно, сохранив возвращаемое значение thread::spawn в
переменной. Возвращаемый тип thread::spawn – JoinHandle<T>.
JoinHandle<T> – это значение во владении, которое при вызове на нем метода
join будет ждать завершения своего потока. Листинг 16-2 показывает, как
использовать JoinHandle<T> потока, созданного нами в листинге 16-1, и как
вызвать join, чтобы убедиться, что порожденный поток завершится до выхода из
main.
use std::thread;
use std::time::Duration;
fn main() {
let handle = thread::spawn(|| {
for i in 1..10 {
println!("hi number {i} from the spawned thread!");
thread::sleep(Duration::from_millis(1));
}
});
for i in 1..5 {
println!("hi number {i} from the main thread!");
thread::sleep(Duration::from_millis(1));
}
handle.join().unwrap();
}JoinHandle<T> из thread::spawn, чтобы гарантировать выполнение потока до концаВызов join у дескриптора блокирует текущий выполняющийся поток, пока поток,
представленный этим дескриптором, не завершится. Блокировка потока означает,
что потоку не дают выполнять работу или завершиться. Поскольку мы поместили
вызов join после цикла for основного потока, запуск листинга 16-2 должен
производить вывод, похожий на этот:
hi number 1 from the main thread!
hi number 2 from the main thread!
hi number 1 from the spawned thread!
hi number 3 from the main thread!
hi number 2 from the spawned thread!
hi number 4 from the main thread!
hi number 3 from the spawned thread!
hi number 4 from the spawned thread!
hi number 5 from the spawned thread!
hi number 6 from the spawned thread!
hi number 7 from the spawned thread!
hi number 8 from the spawned thread!
hi number 9 from the spawned thread!
Два потока продолжают чередоваться, но основной поток ждет из-за вызова
handle.join() и не завершается, пока не завершится порожденный поток.
Но посмотрим, что произойдет, если вместо этого переместить handle.join()
перед циклом for в main, вот так:
use std::thread;
use std::time::Duration;
fn main() {
let handle = thread::spawn(|| {
for i in 1..10 {
println!("hi number {i} from the spawned thread!");
thread::sleep(Duration::from_millis(1));
}
});
handle.join().unwrap();
for i in 1..5 {
println!("hi number {i} from the main thread!");
thread::sleep(Duration::from_millis(1));
}
}Основной поток будет ждать завершения порожденного потока и затем выполнит
свой цикл for, поэтому вывод больше не будет перемежаться, как показано
здесь:
hi number 1 from the spawned thread!
hi number 2 from the spawned thread!
hi number 3 from the spawned thread!
hi number 4 from the spawned thread!
hi number 5 from the spawned thread!
hi number 6 from the spawned thread!
hi number 7 from the spawned thread!
hi number 8 from the spawned thread!
hi number 9 from the spawned thread!
hi number 1 from the main thread!
hi number 2 from the main thread!
hi number 3 from the main thread!
hi number 4 from the main thread!
Мелкие детали, например место вызова join, могут влиять на то, будут ли ваши
потоки выполняться одновременно.
Использование move-замыканий с потоками
Мы часто будем использовать ключевое слово move с замыканиями, передаваемыми
в thread::spawn, потому что тогда замыкание забирает владение значениями,
которые использует из окружения, тем самым передавая владение этими значениями
из одного потока в другой. В разделе «Захват ссылок или перемещение
владения» главы 13 мы обсуждали move в контексте
замыканий. Теперь мы сосредоточимся подробнее на взаимодействии между move и
thread::spawn.
Обратите внимание, что в листинге 16-1 замыкание, которое мы передаем в
thread::spawn, не принимает аргументов: мы не используем никаких данных из
основного потока в коде порожденного потока. Чтобы использовать данные из
основного потока в порожденном потоке, замыкание порожденного потока должно
захватить нужные ему значения. Листинг 16-3 показывает попытку создать вектор
в основном потоке и использовать его в порожденном потоке. Однако это пока не
сработает, как вы сейчас увидите.
use std::thread;
fn main() {
let v = vec![1, 2, 3];
let handle = thread::spawn(|| {
println!("Here's a vector: {v:?}");
});
handle.join().unwrap();
}Замыкание использует v, поэтому оно захватит v и сделает его частью
окружения замыкания. Поскольку thread::spawn запускает это замыкание в новом
потоке, мы должны были бы иметь возможность получить доступ к v внутри этого
нового потока. Но когда мы компилируем этот пример, получаем следующую ошибку:
$ cargo run
Compiling threads v0.1.0 (file:///projects/threads)
error[E0373]: closure may outlive the current function, but it borrows `v`, which is owned by the current function
--> src/main.rs:6:32
|
6 | let handle = thread::spawn(|| {
| ^^ may outlive borrowed value `v`
7 | println!("Here's a vector: {v:?}");
| - `v` is borrowed here
|
note: function requires argument type to outlive `'static`
--> src/main.rs:6:18
|
6 | let handle = thread::spawn(|| {
| __________________^
7 | | println!("Here's a vector: {v:?}");
8 | | });
| |______^
help: to force the closure to take ownership of `v` (and any other referenced variables), use the `move` keyword
|
6 | let handle = thread::spawn(move || {
| ++++
For more information about this error, try `rustc --explain E0373`.
error: could not compile `threads` (bin "threads") due to 1 previous error
Rust выводит, как захватить v, и поскольку println! нужна только ссылка
на v, замыкание пытается заимствовать v. Однако есть проблема: Rust не
может сказать, как долго будет выполняться порожденный поток, поэтому он не
знает, всегда ли ссылка на v будет допустимой.
Листинг 16-4 показывает сценарий, в котором ссылка на v с большей
вероятностью окажется недопустимой.
use std::thread;
fn main() {
let v = vec![1, 2, 3];
let handle = thread::spawn(|| {
println!("Here's a vector: {v:?}");
});
drop(v); // oh no!
handle.join().unwrap();
}v из основного потока, удаляющего vЕсли бы Rust позволил нам выполнить этот код, существовала бы возможность, что
порожденный поток будет немедленно переведен в фон, вообще не начав
выполняться. Внутри порожденного потока есть ссылка на v, но основной поток
сразу удаляет v с помощью функции drop, которую мы обсуждали в главе 15.
Затем, когда порожденный поток начнет выполняться, v уже больше не будет
допустимым, поэтому ссылка на него тоже будет недопустимой. О нет!
Чтобы исправить ошибку компилятора в листинге 16-3, можно воспользоваться советом из сообщения об ошибке:
help: to force the closure to take ownership of `v` (and any other referenced variables), use the `move` keyword
|
6 | let handle = thread::spawn(move || {
| ++++
Добавляя ключевое слово move перед замыканием, мы заставляем замыкание
забрать владение значениями, которые оно использует, вместо того чтобы
позволить Rust вывести, что значения нужно заимствовать. Изменение листинга
16-3, показанное в листинге 16-5, скомпилируется и выполнится так, как мы
ожидаем.
use std::thread;
fn main() {
let v = vec![1, 2, 3];
let handle = thread::spawn(move || {
println!("Here's a vector: {v:?}");
});
handle.join().unwrap();
}move, чтобы заставить замыкание забрать владение используемыми значениямиУ нас мог бы возникнуть соблазн попробовать то же самое, чтобы исправить код
из листинга 16-4, где основной поток вызвал drop, используя move-замыкание.
Однако это исправление не сработает, потому что то, что пытается сделать
листинг 16-4, запрещено по другой причине. Если бы мы добавили move к
замыканию, мы переместили бы v в окружение замыкания и больше не смогли бы
вызвать drop для него в основном потоке. Вместо этого мы получили бы такую
ошибку компилятора:
$ cargo run
Compiling threads v0.1.0 (file:///projects/threads)
error[E0382]: use of moved value: `v`
--> src/main.rs:10:10
|
4 | let v = vec![1, 2, 3];
| - move occurs because `v` has type `Vec<i32>`, which does not implement the `Copy` trait
5 |
6 | let handle = thread::spawn(move || {
| ------- value moved into closure here
7 | println!("Here's a vector: {v:?}");
| - variable moved due to use in closure
...
10 | drop(v); // oh no!
| ^ value used here after move
|
help: consider cloning the value before moving it into the closure
|
6 ~ let value = v.clone();
7 ~ let handle = thread::spawn(move || {
8 ~ println!("Here's a vector: {value:?}");
|
For more information about this error, try `rustc --explain E0382`.
error: could not compile `threads` (bin "threads") due to 1 previous error
Правила владения Rust снова нас спасли! Мы получили ошибку из кода в листинге
16-3, потому что Rust действовал консервативно и только заимствовал v для
потока, а это означало, что основной поток теоретически мог сделать ссылку
порожденного потока недопустимой. Сказав Rust переместить владение v в
порожденный поток, мы гарантируем Rust, что основной поток больше не будет
использовать v. Если мы изменим листинг 16-4 таким же образом, то нарушим
правила владения, когда попытаемся использовать v в основном потоке.
Ключевое слово move переопределяет консервативное поведение Rust по
умолчанию, при котором используется заимствование; оно не позволяет нарушать
правила владения.
Теперь, когда мы рассмотрели, что такое потоки и какие методы предоставляет API потоков, посмотрим на некоторые ситуации, в которых можно использовать потоки.
Передача данных между потоками через передачу сообщений
Передача данных между потоками с помощью передачи сообщений
Один все более популярный подход к обеспечению безопасной конкурентности – передача сообщений, при которой потоки или акторы общаются, отправляя друг другу сообщения с данными. Вот идея в виде лозунга из документации языка Go: “Не общайтесь, разделяя память; вместо этого разделяйте память, общаясь.”
Чтобы реализовать конкурентность с отправкой сообщений, стандартная библиотека Rust предоставляет реализацию каналов. Канал – это общее понятие в программировании, с помощью которого данные отправляются из одного потока в другой.
Канал в программировании можно представить как направленный водный канал, например ручей или реку. Если поместить в реку что-то вроде резиновой уточки, она поплывет вниз по течению к концу водного пути.
У канала есть две половины: передатчик и приемник. Половина-передатчик – это место выше по течению, где вы кладете резиновую уточку в реку, а половина-приемник – это место, куда резиновая уточка попадает ниже по течению. Одна часть вашего кода вызывает методы у передатчика с данными, которые нужно отправить, а другая часть проверяет принимающий конец на наличие прибывших сообщений. Канал считается закрытым, если либо половина передатчика, либо половина приемника была удалена.
Здесь мы постепенно придем к программе, в которой один поток генерирует значения и отправляет их по каналу, а другой поток принимает значения и печатает их. Мы будем отправлять простые значения между потоками с помощью канала, чтобы продемонстрировать эту возможность. Когда вы познакомитесь с этой техникой, вы сможете использовать каналы для любых потоков, которым нужно общаться друг с другом: например, для системы чата или системы, где множество потоков выполняют части вычисления и отправляют эти части одному потоку, который агрегирует результаты.
Сначала в листинге 16-6 мы создадим канал, но ничего с ним делать не будем. Обратите внимание, что этот код пока не скомпилируется, потому что Rust не может определить, значения какого типа мы хотим отправлять по каналу.
use std::sync::mpsc;
fn main() {
let (tx, rx) = mpsc::channel();
}tx и rxМы создаем новый канал с помощью функции mpsc::channel; mpsc означает
multiple producer, single consumer – несколько производителей, один
потребитель. Коротко говоря, способ реализации каналов в стандартной
библиотеке Rust означает, что канал может иметь несколько отправляющих
концов, которые производят значения, но только один принимающий конец,
который потребляет эти значения. Представьте, что несколько ручьев сливаются в
одну большую реку: все, что отправлено вниз по любому из ручьев, в конце
окажется в одной реке. Пока мы начнем с одного производителя, но добавим
нескольких производителей, когда этот пример заработает.
Функция mpsc::channel возвращает кортеж: первый элемент – отправляющий
конец, передатчик, а второй элемент – принимающий конец, приемник. Сокращения
tx и rx традиционно используются во многих областях для transmitter
(передатчик) и receiver (приемник) соответственно, поэтому мы называем
переменные именно так, чтобы обозначить каждый конец. Мы используем инструкцию let с
шаблоном, который деструктурирует кортеж; использование шаблонов в инструкциях
let и деструктуризацию мы обсудим в главе 19. Пока достаточно знать, что
использование инструкции let таким способом – удобный подход для извлечения
частей кортежа, возвращаемого mpsc::channel.
Переместим отправляющий конец в порожденный поток и заставим его отправить одну строку, чтобы порожденный поток общался с основным потоком, как показано в листинге 16-7. Это похоже на помещение резиновой уточки в реку выше по течению или отправку сообщения чата из одного потока в другой.
use std::sync::mpsc;
use std::thread;
fn main() {
let (tx, rx) = mpsc::channel();
thread::spawn(move || {
let val = String::from("hi");
tx.send(val).unwrap();
});
}tx в порожденный поток и отправка "hi"Снова мы используем thread::spawn для создания нового потока, а затем
используем move, чтобы переместить tx в замыкание, и порожденный поток
стал владельцем tx. Порожденный поток должен владеть передатчиком, чтобы
иметь возможность отправлять сообщения через канал.
У передатчика есть метод send, принимающий значение, которое мы хотим
отправить. Метод send возвращает тип Result<T, E>, поэтому если приемник
уже был удален и отправлять значение больше некуда, операция отправки вернет
ошибку. В этом примере мы вызываем unwrap, чтобы вызвать панику в случае
ошибки. Но в настоящем приложении мы обработали бы ее правильно: вернитесь к
главе 9, чтобы вспомнить стратегии корректной обработки ошибок.
В листинге 16-8 мы получим значение из приемника в основном потоке. Это похоже на извлечение резиновой уточки из воды в конце реки или получение сообщения чата.
use std::sync::mpsc;
use std::thread;
fn main() {
let (tx, rx) = mpsc::channel();
thread::spawn(move || {
let val = String::from("hi");
tx.send(val).unwrap();
});
let received = rx.recv().unwrap();
println!("Got: {received}");
}"hi" в основном потоке и его печатьУ приемника есть два полезных метода: recv и try_recv. Мы используем
recv, сокращение от receive, который блокирует выполнение основного потока
и ждет, пока значение не будет отправлено по каналу. Как только значение
отправлено, recv вернет его в Result<T, E>. Когда передатчик закрывается,
recv возвращает ошибку, сигнализируя, что больше значений не будет.
Метод try_recv не блокирует, а вместо этого сразу возвращает Result<T, E>:
значение Ok, содержащее сообщение, если оно доступно, и значение Err, если
сообщений в этот раз нет. Использование try_recv полезно, если этому потоку
нужно выполнять другую работу, пока он ждет сообщений: мы могли бы написать
цикл, который время от времени вызывает try_recv, обрабатывает сообщение,
если оно доступно, а иначе некоторое время выполняет другую работу до
следующей проверки.
В этом примере для простоты мы использовали recv; у основного потока нет
другой работы, кроме ожидания сообщений, поэтому блокировка основного потока
здесь уместна.
Когда мы запустим код из листинга 16-8, мы увидим значение, напечатанное из основного потока:
Got: hi
Отлично!
Передача владения через каналы
Правила владения играют жизненно важную роль в отправке сообщений, потому что
они помогают писать безопасный конкурентный код. Предотвращение ошибок в
конкурентном программировании – преимущество мышления о владении во всех
ваших программах на Rust. Проведем эксперимент, чтобы показать, как каналы и
владение работают вместе для предотвращения проблем: мы попробуем использовать
значение val в порожденном потоке после того, как отправим его по каналу.
Попробуйте скомпилировать код из листинга 16-9, чтобы увидеть, почему этот код
не разрешен.
use std::sync::mpsc;
use std::thread;
fn main() {
let (tx, rx) = mpsc::channel();
thread::spawn(move || {
let val = String::from("hi");
tx.send(val).unwrap();
println!("val is {val}");
});
let received = rx.recv().unwrap();
println!("Got: {received}");
}val после того, как мы отправили его по каналуЗдесь мы пытаемся напечатать val после того, как отправили его по каналу
через tx.send. Разрешить это было бы плохой идеей: после отправки значения в
другой поток этот поток мог бы изменить или удалить его до того, как мы
попробуем использовать значение снова. Потенциально изменения, внесенные другим
потоком, могли бы вызвать ошибки или неожиданные результаты из-за
несогласованных или несуществующих данных. Однако Rust выдает ошибку, если мы
пытаемся скомпилировать код из листинга 16-9:
$ cargo run
Compiling message-passing v0.1.0 (file:///projects/message-passing)
error[E0382]: borrow of moved value: `val`
--> src/main.rs:10:27
|
8 | let val = String::from("hi");
| --- move occurs because `val` has type `String`, which does not implement the `Copy` trait
9 | tx.send(val).unwrap();
| --- value moved here
10 | println!("val is {val}");
| ^^^ value borrowed here after move
|
= note: this error originates in the macro `$crate::format_args_nl` which comes from the expansion of the macro `println` (in Nightly builds, run with -Z macro-backtrace for more info)
For more information about this error, try `rustc --explain E0382`.
error: could not compile `message-passing` (bin "message-passing") due to 1 previous error
Наша ошибка конкурентности привела к ошибке времени компиляции. Функция send
забирает владение своим параметром, и когда значение перемещается, приемник
получает владение им. Это не дает нам случайно использовать значение снова
после отправки; система владения проверяет, что все в порядке.
Отправка нескольких значений
Код в листинге 16-8 скомпилировался и выполнился, но он не показал нам ясно, что два отдельных потока разговаривают друг с другом через канал.
В листинге 16-10 мы внесли некоторые изменения, которые докажут, что код из листинга 16-8 выполняется конкурентно: теперь порожденный поток будет отправлять несколько сообщений и делать паузу в одну секунду между каждым сообщением.
use std::sync::mpsc;
use std::thread;
use std::time::Duration;
fn main() {
let (tx, rx) = mpsc::channel();
thread::spawn(move || {
let vals = vec![
String::from("hi"),
String::from("from"),
String::from("the"),
String::from("thread"),
];
for val in vals {
tx.send(val).unwrap();
thread::sleep(Duration::from_secs(1));
}
});
for received in rx {
println!("Got: {received}");
}
}На этот раз у порожденного потока есть вектор строк, которые мы хотим
отправить в основной поток. Мы перебираем их, отправляя каждую отдельно, и
делаем паузу между отправками, вызывая функцию thread::sleep со значением
Duration в одну секунду.
В основном потоке мы больше не вызываем функцию recv явно: вместо этого мы
обращаемся с rx как с итератором. Для каждого полученного значения мы
печатаем его. Когда канал закрывается, итерация завершится.
При запуске кода из листинга 16-10 вы должны увидеть следующий вывод с секундной паузой между строками:
Got: hi
Got: from
Got: the
Got: thread
Поскольку у нас нет кода, который делает паузу или задержку в цикле for
основного потока, мы можем сказать, что основной поток ждет получения значений
из порожденного потока.
Создание нескольких производителей
Ранее мы упоминали, что mpsc – это сокращение от multiple producer, single
consumer – несколько производителей, один потребитель. Используем mpsc и
расширим код из листинга 16-10, чтобы создать несколько потоков, каждый из
которых отправляет значения одному и тому же приемнику. Мы можем сделать это,
клонировав передатчик, как показано в листинге 16-11.
use std::sync::mpsc;
use std::thread;
use std::time::Duration;
fn main() {
// --snip--
let (tx, rx) = mpsc::channel();
let tx1 = tx.clone();
thread::spawn(move || {
let vals = vec![
String::from("hi"),
String::from("from"),
String::from("the"),
String::from("thread"),
];
for val in vals {
tx1.send(val).unwrap();
thread::sleep(Duration::from_secs(1));
}
});
thread::spawn(move || {
let vals = vec![
String::from("more"),
String::from("messages"),
String::from("for"),
String::from("you"),
];
for val in vals {
tx.send(val).unwrap();
thread::sleep(Duration::from_secs(1));
}
});
for received in rx {
println!("Got: {received}");
}
// --snip--
}На этот раз перед созданием первого порожденного потока мы вызываем clone у
передатчика. Это даст нам новый передатчик, который мы сможем передать первому
порожденному потоку. Исходный передатчик мы передаем второму порожденному
потоку. Так мы получаем два потока, каждый из которых отправляет разные
сообщения одному приемнику.
Когда вы запустите код, ваш вывод должен выглядеть примерно так:
Got: hi
Got: more
Got: from
Got: messages
Got: for
Got: the
Got: thread
Got: you
Вы можете увидеть значения в другом порядке в зависимости от вашей системы.
Именно это делает конкурентность одновременно интересной и трудной. Если
поэкспериментировать с thread::sleep, задавая разные значения в разных
потоках, каждый запуск станет более недетерминированным и каждый раз будет
создавать разный вывод.
Теперь, когда мы посмотрели, как работают каналы, рассмотрим другой метод конкурентности.
Конкурентность через совместное состояние
Конкурентность с общим состоянием
Передача сообщений – хороший способ работать с конкурентностью, но не единственный. Другой способ заключается в том, чтобы несколько потоков получали доступ к одним и тем же общим данным. Снова рассмотрим эту часть лозунга из документации языка Go: “Не общайтесь, разделяя память.”
Как выглядело бы общение через разделение памяти? Кроме того, почему сторонники передачи сообщений предостерегают от использования общей памяти?
В некотором смысле каналы в любом языке программирования похожи на единоличное владение, потому что после передачи значения по каналу вы больше не должны использовать это значение. Конкурентность с общей памятью похожа на множественное владение: несколько потоков могут получать доступ к одному и тому же участку памяти одновременно. Как вы видели в главе 15, где умные указатели сделали возможным множественное владение, множественное владение может добавлять сложность, потому что этими разными владельцами нужно управлять. Система типов и правила владения Rust сильно помогают делать это управление правильно. В качестве примера рассмотрим мьютексы, один из наиболее распространенных примитивов конкурентности для общей памяти.
Управление доступом с помощью мьютексов
Мьютекс – это сокращение от mutual exclusion, то есть взаимное исключение: мьютекс позволяет только одному потоку получать доступ к некоторым данным в любой конкретный момент времени. Чтобы получить доступ к данным в мьютексе, поток сначала должен сообщить, что хочет доступ, запросив захват блокировки мьютекса. Блокировка – это структура данных, являющаяся частью мьютекса и отслеживающая, кто в данный момент имеет исключительный доступ к данным. Поэтому говорят, что мьютекс защищает хранимые им данные с помощью системы блокировки.
Мьютексы имеют репутацию сложных в использовании, потому что нужно помнить два правила:
- Перед использованием данных нужно попытаться захватить блокировку.
- Когда вы закончили работу с данными, которые защищает мьютекс, нужно разблокировать данные, чтобы другие потоки могли захватить блокировку.
Для метафоры мьютекса из реального мира представьте панельную дискуссию на конференции, где есть только один микрофон. Прежде чем участник дискуссии сможет говорить, он должен попросить или подать сигнал, что хочет использовать микрофон. Получив микрофон, он может говорить сколько хочет, а затем передать микрофон следующему участнику, который просит слова. Если участник забудет передать микрофон, когда закончит говорить, никто другой не сможет высказаться. Если управление общим микрофоном пойдет неправильно, панельная дискуссия не будет работать как задумано!
Правильно управлять мьютексами может быть невероятно трудно, и именно поэтому так много людей с энтузиазмом относятся к каналам. Однако благодаря системе типов и правилам владения Rust вы не сможете ошибиться с блокировкой и разблокировкой.
API Mutex<T>
В качестве примера использования мьютекса начнем с мьютекса в однопоточном контексте, как показано в листинге 16-12.
use std::sync::Mutex;
fn main() {
let m = Mutex::new(5);
{
let mut num = m.lock().unwrap();
*num = 6;
}
println!("m = {m:?}");
}Mutex<T> в однопоточном контексте для простотыКак и со многими типами, мы создаем Mutex<T> с помощью связанной функции
new. Чтобы получить доступ к данным внутри мьютекса, мы используем метод
lock для захвата блокировки. Этот вызов заблокирует текущий поток, чтобы он
не мог выполнять никакую работу, пока не наступит наша очередь владеть
блокировкой.
Вызов lock завершился бы ошибкой, если бы другой поток, удерживающий
блокировку, вызвал панику. В таком случае никто уже не смог бы получить
блокировку, поэтому мы выбрали unwrap, чтобы этот поток вызвал панику, если
мы окажемся в такой ситуации.
После захвата блокировки мы можем обращаться с возвращаемым значением, которое
в этом случае называется num, как с изменяемой ссылкой на внутренние данные.
Система типов гарантирует, что мы захватим блокировку перед использованием
значения в m. Тип m – Mutex<i32>, а не i32, поэтому мы должны
вызвать lock, чтобы иметь возможность использовать значение i32. Мы не
можем забыть; иначе система типов не даст нам доступ к внутреннему i32.
Вызов lock возвращает тип MutexGuard, обернутый в LockResult, который мы
обработали вызовом unwrap. Тип MutexGuard реализует Deref, чтобы
указывать на наши внутренние данные; этот тип также имеет реализацию Drop,
которая автоматически освобождает блокировку, когда MutexGuard выходит из
области видимости, что происходит в конце внутренней области видимости. В
результате мы не рискуем забыть освободить блокировку и заблокировать
использование мьютекса другими потоками, потому что освобождение блокировки
происходит автоматически.
После удаления блокировки мы можем напечатать значение мьютекса и увидеть, что
смогли изменить внутреннее i32 на 6.
Общий доступ к Mutex<T>
Теперь попробуем разделить значение между несколькими потоками с помощью
Mutex<T>. Мы запустим 10 потоков и заставим каждый из них увеличить значение
счетчика на 1, так что счетчик пройдет от 0 до 10. Пример в листинге 16-13
получит ошибку компилятора, и мы используем эту ошибку, чтобы узнать больше об
использовании Mutex<T> и о том, как Rust помогает использовать его правильно.
use std::sync::Mutex;
use std::thread;
fn main() {
let counter = Mutex::new(0);
let mut handles = vec![];
for _ in 0..10 {
let handle = thread::spawn(move || {
let mut num = counter.lock().unwrap();
*num += 1;
});
handles.push(handle);
}
for handle in handles {
handle.join().unwrap();
}
println!("Result: {}", *counter.lock().unwrap());
}Mutex<T>Мы создаем переменную counter, чтобы хранить i32 внутри Mutex<T>, как мы
делали в листинге 16-12. Затем мы создаем 10 потоков, итерируясь по диапазону
чисел. Мы используем thread::spawn и передаем всем потокам одно и то же
замыкание: оно перемещает счетчик в поток, захватывает блокировку Mutex<T>
вызовом метода lock, а затем добавляет 1 к значению в мьютексе. Когда поток
заканчивает выполнение своего замыкания, num выходит из области видимости и
освобождает блокировку, чтобы другой поток мог ее захватить.
В основном потоке мы собираем все дескрипторы соединения. Затем, как мы делали
в листинге 16-2, вызываем join для каждого дескриптора, чтобы убедиться, что
все потоки завершились. В этот момент основной поток захватит блокировку и
напечатает результат этой программы.
Мы намекнули, что этот пример не скомпилируется. Теперь выясним почему!
$ cargo run
Compiling shared-state v0.1.0 (file:///projects/shared-state)
error[E0382]: borrow of moved value: `counter`
--> src/main.rs:21:29
|
5 | let counter = Mutex::new(0);
| ------- move occurs because `counter` has type `std::sync::Mutex<i32>`, which does not implement the `Copy` trait
...
8 | for _ in 0..10 {
| -------------- inside of this loop
9 | let handle = thread::spawn(move || {
| ------- value moved into closure here, in previous iteration of loop
...
21 | println!("Result: {}", *counter.lock().unwrap());
| ^^^^^^^ value borrowed here after move
|
help: consider moving the expression out of the loop so it is only moved once
|
8 ~ let mut value = counter.lock();
9 ~ for _ in 0..10 {
10 | let handle = thread::spawn(move || {
11 ~ let mut num = value.unwrap();
|
For more information about this error, try `rustc --explain E0382`.
error: could not compile `shared-state` (bin "shared-state") due to 1 previous error
Сообщение об ошибке говорит, что значение counter было перемещено на
предыдущей итерации цикла. Rust сообщает нам, что мы не можем переместить
владение мьютексом counter в несколько потоков. Исправим ошибку
компилятора с помощью метода множественного владения, который мы обсуждали в
главе 15.
Множественное владение с несколькими потоками
В главе 15 мы дали значению нескольких владельцев, используя умный указатель
Rc<T> для создания значения с подсчетом ссылок. Сделаем здесь то же самое и
посмотрим, что произойдет. В листинге 16-14 мы обернем Mutex<T> в Rc<T> и
клонируем Rc<T> перед перемещением владения в поток.
use std::rc::Rc;
use std::sync::Mutex;
use std::thread;
fn main() {
let counter = Rc::new(Mutex::new(0));
let mut handles = vec![];
for _ in 0..10 {
let counter = Rc::clone(&counter);
let handle = thread::spawn(move || {
let mut num = counter.lock().unwrap();
*num += 1;
});
handles.push(handle);
}
for handle in handles {
handle.join().unwrap();
}
println!("Result: {}", *counter.lock().unwrap());
}Rc<T>, чтобы позволить нескольким потокам владеть Mutex<T>Снова компилируем и получаем… другие ошибки! Компилятор многому нас учит:
$ cargo run
Compiling shared-state v0.1.0 (file:///projects/shared-state)
error[E0277]: `Rc<std::sync::Mutex<i32>>` cannot be sent between threads safely
--> src/main.rs:11:36
|
11 | let handle = thread::spawn(move || {
| ------------- ^------
| | |
| ______________________|_____________within this `{closure@src/main.rs:11:36: 11:43}`
| | |
| | required by a bound introduced by this call
12 | | let mut num = counter.lock().unwrap();
13 | |
14 | | *num += 1;
15 | | });
| |_________^ `Rc<std::sync::Mutex<i32>>` cannot be sent between threads safely
|
= help: within `{closure@src/main.rs:11:36: 11:43}`, the trait `Send` is not implemented for `Rc<std::sync::Mutex<i32>>`
note: required because it's used within this closure
--> src/main.rs:11:36
|
11 | let handle = thread::spawn(move || {
| ^^^^^^^
note: required by a bound in `spawn`
--> /rustc/1159e78c4747b02ef996e55082b704c09b970588/library/std/src/thread/mod.rs:723:1
For more information about this error, try `rustc --explain E0277`.
error: could not compile `shared-state` (bin "shared-state") due to 1 previous error
Ого, это сообщение об ошибке очень многословное! Вот важная часть, на которой
нужно сосредоточиться: `Rc<Mutex<i32>>` cannot be sent between threads safely. Компилятор также сообщает нам причину: the trait `Send` is not implemented for `Rc<Mutex<i32>>`. Мы поговорим о Send в следующем
разделе: это один из трейтов, гарантирующих, что типы, которые мы используем с
потоками, предназначены для использования в конкурентных ситуациях.
К сожалению, Rc<T> небезопасно разделять между потоками. Когда Rc<T>
управляет счетчиком ссылок, он добавляет к счетчику при каждом вызове clone
и вычитает из счетчика, когда каждый клон удаляется. Но он не использует
никаких примитивов конкурентности, чтобы гарантировать, что изменения счетчика
не могут быть прерваны другим потоком. Это могло бы привести к неправильным
счетчикам – неочевидным ошибкам, которые, в свою очередь, могли бы привести к
утечкам памяти или удалению значения до того, как мы закончили с ним работать.
Нам нужен тип, который точно такой же, как Rc<T>, но изменяет счетчик ссылок
потокобезопасным способом.
Атомарный подсчет ссылок с Arc<T>
К счастью, Arc<T> является типом вроде Rc<T>, который безопасно
использовать в конкурентных ситуациях. Буква a означает atomic, то есть
это тип с атомарным подсчетом ссылок. Атомарные операции – дополнительный
вид примитивов конкурентности, который мы не будем подробно рассматривать
здесь: подробнее смотрите документацию стандартной библиотеки для
std::sync::atomic. На этом этапе вам нужно знать
только, что атомарные типы работают как примитивные типы, но их безопасно
разделять между потоками.
После этого вы можете задаться вопросом, почему все примитивные типы не
атомарные и почему типы стандартной библиотеки по умолчанию не реализованы с
использованием Arc<T>. Причина в том, что потокобезопасность имеет издержки
производительности, которые вы хотите платить только тогда, когда они
действительно нужны. Если вы просто выполняете операции над значениями внутри
одного потока, ваш код может работать быстрее, если ему не приходится
обеспечивать гарантии, которые дают атомарные операции.
Вернемся к нашему примеру: у Arc<T> и Rc<T> одинаковый API, поэтому мы
исправим программу, изменив строку use, вызов new и вызов clone. Код в
листинге 16-15 наконец скомпилируется и выполнится.
use std::sync::{Arc, Mutex};
use std::thread;
fn main() {
let counter = Arc::new(Mutex::new(0));
let mut handles = vec![];
for _ in 0..10 {
let counter = Arc::clone(&counter);
let handle = thread::spawn(move || {
let mut num = counter.lock().unwrap();
*num += 1;
});
handles.push(handle);
}
for handle in handles {
handle.join().unwrap();
}
println!("Result: {}", *counter.lock().unwrap());
}Arc<T> для оборачивания Mutex<T>, чтобы иметь возможность совместно владеть им из нескольких потоковЭтот код напечатает следующее:
Result: 10
У нас получилось! Мы посчитали от 0 до 10, что может показаться не очень
впечатляющим, но это многое рассказало нам о Mutex<T> и потокобезопасности.
Вы также могли бы использовать структуру этой программы для более сложных
операций, чем простое увеличение счетчика. Используя эту стратегию, вы можете
разделить вычисление на независимые части, распределить эти части по потокам,
а затем использовать Mutex<T>, чтобы каждый поток обновил итоговый результат
своей частью.
Обратите внимание, что если вы выполняете простые числовые операции, есть типы
проще, чем типы Mutex<T>, предоставляемые модулем std::sync::atomic
стандартной библиотеки.
Эти типы предоставляют безопасный, конкурентный, атомарный доступ к
примитивным типам. В этом примере мы выбрали Mutex<T> с примитивным типом,
чтобы сосредоточиться на том, как работает Mutex<T>.
Сравнение RefCell<T>/Rc<T> и Mutex<T>/Arc<T>
Вы могли заметить, что counter неизменяем, но мы смогли получить изменяемую
ссылку на значение внутри него; это означает, что Mutex<T> предоставляет
внутреннюю изменяемость, как это делает семейство Cell. Так же как мы
использовали RefCell<T> в главе 15, чтобы позволить изменять содержимое
внутри Rc<T>, мы используем Mutex<T>, чтобы изменять содержимое внутри
Arc<T>.
Еще одна деталь, которую нужно отметить: Rust не может защитить вас от всех
видов логических ошибок при использовании Mutex<T>. Вспомните из главы 15,
что использование Rc<T> сопровождалось риском создания циклов ссылок, когда
два значения Rc<T> ссылаются друг на друга, вызывая утечки памяти. Подобным
образом Mutex<T> сопровождается риском создания взаимных блокировок. Они
возникают, когда операции требуется заблокировать два ресурса, а два потока уже
захватили по одной из блокировок, из-за чего они вечно ждут друг друга. Если
вам интересны взаимные блокировки, попробуйте создать Rust-программу, в
которой есть взаимная блокировка; затем изучите стратегии смягчения взаимных
блокировок для мьютексов в любом языке и попробуйте реализовать их в Rust.
Документация API стандартной библиотеки для Mutex<T> и MutexGuard содержит
полезную информацию.
Мы завершим эту главу разговором о трейтах Send и Sync и о том, как
использовать их с пользовательскими типами.
Расширяемая конкурентность с Send и Sync
Расширяемая конкурентность с Send и Sync
Интересно, что почти все возможности конкурентности, о которых мы говорили до сих пор в этой главе, были частью стандартной библиотеки, а не языка. Ваши варианты работы с конкурентностью не ограничены языком или стандартной библиотекой; вы можете написать собственные возможности конкурентности или использовать написанные другими.
Однако среди ключевых концепций конкурентности, встроенных именно в язык, а не
в стандартную библиотеку, находятся трейты std::marker Send и Sync.
Передача владения между потоками
Маркерный трейт Send указывает, что владение значениями типа, реализующего
Send, можно передавать между потоками. Почти каждый тип Rust реализует
Send, но есть некоторые исключения, включая Rc<T>: этот тип не может
реализовать Send, потому что если бы вы клонировали значение Rc<T> и
попытались передать владение клоном в другой поток, оба потока могли бы
обновлять счетчик ссылок одновременно. По этой причине Rc<T> реализован для
использования в однопоточных ситуациях, где вы не хотите платить
производительностью за потокобезопасность.
Поэтому система типов и ограничения трейтов Rust гарантируют, что вы никогда
не сможете случайно небезопасно отправить значение Rc<T> между потоками.
Когда мы попытались сделать это в листинге 16-14, мы получили ошибку the trait `Send` is not implemented for `Rc<Mutex<i32>>`. Когда мы перешли на
Arc<T>, который реализует Send, код скомпилировался.
Любой тип, полностью состоящий из типов Send, также автоматически помечается
как Send. Почти все примитивные типы являются Send, за исключением сырых
указателей, которые мы обсудим в главе 20.
Доступ из нескольких потоков
Маркерный трейт Sync указывает, что на тип, реализующий Sync, безопасно
ссылаться из нескольких потоков. Другими словами, любой тип T реализует
Sync, если &T (неизменяемая ссылка на T) реализует Send, что означает,
что ссылку можно безопасно отправить в другой поток. Подобно Send, все
примитивные типы реализуют Sync, и типы, полностью состоящие из типов,
реализующих Sync, также реализуют Sync.
Умный указатель Rc<T> также не реализует Sync по тем же причинам, по
которым он не реализует Send. Тип RefCell<T> (о котором мы говорили в
главе 15) и семейство связанных типов Cell<T> не реализуют Sync.
Реализация проверки заимствований, которую RefCell<T> выполняет во время
выполнения, не является потокобезопасной. Умный указатель Mutex<T> реализует
Sync и может использоваться для разделения доступа между несколькими
потоками, как вы видели в разделе «Общий доступ к
Mutex<T>».
Ручная реализация Send и Sync небезопасна
Поскольку типы, полностью состоящие из других типов, реализующих трейты Send
и Sync, также автоматически реализуют Send и Sync, нам не приходится
реализовывать эти трейты вручную. Как маркерные трейты, они даже не имеют
методов, которые нужно реализовать. Они просто полезны для обеспечения
инвариантов, связанных с конкурентностью.
Ручная реализация этих трейтов включает реализацию небезопасного кода Rust. Мы
поговорим об использовании небезопасного кода Rust в главе 20; сейчас важная
информация в том, что создание новых конкурентных типов, не составленных из
частей Send и Sync, требует тщательного обдумывания, чтобы поддерживать
гарантии безопасности. В «The Rustonomicon» есть больше информации
об этих гарантиях и о том, как их поддерживать.
Итоги
Это не последний раз, когда вы увидите конкурентность в этой книге: следующая глава посвящена асинхронному программированию, а проект в главе 21 будет использовать концепции из этой главы в более реалистичной ситуации, чем небольшие примеры, обсуждавшиеся здесь.
Как упоминалось ранее, поскольку очень малая часть того, как Rust работает с конкурентностью, является частью языка, многие решения для конкурентности реализуются как крейты. Они развиваются быстрее стандартной библиотеки, поэтому обязательно ищите в интернете актуальные современные крейты для использования в многопоточных ситуациях.
Стандартная библиотека Rust предоставляет каналы для передачи сообщений и типы
умных указателей, такие как Mutex<T> и Arc<T>, которые безопасно
использовать в конкурентных контекстах. Система типов и проверщик
заимствований гарантируют, что код, использующий эти решения, не приведет к
гонкам данных или недопустимым ссылкам. После того как ваш код
скомпилируется, вы можете быть уверены, что он спокойно будет выполняться в
нескольких потоках без трудноотслеживаемых ошибок, распространенных в других
языках. Конкурентное программирование больше не является концепцией, которой
нужно бояться: идите и делайте ваши программы конкурентными, бесстрашно!
Основы асинхронного программирования: async, await, futures и streams
Многие операции, которые мы просим компьютер выполнить, могут занимать некоторое время. Было бы хорошо иметь возможность делать что-то еще, пока мы ждем завершения этих длительных процессов. Современные компьютеры предлагают две техники для работы более чем над одной операцией одновременно: параллелизм и конкурентность. Однако логика наших программ в основном записывается линейно. Мы хотели бы иметь возможность указывать операции, которые должна выполнить программа, и точки, в которых функция могла бы приостановиться, а другая часть программы вместо нее могла бы выполняться, без необходимости заранее точно указывать порядок и способ выполнения каждого фрагмента кода. Асинхронное программирование – это абстракция, которая позволяет выражать код в терминах потенциальных точек приостановки и будущих результатов, беря на себя детали координации.
Эта глава опирается на использование потоков для параллелизма и конкурентности
из главы 16 и вводит альтернативный подход к написанию кода: Rust futures,
streams, а также синтаксис async и await, позволяющие выражать, как
операции могут быть асинхронными, и сторонние крейты, реализующие асинхронные
среды выполнения: код, который управляет выполнением асинхронных операций и
координирует его.
Рассмотрим пример. Допустим, вы экспортируете созданное вами видео семейного праздника, и эта операция может занять от нескольких минут до нескольких часов. Экспорт видео будет использовать столько мощности CPU и GPU, сколько сможет. Если бы у вас было только одно ядро CPU и ваша операционная система не приостанавливала бы экспорт до его завершения, то есть выполняла бы экспорт синхронно, вы не могли бы делать на компьютере ничего другого, пока эта задача выполняется. Это было бы довольно неприятно. К счастью, операционная система вашего компьютера может и действительно незаметно прерывает экспорт достаточно часто, чтобы вы могли одновременно выполнять другую работу.
Теперь предположим, что вы скачиваете видео, которым поделился кто-то другой. Это тоже может занять некоторое время, но не требует так много времени CPU. В этом случае CPU должен ждать, пока данные поступят из сети. Хотя вы можете начать читать данные, как только они начнут поступать, может потребоваться некоторое время, пока появятся все данные. Даже когда все данные уже есть, если видео довольно большое, его загрузка целиком может занять как минимум секунду или две. Это может звучать не так уж много, но для современного процессора, который может выполнять миллиарды операций в секунду, это очень долго. И снова ваша операционная система незаметно прервет программу, чтобы позволить CPU выполнять другую работу, пока он ждет завершения сетевого вызова.
Экспорт видео – пример операции, ограниченной CPU или ограниченной вычислениями. Она ограничена потенциальной скоростью обработки данных компьютером внутри CPU или GPU и тем, какую часть этой скорости он может выделить операции. Скачивание видео – пример операции, ограниченной I/O, потому что она ограничена скоростью ввода и вывода компьютера; она может выполняться только настолько быстро, насколько данные могут передаваться по сети.
В обоих этих примерах невидимые прерывания операционной системы предоставляют форму конкурентности. Однако эта конкурентность происходит только на уровне всей программы: операционная система прерывает одну программу, чтобы позволить другим программам выполнить работу. Во многих случаях, поскольку мы понимаем свои программы на гораздо более детальном уровне, чем операционная система, мы можем заметить возможности для конкурентности, которые операционная система не видит.
Например, если мы создаем инструмент для управления скачиванием файлов, мы должны иметь возможность написать программу так, чтобы начало одного скачивания не блокировало пользовательский интерфейс, а пользователи могли запускать несколько скачиваний одновременно. Однако многие API операционных систем для взаимодействия с сетью являются блокирующими: то есть они блокируют продвижение программы, пока обрабатываемые ими данные не будут полностью готовы.
Примечание: если подумать, именно так работает большинство вызовов функций. Однако термин блокирующий обычно зарезервирован для вызовов функций, которые взаимодействуют с файлами, сетью или другими ресурсами компьютера, потому что именно в этих случаях отдельной программе была бы полезна неблокирующая операция.
Мы могли бы избежать блокировки основного потока, создав отдельный поток для скачивания каждого файла. Однако накладные расходы системных ресурсов, используемых этими потоками, в конце концов стали бы проблемой. Было бы лучше, если бы вызов вообще не блокировал выполнение, а вместо этого мы могли бы определить набор задач, которые хотим, чтобы программа выполнила, и позволить среде выполнения выбрать лучший порядок и способ их выполнения.
Именно это дает нам абстракция Rust async (сокращение от asynchronous, асинхронный). В этой главе вы узнаете все об async, пока мы будем рассматривать следующие темы:
- Как использовать синтаксис Rust
asyncиawaitи выполнять асинхронные функции с помощью среды выполнения - Как использовать асинхронную модель для решения некоторых из тех же задач, которые мы рассматривали в главе 16
- Как многопоточность и async предоставляют взаимодополняющие решения, которые во многих случаях можно сочетать
Однако прежде чем увидеть, как async работает на практике, нужно сделать небольшое отступление и обсудить различия между параллелизмом и конкурентностью.
Параллелизм и конкурентность
До сих пор мы рассматривали параллелизм и конкурентность как в основном взаимозаменяемые понятия. Теперь нужно различить их точнее, потому что эти различия проявятся, когда мы начнем работать.
Рассмотрим разные способы, которыми команда могла бы разделить работу над программным проектом. Вы могли бы назначить одному участнику несколько задач, назначить каждому участнику по одной задаче или использовать смесь двух подходов.
Когда один человек работает над несколькими разными задачами до того, как какая-либо из них завершена, это конкурентность. Один способ реализовать конкурентность похож на ситуацию, когда на вашем компьютере открыты два разных проекта, и когда вам становится скучно или вы застреваете в одном проекте, вы переключаетесь на другой. Вы всего один человек, поэтому не можете продвигаться по обеим задачам точно в одно и то же время, но можете работать в многозадачном режиме, продвигаясь по одной задаче за раз, переключаясь между ними (см. рисунок 17-1).
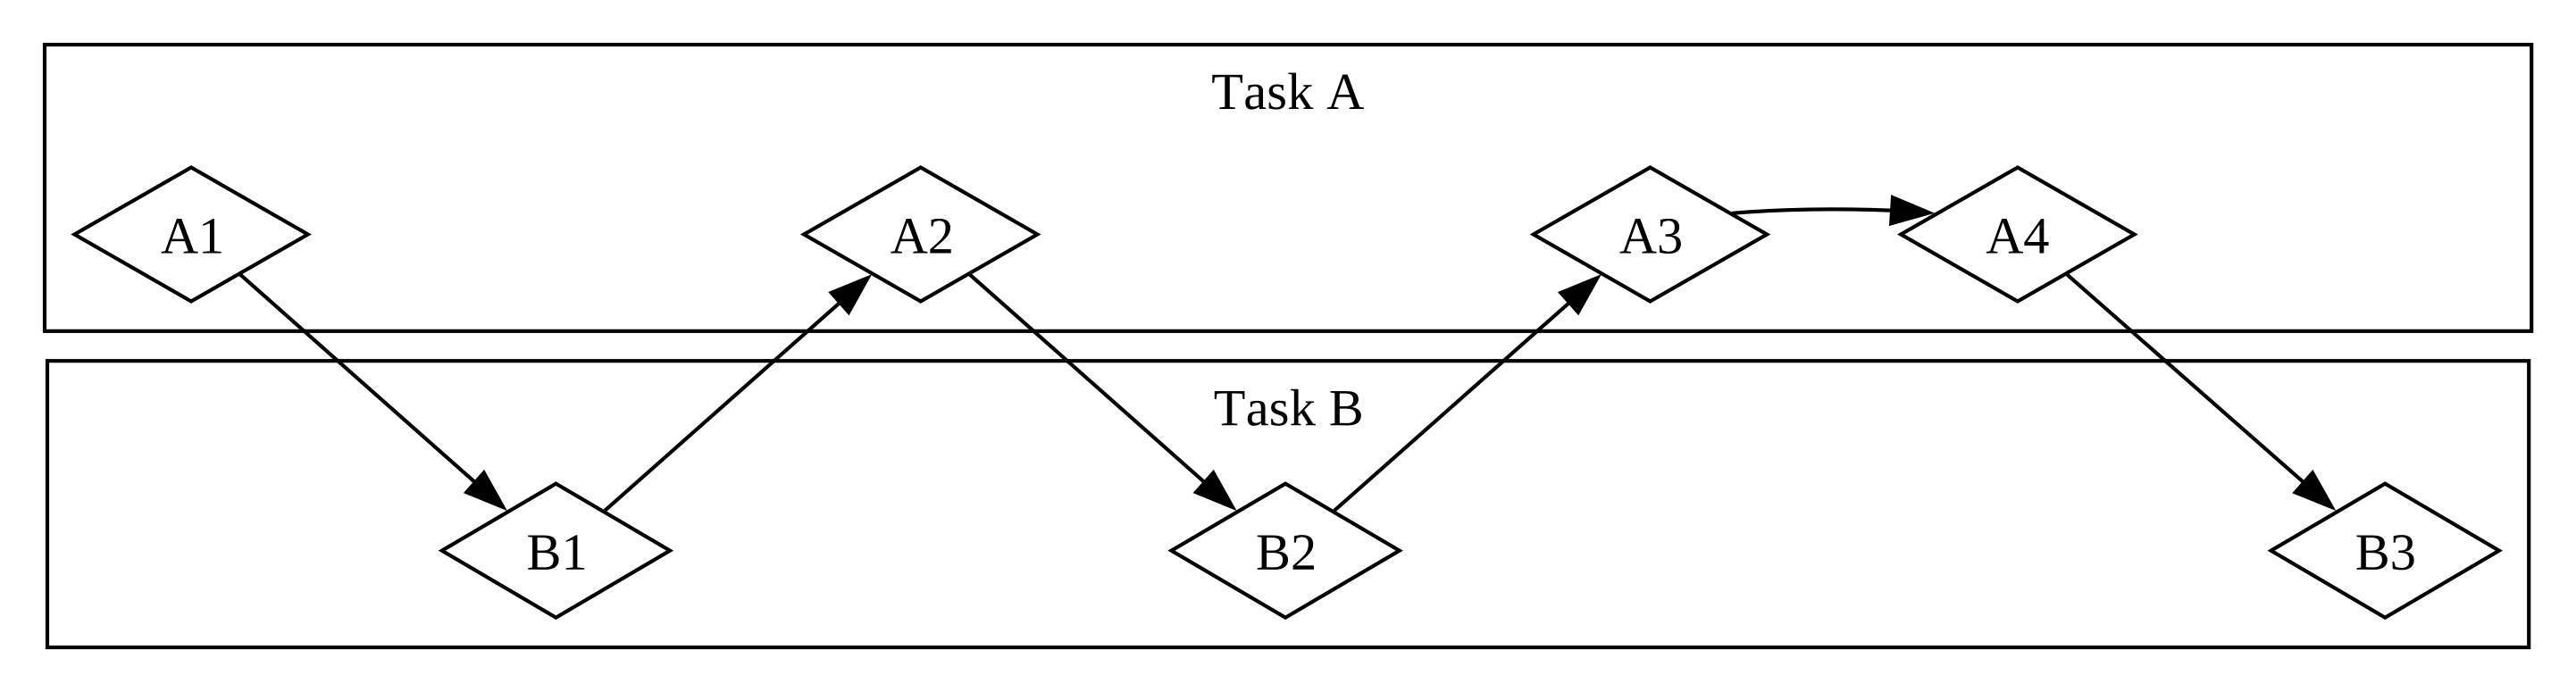
Когда команда разделяет группу задач так, что каждый участник берет одну задачу и работает над ней отдельно, это параллелизм. Каждый человек в команде может продвигаться точно в одно и то же время (см. рисунок 17-2).
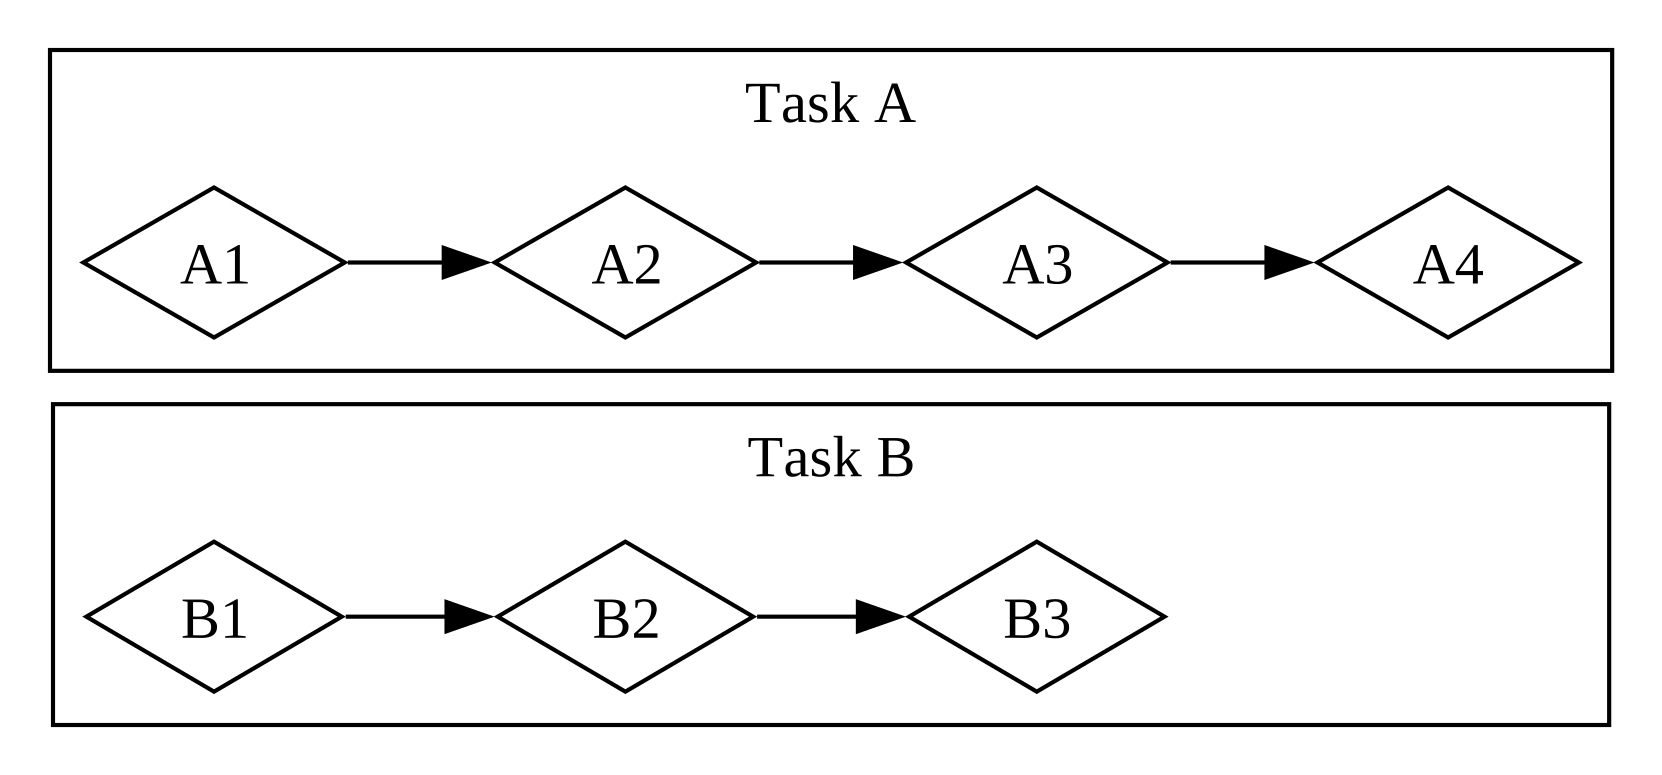
В обоих этих рабочих процессах вам, возможно, придется координировать разные задачи. Может быть, вы думали, что задача, назначенная одному человеку, полностью независима от работы всех остальных, но на самом деле она требует, чтобы другой человек в команде сначала завершил свою задачу. Некоторая часть работы могла выполняться параллельно, но часть на самом деле была последовательной: она могла происходить только последовательно, одна задача за другой, как на рисунке 17-3.
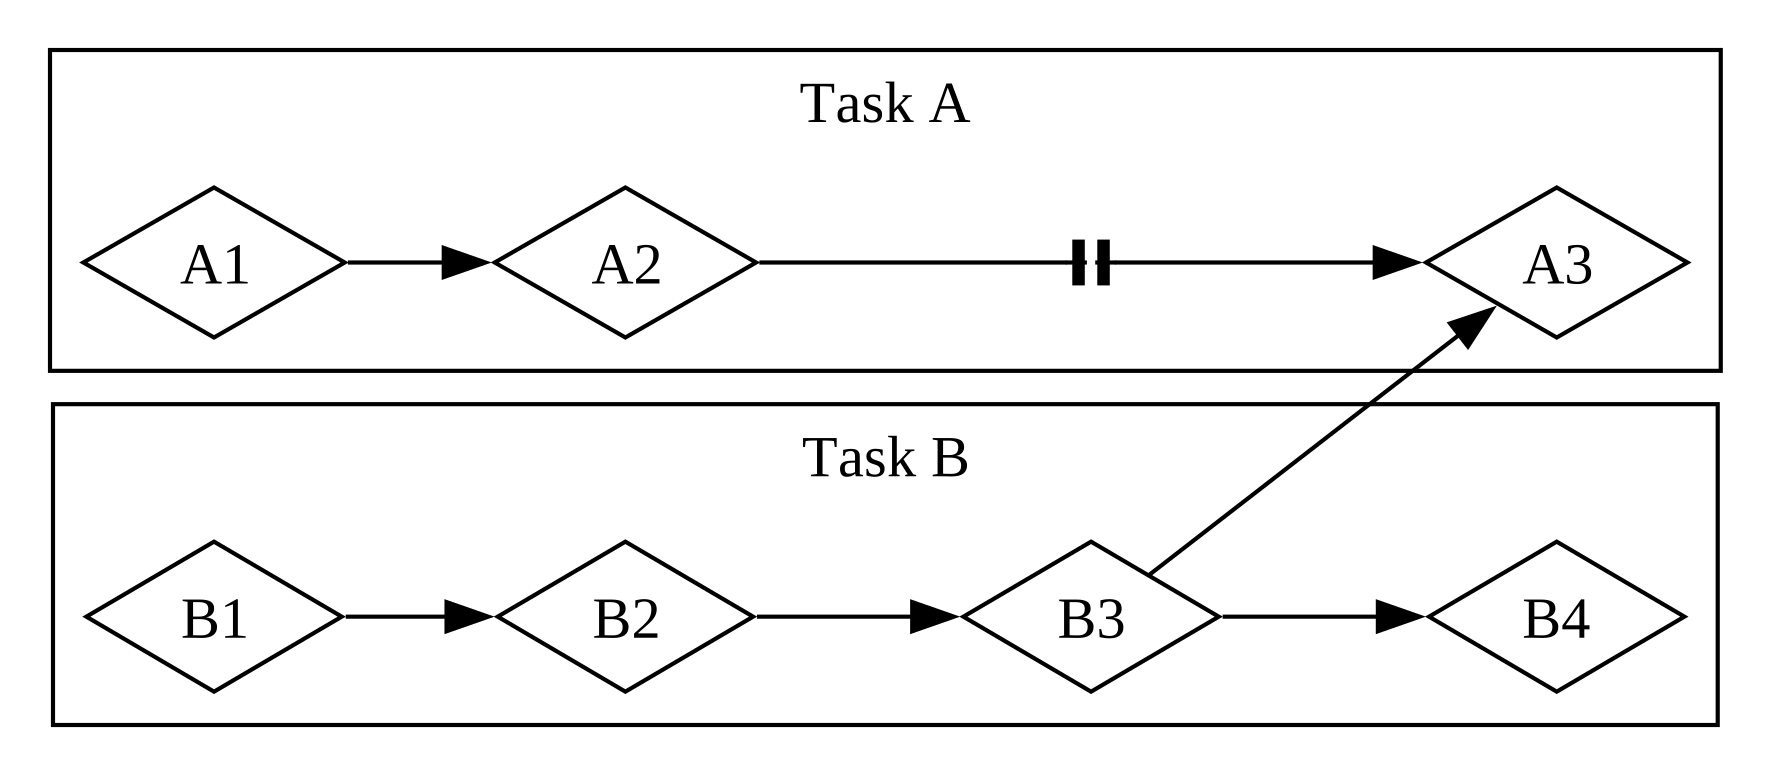
Точно так же вы можете понять, что одна из ваших собственных задач зависит от другой вашей задачи. Теперь ваша конкурентная работа тоже стала последовательной.
Параллелизм и конкурентность также могут пересекаться. Если вы узнаете, что коллега застрял, пока вы не завершите одну из своих задач, вы, вероятно, сосредоточите все усилия на этой задаче, чтобы “разблокировать” коллегу. Вы и ваш коллега больше не можете работать параллельно, и вы также больше не можете конкурентно работать над собственными задачами.
Та же базовая динамика проявляется в программном обеспечении и оборудовании. На машине с одним ядром CPU процессор может выполнять только одну операцию за раз, но все равно может работать конкурентно. Используя инструменты вроде потоков, процессов и async, компьютер может приостановить одну активность и переключиться на другие, прежде чем в конечном счете снова вернуться к первой активности. На машине с несколькими ядрами CPU он также может выполнять работу параллельно. Одно ядро может выполнять одну задачу, пока другое ядро выполняет совершенно не связанную с ней задачу, и эти операции действительно происходят в одно и то же время.
Выполнение async-кода в Rust обычно происходит конкурентно. В зависимости от оборудования, операционной системы и используемой нами async-среды выполнения (подробнее об async-средах выполнения скоро), эта конкурентность под капотом может также использовать параллелизм.
Теперь погрузимся в то, как на самом деле работает асинхронное программирование в Rust.
Future и синтаксис Async
Futures и синтаксис async
Ключевые элементы асинхронного программирования в Rust — это futures и
ключевые слова Rust async и await.
Future — это значение, которое может быть не готово сейчас, но станет
готовым в какой-то момент в будущем. (Та же самая концепция встречается во
многих языках, иногда под другими именами, такими как task или promise.)
Rust предоставляет трейт Future как строительный блок, чтобы разные
асинхронные операции можно было реализовывать с помощью разных структур данных,
но с общим интерфейсом. В Rust futures — это типы, реализующие трейт Future.
Каждый future хранит собственную информацию о том, какой прогресс уже был
достигнут и что означает состояние «готово».
Ключевое слово async можно применять к блокам и функциям, чтобы указать, что
их выполнение может быть прервано и затем возобновлено. Внутри async-блока или
async-функции можно использовать ключевое слово await, чтобы ожидать
future (то есть ждать, пока он станет готовым). Любое место, где вы ожидаете
future внутри async-блока или функции, является потенциальной точкой, в которой
этот блок или функция может приостановиться и затем возобновиться. Процесс
проверки future, чтобы узнать, доступно ли уже его значение, называется
опросом (polling).
Некоторые другие языки, такие как C# и JavaScript, также используют ключевые
слова async и await для асинхронного программирования. Если вы знакомы с
этими языками, то можете заметить существенные различия в том, как Rust
обрабатывает этот синтаксис. Для этого есть веские причины, как мы увидим
дальше!
Когда мы пишем асинхронный Rust-код, мы большую часть времени используем
ключевые слова async и await. Rust компилирует их в эквивалентный код с
использованием трейта Future примерно так же, как он компилирует циклы for
в эквивалентный код с использованием трейта Iterator. Однако, поскольку Rust
предоставляет трейт Future, вы также можете реализовать его для собственных
типов данных, когда это потребуется. Многие функции, которые мы увидим на
протяжении этой главы, возвращают типы со своими собственными реализациями
Future. Мы вернемся к определению трейта в конце главы и подробнее разберем,
как он работает, но этих подробностей достаточно, чтобы двигаться дальше.
Все это может казаться немного абстрактным, поэтому давайте напишем нашу первую асинхронную программу: небольшой веб-скрапер. Мы передадим в него два URL из командной строки, загрузим их оба конкурентно и вернем результат того, который завершится первым. В этом примере будет немало нового синтаксиса, но не волнуйтесь: по ходу дела мы объясним все, что вам нужно знать.
Наша первая асинхронная программа
Чтобы в этой главе сосредоточиться на изучении async, а не на совмещении
частей экосистемы, мы создали крейт trpl (trpl — сокращение от «The Rust
Programming Language»). Он реэкспортирует все типы, трейты и функции, которые
вам понадобятся, в основном из крейтов futures и tokio. Крейт futures — официальное место в
Rust для экспериментов с асинхронным кодом, и именно там изначально был
спроектирован трейт Future. Tokio сегодня является самой широко используемой
async-средой выполнения в Rust, особенно для веб-приложений. Существуют и
другие отличные среды выполнения, и они могут лучше подходить для ваших целей.
Мы используем крейт tokio внутри trpl, потому что он хорошо протестирован
и широко применяется.
В некоторых случаях trpl также переименовывает или оборачивает исходные API,
чтобы вы могли сосредоточиться на деталях, относящихся к этой главе. Если вы
хотите понять, что делает этот крейт, мы советуем посмотреть его исходный
код. Вы сможете увидеть, из какого крейта взят каждый реэкспорт,
а также найдете подробные комментарии, объясняющие, что делает этот крейт.
Создайте новый бинарный проект с именем hello-async и добавьте крейт trpl
как зависимость:
$ cargo new hello-async
$ cd hello-async
$ cargo add trpl
Теперь мы можем использовать разные части, предоставляемые trpl, чтобы
написать нашу первую асинхронную программу. Мы построим небольшой инструмент
командной строки, который загружает две веб-страницы, извлекает элемент
<title> из каждой и печатает заголовок той страницы, для которой весь этот
процесс завершится первым.
Определение функции page_title
Начнем с написания функции, которая принимает URL одной страницы как параметр,
отправляет к нему запрос и возвращает текст элемента <title> (см. листинг
17-1).
extern crate trpl; // required for mdbook test
fn main() {
// TODO: we'll add this next!
}
use trpl::Html;
async fn page_title(url: &str) -> Option<String> {
let response = trpl::get(url).await;
let response_text = response.text().await;
Html::parse(&response_text)
.select_first("title")
.map(|title| title.inner_html())
}Сначала мы определяем функцию с именем page_title и помечаем ее ключевым
словом async. Затем мы используем функцию trpl::get, чтобы загрузить любой
переданный URL, и добавляем ключевое слово await, чтобы дождаться ответа.
Чтобы получить текст из response, мы вызываем его метод text и снова
ожидаем его с помощью ключевого слова await. Оба этих шага являются
асинхронными. Для функции get нам нужно дождаться, пока сервер отправит
первую часть своего ответа, которая будет включать HTTP-заголовки, cookie и
так далее и может быть доставлена отдельно от тела ответа. Особенно если тело
очень большое, может потребоваться некоторое время, чтобы оно пришло целиком.
Поскольку нам нужно дождаться, пока придет весь ответ, метод text тоже
является async.
Мы должны явно ожидать оба этих future, потому что futures в Rust ленивые:
они ничего не делают, пока вы не попросите их об этом с помощью ключевого
слова await. (На самом деле Rust покажет предупреждение компилятора, если вы
не используете future.) Это может напомнить обсуждение итераторов в разделе
«Обработка серии элементов с помощью итераторов» главы 13. Итераторы ничего не делают, пока вы не вызовете их метод
next — напрямую, через циклы for или через методы вроде map, которые
используют next внутри. Точно так же futures ничего не делают, пока вы явно
не попросите их об этом. Эта ленивость позволяет Rust не выполнять
асинхронный код до тех пор, пока он действительно не понадобится.
Примечание: Это отличается от поведения, которое мы видели при использовании
thread::spawnв разделе «Создание нового потока с помощью spawn» главы 16, где замыкание, переданное нами в другой поток, начинало выполняться немедленно. Это также отличается от подхода к async во многих других языках. Но для Rust это важно, чтобы он мог предоставлять свои гарантии производительности, как и в случае с итераторами.
Когда у нас есть response_text, мы можем разобрать его в экземпляр типа
Html с помощью Html::parse. Вместо сырой строки у нас теперь есть тип
данных, с которым можно работать как с более богатой структурой HTML. В
частности, мы можем использовать метод select_first, чтобы найти первый
экземпляр заданного CSS-селектора. Передав строку "title", мы получим первый
элемент <title> в документе, если он там есть. Поскольку подходящего
элемента может не быть, select_first возвращает Option<ElementRef>.
Наконец, мы используем метод Option::map, который позволяет работать с
элементом внутри Option, если он присутствует, и ничего не делать, если его
нет. (Здесь мы также могли бы использовать выражение match, но map более
идиоматичен.) В теле функции, которую мы передаем в map, мы вызываем
inner_html у title, чтобы получить его содержимое, которое является
String. Когда все сказано и сделано, у нас получается Option<String>.
Обратите внимание, что ключевое слово Rust await ставится после выражения,
которое вы ожидаете, а не перед ним. То есть это постфиксное ключевое слово.
Это может отличаться от того, к чему вы привыкли, если использовали async в
других языках, но в Rust так намного удобнее работать с цепочками методов. В
результате мы могли бы изменить тело page_title, объединив вызовы функций
trpl::get и text в цепочку с await между ними, как показано в листинге
17-2.
extern crate trpl; // required for mdbook test
use trpl::Html;
fn main() {
// TODO: we'll add this next!
}
async fn page_title(url: &str) -> Option<String> {
let response_text = trpl::get(url).await.text().await;
Html::parse(&response_text)
.select_first("title")
.map(|title| title.inner_html())
}awaitТеперь мы успешно написали нашу первую async-функцию! Прежде чем добавить код
в main, чтобы вызвать ее, поговорим немного подробнее о том, что мы написали
и что это означает.
Когда Rust видит блок, помеченный ключевым словом async, он компилирует
его в уникальный анонимный тип данных, реализующий трейт Future. Когда Rust
видит функцию, помеченную async, он компилирует ее в не-async функцию,
тело которой является async-блоком. Возвращаемый тип async-функции — это тип
анонимного типа данных, который компилятор создает для этого async-блока.
Таким образом, запись async fn эквивалентна записи функции, которая
возвращает future возвращаемого типа. Для компилятора определение функции,
такое как async fn page_title в листинге 17-1, примерно эквивалентно
не-async функции, определенной так:
#![allow(unused)]
fn main() {
extern crate trpl; // required for mdbook test
use std::future::Future;
use trpl::Html;
fn page_title(url: &str) -> impl Future<Output = Option<String>> {
async move {
let text = trpl::get(url).await.text().await;
Html::parse(&text)
.select_first("title")
.map(|title| title.inner_html())
}
}
}Разберем каждую часть преобразованной версии:
- Она использует синтаксис
impl Trait, который мы обсуждали еще в главе 10 в разделе «Трейты как параметры». - Возвращаемое значение реализует трейт
Futureсо связанным типомOutput. Обратите внимание, что типOutput— этоOption<String>, то есть тот же тип, что и исходный возвращаемый тип из версииpage_titleсasync fn. - Весь код, вызываемый в теле исходной функции, обернут в блок
async move. Помните, что блоки являются выражениями. Весь этот блок является выражением, возвращаемым из функции. - Этот async-блок производит значение с типом
Option<String>, как только что описано. Это значение соответствует типуOutputв возвращаемом типе. Это похоже на другие блоки, которые вы уже видели. - Новое тело функции является блоком
async moveиз-за того, как оно использует параметрurl. (Позже в этой главе мы гораздо подробнее поговорим оasyncиasync move.)
Теперь мы можем вызвать page_title в main.
Выполнение async-функции с помощью среды выполнения
Для начала мы получим заголовок одной страницы, как показано в листинге 17-3. К сожалению, этот код пока не компилируется.
extern crate trpl; // required for mdbook test
use trpl::Html;
async fn main() {
let args: Vec<String> = std::env::args().collect();
let url = &args[1];
match page_title(url).await {
Some(title) => println!("The title for {url} was {title}"),
None => println!("{url} had no title"),
}
}
async fn page_title(url: &str) -> Option<String> {
let response_text = trpl::get(url).await.text().await;
Html::parse(&response_text)
.select_first("title")
.map(|title| title.inner_html())
}page_title из main с аргументом, предоставленным пользователемМы следуем тому же шаблону, который использовали для получения аргументов
командной строки в разделе «Прием аргументов командной строки» главы 12. Затем мы передаем URL-аргумент в page_title и ожидаем
результат. Поскольку значение, произведенное future, является
Option<String>, мы используем выражение match, чтобы печатать разные
сообщения с учетом того, был ли у страницы <title>.
Единственное место, где можно использовать ключевое слово await, — это
async-функции или блоки, а Rust не позволит нам пометить специальную функцию
main как async.
error[E0752]: `main` function is not allowed to be `async`
--> src/main.rs:6:1
|
6 | async fn main() {
| ^^^^^^^^^^^^^^^ `main` function is not allowed to be `async`
Причина, по которой main нельзя пометить async, заключается в том, что
асинхронному коду нужна среда выполнения (runtime): крейт Rust, который
управляет деталями выполнения асинхронного кода. Функция main программы
может инициализировать среду выполнения, но она сама не является средой
выполнения. (Чуть позже мы увидим больше о том, почему это так.) В каждой
программе Rust, выполняющей асинхронный код, есть по крайней мере одно место,
где она настраивает среду выполнения, которая исполняет futures.
В большинстве языков, поддерживающих async, среда выполнения поставляется вместе с языком, но Rust этого не делает. Вместо этого доступно много разных async-сред выполнения, каждая из которых делает разные компромиссы, подходящие для целевого сценария использования. Например, высокопроизводительный веб-сервер с большим числом ядер CPU и большим объемом RAM имеет совсем другие потребности, чем микроконтроллер с одним ядром, небольшим объемом RAM и без возможности выделения памяти в куче. Крейты, предоставляющие такие среды выполнения, также часто предоставляют async-версии распространенной функциональности, такой как файловый или сетевой I/O.
Здесь и на протяжении остальной части этой главы мы будем использовать функцию
block_on из крейта trpl, которая принимает future как аргумент и блокирует
текущий поток до тех пор, пока этот future не выполнится до конца. За кулисами
вызов block_on настраивает среду выполнения с помощью крейта tokio, которая
используется для запуска переданного future (поведение block_on из крейта
trpl похоже на функции block_on из других крейтов сред выполнения). Когда
future завершается, block_on возвращает любое значение, которое этот future
произвел.
Мы могли бы передать future, возвращенный page_title, напрямую в block_on
и после его завершения сопоставить получившийся Option<String> так, как
пытались сделать в листинге 17-3. Однако в большинстве примеров этой главы
(и в большинстве асинхронного кода в реальном мире) мы будем делать больше,
чем один вызов async-функции, поэтому вместо этого передадим блок async и
явно дождемся результата вызова page_title, как в листинге 17-4.
extern crate trpl; // required for mdbook test
use trpl::Html;
fn main() {
let args: Vec<String> = std::env::args().collect();
trpl::block_on(async {
let url = &args[1];
match page_title(url).await {
Some(title) => println!("The title for {url} was {title}"),
None => println!("{url} had no title"),
}
})
}
async fn page_title(url: &str) -> Option<String> {
let response_text = trpl::get(url).await.text().await;
Html::parse(&response_text)
.select_first("title")
.map(|title| title.inner_html())
}trpl::block_onКогда мы запускаем этот код, мы получаем поведение, которого ожидали изначально:
$ cargo run -- "https://www.rust-lang.org"
Finished `dev` profile [unoptimized + debuginfo] target(s) in 0.05s
Running `target/debug/async_await 'https://www.rust-lang.org'`
The title for https://www.rust-lang.org was
Rust Programming Language
Уф, наконец-то у нас есть рабочий асинхронный код! Но прежде чем добавить код, который заставит два сайта соревноваться друг с другом, ненадолго вернемся к тому, как работают futures.
Каждая точка await, то есть каждое место, где код использует ключевое слово
await, представляет место, где управление передается обратно среде
выполнения. Чтобы это работало, Rust должен отслеживать состояние,
задействованное в async-блоке, так чтобы среда выполнения могла запустить
какую-то другую работу, а затем вернуться, когда будет готова снова попытаться
продвинуть первую задачу. Это невидимый конечный автомат, как если бы вы написали
такое перечисление, чтобы сохранять текущее состояние в каждой точке await:
#![allow(unused)]
fn main() {
extern crate trpl; // required for mdbook test
enum PageTitleFuture<'a> {
Initial { url: &'a str },
GetAwaitPoint { url: &'a str },
TextAwaitPoint { response: trpl::Response },
}
}Однако писать код для перехода между каждым состоянием вручную было бы утомительно и чревато ошибками, особенно когда позже нужно добавить в код больше функциональности и больше состояний. К счастью, компилятор Rust автоматически создает структуры данных конечного автомата для асинхронного кода и управляет ими. Обычные правила заимствования и владения для структур данных по-прежнему применяются, и, к счастью, компилятор также проверяет их за нас и выдает полезные сообщения об ошибках. Мы разберем несколько таких случаев позже в этой главе.
В конечном счете что-то должно выполнять этот конечный автомат, и это что-то — среда выполнения. (Именно поэтому при изучении сред выполнения вы можете встретить упоминания исполнителей (executors): исполнитель — это часть среды выполнения, отвечающая за выполнение асинхронного кода.)
Теперь вы можете понять, почему компилятор не позволил нам сделать саму
main async-функцией в листинге 17-3. Если бы main была async-функцией,
чему-то еще пришлось бы управлять конечным автоматом для того future, который
вернула бы main, но main — это точка входа программы! Вместо этого мы
вызвали функцию trpl::block_on в main, чтобы настроить среду выполнения и
запустить future, возвращенный async-блоком, до завершения.
Примечание: Некоторые среды выполнения предоставляют макросы, благодаря которым вы можете написать async-функцию
main. Эти макросы переписываютasync fn main() { ... }в обычнуюfn main, которая делает то же самое, что мы сделали вручную в листинге 17-4: вызывает функцию, запускающую future до завершения так, как это делаетtrpl::block_on.
Теперь соберем эти части вместе и посмотрим, как можно писать конкурентный код.
Состязание двух URL друг с другом конкурентно
В листинге 17-5 мы вызываем page_title с двумя разными URL, переданными из
командной строки, и устраиваем между ними состязание, выбирая тот future,
который завершится первым.
extern crate trpl; // required for mdbook test
use trpl::{Either, Html};
fn main() {
let args: Vec<String> = std::env::args().collect();
trpl::block_on(async {
let title_fut_1 = page_title(&args[1]);
let title_fut_2 = page_title(&args[2]);
let (url, maybe_title) =
match trpl::select(title_fut_1, title_fut_2).await {
Either::Left(left) => left,
Either::Right(right) => right,
};
println!("{url} returned first");
match maybe_title {
Some(title) => println!("Its page title was: '{title}'"),
None => println!("It had no title."),
}
})
}
async fn page_title(url: &str) -> (&str, Option<String>) {
let response_text = trpl::get(url).await.text().await;
let title = Html::parse(&response_text)
.select_first("title")
.map(|title| title.inner_html());
(url, title)
}page_title для двух URL, чтобы увидеть, какой вернется первымМы начинаем с вызова page_title для каждого из URL, предоставленных
пользователем. Получившиеся futures мы сохраняем как title_fut_1 и
title_fut_2. Помните, что они пока ничего не делают, потому что futures
ленивые, а мы их еще не ожидали. Затем мы передаем эти futures в
trpl::select, который возвращает значение, указывающее, какой из переданных
ему futures завершится первым.
Примечание: Под капотом
trpl::selectпостроен на более общей функцииselect, определенной в крейтеfutures. Функцияselectиз крейтаfuturesможет делать многое из того, чего не может функцияtrpl::select, но она также содержит дополнительную сложность, которую мы пока можем пропустить.
Любой из futures может законно «выиграть», поэтому возвращать Result не
имеет смысла. Вместо этого trpl::select возвращает тип, которого мы раньше
не видели, trpl::Either. Тип Either в чем-то похож на Result, потому что
у него есть два варианта. Однако, в отличие от Result, в Either не
заложено понятие успеха или ошибки. Вместо этого он использует Left и
Right, чтобы указать «одно или другое»:
#![allow(unused)]
fn main() {
enum Either<A, B> {
Left(A),
Right(B),
}
}Функция select возвращает Left с результатом этого future, если выигрывает
первый аргумент, и Right с результатом второго аргумента-future, если
выигрывает он. Это соответствует порядку, в котором аргументы появляются при
вызове функции: первый аргумент находится слева от второго.
Мы также обновляем page_title, чтобы он возвращал тот же URL, который был
передан в него. Так, если страница, ответившая первой, не имеет <title>,
который мы можем определить, мы все равно сможем напечатать осмысленное
сообщение. Имея эту информацию, мы завершаем пример обновлением вывода
println!, чтобы указать и какой URL завершился первым, и какой, если он есть,
<title> имеет веб-страница по этому URL.
Теперь вы построили небольшой рабочий веб-скрапер! Выберите пару URL и запустите инструмент командной строки. Вы можете обнаружить, что одни сайты стабильно быстрее других, а в других случаях более быстрый сайт меняется от запуска к запуску. Что важнее, вы изучили основы работы с futures, так что теперь мы можем глубже разобраться в том, что можно делать с async.
Применение конкурентности с Async
Применение конкурентности с async
В этом разделе мы применим async к некоторым из тех же задач конкурентности, которые решали с потоками в главе 16. Поскольку там мы уже обсудили многие ключевые идеи, в этом разделе сосредоточимся на том, чем потоки отличаются от futures.
Во многих случаях API для работы с конкурентностью с использованием async очень похожи на API для использования потоков. В других случаях они в итоге оказываются совсем другими. Даже когда API для потоков и async выглядят похожими, они часто ведут себя по-разному — и почти всегда имеют разные характеристики производительности.
Создание новой задачи с помощью spawn_task
Первой операцией, которую мы разбирали в разделе «Создание нового потока с
помощью spawn» главы 16, был счет в двух
отдельных потоках. Давайте сделаем то же самое с помощью async. Крейт trpl
предоставляет функцию spawn_task, которая выглядит очень похожей на API
thread::spawn, и функцию sleep, которая является async-версией API
thread::sleep. Мы можем использовать их вместе, чтобы реализовать пример со
счетом, как показано в листинге 17-6.
extern crate trpl; // required for mdbook test
use std::time::Duration;
fn main() {
trpl::block_on(async {
trpl::spawn_task(async {
for i in 1..10 {
println!("hi number {i} from the first task!");
trpl::sleep(Duration::from_millis(500)).await;
}
});
for i in 1..5 {
println!("hi number {i} from the second task!");
trpl::sleep(Duration::from_millis(500)).await;
}
});
}В качестве отправной точки мы настраиваем функцию main с помощью
trpl::block_on, чтобы наша функция верхнего уровня могла быть async.
Примечание: Начиная с этого места в главе, каждый пример будет включать точно такой же оборачивающий код с
trpl::block_onвmain, поэтому мы часто будем пропускать его так же, как пропускаемmain. Не забывайте включать его в свой код!
Затем внутри этого блока мы пишем два цикла, каждый из которых содержит вызов
trpl::sleep, ожидающий полсекунды (500 миллисекунд) перед отправкой
следующего сообщения. Один цикл мы помещаем в тело trpl::spawn_task, а
другой — в цикл for верхнего уровня. Мы также добавляем await после
вызовов sleep.
Этот код ведет себя похоже на реализацию на основе потоков, включая то, что при запуске вы можете увидеть сообщения в своем терминале в другом порядке:
hi number 1 from the second task!
hi number 1 from the first task!
hi number 2 from the first task!
hi number 2 from the second task!
hi number 3 from the first task!
hi number 3 from the second task!
hi number 4 from the first task!
hi number 4 from the second task!
hi number 5 from the first task!
Эта версия останавливается, как только цикл for в теле основного async-блока
завершается, потому что задача, порожденная spawn_task, завершается
принудительно, когда завершается функция main. Если вы хотите, чтобы она
выполнилась до конца задачи, нужно использовать дескриптор соединения, чтобы
дождаться завершения первой задачи. С потоками мы использовали метод join,
чтобы «блокироваться» до завершения выполнения потока. В листинге 17-7 мы
можем использовать await, чтобы сделать то же самое, потому что сам
дескриптор задачи является future. Его тип Output — это Result, поэтому
после ожидания мы также разворачиваем его.
extern crate trpl; // required for mdbook test
use std::time::Duration;
fn main() {
trpl::block_on(async {
let handle = trpl::spawn_task(async {
for i in 1..10 {
println!("hi number {i} from the first task!");
trpl::sleep(Duration::from_millis(500)).await;
}
});
for i in 1..5 {
println!("hi number {i} from the second task!");
trpl::sleep(Duration::from_millis(500)).await;
}
handle.await.unwrap();
});
}await с дескриптором соединения, чтобы выполнить задачу до концаЭта обновленная версия выполняется до тех пор, пока не завершатся оба цикла:
hi number 1 from the second task!
hi number 1 from the first task!
hi number 2 from the first task!
hi number 2 from the second task!
hi number 3 from the first task!
hi number 3 from the second task!
hi number 4 from the first task!
hi number 4 from the second task!
hi number 5 from the first task!
hi number 6 from the first task!
hi number 7 from the first task!
hi number 8 from the first task!
hi number 9 from the first task!
Пока что кажется, что async и потоки дают похожие результаты, только с разным
синтаксисом: мы используем await вместо вызова join у дескриптора
соединения и ожидаем вызовы sleep.
Более существенное отличие в том, что для этого нам не пришлось порождать еще
один поток операционной системы. На самом деле здесь даже не нужно порождать
задачу. Поскольку async-блоки компилируются в анонимные futures, мы можем
поместить каждый цикл в async-блок и позволить среде выполнения выполнить оба
до завершения с помощью функции trpl::join.
В разделе «Ожидание завершения всех потоков»
главы 16 мы показали, как использовать метод join у типа JoinHandle,
который возвращается при вызове std::thread::spawn. Функция trpl::join
похожа на него, но предназначена для futures. Когда вы передаете ей два
future, она создает один новый future, вывод которого является кортежем,
содержащим вывод каждого переданного future после того, как оба завершатся.
Таким образом, в листинге 17-8 мы используем trpl::join, чтобы дождаться
завершения и fut1, и fut2. Мы ожидаем не fut1 и fut2, а новый future,
созданный trpl::join. Вывод мы игнорируем, потому что это всего лишь кортеж,
содержащий два единичных значения.
extern crate trpl; // required for mdbook test
use std::time::Duration;
fn main() {
trpl::block_on(async {
let fut1 = async {
for i in 1..10 {
println!("hi number {i} from the first task!");
trpl::sleep(Duration::from_millis(500)).await;
}
};
let fut2 = async {
for i in 1..5 {
println!("hi number {i} from the second task!");
trpl::sleep(Duration::from_millis(500)).await;
}
};
trpl::join(fut1, fut2).await;
});
}trpl::join для ожидания двух анонимных futuresКогда мы запускаем это, мы видим, что оба future выполняются до завершения:
hi number 1 from the first task!
hi number 1 from the second task!
hi number 2 from the first task!
hi number 2 from the second task!
hi number 3 from the first task!
hi number 3 from the second task!
hi number 4 from the first task!
hi number 4 from the second task!
hi number 5 from the first task!
hi number 6 from the first task!
hi number 7 from the first task!
hi number 8 from the first task!
hi number 9 from the first task!
Теперь вы будете видеть один и тот же порядок каждый раз, что сильно
отличается от того, что мы видели с потоками и с trpl::spawn_task в листинге
17-7. Причина в том, что функция trpl::join является справедливой: она
проверяет каждый future одинаково часто, чередуясь между ними, и никогда не
позволяет одному сильно вырваться вперед, если другой тоже готов. В случае с
потоками операционная система решает, какой поток проверять и как долго
позволять ему выполняться. В async Rust среда выполнения решает, какую задачу
проверять. (На практике детали становятся сложнее, потому что async-среда
выполнения может использовать потоки операционной системы под капотом как часть
того, как она управляет конкурентностью, поэтому гарантия справедливости может
требовать от среды выполнения больше работы, но это все равно возможно!) Среды
выполнения не обязаны гарантировать справедливость для каждой конкретной
операции, и они часто предлагают разные API, чтобы вы могли выбрать, нужна ли
вам справедливость или нет.
Попробуйте некоторые из этих вариантов ожидания futures и посмотрите, что они делают:
- Уберите async-блок вокруг одного или обоих циклов.
- Ожидайте каждый async-блок сразу после его определения.
- Оберните только первый цикл в async-блок и ожидайте получившийся future после тела второго цикла.
В качестве дополнительной задачи попробуйте понять, каким будет вывод в каждом случае, до запуска кода!
Передача данных между двумя задачами с помощью передачи сообщений
Совместное использование данных между futures тоже будет знакомым: мы снова используем передачу сообщений, но на этот раз с async-версиями типов и функций. Мы пойдем немного другим путем, чем в разделе «Передача данных между потоками с помощью передачи сообщений» главы 16, чтобы показать некоторые ключевые различия между конкурентностью на основе потоков и конкурентностью на основе futures. В листинге 17-9 мы начнем всего с одного async-блока — не порождая отдельную задачу, как мы порождали отдельный поток.
extern crate trpl; // required for mdbook test
fn main() {
trpl::block_on(async {
let (tx, mut rx) = trpl::channel();
let val = String::from("hi");
tx.send(val).unwrap();
let received = rx.recv().await.unwrap();
println!("received '{received}'");
});
}tx и rxЗдесь мы используем trpl::channel, async-версию API канала с несколькими
производителями и одним потребителем, который мы использовали с потоками еще в
главе 16. Async-версия API лишь немного отличается от версии на основе
потоков: она использует изменяемый, а не неизменяемый приемник rx, и ее
метод recv создает future, который нужно ожидать, вместо того чтобы
возвращать значение напрямую. Теперь мы можем отправлять сообщения от
отправителя к приемнику. Обратите внимание, что нам не нужно порождать
отдельный поток или даже задачу; нам нужно лишь ожидать вызов rx.recv.
Синхронный метод Receiver::recv в std::mpsc::channel блокируется, пока не
получит сообщение. Метод trpl::Receiver::recv этого не делает, потому что он
async. Вместо блокировки он возвращает управление среде выполнения, пока либо
не будет получено сообщение, либо не закроется отправляющая сторона канала. В
противоположность этому мы не ожидаем вызов send, потому что он не
блокируется. Ему и не нужно блокироваться, потому что канал, в который мы
отправляем, неограниченный.
Примечание: Поскольку весь этот async-код выполняется в async-блоке внутри вызова
trpl::block_on, все внутри него может избегать блокировки. Однако код снаружи будет блокироваться на возврате функцииblock_on. В этом и состоит весь смысл функцииtrpl::block_on: она позволяет вам выбрать, где блокироваться на некотором наборе async-кода, а значит, где переходить между синхронным и асинхронным кодом.
Обратите внимание на две вещи в этом примере. Во-первых, сообщение придет сразу. Во-вторых, хотя здесь мы используем future, конкурентности пока нет. Все в листинге происходит последовательно, точно так же, как происходило бы, если бы futures вообще не были задействованы.
Разберемся с первой частью, отправив серию сообщений и засыпая между ними, как показано в листинге 17-10.
extern crate trpl; // required for mdbook test
use std::time::Duration;
fn main() {
trpl::block_on(async {
let (tx, mut rx) = trpl::channel();
let vals = vec![
String::from("hi"),
String::from("from"),
String::from("the"),
String::from("future"),
];
for val in vals {
tx.send(val).unwrap();
trpl::sleep(Duration::from_millis(500)).await;
}
while let Some(value) = rx.recv().await {
println!("received '{value}'");
}
});
}await между каждым сообщениемПомимо отправки сообщений, нам нужно их получать. В этом случае, поскольку мы
знаем, сколько сообщений поступит, мы могли бы сделать это вручную, вызвав
rx.recv().await четыре раза. Однако в реальном мире мы обычно будем ждать
некоторое неизвестное количество сообщений, поэтому нужно продолжать ждать,
пока мы не определим, что сообщений больше нет.
В листинге 16-10 мы использовали цикл for, чтобы обработать все элементы,
полученные из синхронного канала. Однако в Rust пока нет способа использовать
цикл for с асинхронно производимой серией элементов, поэтому нам нужно
использовать цикл, которого мы раньше не видели: условный цикл while let.
Это циклическая версия конструкции if let, которую мы видели в разделе
«Краткий поток управления с if let и let...else»
главы 6. Цикл продолжит выполняться, пока заданный им шаблон продолжает
соответствовать значению.
Вызов rx.recv создает future, который мы ожидаем. Среда выполнения
приостановит future, пока он не будет готов. Когда приходит сообщение, future
разрешается в Some(message) столько раз, сколько приходят сообщения. Когда
канал закрывается, независимо от того, пришли ли какие-либо сообщения,
future вместо этого разрешается в None, чтобы указать, что значений больше
нет и поэтому мы должны прекратить опрос, то есть прекратить ожидание.
Цикл while let собирает все это вместе. Если результат вызова
rx.recv().await — это Some(message), мы получаем доступ к сообщению и
можем использовать его в теле цикла, как могли бы с if let. Если результат —
None, цикл заканчивается. Каждый раз, когда цикл завершается, он снова
доходит до точки await, поэтому среда выполнения снова приостанавливает его до
появления другого сообщения.
Теперь код успешно отправляет и получает все сообщения. К сожалению, все еще есть пара проблем. Во-первых, сообщения не приходят с интервалами в полсекунды. Они приходят все сразу, через 2 секунды (2 000 миллисекунд) после запуска программы. Во-вторых, эта программа также никогда не завершается! Вместо этого она вечно ждет новые сообщения. Вам нужно будет остановить ее с помощью ctrl-C.
Код внутри одного async-блока выполняется линейно
Начнем с того, почему сообщения приходят все сразу после полной задержки, а не
с задержками между каждым из них. Внутри заданного async-блока порядок, в
котором ключевые слова await появляются в коде, также является порядком, в
котором они выполняются при запуске программы.
В листинге 17-10 есть только один async-блок, поэтому все внутри него
выполняется линейно. Конкурентности по-прежнему нет. Все вызовы tx.send
происходят вперемешку со всеми вызовами trpl::sleep и связанными с ними
точками await. Только после этого цикл while let получает возможность пройти
через какие-либо точки await на вызовах recv.
Чтобы получить нужное поведение, при котором задержка сна происходит между
каждым сообщением, нужно поместить операции tx и rx в их собственные
async-блоки, как показано в листинге 17-11. Тогда среда выполнения сможет
исполнять каждый из них отдельно с помощью trpl::join, как в листинге 17-8.
И снова мы ожидаем результат вызова trpl::join, а не отдельные futures. Если
бы мы ожидали отдельные futures последовательно, мы просто вернулись бы к
последовательному потоку выполнения — именно к тому, чего мы пытаемся не
делать.
extern crate trpl; // required for mdbook test
use std::time::Duration;
fn main() {
trpl::block_on(async {
let (tx, mut rx) = trpl::channel();
let tx_fut = async {
let vals = vec![
String::from("hi"),
String::from("from"),
String::from("the"),
String::from("future"),
];
for val in vals {
tx.send(val).unwrap();
trpl::sleep(Duration::from_millis(500)).await;
}
};
let rx_fut = async {
while let Some(value) = rx.recv().await {
println!("received '{value}'");
}
};
trpl::join(tx_fut, rx_fut).await;
});
}send и recv по собственным блокам async и ожидание futures этих блоковС обновленным кодом в листинге 17-11 сообщения печатаются с интервалами в 500 миллисекунд, а не все сразу после 2 секунд.
Перемещение владения в async-блок
Однако программа все еще никогда не завершается из-за того, как цикл
while let взаимодействует с trpl::join:
- Future, возвращенный из
trpl::join, завершается только после того, как завершатся оба future, переданных в него. - Future
tx_futзавершается после того, как заканчивается его сон после отправки последнего сообщения вvals. - Future
rx_futне завершится, пока не закончится циклwhile let. - Цикл
while letне закончится, пока ожиданиеrx.recvне дастNone. - Ожидание
rx.recvвернетNoneтолько после того, как другой конец канала будет закрыт. - Канал закроется только если мы вызовем
rx.closeили когда отправляющая сторона,tx, будет отброшена. - Мы нигде не вызываем
rx.close, аtxне будет отброшен до тех пор, пока не завершится самый внешний async-блок, переданный вtrpl::block_on. - Блок не может завершиться, потому что он заблокирован на завершении
trpl::join, что возвращает нас к началу этого списка.
Сейчас async-блок, в котором мы отправляем сообщения, только заимствует tx,
потому что отправка сообщения не требует владения. Но если бы мы могли
переместить tx в этот async-блок, он был бы отброшен после завершения
блока. В разделе «Захват ссылок или перемещение владения»
главы 13 вы узнали, как использовать ключевое слово move с
замыканиями, и, как обсуждалось в разделе «Использование замыканий move с
потоками» главы 16, нам часто нужно перемещать
данные в замыкания при работе с потоками. Та же базовая динамика применима к
async-блокам, поэтому ключевое слово move работает с async-блоками так же,
как с замыканиями.
В листинге 17-12 мы меняем блок, используемый для отправки сообщений, с
async на async move.
extern crate trpl; // required for mdbook test
use std::time::Duration;
fn main() {
trpl::block_on(async {
let (tx, mut rx) = trpl::channel();
let tx_fut = async move {
// --snip--
let vals = vec![
String::from("hi"),
String::from("from"),
String::from("the"),
String::from("future"),
];
for val in vals {
tx.send(val).unwrap();
trpl::sleep(Duration::from_millis(500)).await;
}
};
let rx_fut = async {
while let Some(value) = rx.recv().await {
println!("received '{value}'");
}
};
trpl::join(tx_fut, rx_fut).await;
});
}Когда мы запускаем эту версию кода, она корректно завершает работу после отправки и получения последнего сообщения. Далее посмотрим, что нужно изменить, чтобы отправлять данные из более чем одного future.
Объединение нескольких futures с помощью макроса join!
Этот async-канал также является каналом с несколькими производителями, поэтому
мы можем вызвать clone у tx, если хотим отправлять сообщения из нескольких
futures, как показано в листинге 17-13.
extern crate trpl; // required for mdbook test
use std::time::Duration;
fn main() {
trpl::block_on(async {
let (tx, mut rx) = trpl::channel();
let tx1 = tx.clone();
let tx1_fut = async move {
let vals = vec![
String::from("hi"),
String::from("from"),
String::from("the"),
String::from("future"),
];
for val in vals {
tx1.send(val).unwrap();
trpl::sleep(Duration::from_millis(500)).await;
}
};
let rx_fut = async {
while let Some(value) = rx.recv().await {
println!("received '{value}'");
}
};
let tx_fut = async move {
let vals = vec![
String::from("more"),
String::from("messages"),
String::from("for"),
String::from("you"),
];
for val in vals {
tx.send(val).unwrap();
trpl::sleep(Duration::from_millis(1500)).await;
}
};
trpl::join!(tx1_fut, tx_fut, rx_fut);
});
}Сначала мы клонируем tx, создавая tx1 вне первого async-блока. Мы
перемещаем tx1 в этот блок точно так же, как раньше поступили с tx. Затем,
позже, мы перемещаем исходный tx в новый async-блок, где отправляем больше
сообщений с немного более медленной задержкой. Так получилось, что мы помещаем
этот новый async-блок после async-блока для получения сообщений, но он с тем
же успехом мог бы идти перед ним. Главное — порядок, в котором futures
ожидаются, а не порядок, в котором они создаются.
Оба async-блока для отправки сообщений должны быть блоками async move, чтобы
и tx, и tx1 были отброшены при завершении этих блоков. Иначе мы снова
окажемся в том же бесконечном цикле, с которого начали.
Наконец, мы переключаемся с trpl::join на trpl::join!, чтобы обработать
дополнительный future: макрос join! ожидает произвольное число futures, когда
количество futures известно во время компиляции. Ожидание коллекции с
неизвестным числом futures мы обсудим позже в этой главе.
Теперь мы видим все сообщения от обоих отправляющих futures, и поскольку отправляющие futures используют немного разные задержки после отправки, сообщения также принимаются через эти разные интервалы:
received 'hi'
received 'more'
received 'from'
received 'the'
received 'messages'
received 'future'
received 'for'
received 'you'
Мы исследовали, как использовать передачу сообщений для отправки данных между futures, как код внутри async-блока выполняется последовательно, как перемещать владение в async-блок и как объединять несколько futures. Далее обсудим, как и почему сообщать среде выполнения, что она может переключиться на другую задачу.
Работа с произвольным количеством Future
Передача управления среде выполнения
Вспомните из раздела «Наша первая асинхронная программа», что в каждой точке await Rust дает среде выполнения возможность приостановить задачу и переключиться на другую, если ожидаемый future еще не готов. Верно и обратное: Rust приостанавливает async-блоки и возвращает управление среде выполнения только в точке await. Все между точками await является синхронным.
Это означает, что если вы выполняете большой объем работы в async-блоке без точки await, такой future не даст другим futures продвигаться вперед. Иногда можно услышать, что это называется голоданием (starving) других futures одним future. В некоторых случаях это может быть не так важно. Однако если вы выполняете какую-то дорогостоящую настройку или долгую работу, или если у вас есть future, который будет бесконечно выполнять какую-то конкретную задачу, вам нужно подумать, когда и где возвращать управление среде выполнения.
Давайте смоделируем долгую операцию, чтобы проиллюстрировать проблему
голодания, а затем рассмотрим, как ее решить. Листинг 17-14 вводит функцию
slow.
extern crate trpl; // required for mdbook test
use std::{thread, time::Duration};
fn main() {
trpl::block_on(async {
// We will call `slow` here later
});
}
fn slow(name: &str, ms: u64) {
thread::sleep(Duration::from_millis(ms));
println!("'{name}' ran for {ms}ms");
}thread::sleep для имитации медленных операцийЭтот код использует std::thread::sleep вместо trpl::sleep, так что вызов
slow будет блокировать текущий поток на некоторое число миллисекунд. Мы
можем использовать slow как замену реальным операциям, которые одновременно
являются долгими и блокирующими.
В листинге 17-15 мы используем slow, чтобы имитировать выполнение такой
работы, ограниченной CPU, в паре futures.
extern crate trpl; // required for mdbook test
use std::{thread, time::Duration};
fn main() {
trpl::block_on(async {
let a = async {
println!("'a' started.");
slow("a", 30);
slow("a", 10);
slow("a", 20);
trpl::sleep(Duration::from_millis(50)).await;
println!("'a' finished.");
};
let b = async {
println!("'b' started.");
slow("b", 75);
slow("b", 10);
slow("b", 15);
slow("b", 350);
trpl::sleep(Duration::from_millis(50)).await;
println!("'b' finished.");
};
trpl::select(a, b).await;
});
}
fn slow(name: &str, ms: u64) {
thread::sleep(Duration::from_millis(ms));
println!("'{name}' ran for {ms}ms");
}slow для имитации медленных операцийКаждый future возвращает управление среде выполнения только после выполнения набора медленных операций. Если вы запустите этот код, то увидите такой вывод:
'a' started.
'a' ran for 30ms
'a' ran for 10ms
'a' ran for 20ms
'b' started.
'b' ran for 75ms
'b' ran for 10ms
'b' ran for 15ms
'b' ran for 350ms
'a' finished.
Как и в листинге 17-5, где мы использовали trpl::select, чтобы устроить
состязание futures, загружающих два URL, select все еще завершается, как
только завершается a. Однако между вызовами slow в двух futures нет
чередования. Future a выполняет всю свою работу, пока не будет достигнуто
ожидание вызова trpl::sleep; затем future b выполняет всю свою работу,
пока не будет достигнуто ожидание его собственного вызова trpl::sleep; и,
наконец, future a завершается. Чтобы оба futures могли продвигаться вперед
между своими медленными задачами, нам нужны точки await, чтобы мы могли
возвращать управление среде выполнения. Значит, нам нужно что-то, что можно
ожидать!
Мы уже видим такую передачу управления в листинге 17-15: если бы мы удалили
trpl::sleep в конце future a, он завершился бы, а future b не выполнился
бы вообще. Давайте попробуем использовать функцию trpl::sleep как
отправную точку для того, чтобы операции могли по очереди продвигаться вперед,
как показано в листинге 17-16.
extern crate trpl; // required for mdbook test
use std::{thread, time::Duration};
fn main() {
trpl::block_on(async {
let one_ms = Duration::from_millis(1);
let a = async {
println!("'a' started.");
slow("a", 30);
trpl::sleep(one_ms).await;
slow("a", 10);
trpl::sleep(one_ms).await;
slow("a", 20);
trpl::sleep(one_ms).await;
println!("'a' finished.");
};
let b = async {
println!("'b' started.");
slow("b", 75);
trpl::sleep(one_ms).await;
slow("b", 10);
trpl::sleep(one_ms).await;
slow("b", 15);
trpl::sleep(one_ms).await;
slow("b", 350);
trpl::sleep(one_ms).await;
println!("'b' finished.");
};
trpl::select(a, b).await;
});
}
fn slow(name: &str, ms: u64) {
thread::sleep(Duration::from_millis(ms));
println!("'{name}' ran for {ms}ms");
}trpl::sleep, чтобы позволить операциям по очереди продвигаться впередМы добавили вызовы trpl::sleep с точками await между каждым вызовом slow.
Теперь работа двух futures чередуется:
'a' started.
'a' ran for 30ms
'b' started.
'b' ran for 75ms
'a' ran for 10ms
'b' ran for 10ms
'a' ran for 20ms
'b' ran for 15ms
'a' finished.
Future a все еще выполняется некоторое время перед передачей управления
future b, потому что он вызывает slow до первого вызова trpl::sleep, но
после этого futures передают управление друг другу каждый раз, когда один из
них доходит до точки await. В этом случае мы сделали это после каждого вызова
slow, но могли бы разбить работу любым способом, который кажется нам наиболее
разумным.
Однако на самом деле мы не хотим здесь спать: мы хотим продвигаться вперед
как можно быстрее. Нам просто нужно вернуть управление среде выполнения. Мы
можем сделать это напрямую, используя функцию trpl::yield_now. В листинге
17-17 мы заменяем все эти вызовы trpl::sleep на trpl::yield_now.
extern crate trpl; // required for mdbook test
use std::{thread, time::Duration};
fn main() {
trpl::block_on(async {
let a = async {
println!("'a' started.");
slow("a", 30);
trpl::yield_now().await;
slow("a", 10);
trpl::yield_now().await;
slow("a", 20);
trpl::yield_now().await;
println!("'a' finished.");
};
let b = async {
println!("'b' started.");
slow("b", 75);
trpl::yield_now().await;
slow("b", 10);
trpl::yield_now().await;
slow("b", 15);
trpl::yield_now().await;
slow("b", 350);
trpl::yield_now().await;
println!("'b' finished.");
};
trpl::select(a, b).await;
});
}
fn slow(name: &str, ms: u64) {
thread::sleep(Duration::from_millis(ms));
println!("'{name}' ran for {ms}ms");
}yield_now, чтобы позволить операциям по очереди продвигаться впередЭтот код яснее выражает фактическое намерение и может быть значительно быстрее,
чем использование sleep, потому что таймеры вроде того, который использует
sleep, часто имеют ограничения по точности. Например, версия sleep, которую
мы используем, всегда будет спать как минимум одну миллисекунду, даже если мы
передадим ей Duration в одну наносекунду. Повторим: современные компьютеры
быстры — они могут сделать очень много за одну миллисекунду!
Это означает, что async может быть полезен даже для задач, ограниченных вычислениями, в зависимости от того, что еще делает ваша программа, потому что он предоставляет полезный инструмент для структурирования отношений между разными частями программы (но ценой накладных расходов конечного автомата async). Это форма кооперативной многозадачности, где каждый future имеет возможность определять, когда передать управление через точки await. Следовательно, каждый future также несет ответственность за то, чтобы не блокироваться слишком долго. В некоторых встроенных операционных системах на основе Rust это единственный вид многозадачности!
В реальном коде вы, конечно, обычно не будете чередовать вызовы функций с точками await на каждой отдельной строке. Хотя такая передача управления относительно недорога, она не бесплатна. Во многих случаях попытка разбить задачу, ограниченную вычислениями, может сделать ее значительно медленнее, поэтому иногда для общей производительности лучше позволить операции ненадолго заблокироваться. Всегда измеряйте, где на самом деле находятся узкие места производительности вашего кода. Однако важно помнить о лежащей в основе динамике, если вы видите много работы, выполняющейся последовательно, хотя ожидали, что она будет выполняться конкурентно!
Создание собственных async-абстракций
Мы также можем компоновать futures вместе, чтобы создавать новые шаблоны.
Например, мы можем построить функцию timeout с помощью уже имеющихся у нас
async-строительных блоков. Когда мы закончим, результат станет еще одним
строительным блоком, который мы сможем использовать для создания новых
async-абстракций.
Листинг 17-18 показывает, как мы ожидали бы, что этот timeout будет работать
с медленным future.
extern crate trpl; // required for mdbook test
use std::time::Duration;
fn main() {
trpl::block_on(async {
let slow = async {
trpl::sleep(Duration::from_secs(5)).await;
"Finally finished"
};
match timeout(slow, Duration::from_secs(2)).await {
Ok(message) => println!("Succeeded with '{message}'"),
Err(duration) => {
println!("Failed after {} seconds", duration.as_secs())
}
}
});
}timeout для запуска медленной операции с ограничением по времениДавайте реализуем это! Для начала подумаем об API для timeout:
- Он сам должен быть async-функцией, чтобы мы могли его ожидать.
- Его первым параметром должен быть future, который нужно запустить. Мы можем сделать его обобщенным, чтобы он работал с любым future.
- Его вторым параметром будет максимальное время ожидания. Если мы используем
Duration, его будет легко передать дальше вtrpl::sleep. - Он должен возвращать
Result. Если future успешно завершится,ResultбудетOkсо значением, произведенным этим future. Если первым истечет тайм-аут,ResultбудетErrс длительностью, которую мы ждали до истечения тайм-аута.
Листинг 17-19 показывает это объявление.
extern crate trpl; // required for mdbook test
use std::time::Duration;
fn main() {
trpl::block_on(async {
let slow = async {
trpl::sleep(Duration::from_secs(5)).await;
"Finally finished"
};
match timeout(slow, Duration::from_secs(2)).await {
Ok(message) => println!("Succeeded with '{message}'"),
Err(duration) => {
println!("Failed after {} seconds", duration.as_secs())
}
}
});
}
async fn timeout<F: Future>(
future_to_try: F,
max_time: Duration,
) -> Result<F::Output, Duration> {
// Here is where our implementation will go!
}timeoutЭто удовлетворяет нашим целям для типов. Теперь подумаем о поведении,
которое нам нужно: мы хотим устроить состязание переданного future с
длительностью. Мы можем использовать trpl::sleep, чтобы создать future-таймер
из длительности, и использовать trpl::select, чтобы запустить этот таймер
вместе с future, который передает вызывающая сторона.
В листинге 17-20 мы реализуем timeout, сопоставляя результат ожидания
trpl::select.
extern crate trpl; // required for mdbook test
use std::time::Duration;
use trpl::Either;
// --snip--
fn main() {
trpl::block_on(async {
let slow = async {
trpl::sleep(Duration::from_secs(5)).await;
"Finally finished"
};
match timeout(slow, Duration::from_secs(2)).await {
Ok(message) => println!("Succeeded with '{message}'"),
Err(duration) => {
println!("Failed after {} seconds", duration.as_secs())
}
}
});
}
async fn timeout<F: Future>(
future_to_try: F,
max_time: Duration,
) -> Result<F::Output, Duration> {
match trpl::select(future_to_try, trpl::sleep(max_time)).await {
Either::Left(output) => Ok(output),
Either::Right(_) => Err(max_time),
}
}timeout с помощью select и sleepРеализация trpl::select несправедлива: она всегда опрашивает аргументы в том
порядке, в котором они переданы (другие реализации select будут случайным
образом выбирать, какой аргумент опросить первым). Поэтому мы передаем
future_to_try в select первым, чтобы он получил шанс завершиться, даже если
max_time — очень короткая длительность. Если future_to_try завершается
первым, select вернет Left с результатом от future_to_try. Если первым
завершится timer, select вернет Right с выводом таймера ().
Если future_to_try успешно завершается и мы получаем Left(output), мы
возвращаем Ok(output). Если вместо этого истекает таймер сна и мы получаем
Right(()), мы игнорируем () с помощью _ и возвращаем Err(max_time).
Теперь у нас есть работающий timeout, построенный из двух других
async-помощников. Если мы запустим наш код, он напечатает сценарий ошибки
после тайм-аута:
Failed after 2 seconds
Поскольку futures компонуются с другими futures, вы можете строить действительно мощные инструменты, используя меньшие async-строительные блоки. Например, можно использовать тот же подход, чтобы объединять тайм-ауты с повторными попытками, а затем применять их к операциям вроде сетевых вызовов (таких как в листинге 17-5).
На практике вы обычно будете работать напрямую с async и await, а во
вторую очередь — с функциями вроде select и макросами вроде join!, чтобы
управлять тем, как исполняются самые внешние futures.
Теперь мы увидели несколько способов работать с несколькими futures одновременно. Далее мы рассмотрим, как можно работать с несколькими futures в последовательности во времени с помощью streams.
Потоки (Streams): последовательность Future
Streams: futures в последовательности
Вспомните, как ранее в этой главе, в разделе «Передача
сообщений», мы использовали приемник нашего
async-канала. Async-метод recv со временем производит последовательность
элементов. Это пример гораздо более общего шаблона, известного как stream.
Многие концепции естественно представляются в виде streams: элементы,
становящиеся доступными в очереди; фрагменты данных, постепенно извлекаемые из
файловой системы, когда полный набор данных слишком велик для памяти
компьютера; или данные, поступающие по сети с течением времени. Поскольку
streams являются futures, мы можем использовать их с любыми другими видами
futures и комбинировать интересными способами. Например, можно объединять
события в пакеты, чтобы не запускать слишком много сетевых вызовов, задавать
тайм-ауты для последовательностей долгих операций или ограничивать частоту
событий пользовательского интерфейса, чтобы не выполнять лишнюю работу.
Мы уже видели последовательность элементов в главе 13, когда рассматривали
трейт Iterator в разделе «Трейт Iterator и метод next», но между итераторами и приемником async-канала есть два различия.
Первое различие — время: итераторы синхронны, а приемник канала асинхронен.
Второе различие — API. Работая напрямую с Iterator, мы вызываем его
синхронный метод next. В частности, со stream trpl::Receiver вместо этого
мы вызывали асинхронный метод recv. В остальном эти API ощущаются очень
похожими, и это сходство не случайно. Stream похож на асинхронную форму
итерации. Однако если trpl::Receiver конкретно ожидает получения сообщений,
то stream API общего назначения гораздо шире: он предоставляет следующий
элемент так же, как это делает Iterator, но асинхронно.
Сходство между итераторами и streams в Rust означает, что мы на самом деле
можем создать stream из любого итератора. Как и с итератором, со stream можно
работать, вызывая его метод next, а затем ожидая результат, как в листинге
17-21, который пока не скомпилируется.
extern crate trpl; // required for mdbook test
fn main() {
trpl::block_on(async {
let values = [1, 2, 3, 4, 5, 6, 7, 8, 9, 10];
let iter = values.iter().map(|n| n * 2);
let mut stream = trpl::stream_from_iter(iter);
while let Some(value) = stream.next().await {
println!("The value was: {value}");
}
});
}Мы начинаем с массива чисел, который преобразуем в итератор, а затем вызываем
у него map, чтобы удвоить все значения. Затем мы преобразуем итератор в
stream с помощью функции trpl::stream_from_iter. Далее мы проходим по
элементам stream по мере их поступления с помощью цикла while let.
К сожалению, когда мы пытаемся запустить код, он не компилируется, а вместо
этого сообщает, что доступного метода next нет:
error[E0599]: no method named `next` found for struct `tokio_stream::iter::Iter` in the current scope
--> src/main.rs:10:40
|
10 | while let Some(value) = stream.next().await {
| ^^^^
|
= help: items from traits can only be used if the trait is in scope
help: the following traits which provide `next` are implemented but not in scope; perhaps you want to import one of them
|
1 + use crate::trpl::StreamExt;
|
1 + use futures_util::stream::stream::StreamExt;
|
1 + use std::iter::Iterator;
|
1 + use std::str::pattern::Searcher;
|
help: there is a method `try_next` with a similar name
|
10 | while let Some(value) = stream.try_next().await {
| ~~~~~~~~
Как объясняет этот вывод, причина ошибки компилятора в том, что для
использования метода next нужный трейт должен находиться в области видимости.
С учетом нашего обсуждения до этого момента можно было бы разумно ожидать, что
этим трейтом будет Stream, но на самом деле это StreamExt. Сокращение
Ext от extension — распространенный в сообществе Rust шаблон для
расширения одного трейта другим.
Трейт Stream определяет низкоуровневый интерфейс, который фактически
объединяет трейты Iterator и Future. StreamExt предоставляет более
высокоуровневый набор API поверх Stream, включая метод next, а также
другие вспомогательные методы, похожие на те, которые предоставляет трейт
Iterator. Stream и StreamExt пока не являются частью стандартной
библиотеки Rust, но большинство крейтов экосистемы используют похожие
определения.
Исправление ошибки компилятора состоит в том, чтобы добавить объявление use
для trpl::StreamExt, как в листинге 17-22.
extern crate trpl; // required for mdbook test
use trpl::StreamExt;
fn main() {
trpl::block_on(async {
let values = [1, 2, 3, 4, 5, 6, 7, 8, 9, 10];
// --snip--
let iter = values.iter().map(|n| n * 2);
let mut stream = trpl::stream_from_iter(iter);
while let Some(value) = stream.next().await {
println!("The value was: {value}");
}
});
}Когда все эти части собраны вместе, этот код работает так, как нам нужно!
Более того, теперь, когда StreamExt находится в области видимости, мы можем
использовать все его вспомогательные методы, как и с итераторами.
Более подробный взгляд на трейты для Async
Более пристальный взгляд на трейты для async
На протяжении главы мы по-разному использовали трейты Future, Stream и
StreamExt. Однако до сих пор мы избегали слишком глубокого погружения в
детали того, как они работают или как связаны друг с другом, и большую часть
времени для повседневной работы с Rust этого достаточно. Но иногда вы будете
сталкиваться с ситуациями, где нужно понимать немного больше подробностей об
этих трейтах, а также о типе Pin и трейте Unpin. В этом разделе мы
разберемся ровно настолько, чтобы помочь в таких сценариях, оставив
действительно глубокое погружение другой документации.
Трейт Future
Начнем с более пристального взгляда на то, как работает трейт Future. Вот
как Rust определяет его:
#![allow(unused)]
fn main() {
use std::pin::Pin;
use std::task::{Context, Poll};
pub trait Future {
type Output;
fn poll(self: Pin<&mut Self>, cx: &mut Context<'_>) -> Poll<Self::Output>;
}
}Это определение трейта включает множество новых типов, а также некоторый синтаксис, которого мы раньше не видели, поэтому разберем определение по частям.
Во-первых, связанный тип Output у Future говорит, какое значение future
выдаст после завершения. Это аналогично связанному типу Item у трейта
Iterator. Во-вторых, у Future есть метод poll, который принимает
специальную ссылку, обернутую в Pin, для своего параметра self и изменяемую
ссылку на тип Context, а возвращает Poll<Self::Output>. Мы поговорим
подробнее о Pin и Context через мгновение. Пока сосредоточимся на том, что
возвращает этот метод, то есть на типе Poll:
#![allow(unused)]
fn main() {
pub enum Poll<T> {
Ready(T),
Pending,
}
}Этот тип Poll похож на Option. У него есть один вариант со значением,
Ready(T), и один без значения, Pending. Однако Poll означает нечто
совсем иное, чем Option! Вариант Pending указывает, что future еще должен
выполнить работу, поэтому вызывающей стороне нужно будет проверить его позже
еще раз. Вариант Ready указывает, что Future завершил свою работу и
значение T доступно.
Примечание: Обычно нет необходимости вызывать
pollнапрямую, но если вам все же нужно это сделать, помните, что для большинства futures вызывающая сторона не должна снова вызыватьpollпосле того, как future вернулReady. Многие futures вызовут панику, если их снова опросить после готовности. Futures, которые безопасно опрашивать повторно, явно сообщат об этом в своей документации. Это похоже на поведениеIterator::next.
Когда вы видите код, использующий await, Rust под капотом компилирует его в
код, который вызывает poll. Если вернуться к листингу 17-4, где мы печатали
заголовок страницы для одного URL после того, как он разрешился, Rust
компилирует это во что-то примерно (хотя и не точно) похожее на следующее:
match page_title(url).poll() {
Ready(page_title) => match page_title {
Some(title) => println!("The title for {url} was {title}"),
None => println!("{url} had no title"),
}
Pending => {
// But what goes here?
}
}Что нам делать, когда future все еще находится в состоянии Pending? Нам
нужен какой-то способ пробовать снова, и снова, и снова, пока future наконец не
станет готовым. Другими словами, нам нужен цикл:
let mut page_title_fut = page_title(url);
loop {
match page_title_fut.poll() {
Ready(value) => match page_title {
Some(title) => println!("The title for {url} was {title}"),
None => println!("{url} had no title"),
}
Pending => {
// continue
}
}
}Однако если бы Rust компилировал это именно в такой код, каждый await был бы
блокирующим — то есть давал бы ровно противоположное тому, к чему мы стремимся!
Вместо этого Rust гарантирует, что цикл может передать управление чему-то, что
способно приостановить работу над этим future, поработать над другими futures,
а затем снова проверить этот future позже. Как мы уже видели, это «что-то» —
async-среда выполнения, и эта работа по планированию и координации является
одной из ее основных задач.
В разделе «Передача данных между двумя задачами с помощью передачи
сообщений» мы описывали ожидание rx.recv.
Вызов recv возвращает future, а ожидание future опрашивает его. Мы отметили,
что среда выполнения приостановит future, пока он не будет готов либо с
Some(message), либо с None, когда канал закроется. С нашим более глубоким
пониманием трейта Future, и особенно Future::poll, мы можем увидеть, как
это работает. Среда выполнения знает, что future не готов, когда он возвращает
Poll::Pending. И наоборот, среда выполнения знает, что future готов, и
продвигает его, когда poll возвращает Poll::Ready(Some(message)) или
Poll::Ready(None).
Точные подробности того, как среда выполнения это делает, выходят за рамки этой книги, но важно увидеть базовую механику futures: среда выполнения опрашивает каждый future, за который она отвечает, снова усыпляя future, когда он еще не готов.
Тип Pin и трейт Unpin
В листинге 17-13 мы использовали макрос trpl::join!, чтобы ожидать три
futures. Однако часто бывает коллекция, например вектор, содержащая некоторое
количество futures, которое будет известно только во время выполнения. Давайте
изменим листинг 17-13 на код из листинга 17-23, который помещает три futures в
вектор и вместо этого вызывает функцию trpl::join_all; этот код пока не
скомпилируется.
extern crate trpl; // required for mdbook test
use std::time::Duration;
fn main() {
trpl::block_on(async {
let (tx, mut rx) = trpl::channel();
let tx1 = tx.clone();
let tx1_fut = async move {
let vals = vec![
String::from("hi"),
String::from("from"),
String::from("the"),
String::from("future"),
];
for val in vals {
tx1.send(val).unwrap();
trpl::sleep(Duration::from_secs(1)).await;
}
};
let rx_fut = async {
while let Some(value) = rx.recv().await {
println!("received '{value}'");
}
};
let tx_fut = async move {
// --snip--
let vals = vec![
String::from("more"),
String::from("messages"),
String::from("for"),
String::from("you"),
];
for val in vals {
tx.send(val).unwrap();
trpl::sleep(Duration::from_secs(1)).await;
}
};
let futures: Vec<Box<dyn Future<Output = ()>>> =
vec![Box::new(tx1_fut), Box::new(rx_fut), Box::new(tx_fut)];
trpl::join_all(futures).await;
});
}Мы помещаем каждый future внутрь Box, чтобы превратить их в трейт-объекты,
точно так же, как делали в разделе «Возврат ошибок из run» главы 12. (Мы
подробно рассмотрим трейт-объекты в главе 18.) Использование трейт-объектов
позволяет нам обращаться с каждым из анонимных futures, создаваемых этими
типами, как с одним и тем же типом, потому что все они реализуют трейт
Future.
Это может удивить. В конце концов, ни один из async-блоков ничего не
возвращает, поэтому каждый из них создает Future<Output = ()>. Однако
помните, что Future — это трейт, и компилятор создает уникальное
перечисление для каждого async-блока, даже если у них одинаковые типы вывода.
Точно так же, как нельзя положить две разные вручную написанные структуры в
Vec, нельзя смешивать перечисления, сгенерированные компилятором.
Затем мы передаем коллекцию futures в функцию trpl::join_all и ожидаем
результат. Однако это не компилируется; вот соответствующая часть сообщений об
ошибках.
error[E0277]: `dyn Future<Output = ()>` cannot be unpinned
--> src/main.rs:48:33
|
48 | trpl::join_all(futures).await;
| ^^^^^ the trait `Unpin` is not implemented for `dyn Future<Output = ()>`
|
= note: consider using the `pin!` macro
consider using `Box::pin` if you need to access the pinned value outside of the current scope
= note: required for `Box<dyn Future<Output = ()>>` to implement `Future`
note: required by a bound in `futures_util::future::join_all::JoinAll`
--> file:///home/.cargo/registry/src/index.crates.io-1949cf8c6b5b557f/futures-util-0.3.30/src/future/join_all.rs:29:8
|
27 | pub struct JoinAll<F>
| ------- required by a bound in this struct
28 | where
29 | F: Future,
| ^^^^^^ required by this bound in `JoinAll`
Примечание в этом сообщении об ошибке говорит нам, что следует использовать
макрос pin!, чтобы закрепить значения; это означает поместить их внутрь
типа Pin, который гарантирует, что значения не будут перемещены в памяти.
Сообщение об ошибке говорит, что закрепление требуется, потому что
dyn Future<Output = ()> должен реализовывать трейт Unpin, а сейчас он его
не реализует.
Функция trpl::join_all возвращает структуру с именем JoinAll. Эта структура
обобщена по типу F, который ограничен требованием реализовывать трейт
Future. Прямое ожидание future с помощью await закрепляет future неявно.
Именно поэтому нам не нужно использовать pin! везде, где мы хотим ожидать
futures.
Однако здесь мы не ожидаем future напрямую. Вместо этого мы конструируем новый
future, JoinAll, передавая коллекцию futures в функцию join_all. Сигнатура
join_all требует, чтобы все типы элементов в коллекции реализовывали трейт
Future, а Box<T> реализует Future только если оборачиваемый им T
является future, который реализует трейт Unpin.
Это много информации! Чтобы действительно понять это, давайте немного глубже
погрузимся в то, как на самом деле работает трейт Future, особенно вокруг
закрепления. Снова взгляните на определение трейта Future:
#![allow(unused)]
fn main() {
use std::pin::Pin;
use std::task::{Context, Poll};
pub trait Future {
type Output;
// Required method
fn poll(self: Pin<&mut Self>, cx: &mut Context<'_>) -> Poll<Self::Output>;
}
}Параметр cx и его тип Context являются ключом к тому, как среда выполнения
на самом деле узнает, когда проверять конкретный future и при этом оставаться
ленивой. Опять же, подробности того, как это работает, выходят за рамки этой
главы, и обычно вам нужно думать об этом только при написании собственной
реализации Future. Вместо этого мы сосредоточимся на типе для self,
поскольку это первый раз, когда мы видим метод, где у self есть аннотация
типа. Аннотация типа для self работает как аннотации типов для других
параметров функции, но с двумя ключевыми отличиями:
- Она сообщает Rust, какого типа должен быть
self, чтобы метод можно было вызвать. - Это не может быть просто любой тип. Он ограничен типом, для которого
реализован метод, ссылкой или умным указателем на этот тип, либо
Pin, оборачивающим ссылку на этот тип.
Подробнее этот синтаксис мы увидим в главе 18. Пока
достаточно знать, что если мы хотим опросить future, чтобы проверить, находится
ли он в состоянии Pending или Ready(Output), нам нужна обернутая в Pin
изменяемая ссылка на тип.
Pin — это обертка для указателеподобных типов, таких как &, &mut, Box
и Rc. (Технически Pin работает с типами, которые реализуют трейты Deref
или DerefMut, но фактически это эквивалентно работе только со ссылками и
умными указателями.) Pin сам по себе не является указателем и не имеет
собственного поведения, как Rc и Arc с подсчетом ссылок; это всего лишь
инструмент, который компилятор может использовать для соблюдения ограничений
на использование указателей.
Вспоминая, что await реализован через вызовы poll, мы начинаем понимать
сообщение об ошибке, которое видели ранее, но там речь шла об Unpin, а не о
Pin. Так как именно Pin связан с Unpin, и почему Future требует, чтобы
self находился в типе Pin для вызова poll?
Помните из начала этой главы, что серия точек await в future компилируется в конечный автомат, а компилятор гарантирует, что этот конечный автомат следует всем обычным правилам безопасности Rust, включая заимствование и владение. Чтобы это работало, Rust смотрит, какие данные нужны между одной точкой await и либо следующей точкой await, либо концом async-блока. Затем он создает соответствующий вариант в скомпилированном конечном автомате. Каждый вариант получает нужный ему доступ к данным, которые будут использоваться в этом участке исходного кода: либо принимая владение этими данными, либо получая изменяемую или неизменяемую ссылку на них.
Пока все хорошо: если мы ошибемся с владением или ссылками в заданном
async-блоке, проверщик заимствований сообщит нам об этом. Но когда мы хотим
перемещать future, соответствующий этому блоку, например переместить его в
Vec, чтобы передать в join_all, все становится сложнее.
Когда мы перемещаем future — будь то помещая его в структуру данных, чтобы
использовать как итератор с join_all, или возвращая его из функции, — это на
самом деле означает перемещение конечного автомата, который Rust создает для
нас. И в отличие от большинства других типов в Rust, futures, которые Rust
создает для async-блоков, могут в итоге иметь ссылки на самих себя в полях
любого конкретного варианта, как показано в упрощенной иллюстрации на рисунке
17-4.
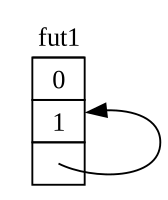
По умолчанию любой объект, имеющий ссылку на самого себя, небезопасно перемещать, потому что ссылки всегда указывают на фактический адрес памяти того, на что они ссылаются (см. рисунок 17-5). Если вы переместите саму структуру данных, эти внутренние ссылки останутся указывать на старое место. Однако это место памяти теперь недействительно. С одной стороны, его значение не будет обновляться, когда вы будете вносить изменения в структуру данных. С другой, что важнее, компьютер теперь свободен использовать эту память для других целей! Позже вы можете в итоге прочитать совершенно не связанные с этим данные.
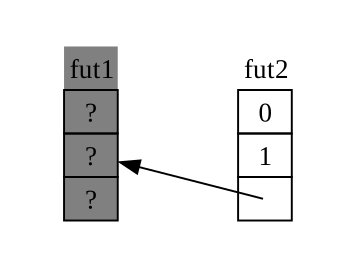
Теоретически компилятор Rust мог бы пытаться обновлять каждую ссылку на объект каждый раз, когда он перемещается, но это могло бы добавить большие накладные расходы производительности, особенно если нужно обновлять целую сеть ссылок. Если бы вместо этого мы могли гарантировать, что рассматриваемая структура данных не перемещается в памяти, нам не пришлось бы обновлять никакие ссылки. Именно для этого и нужен проверщик заимствований Rust: в безопасном коде он не позволяет перемещать любой элемент, на который есть активная ссылка.
Pin строится на этом и дает нам именно ту гарантию, которая нужна. Когда мы
закрепляем значение, оборачивая указатель на это значение в Pin, оно больше
не может перемещаться. Таким образом, если у вас есть Pin<Box<SomeType>>, вы
на самом деле закрепляете значение SomeType, а не указатель Box. Рисунок
17-6 иллюстрирует этот процесс.
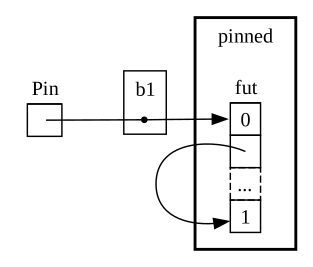
На самом деле указатель Box по-прежнему может свободно перемещаться.
Помните: нам важно убедиться, что данные, на которые в конечном счете есть
ссылка, остаются на месте. Если указатель перемещается, но данные, на которые
он указывает, остаются на том же месте, как на рисунке 17-7, потенциальной
проблемы нет. (В качестве самостоятельного упражнения посмотрите документацию
для типов, а также модуль std::pin, и попробуйте понять, как сделать это с
Pin, оборачивающим Box.) Ключевой момент в том, что сам самоссылочный тип
не может перемещаться, потому что он все еще закреплен.
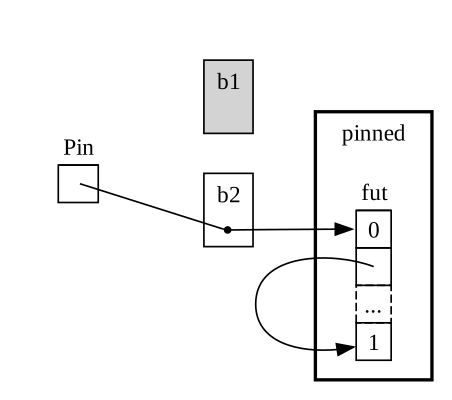
Однако большинство типов совершенно безопасно перемещать, даже если они
оказались за указателем Pin. Нам нужно думать о закреплении только тогда,
когда у элементов есть внутренние ссылки. Примитивные значения, такие как
числа и логические значения, безопасны, потому что у них очевидно нет
внутренних ссылок. У большинства типов, с которыми вы обычно работаете в Rust,
их тоже нет. Например, Vec можно перемещать без опасений. Учитывая то, что
мы уже увидели, если у вас есть Pin<Vec<String>>, вам пришлось бы делать все
через безопасные, но ограничительные API, предоставляемые Pin, хотя
Vec<String> всегда безопасно перемещать, если на него нет других ссылок. Нам
нужен способ сказать компилятору, что в таких случаях элементы можно
перемещать, и именно здесь вступает в дело Unpin.
Unpin — это маркерный трейт, похожий на трейты Send и Sync, которые мы
видели в главе 16, и потому он не имеет собственной функциональности.
Маркерные трейты существуют только для того, чтобы сообщать компилятору, что
безопасно использовать тип, реализующий данный трейт, в определенном
контексте. Unpin сообщает компилятору, что данный тип не должен
поддерживать никаких гарантий о том, можно ли безопасно перемещать
соответствующее значение.
Как и в случае с Send и Sync, компилятор автоматически реализует Unpin
для всех типов, для которых он может доказать безопасность этого. Особый
случай, опять же похожий на Send и Sync, — когда Unpin не реализован
для типа. Обозначение для этого выглядит как impl !Unpin for
SomeType, где SomeType — имя типа,
который должен поддерживать эти гарантии, чтобы быть безопасным всякий раз,
когда указатель на этот тип используется в Pin.
Другими словами, о связи между Pin и Unpin нужно помнить две вещи.
Во-первых, Unpin — это «нормальный» случай, а !Unpin — особый случай.
Во-вторых, реализует ли тип Unpin или !Unpin, имеет значение только
тогда, когда вы используете закрепленный указатель на этот тип, например
Pin<&mut SomeType>.
Чтобы сделать это конкретным, подумайте о String: у него есть длина и
символы Unicode, из которых он состоит. Мы можем обернуть String в Pin, как
показано на рисунке 17-8. Однако String автоматически реализует Unpin, как
и большинство других типов в Rust.
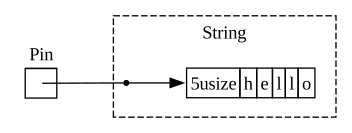
В результате мы можем делать вещи, которые были бы незаконны, если бы String
вместо этого реализовывал !Unpin, например заменить одну строку другой точно
в том же месте памяти, как на рисунке 17-9. Это не нарушает контракт Pin,
потому что у String нет внутренних ссылок, из-за которых его было бы
небезопасно перемещать. Именно поэтому он реализует Unpin, а не !Unpin.
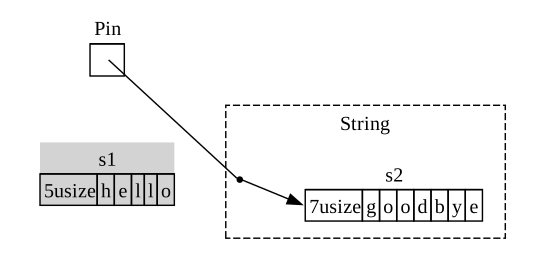
Теперь мы знаем достаточно, чтобы понять ошибки, сообщенные для вызова
join_all из листинга 17-23. Изначально мы пытались переместить futures,
созданные async-блоками, в Vec<Box<dyn Future<Output = ()>>>, но, как мы
увидели, у этих futures могут быть внутренние ссылки, поэтому они автоматически
не реализуют Unpin. Когда мы закрепим их, мы сможем передать получившийся
тип Pin в Vec, будучи уверенными, что лежащие в основе данные в futures
не будут перемещены. Листинг 17-24 показывает, как исправить код, вызвав
макрос pin! там, где определен каждый из трех futures, и скорректировав тип
трейт-объекта.
extern crate trpl; // required for mdbook test
use std::pin::{Pin, pin};
// --snip--
use std::time::Duration;
fn main() {
trpl::block_on(async {
let (tx, mut rx) = trpl::channel();
let tx1 = tx.clone();
let tx1_fut = pin!(async move {
// --snip--
let vals = vec![
String::from("hi"),
String::from("from"),
String::from("the"),
String::from("future"),
];
for val in vals {
tx1.send(val).unwrap();
trpl::sleep(Duration::from_secs(1)).await;
}
});
let rx_fut = pin!(async {
// --snip--
while let Some(value) = rx.recv().await {
println!("received '{value}'");
}
});
let tx_fut = pin!(async move {
// --snip--
let vals = vec![
String::from("more"),
String::from("messages"),
String::from("for"),
String::from("you"),
];
for val in vals {
tx.send(val).unwrap();
trpl::sleep(Duration::from_secs(1)).await;
}
});
let futures: Vec<Pin<&mut dyn Future<Output = ()>>> =
vec![tx1_fut, rx_fut, tx_fut];
trpl::join_all(futures).await;
});
}Теперь этот пример компилируется и выполняется, и мы могли бы добавлять futures в вектор или удалять их из него во время выполнения и ожидать их все вместе.
Pin и Unpin в основном важны для создания низкоуровневых библиотек или при
создании самой среды выполнения, а не для повседневного Rust-кода. Но когда вы
видите эти трейты в сообщениях об ошибках, теперь вы будете лучше понимать,
как исправить свой код!
Примечание: Эта комбинация
PinиUnpinпозволяет безопасно реализовать в Rust целый класс сложных типов, которые иначе оказались бы затруднительными, потому что они самоссылочные. Типы, требующиеPin, сегодня чаще всего встречаются в async Rust, но время от времени вы можете увидеть их и в других контекстах.Подробности того, как работают
PinиUnpin, и правила, которые они должны соблюдать, подробно описаны в API-документации дляstd::pin, поэтому если вы хотите узнать больше, это отличное место для начала.Если вы хотите еще подробнее понять, как все работает под капотом, см. главы 2 и 4 книги Asynchronous Programming in Rust.
Трейт Stream
Теперь, когда у вас есть более глубокое понимание трейтов Future, Pin и
Unpin, мы можем обратить внимание на трейт Stream. Как вы узнали ранее в
главе, streams похожи на асинхронные итераторы. Однако, в отличие от
Iterator и Future, на момент написания этой книги Stream не имеет
определения в стандартной библиотеке, но существует очень распространенное
определение из крейта futures, используемое по всей экосистеме.
Давайте повторим определения трейтов Iterator и Future, прежде чем
посмотрим, как трейт Stream может объединить их. Из Iterator у нас есть
идея последовательности: его метод next предоставляет Option<Self::Item>.
Из Future у нас есть идея готовности во времени: его метод poll
предоставляет Poll<Self::Output>. Чтобы представить последовательность
элементов, которые становятся готовыми со временем, мы определяем трейт
Stream, объединяющий эти особенности:
#![allow(unused)]
fn main() {
use std::pin::Pin;
use std::task::{Context, Poll};
trait Stream {
type Item;
fn poll_next(
self: Pin<&mut Self>,
cx: &mut Context<'_>
) -> Poll<Option<Self::Item>>;
}
}Трейт Stream определяет связанный тип с именем Item для типа элементов,
производимых stream. Это похоже на Iterator, где элементов может быть от
нуля до многих, и отличается от Future, где всегда есть один Output, даже
если это единичный тип ().
Stream также определяет метод для получения этих элементов. Мы называем его
poll_next, чтобы было ясно, что он опрашивает так же, как это делает
Future::poll, и производит последовательность элементов так же, как это
делает Iterator::next. Его возвращаемый тип объединяет Poll с Option.
Внешний тип — Poll, потому что его нужно проверять на готовность, как и
future. Внутренний тип — Option, потому что он должен сигнализировать, есть
ли еще элементы, как это делает итератор.
Что-то очень похожее на это определение, вероятно, в итоге станет частью стандартной библиотеки Rust. Тем временем оно является частью инструментария большинства сред выполнения, так что вы можете на него полагаться, и все, что мы рассмотрим дальше, в целом должно применяться!
Однако в примерах, которые мы видели в разделе «Streams: futures в
последовательности», мы использовали не poll_next и
не Stream, а next и StreamExt. Конечно, мы могли бы работать напрямую
с API poll_next, вручную написав свои собственные конечные автоматы
Stream, точно так же как мы могли бы работать с futures напрямую через их
метод poll. Но использовать await намного удобнее, и трейт StreamExt
предоставляет метод next, чтобы мы могли делать именно это:
#![allow(unused)]
fn main() {
use std::pin::Pin;
use std::task::{Context, Poll};
trait Stream {
type Item;
fn poll_next(
self: Pin<&mut Self>,
cx: &mut Context<'_>,
) -> Poll<Option<Self::Item>>;
}
trait StreamExt: Stream {
async fn next(&mut self) -> Option<Self::Item>
where
Self: Unpin;
// other methods...
}
}Примечание: Фактическое определение, которое мы использовали ранее в главе, выглядит немного иначе, потому что оно поддерживает версии Rust, которые еще не поддерживали использование async-функций в трейтах. В результате оно выглядит так:
fn next(&mut self) -> Next<'_, Self> where Self: Unpin;Этот тип
Nextявляетсяstruct, реализующейFuture, и позволяет нам назвать время жизни ссылки наselfс помощьюNext<'_, Self>, чтобыawaitмог работать с этим методом.
Трейт StreamExt также является местом для всех интересных методов, доступных
для использования со streams. StreamExt автоматически реализуется для каждого
типа, который реализует Stream, но эти трейты определены отдельно, чтобы
сообщество могло развивать удобные API без влияния на фундаментальный трейт.
В версии StreamExt, используемой в крейте trpl, трейт не только определяет
метод next, но и предоставляет реализацию next по умолчанию, которая
корректно обрабатывает детали вызова Stream::poll_next. Это означает, что
даже когда вам нужно написать собственный потоковый тип данных, вам нужно
только реализовать Stream, а затем любой, кто использует ваш тип данных,
сможет автоматически использовать с ним StreamExt и его методы.
Это все, что мы собираемся рассмотреть о низкоуровневых деталях этих трейтов. В завершение давайте подумаем, как futures (включая streams), задачи и потоки соотносятся друг с другом!
Future, задачи и потоки
Собираем все вместе: futures, задачи и потоки
Как мы видели в главе 16, потоки предоставляют один подход к конкурентности. В этой главе мы увидели другой подход: использование async с futures и streams. Если вы задаетесь вопросом, когда выбирать один метод вместо другого, ответ такой: зависит от ситуации! И во многих случаях выбор заключается не в потоках или async, а в потоках и async.
Многие операционные системы уже десятилетиями предоставляют модели конкурентности на основе потоков, и в результате многие языки программирования их поддерживают. Однако у этих моделей есть компромиссы. Во многих операционных системах каждый поток использует довольно много памяти. Кроме того, потоки возможны только тогда, когда их поддерживают ваша операционная система и оборудование. В отличие от массовых настольных и мобильных компьютеров, некоторые встроенные системы вообще не имеют ОС, а значит, у них также нет потоков.
Модель async предоставляет другой — и в конечном счете дополняющий — набор
компромиссов. В модели async конкурентным операциям не нужны собственные
потоки. Вместо этого они могут выполняться в задачах, как тогда, когда мы
использовали trpl::spawn_task, чтобы запустить работу из синхронной функции
в разделе о streams. Задача похожа на поток, но вместо управления со стороны
операционной системы ею управляет код уровня библиотеки: среда выполнения.
Есть причина, по которой API для порождения потоков и порождения задач так похожи. Потоки действуют как граница для наборов синхронных операций; конкурентность возможна между потоками. Задачи действуют как граница для наборов асинхронных операций; конкурентность возможна и между задачами, и внутри задач, потому что задача может переключаться между futures в своем теле. Наконец, futures являются самой мелкой единицей конкурентности в Rust, и каждый future может представлять дерево других futures. Среда выполнения, а точнее ее исполнитель, управляет задачами, а задачи управляют futures. В этом отношении задачи похожи на легковесные потоки, управляемые средой выполнения, с дополнительными возможностями, которые появляются благодаря управлению со стороны среды выполнения, а не операционной системы.
Это не означает, что async-задачи всегда лучше потоков (или наоборот).
Конкурентность с потоками в некотором смысле является более простой моделью
программирования, чем конкурентность с async. Это может быть как сильной,
так и слабой стороной. Потоки в некотором смысле работают по принципу
«запустить и забыть»; у них нет встроенного аналога future, поэтому они просто
выполняются до завершения, не прерываясь ничем, кроме самой операционной
системы.
И оказывается, что потоки и задачи часто очень хорошо работают вместе, потому
что задачи могут (по крайней мере в некоторых средах выполнения) перемещаться
между потоками. На самом деле под капотом среда выполнения, которую мы
использовали, включая функции spawn_blocking и spawn_task, по умолчанию
многопоточная! Многие среды выполнения используют подход под названием
кража работы (work stealing), чтобы прозрачно перемещать задачи между
потоками на основе того, как потоки используются в данный момент, и улучшать
общую производительность системы. Такой подход фактически требует и потоков,
и задач, а значит, и futures.
Когда вы думаете, какой метод и когда использовать, учитывайте эти практические правила:
- Если работа очень хорошо распараллеливается (то есть ограничена CPU), например обработка большого количества данных, где каждую часть можно обработать отдельно, потоки будут лучшим выбором.
- Если работа очень конкурентна (то есть ограничена I/O), например обработка сообщений из множества разных источников, которые могут поступать с разными интервалами или с разной скоростью, async будет лучшим выбором.
А если вам нужны и параллелизм, и конкурентность, вам не нужно выбирать между потоками и async. Вы можете свободно использовать их вместе, позволяя каждому играть ту роль, для которой он подходит лучше всего. Например, листинг 17-25 показывает довольно распространенный пример такого смешения в реальном Rust-коде.
extern crate trpl; // for mdbook test
use std::{thread, time::Duration};
fn main() {
let (tx, mut rx) = trpl::channel();
thread::spawn(move || {
for i in 1..11 {
tx.send(i).unwrap();
thread::sleep(Duration::from_secs(1));
}
});
trpl::block_on(async {
while let Some(message) = rx.recv().await {
println!("{message}");
}
});
}Мы начинаем с создания async-канала, а затем порождаем поток, который получает
владение отправляющей стороной канала с помощью ключевого слова move. Внутри
потока мы отправляем числа от 1 до 10, засыпая на секунду между каждым.
Наконец, мы запускаем future, созданный async-блоком, переданным в
trpl::block_on, как делали на протяжении всей главы. В этом future мы
ожидаем эти сообщения, так же как в других примерах передачи сообщений,
которые уже видели.
Возвращаясь к сценарию, с которого мы начали главу, представьте выполнение набора задач кодирования видео с помощью выделенного потока (потому что кодирование видео ограничено вычислениями), но уведомление UI о завершении этих операций через async-канал. В реальных сценариях использования есть бесчисленное множество примеров таких сочетаний.
Итоги
Это не последний раз, когда вы увидите конкурентность в этой книге. Проект в главе 21 применит эти концепции в более реалистичной ситуации, чем простые примеры, обсуждавшиеся здесь, и более напрямую сравнит решение задач с помощью потоков с решением с помощью задач и futures.
Независимо от того, какой из этих подходов вы выберете, Rust дает вам инструменты, необходимые для написания безопасного, быстрого, конкурентного кода — будь то высокопроизводительный веб-сервер или встроенная операционная система.
Далее мы поговорим об идиоматичных способах моделировать задачи и структурировать решения по мере роста ваших программ на Rust. Кроме того, мы обсудим, как идиомы Rust соотносятся с теми, которые могут быть знакомы вам из объектно-ориентированного программирования.
Возможности объектно-ориентированного программирования
Объектно-ориентированное программирование (ООП) — это способ моделирования программ. Объекты как программная концепция были введены в языке программирования Simula в 1960-х годах. Эти объекты повлияли на программную архитектуру Алана Кея, в которой объекты передают сообщения друг другу. Чтобы описать эту архитектуру, в 1967 году он ввел термин объектно-ориентированное программирование. Существует много конкурирующих определений того, что такое ООП, и по одним из этих определений Rust является объектно-ориентированным, а по другим — нет. В этой главе мы рассмотрим некоторые характеристики, которые обычно считаются объектно-ориентированными, и то, как эти характеристики переносятся в идиоматичный Rust. Затем мы покажем, как реализовать объектно-ориентированный шаблон проектирования в Rust, и обсудим компромиссы такого подхода по сравнению с реализацией решения, использующей вместо этого некоторые сильные стороны Rust.
Характеристики объектно-ориентированных языков
Характеристики объектно-ориентированных языков
В сообществе программистов нет единого мнения о том, какие возможности должен иметь язык, чтобы считаться объектно-ориентированным. На Rust повлияло много парадигм программирования, включая ООП; например, в главе 13 мы исследовали возможности, пришедшие из функционального программирования. Можно утверждать, что языки ООП имеют некоторые общие характеристики, а именно объекты, инкапсуляцию и наследование. Давайте посмотрим, что означает каждая из этих характеристик и поддерживает ли ее Rust.
Объекты содержат данные и поведение
Книга Design Patterns: Elements of Reusable Object-Oriented Software Эриха Гаммы, Ричарда Хелма, Ральфа Джонсона и Джона Влиссидеса (Addison-Wesley, 1994), в разговорной речи называемая книгой Банды четырех, является каталогом объектно-ориентированных шаблонов проектирования. Она определяет ООП так:
Объектно-ориентированные программы состоят из объектов. Объект упаковывает вместе данные и процедуры, которые работают с этими данными. Эти процедуры обычно называются методами или операциями.
Используя это определение, Rust является объектно-ориентированным: структуры и
перечисления имеют данные, а блоки impl предоставляют методы для структур и
перечислений. Хотя структуры и перечисления с методами не называются
объектами, они предоставляют ту же функциональность согласно определению
объектов из книги Банды четырех.
Инкапсуляция, скрывающая детали реализации
Другой аспект, обычно связываемый с ООП, — идея инкапсуляции, которая означает, что детали реализации объекта недоступны коду, использующему этот объект. Поэтому единственный способ взаимодействовать с объектом — через его открытый API; код, использующий объект, не должен иметь возможности проникнуть во внутренности объекта и напрямую изменить данные или поведение. Это позволяет программисту изменять и рефакторить внутреннее устройство объекта без необходимости менять код, который использует этот объект.
Мы обсуждали, как управлять инкапсуляцией, в главе 7: можно использовать
ключевое слово pub, чтобы решить, какие модули, типы, функции и методы в
нашем коде должны быть публичными, а все остальное по умолчанию остается
приватным. Например, мы можем определить структуру AveragedCollection, у
которой есть поле, содержащее вектор значений i32. У структуры также может
быть поле, содержащее среднее значение элементов в векторе; это означает, что
среднее не нужно вычислять по требованию каждый раз, когда оно кому-то
понадобится. Другими словами, AveragedCollection будет кэшировать
вычисленное среднее для нас. В листинге 18-1 приведено определение структуры
AveragedCollection.
pub struct AveragedCollection {
list: Vec<i32>,
average: f64,
}AveragedCollection, которая поддерживает список целых чисел и среднее значение элементов в коллекцииСтруктура помечена pub, чтобы другой код мог ее использовать, но поля внутри
структуры остаются приватными. В данном случае это важно, потому что мы хотим
гарантировать: всякий раз, когда значение добавляется в список или удаляется
из него, среднее значение тоже обновляется. Мы делаем это, реализуя для
структуры методы add, remove и average, как показано в листинге 18-2.
pub struct AveragedCollection {
list: Vec<i32>,
average: f64,
}
impl AveragedCollection {
pub fn add(&mut self, value: i32) {
self.list.push(value);
self.update_average();
}
pub fn remove(&mut self) -> Option<i32> {
let result = self.list.pop();
match result {
Some(value) => {
self.update_average();
Some(value)
}
None => None,
}
}
pub fn average(&self) -> f64 {
self.average
}
fn update_average(&mut self) {
let total: i32 = self.list.iter().sum();
self.average = total as f64 / self.list.len() as f64;
}
}add, remove и average для AveragedCollectionПубличные методы add, remove и average — единственные способы получить
доступ к данным в экземпляре AveragedCollection или изменить их. Когда
элемент добавляется в list с помощью метода add или удаляется с помощью
метода remove, реализации каждого из них вызывают приватный метод
update_average, который также отвечает за обновление поля average.
Мы оставляем поля list и average приватными, чтобы у внешнего кода не было
способа напрямую добавлять элементы в поле list или удалять их из него; в
противном случае поле average могло бы рассинхронизироваться при изменении
list. Метод average возвращает значение из поля average, позволяя
внешнему коду читать average, но не изменять его.
Поскольку мы инкапсулировали детали реализации структуры AveragedCollection,
мы можем легко изменить ее части в будущем, например структуру данных. К
примеру, для поля list можно было бы использовать HashSet<i32> вместо
Vec<i32>. Пока сигнатуры публичных методов add, remove и average
остаются теми же, код, использующий AveragedCollection, менять не придется.
Если бы вместо этого мы сделали list публичным, это не обязательно было бы
так: у HashSet<i32> и Vec<i32> разные методы для добавления и удаления
элементов, поэтому внешний код, вероятно, пришлось бы изменить, если бы он
напрямую модифицировал list.
Если инкапсуляция является обязательным аспектом, чтобы язык считался
объектно-ориентированным, то Rust соответствует этому требованию. Возможность
использовать или не использовать pub для разных частей кода позволяет
инкапсулировать детали реализации.
Наследование как система типов и как совместное использование кода
Наследование — это механизм, с помощью которого объект может наследовать элементы из определения другого объекта, получая данные и поведение родительского объекта без необходимости определять их заново.
Если язык должен иметь наследование, чтобы быть объектно-ориентированным, то Rust таким языком не является. В Rust нет способа определить структуру, которая наследует поля и реализации методов родительской структуры, без использования макроса.
Однако если вы привыкли иметь наследование в своем наборе инструментов программирования, в Rust можно использовать другие решения, в зависимости от того, по какой причине вы изначально обращаетесь к наследованию.
Вы выбрали бы наследование по двум основным причинам. Первая — повторное
использование кода: можно реализовать определенное поведение для одного типа,
а наследование позволяет повторно использовать эту реализацию для другого типа.
В ограниченном виде это можно сделать в Rust с помощью реализаций методов
трейта по умолчанию, которые вы видели в листинге 10-14, когда мы добавили
реализацию метода summarize по умолчанию в трейте Summary. Любой тип,
реализующий трейт Summary, будет иметь доступный для него метод summarize
без дополнительного кода. Это похоже на то, как у родительского класса есть
реализация метода, и наследующий дочерний класс также получает реализацию этого
метода. Мы также можем переопределить реализацию метода summarize по
умолчанию при реализации трейта Summary, что похоже на то, как дочерний
класс переопределяет реализацию метода, унаследованного от родительского
класса.
Другая причина использовать наследование связана с системой типов: она позволяет использовать дочерний тип в тех же местах, где используется родительский тип. Это также называется полиморфизмом, что означает возможность подставлять несколько объектов друг вместо друга во время выполнения, если у них есть определенные общие характеристики.
Полиморфизм
Для многих людей полиморфизм является синонимом наследования. Но на самом деле это более общая концепция, относящаяся к коду, который может работать с данными нескольких типов. В случае наследования эти типы обычно являются подклассами.
Вместо этого Rust использует обобщения, чтобы абстрагироваться над разными возможными типами, и ограничения трейтов, чтобы наложить требования на то, что эти типы должны предоставлять. Иногда это называется ограниченным параметрическим полиморфизмом.
Rust выбрал другой набор компромиссов, не предлагая наследование. Наследование часто несет риск совместного использования большего количества кода, чем необходимо. Подклассы не всегда должны разделять все характеристики своего родительского класса, но при наследовании они будут это делать. Это может сделать дизайн программы менее гибким. Это также создает возможность вызывать у подклассов методы, которые не имеют смысла или вызывают ошибки, потому что эти методы неприменимы к подклассу. Кроме того, некоторые языки разрешают только одиночное наследование (то есть подкласс может наследовать только от одного класса), что еще сильнее ограничивает гибкость дизайна программы.
По этим причинам Rust использует другой подход: трейт-объекты вместо наследования для достижения полиморфизма во время выполнения. Давайте посмотрим, как работают трейт-объекты.
Использование объектов трейтов для абстрагирования общего поведения
Использование трейт-объектов для абстрагирования общего поведения
В главе 8 мы упоминали, что одно из ограничений векторов заключается в том,
что они могут хранить элементы только одного типа. В листинге 8-9 мы создали
обходное решение, где определили перечисление SpreadsheetCell с вариантами
для хранения целых чисел, чисел с плавающей точкой и текста. Это означало, что
мы могли хранить разные типы данных в каждой ячейке и при этом иметь вектор,
представляющий строку ячеек. Такое решение вполне подходит, когда наши
взаимозаменяемые элементы принадлежат фиксированному набору типов, известному
во время компиляции кода.
Однако иногда мы хотим, чтобы пользователь нашей библиотеки мог расширять
набор типов, допустимых в конкретной ситуации. Чтобы показать, как можно этого
достичь, мы создадим пример инструмента графического пользовательского
интерфейса (GUI), который проходит по списку элементов, вызывая у каждого
метод draw, чтобы нарисовать его на экране; это распространенный прием для
GUI-инструментов. Мы создадим библиотечный крейт gui, содержащий структуру
GUI-библиотеки. Этот крейт может включать некоторые типы для использования,
такие как Button или TextField. Кроме того, пользователи gui захотят
создавать собственные типы, которые можно рисовать: например, один программист
может добавить Image, а другой — SelectBox.
Во время написания библиотеки мы не можем знать и определить все типы, которые
другие программисты могут захотеть создать. Но мы знаем, что gui должен
отслеживать множество значений разных типов и вызывать метод draw у каждого
из этих разнотипных значений. Ему не нужно знать, что именно произойдет при
вызове метода draw; достаточно знать, что у значения будет доступен этот
метод для вызова.
Чтобы сделать это в языке с наследованием, мы могли бы определить класс с
именем Component, у которого есть метод draw. Другие классы, такие как
Button, Image и SelectBox, наследовались бы от Component и таким
образом наследовали бы метод draw. Каждый из них мог бы переопределить метод
draw, чтобы задать свое поведение, но фреймворк мог бы обращаться со всеми
типами так, будто они являются экземплярами Component, и вызывать у них
draw. Но поскольку в Rust нет наследования, нам нужен другой способ
структурировать библиотеку gui, чтобы позволить пользователям создавать
новые типы, совместимые с библиотекой.
Определение трейта для общего поведения
Чтобы реализовать поведение, которое мы хотим получить от gui, мы определим
трейт с именем Draw, у которого будет один метод с именем draw. Затем мы
можем определить вектор, принимающий трейт-объект. Трейт-объект указывает и
на экземпляр типа, реализующего указанный нами трейт, и на таблицу, которая
используется для поиска методов трейта у этого типа во время выполнения. Мы
создаем трейт-объект, указывая некоторый вид указателя, например ссылку или
умный указатель Box<T>, затем ключевое слово dyn, а затем соответствующий
трейт. (О причине, по которой трейт-объекты должны использовать указатель, мы
поговорим в разделе «Динамически размерные типы и трейт
Sized» главы 20.) Мы можем использовать
трейт-объекты вместо обобщенного или конкретного типа. Везде, где мы
используем трейт-объект, система типов Rust во время компиляции гарантирует,
что любое значение, используемое в этом контексте, будет реализовывать трейт
этого трейт-объекта. Следовательно, нам не нужно знать все возможные типы во
время компиляции.
Мы упоминали, что в Rust мы воздерживаемся от называния структур и
перечислений «объектами», чтобы отличать их от объектов в других языках. В
структуре или перечислении данные в полях структуры и поведение в блоках
impl разделены, тогда как в других языках данные и поведение, объединенные в
одну концепцию, часто называются объектом. Трейт-объекты отличаются от
объектов в других языках тем, что мы не можем добавить данные в трейт-объект.
Трейт-объекты не столь универсально полезны, как объекты в других языках: их
конкретная цель — позволить абстрагироваться над общим поведением.
Листинг 18-3 показывает, как определить трейт с именем Draw с одним методом
draw.
pub trait Draw {
fn draw(&self);
}DrawЭтот синтаксис должен быть знаком вам по обсуждению определения трейтов в
главе 10. Далее идет новый синтаксис: в листинге 18-4 определяется структура
Screen, которая хранит вектор с именем components. Этот вектор имеет тип
Box<dyn Draw>, то есть является трейт-объектом; он служит заменой для любого
типа внутри Box, который реализует трейт Draw.
pub trait Draw {
fn draw(&self);
}
pub struct Screen {
pub components: Vec<Box<dyn Draw>>,
}Screen с полем components, хранящим вектор трейт-объектов, реализующих трейт DrawДля структуры Screen мы определим метод с именем run, который будет
вызывать метод draw у каждого из ее components, как показано в листинге
18-5.
pub trait Draw {
fn draw(&self);
}
pub struct Screen {
pub components: Vec<Box<dyn Draw>>,
}
impl Screen {
pub fn run(&self) {
for component in self.components.iter() {
component.draw();
}
}
}run для Screen, вызывающий метод draw у каждого компонентаЭто работает иначе, чем определение структуры, использующей обобщенный
параметр типа с ограничениями трейта. Обобщенный параметр типа может быть
заменен только одним конкретным типом за раз, тогда как трейт-объекты
позволяют нескольким конкретным типам подставляться вместо трейт-объекта во
время выполнения. Например, мы могли бы определить структуру Screen с
помощью обобщенного типа и ограничения трейта, как в листинге 18-6.
pub trait Draw {
fn draw(&self);
}
pub struct Screen<T: Draw> {
pub components: Vec<T>,
}
impl<T> Screen<T>
where
T: Draw,
{
pub fn run(&self) {
for component in self.components.iter() {
component.draw();
}
}
}Screen и ее метода run с использованием обобщений и ограничений трейтовЭто ограничивает нас экземпляром Screen, у которого список компонентов
состоит либо только из значений типа Button, либо только из значений типа
TextField. Если у вас всегда будут только однородные коллекции,
использование обобщений и ограничений трейтов предпочтительнее, потому что
определения будут мономорфизированы во время компиляции для использования
конкретных типов.
С другой стороны, с методом, использующим трейт-объекты, один экземпляр
Screen может содержать Vec<T>, в котором находятся и Box<Button>, и
Box<TextField>. Давайте посмотрим, как это работает, а затем поговорим о
последствиях для производительности во время выполнения.
Реализация трейта
Теперь мы добавим несколько типов, реализующих трейт Draw. Мы предоставим
тип Button. Опять же, фактическая реализация GUI-библиотеки выходит за рамки
этой книги, поэтому метод draw не будет иметь полезной реализации в своем
теле. Чтобы представить, как могла бы выглядеть реализация, структура Button
может иметь поля width, height и label, как показано в листинге 18-7.
pub trait Draw {
fn draw(&self);
}
pub struct Screen {
pub components: Vec<Box<dyn Draw>>,
}
impl Screen {
pub fn run(&self) {
for component in self.components.iter() {
component.draw();
}
}
}
pub struct Button {
pub width: u32,
pub height: u32,
pub label: String,
}
impl Draw for Button {
fn draw(&self) {
// code to actually draw a button
}
}Button, реализующая трейт DrawПоля width, height и label у Button будут отличаться от полей других
компонентов; например, тип TextField мог бы иметь те же поля плюс поле
placeholder. Каждый тип, который мы хотим рисовать на экране, будет
реализовывать трейт Draw, но будет использовать разный код в методе draw,
чтобы определить, как рисовать этот конкретный тип, как здесь делает Button
(без фактического GUI-кода, как уже упоминалось). Например, тип Button мог
бы иметь дополнительный блок impl, содержащий методы, связанные с тем, что
происходит, когда пользователь нажимает кнопку. Такие методы не будут
применимы к типам вроде TextField.
Если кто-то, использующий нашу библиотеку, решит реализовать структуру
SelectBox с полями width, height и options, он также реализует трейт
Draw для типа SelectBox, как показано в листинге 18-8.
use gui::Draw;
struct SelectBox {
width: u32,
height: u32,
options: Vec<String>,
}
impl Draw for SelectBox {
fn draw(&self) {
// code to actually draw a select box
}
}
fn main() {}gui и реализует трейт Draw для структуры SelectBoxПользователь нашей библиотеки теперь может написать свою функцию main, чтобы
создать экземпляр Screen. В экземпляр Screen он может добавить SelectBox
и Button, поместив каждый из них в Box<T>, чтобы они стали
трейт-объектами. Затем он может вызвать метод run у экземпляра Screen, и
тот вызовет draw у каждого из компонентов. Листинг 18-9 показывает эту
реализацию.
use gui::Draw;
struct SelectBox {
width: u32,
height: u32,
options: Vec<String>,
}
impl Draw for SelectBox {
fn draw(&self) {
// code to actually draw a select box
}
}
use gui::{Button, Screen};
fn main() {
let screen = Screen {
components: vec![
Box::new(SelectBox {
width: 75,
height: 10,
options: vec![
String::from("Yes"),
String::from("Maybe"),
String::from("No"),
],
}),
Box::new(Button {
width: 50,
height: 10,
label: String::from("OK"),
}),
],
};
screen.run();
}Когда мы писали библиотеку, мы не знали, что кто-то может добавить тип
SelectBox, но наша реализация Screen смогла работать с новым типом и
нарисовать его, потому что SelectBox реализует трейт Draw, а значит,
реализует метод draw.
Эта концепция — интересоваться только сообщениями, на которые отвечает
значение, а не конкретным типом значения — похожа на концепцию утиной
типизации в динамически типизированных языках: если ходит как утка и крякает
как утка, значит, это должна быть утка! В реализации run для Screen в
листинге 18-5
run не должен знать конкретный тип каждого компонента. Он не проверяет,
является ли компонент экземпляром Button или SelectBox, он просто вызывает
метод draw у компонента. Указав Box<dyn Draw> как тип значений в векторе
components, мы определили, что Screen нужны значения, у которых можно
вызвать метод draw.
Преимущество использования трейт-объектов и системы типов Rust для написания кода, похожего на код с утиной типизацией, заключается в том, что нам никогда не приходится проверять во время выполнения, реализует ли значение конкретный метод, или беспокоиться о получении ошибок, если значение не реализует метод, но мы все равно его вызвали. Rust не скомпилирует наш код, если значения не реализуют трейты, которые нужны трейт-объектам.
Например, листинг 18-10 показывает, что произойдет, если мы попытаемся создать
Screen со String в качестве компонента.
use gui::Screen;
fn main() {
let screen = Screen {
components: vec![Box::new(String::from("Hi"))],
};
screen.run();
}Мы получим эту ошибку, потому что String не реализует трейт Draw:
$ cargo run
Compiling gui v0.1.0 (file:///projects/gui)
error[E0277]: the trait bound `String: Draw` is not satisfied
--> src/main.rs:5:26
|
5 | components: vec![Box::new(String::from("Hi"))],
| ^^^^^^^^^^^^^^^^^^^^^^^^^^^^ the trait `Draw` is not implemented for `String`
|
= help: the trait `Draw` is implemented for `Button`
= note: required for the cast from `Box<String>` to `Box<dyn Draw>`
For more information about this error, try `rustc --explain E0277`.
error: could not compile `gui` (bin "gui") due to 1 previous error
Эта ошибка сообщает нам, что либо мы передаем в Screen не то, что хотели
передать, и поэтому должны передать другой тип, либо нам следует реализовать
Draw для String, чтобы Screen мог вызвать у него draw.
Выполнение динамической диспетчеризации
Вспомните наше обсуждение процесса мономорфизации, который компилятор выполняет для обобщений, в разделе «Производительность кода, использующего обобщения» главы 10: компилятор генерирует необобщенные реализации функций и методов для каждого конкретного типа, который мы используем вместо обобщенного параметра типа. Код, получающийся в результате мономорфизации, выполняет статическую диспетчеризацию: компилятор знает во время компиляции, какой метод вы вызываете. Это противопоставляется динамической диспетчеризации, когда компилятор не может сказать во время компиляции, какой метод вы вызываете. В случаях динамической диспетчеризации компилятор генерирует код, который во время выполнения узнает, какой метод вызвать.
Когда мы используем трейт-объекты, Rust должен использовать динамическую диспетчеризацию. Компилятор не знает все типы, которые могут использоваться с кодом, использующим трейт-объекты, поэтому он не знает, реализацию какого метода у какого типа нужно вызвать. Вместо этого во время выполнения Rust использует указатели внутри трейт-объекта, чтобы узнать, какой метод вызвать. Этот поиск создает накладные расходы во время выполнения, которых нет при статической диспетчеризации. Динамическая диспетчеризация также не позволяет компилятору выбрать встраивание кода метода, что, в свою очередь, препятствует некоторым оптимизациям. Кроме того, в Rust есть правила о том, где можно и где нельзя использовать динамическую диспетчеризацию; они называются dyn-совместимостью. Эти правила выходят за рамки этого обсуждения, но вы можете подробнее прочитать о них в справочнике. Однако мы получили дополнительную гибкость в коде, который написали в листинге 18-5 и смогли поддержать в листинге 18-9, так что это компромисс, который стоит учитывать.
Реализация объектно-ориентированного паттерна проектирования
Реализация объектно-ориентированного шаблона проектирования
Шаблон «Состояние» (state pattern) — это объектно-ориентированный шаблон проектирования. Суть шаблона в том, что мы определяем набор состояний, которые значение может иметь внутри. Состояния представлены набором объектов состояния, а поведение значения меняется в зависимости от его состояния. Мы разберем пример структуры записи блога, у которой есть поле для хранения ее состояния; это состояние будет объектом состояния из набора «черновик», «проверка» или «опубликовано».
Объекты состояния имеют общую функциональность: в Rust, конечно, мы используем структуры и трейты, а не объекты и наследование. Каждый объект состояния отвечает за собственное поведение и за управление тем, когда он должен перейти в другое состояние. Значение, хранящее объект состояния, ничего не знает о различном поведении состояний или о том, когда нужно переходить между состояниями.
Преимущество использования шаблона «Состояние» заключается в том, что когда бизнес-требования программы изменяются, нам не нужно менять код значения, хранящего состояние, или код, который использует это значение. Нам потребуется только обновить код внутри одного из объектов состояния, чтобы изменить его правила, или, возможно, добавить больше объектов состояния.
Сначала мы реализуем шаблон «Состояние» более традиционным объектно-ориентированным способом. Затем используем подход, который немного естественнее для Rust. Давайте постепенно реализуем рабочий процесс записи блога с помощью шаблона «Состояние».
Итоговая функциональность будет выглядеть так:
- Запись блога начинается как пустой черновик.
- Когда черновик готов, запрашивается проверка записи.
- Когда запись одобрена, она публикуется.
- Только опубликованные записи блога возвращают содержимое для печати, чтобы неодобренные записи нельзя было случайно опубликовать.
Любые другие попытки изменить запись не должны иметь эффекта. Например, если мы попробуем одобрить черновик записи блога до того, как запросили проверку, запись должна остаться неопубликованным черновиком.
Попытка в традиционном объектно-ориентированном стиле
Существует бесконечно много способов структурировать код для решения одной и той же задачи, и у каждого свои компромиссы. Реализация в этом разделе больше похожа на традиционный объектно-ориентированный стиль, который можно написать в Rust, но он не использует некоторые сильные стороны Rust. Позже мы продемонстрируем другое решение, которое все еще использует объектно-ориентированный шаблон проектирования, но структурировано так, что может выглядеть менее привычно для программистов с объектно-ориентированным опытом. Мы сравним два решения, чтобы увидеть компромиссы при проектировании Rust-кода иначе, чем кода в других языках.
Листинг 18-11 показывает этот рабочий процесс в виде кода: это пример
использования API, который мы реализуем в библиотечном крейте с именем blog.
Этот код пока не скомпилируется, потому что мы еще не реализовали крейт
blog.
use blog::Post;
fn main() {
let mut post = Post::new();
post.add_text("I ate a salad for lunch today");
assert_eq!("", post.content());
post.request_review();
assert_eq!("", post.content());
post.approve();
assert_eq!("I ate a salad for lunch today", post.content());
}blogМы хотим позволить пользователю создать новый черновик записи блога с помощью
Post::new. Мы хотим позволить добавлять текст в запись блога. Если мы
попробуем получить содержимое записи сразу, до одобрения, мы не должны
получить никакого текста, потому что запись все еще является черновиком. Мы
добавили assert_eq! в код для демонстрации. Отличным модульным тестом для
этого было бы утверждение, что черновик записи блога возвращает пустую строку
из метода content, но для этого примера мы не будем писать тесты.
Далее мы хотим разрешить запрос проверки записи, и мы хотим, чтобы content
возвращал пустую строку во время ожидания проверки. Когда запись получает
одобрение, она должна быть опубликована, то есть текст записи будет
возвращаться при вызове content.
Обратите внимание, что единственный тип из крейта, с которым мы
взаимодействуем, — это тип Post. Этот тип будет использовать шаблон
«Состояние» и хранить значение, которое будет одним из трех объектов состояния,
представляющих различные состояния, в которых может находиться запись:
черновик, проверка или опубликовано. Переход из одного состояния в другое
будет управляться внутри типа Post. Состояния меняются в ответ на методы,
которые пользователи нашей библиотеки вызывают у экземпляра Post, но им не
нужно напрямую управлять изменениями состояния. Кроме того, пользователи не
могут ошибиться с состояниями, например опубликовать запись до того, как она
будет проверена.
Определение Post и создание нового экземпляра
Давайте начнем реализацию библиотеки! Мы знаем, что нам нужна публичная
структура Post, хранящая некоторое содержимое, поэтому начнем с определения
структуры и связанной публичной функции new для создания экземпляра Post,
как показано в листинге 18-12. Мы также создадим приватный трейт State,
который определит поведение, необходимое всем объектам состояния для Post.
Затем Post будет хранить трейт-объект Box<dyn State> внутри Option<T> в
приватном поле с именем state, чтобы хранить объект состояния. Скоро вы
увидите, зачем нужен Option<T>.
pub struct Post {
state: Option<Box<dyn State>>,
content: String,
}
impl Post {
pub fn new() -> Post {
Post {
state: Some(Box::new(Draft {})),
content: String::new(),
}
}
}
trait State {}
struct Draft {}
impl State for Draft {}Post и функции new, создающей новый экземпляр Post, трейта State и структуры DraftТрейт State определяет поведение, общее для разных состояний записи.
Объектами состояния являются Draft, PendingReview и Published, и все они
будут реализовывать трейт State. Пока у трейта нет никаких методов, и мы
начнем с определения только состояния Draft, потому что именно в этом
состоянии должна начинаться запись.
Когда мы создаем новый Post, мы устанавливаем его поле state в значение
Some, которое хранит Box. Этот Box указывает на новый экземпляр структуры
Draft. Это гарантирует, что всякий раз, когда мы создаем новый экземпляр
Post, он будет начинаться как черновик. Поскольку поле state у Post
приватное, невозможно создать Post в каком-либо другом состоянии! В функции
Post::new мы устанавливаем поле content в новую пустую String.
Хранение текста содержимого записи
В листинге 18-11 мы видели, что хотим иметь возможность вызвать метод
add_text и передать ему &str, который затем добавляется как текстовое
содержимое записи блога. Мы реализуем это как метод, а не открываем поле
content через pub, чтобы позже можно было реализовать метод, управляющий
тем, как читаются данные поля content. Метод add_text довольно прост, так
что добавим реализацию из листинга 18-13 в блок impl Post.
pub struct Post {
state: Option<Box<dyn State>>,
content: String,
}
impl Post {
// --snip--
pub fn new() -> Post {
Post {
state: Some(Box::new(Draft {})),
content: String::new(),
}
}
pub fn add_text(&mut self, text: &str) {
self.content.push_str(text);
}
}
trait State {}
struct Draft {}
impl State for Draft {}add_text для добавления текста в content записиМетод add_text принимает изменяемую ссылку на self, потому что мы меняем
экземпляр Post, у которого вызываем add_text. Затем мы вызываем push_str
у String в поле content и передаем аргумент text, чтобы добавить его к
сохраненному content. Это поведение не зависит от состояния записи, поэтому
оно не является частью шаблона «Состояние». Метод add_text вообще не
взаимодействует с полем state, но он является частью поведения, которое мы
хотим поддерживать.
Обеспечение пустого содержимого черновика записи
Даже после того как мы вызвали add_text и добавили некоторое содержимое в
нашу запись, мы все равно хотим, чтобы метод content возвращал пустой
строковый срез, потому что запись все еще находится в состоянии черновика, как
показывает первый assert_eq! в листинге 18-11. Пока реализуем метод
content самым простым способом, который выполнит это требование: всегда
возвращая пустой строковый срез. Мы изменим это позже, когда реализуем
возможность изменять состояние записи, чтобы ее можно было опубликовать. Пока
записи могут быть только в состоянии черновика, поэтому содержимое записи
должно всегда быть пустым. Листинг 18-14 показывает эту временную реализацию.
pub struct Post {
state: Option<Box<dyn State>>,
content: String,
}
impl Post {
// --snip--
pub fn new() -> Post {
Post {
state: Some(Box::new(Draft {})),
content: String::new(),
}
}
pub fn add_text(&mut self, text: &str) {
self.content.push_str(text);
}
pub fn content(&self) -> &str {
""
}
}
trait State {}
struct Draft {}
impl State for Draft {}content для Post, которая всегда возвращает пустой строковый срезС добавленным методом content все в листинге 18-11 до первого assert_eq!
включительно работает как задумано.
Запрос проверки, который изменяет состояние записи
Далее нам нужно добавить функциональность для запроса проверки записи, которая
должна изменить ее состояние с Draft на PendingReview. Листинг 18-15
показывает этот код.
pub struct Post {
state: Option<Box<dyn State>>,
content: String,
}
impl Post {
// --snip--
pub fn new() -> Post {
Post {
state: Some(Box::new(Draft {})),
content: String::new(),
}
}
pub fn add_text(&mut self, text: &str) {
self.content.push_str(text);
}
pub fn content(&self) -> &str {
""
}
pub fn request_review(&mut self) {
if let Some(s) = self.state.take() {
self.state = Some(s.request_review())
}
}
}
trait State {
fn request_review(self: Box<Self>) -> Box<dyn State>;
}
struct Draft {}
impl State for Draft {
fn request_review(self: Box<Self>) -> Box<dyn State> {
Box::new(PendingReview {})
}
}
struct PendingReview {}
impl State for PendingReview {
fn request_review(self: Box<Self>) -> Box<dyn State> {
self
}
}request_review для Post и трейта StateМы даем Post публичный метод с именем request_review, который принимает
изменяемую ссылку на self. Затем мы вызываем внутренний метод
request_review у текущего состояния Post, и этот второй метод
request_review поглощает текущее состояние и возвращает новое состояние.
Мы добавляем метод request_review в трейт State; все типы, реализующие
трейт, теперь должны будут реализовать метод request_review. Обратите
внимание, что вместо self, &self или &mut self в качестве первого
параметра метода у нас используется self: Box<Self>. Такой синтаксис
означает, что метод действителен только при вызове у Box, хранящего этот
тип. Этот синтаксис принимает владение Box<Self>, делая старое состояние
недействительным, чтобы значение состояния Post могло преобразоваться в
новое состояние.
Чтобы поглотить старое состояние, методу request_review нужно принять
владение значением состояния. Именно здесь вступает в дело Option в поле
state у Post: мы вызываем метод take, чтобы взять значение Some из
поля state и оставить на его месте None, потому что Rust не позволяет нам
иметь незаполненные поля в структурах. Это позволяет нам переместить значение
state из Post, а не заимствовать его. Затем мы установим значение state
записи в результат этой операции.
Нам нужно временно установить state в None, а не присваивать его напрямую
кодом вроде self.state = self.state.request_review();, чтобы получить
владение значением state. Это гарантирует, что Post не сможет использовать
старое значение state после того, как мы преобразовали его в новое
состояние.
Метод request_review для Draft возвращает новый упакованный в Box
экземпляр новой структуры PendingReview, которая представляет состояние, в
котором запись ожидает проверки. Структура PendingReview также реализует
метод request_review, но не выполняет никаких преобразований. Вместо этого
она возвращает саму себя, потому что когда мы запрашиваем проверку записи, уже
находящейся в состоянии PendingReview, она должна остаться в состоянии
PendingReview.
Теперь мы можем начать видеть преимущества шаблона «Состояние»: метод
request_review для Post одинаков независимо от значения его state.
Каждое состояние отвечает за собственные правила.
Мы оставим метод content для Post как есть: он возвращает пустой строковый
срез. Теперь у нас может быть Post как в состоянии PendingReview, так и в
состоянии Draft, но в состоянии PendingReview нам нужно то же поведение.
Листинг 18-11 теперь работает до второго вызова assert_eq!!
Добавление approve, чтобы изменить поведение content
Метод approve будет похож на метод request_review: он установит state в
значение, которое текущее состояние говорит использовать, когда это состояние
одобрено, как показано в листинге 18-16.
pub struct Post {
state: Option<Box<dyn State>>,
content: String,
}
impl Post {
// --snip--
pub fn new() -> Post {
Post {
state: Some(Box::new(Draft {})),
content: String::new(),
}
}
pub fn add_text(&mut self, text: &str) {
self.content.push_str(text);
}
pub fn content(&self) -> &str {
""
}
pub fn request_review(&mut self) {
if let Some(s) = self.state.take() {
self.state = Some(s.request_review())
}
}
pub fn approve(&mut self) {
if let Some(s) = self.state.take() {
self.state = Some(s.approve())
}
}
}
trait State {
fn request_review(self: Box<Self>) -> Box<dyn State>;
fn approve(self: Box<Self>) -> Box<dyn State>;
}
struct Draft {}
impl State for Draft {
// --snip--
fn request_review(self: Box<Self>) -> Box<dyn State> {
Box::new(PendingReview {})
}
fn approve(self: Box<Self>) -> Box<dyn State> {
self
}
}
struct PendingReview {}
impl State for PendingReview {
// --snip--
fn request_review(self: Box<Self>) -> Box<dyn State> {
self
}
fn approve(self: Box<Self>) -> Box<dyn State> {
Box::new(Published {})
}
}
struct Published {}
impl State for Published {
fn request_review(self: Box<Self>) -> Box<dyn State> {
self
}
fn approve(self: Box<Self>) -> Box<dyn State> {
self
}
}approve для Post и трейта StateМы добавляем метод approve в трейт State и добавляем новую структуру,
реализующую State, состояние Published.
Подобно тому, как работает request_review для PendingReview, если мы
вызовем метод approve у Draft, он не будет иметь эффекта, потому что
approve вернет self. Когда мы вызываем approve у PendingReview, он
возвращает новый упакованный в Box экземпляр структуры Published. Структура
Published реализует трейт State, и для обоих методов, request_review и
approve, она возвращает саму себя, потому что в этих случаях запись должна
оставаться в состоянии Published.
Теперь нам нужно обновить метод content для Post. Мы хотим, чтобы
значение, возвращаемое из content, зависело от текущего состояния Post,
поэтому заставим Post делегировать работу методу content, определенному у
его state, как показано в листинге 18-17.
pub struct Post {
state: Option<Box<dyn State>>,
content: String,
}
impl Post {
// --snip--
pub fn new() -> Post {
Post {
state: Some(Box::new(Draft {})),
content: String::new(),
}
}
pub fn add_text(&mut self, text: &str) {
self.content.push_str(text);
}
pub fn content(&self) -> &str {
self.state.as_ref().unwrap().content(self)
}
// --snip--
pub fn request_review(&mut self) {
if let Some(s) = self.state.take() {
self.state = Some(s.request_review())
}
}
pub fn approve(&mut self) {
if let Some(s) = self.state.take() {
self.state = Some(s.approve())
}
}
}
trait State {
fn request_review(self: Box<Self>) -> Box<dyn State>;
fn approve(self: Box<Self>) -> Box<dyn State>;
}
struct Draft {}
impl State for Draft {
fn request_review(self: Box<Self>) -> Box<dyn State> {
Box::new(PendingReview {})
}
fn approve(self: Box<Self>) -> Box<dyn State> {
self
}
}
struct PendingReview {}
impl State for PendingReview {
fn request_review(self: Box<Self>) -> Box<dyn State> {
self
}
fn approve(self: Box<Self>) -> Box<dyn State> {
Box::new(Published {})
}
}
struct Published {}
impl State for Published {
fn request_review(self: Box<Self>) -> Box<dyn State> {
self
}
fn approve(self: Box<Self>) -> Box<dyn State> {
self
}
}content для Post, чтобы он делегировал работу методу content у StateПоскольку цель состоит в том, чтобы держать все эти правила внутри структур,
реализующих State, мы вызываем метод content у значения в state и
передаем экземпляр записи (то есть self) как аргумент. Затем мы возвращаем
значение, которое вернулось от использования метода content у значения
state.
Мы вызываем метод as_ref у Option, потому что хотим получить ссылку на
значение внутри Option, а не владение этим значением. Поскольку state имеет
тип Option<Box<dyn State>>, при вызове as_ref возвращается
Option<&Box<dyn State>>. Если бы мы не вызвали as_ref, мы получили бы
ошибку, потому что не можем переместить state из заимствованного &self
параметра функции.
Затем мы вызываем метод unwrap, который, как мы знаем, никогда не вызовет
панику, потому что методы Post гарантируют, что state всегда будет
содержать значение Some после завершения этих методов. Это один из случаев,
о которых мы говорили в разделе «Когда у вас больше информации, чем у
компилятора» главы 9: мы знаем, что
значение None невозможно, хотя компилятор не способен это понять.
В этот момент, когда мы вызываем content у &Box<dyn State>, сработает
приведение через разыменование для & и Box, так что метод content в
итоге будет вызван у типа, реализующего трейт State. Это означает, что нам
нужно добавить content в определение трейта State, и именно туда мы
поместим логику того, какое содержимое возвращать в зависимости от текущего
состояния, как показано в листинге 18-18.
pub struct Post {
state: Option<Box<dyn State>>,
content: String,
}
impl Post {
pub fn new() -> Post {
Post {
state: Some(Box::new(Draft {})),
content: String::new(),
}
}
pub fn add_text(&mut self, text: &str) {
self.content.push_str(text);
}
pub fn content(&self) -> &str {
self.state.as_ref().unwrap().content(self)
}
pub fn request_review(&mut self) {
if let Some(s) = self.state.take() {
self.state = Some(s.request_review())
}
}
pub fn approve(&mut self) {
if let Some(s) = self.state.take() {
self.state = Some(s.approve())
}
}
}
trait State {
// --snip--
fn request_review(self: Box<Self>) -> Box<dyn State>;
fn approve(self: Box<Self>) -> Box<dyn State>;
fn content<'a>(&self, post: &'a Post) -> &'a str {
""
}
}
// --snip--
struct Draft {}
impl State for Draft {
fn request_review(self: Box<Self>) -> Box<dyn State> {
Box::new(PendingReview {})
}
fn approve(self: Box<Self>) -> Box<dyn State> {
self
}
}
struct PendingReview {}
impl State for PendingReview {
fn request_review(self: Box<Self>) -> Box<dyn State> {
self
}
fn approve(self: Box<Self>) -> Box<dyn State> {
Box::new(Published {})
}
}
struct Published {}
impl State for Published {
// --snip--
fn request_review(self: Box<Self>) -> Box<dyn State> {
self
}
fn approve(self: Box<Self>) -> Box<dyn State> {
self
}
fn content<'a>(&self, post: &'a Post) -> &'a str {
&post.content
}
}content в трейт StateМы добавляем реализацию метода content по умолчанию, которая возвращает
пустой строковый срез. Это означает, что нам не нужно реализовывать content
для структур Draft и PendingReview. Структура Published переопределит
метод content и вернет значение из post.content. Хотя это удобно, наличие
метода content у State, определяющего содержимое Post, размывает границы
между ответственностью State и ответственностью Post.
Обратите внимание, что для этого метода нам нужны аннотации времени жизни, как
мы обсуждали в главе 10. Мы принимаем ссылку на post как аргумент и
возвращаем ссылку на часть этого post, поэтому время жизни возвращаемой
ссылки связано со временем жизни аргумента post.
И готово: теперь весь листинг 18-11 работает! Мы реализовали шаблон «Состояние»
с правилами рабочего процесса записи блога. Логика, связанная с правилами,
живет в объектах состояния, а не разбросана по Post.
Почему не перечисление?
Возможно, вы задавались вопросом, почему мы не использовали перечисление с
разными возможными состояниями записи как вариантами. Это, безусловно,
возможное решение; попробуйте его и сравните конечные результаты, чтобы
понять, что вам больше нравится! Один недостаток использования перечисления
в том, что каждое место, проверяющее значение перечисления, должно будет
иметь выражение match или что-то похожее, чтобы обработать каждый
возможный вариант. Это может стать более повторяющимся, чем решение с
трейт-объектами.
Оценка шаблона «Состояние»
Мы показали, что Rust способен реализовать объектно-ориентированный шаблон
«Состояние», чтобы инкапсулировать разные виды поведения, которые запись должна
иметь в каждом состоянии. Методы Post ничего не знают о различных вариантах
поведения. Благодаря тому, как мы организовали код, нам нужно смотреть только
в одно место, чтобы узнать, какими разными способами может вести себя
опубликованная запись: в реализацию трейта State для структуры Published.
Если бы мы создали альтернативную реализацию, не использующую шаблон
«Состояние», мы могли бы вместо этого использовать выражения match в методах
Post или даже в коде main, который проверяет состояние записи и меняет
поведение в этих местах. Это означало бы, что нам пришлось бы смотреть в
несколько мест, чтобы понять все последствия того, что запись находится в
опубликованном состоянии.
С шаблоном «Состояние» методам Post и местам, где мы используем Post, не
нужны выражения match, а чтобы добавить новое состояние, нам нужно было бы
только добавить новую структуру и реализовать методы трейта для этой одной
структуры в одном месте.
Реализацию, использующую шаблон «Состояние», легко расширять, добавляя больше функциональности. Чтобы увидеть, насколько просто поддерживать код, использующий шаблон «Состояние», попробуйте несколько из этих предложений:
- Добавьте метод
reject, который меняет состояние записи сPendingReviewобратно наDraft. - Требуйте два вызова
approve, прежде чем состояние сможет измениться наPublished. - Разрешите пользователям добавлять текстовое содержимое только тогда, когда
запись находится в состоянии
Draft. Подсказка: пусть объект состояния отвечает за то, что может измениться в содержимом, но не отвечает за изменениеPost.
Один недостаток шаблона «Состояние» заключается в том, что, поскольку состояния
реализуют переходы между состояниями, некоторые состояния связаны друг с
другом. Если мы добавим еще одно состояние между PendingReview и Published,
например Scheduled, нам придется изменить код в PendingReview, чтобы он
переходил в Scheduled. Было бы меньше работы, если бы PendingReview не
нужно было менять при добавлении нового состояния, но это означало бы переход
к другому шаблону проектирования.
Другой недостаток состоит в том, что мы продублировали часть логики. Чтобы
устранить часть дублирования, можно было бы попытаться сделать реализации по
умолчанию для методов request_review и approve в трейте State, которые
возвращают self. Однако это не сработает: при использовании State как
трейт-объекта трейт не знает, каким именно будет конкретный self, поэтому
возвращаемый тип неизвестен во время компиляции. (Это одно из правил
dyn-совместимости, упомянутых ранее.)
Другое дублирование включает похожие реализации методов request_review и
approve для Post. Оба метода используют Option::take с полем state
структуры Post, и если state является Some, они делегируют работу
реализации того же метода у обернутого значения и устанавливают новое значение
поля state в результат. Если бы у нас было много методов у Post, следующих
этому шаблону, мы могли бы рассмотреть определение макроса для устранения
повторения (см. раздел «Макросы» в главе 20).
Реализуя шаблон «Состояние» ровно так, как он определен для
объектно-ориентированных языков, мы не используем сильные стороны Rust
настолько полно, насколько могли бы. Давайте рассмотрим некоторые изменения,
которые можно внести в крейт blog, чтобы сделать недопустимые состояния и
переходы ошибками времени компиляции.
Кодирование состояний и поведения как типов
Мы покажем, как переосмыслить шаблон «Состояние», чтобы получить другой набор компромиссов. Вместо того чтобы полностью инкапсулировать состояния и переходы, так что внешний код ничего о них не знает, мы закодируем состояния в разных типах. В результате система проверки типов Rust будет предотвращать попытки использовать черновики записей там, где разрешены только опубликованные записи, выдавая ошибку компилятора.
Рассмотрим первую часть main в листинге 18-11:
use blog::Post;
fn main() {
let mut post = Post::new();
post.add_text("I ate a salad for lunch today");
assert_eq!("", post.content());
post.request_review();
assert_eq!("", post.content());
post.approve();
assert_eq!("I ate a salad for lunch today", post.content());
}Мы по-прежнему разрешаем создание новых записей в состоянии черновика с
помощью Post::new и возможность добавлять текст в содержимое записи. Но
вместо метода content у черновика записи, который возвращает пустую строку,
мы сделаем так, что у черновиков записей вообще не будет метода content.
Тогда, если мы попытаемся получить содержимое черновика записи, получим ошибку
компилятора, сообщающую, что метода не существует. В результате мы не сможем
случайно отобразить содержимое черновика записи в рабочей версии, потому что такой
код даже не скомпилируется. Листинг 18-19 показывает определение структуры
Post и структуры DraftPost, а также методы для каждой из них.
pub struct Post {
content: String,
}
pub struct DraftPost {
content: String,
}
impl Post {
pub fn new() -> DraftPost {
DraftPost {
content: String::new(),
}
}
pub fn content(&self) -> &str {
&self.content
}
}
impl DraftPost {
pub fn add_text(&mut self, text: &str) {
self.content.push_str(text);
}
}Post с методом content и DraftPost без метода contentИ у структуры Post, и у структуры DraftPost есть приватное поле content,
которое хранит текст записи блога. У структур больше нет поля state, потому
что мы переносим кодирование состояния в типы структур. Структура Post будет
представлять опубликованную запись, и у нее есть метод content, возвращающий
содержимое.
У нас все еще есть функция Post::new, но вместо возврата экземпляра Post
она возвращает экземпляр DraftPost. Поскольку content приватен и нет
никаких функций, возвращающих Post, прямо сейчас невозможно создать экземпляр
Post.
У структуры DraftPost есть метод add_text, поэтому мы можем добавлять текст
в content, как и раньше, но обратите внимание, что у DraftPost не
определен метод content! Теперь программа гарантирует, что все записи
начинаются как черновики, а содержимое черновиков недоступно для отображения.
Любая попытка обойти эти ограничения приведет к ошибке компилятора.
Итак, как получить опубликованную запись? Мы хотим обеспечить правило, что
черновик записи должен пройти проверку и быть одобрен, прежде чем его можно
будет опубликовать. Запись в состоянии ожидания проверки все еще не должна
отображать никакого содержимого. Давайте реализуем эти ограничения, добавив
еще одну структуру, PendingReviewPost, определив метод request_review для
DraftPost, который возвращает PendingReviewPost, и определив метод
approve для PendingReviewPost, который возвращает Post, как показано в
листинге 18-20.
pub struct Post {
content: String,
}
pub struct DraftPost {
content: String,
}
impl Post {
pub fn new() -> DraftPost {
DraftPost {
content: String::new(),
}
}
pub fn content(&self) -> &str {
&self.content
}
}
impl DraftPost {
// --snip--
pub fn add_text(&mut self, text: &str) {
self.content.push_str(text);
}
pub fn request_review(self) -> PendingReviewPost {
PendingReviewPost {
content: self.content,
}
}
}
pub struct PendingReviewPost {
content: String,
}
impl PendingReviewPost {
pub fn approve(self) -> Post {
Post {
content: self.content,
}
}
}PendingReviewPost, создаваемый вызовом request_review у DraftPost, и метод approve, превращающий PendingReviewPost в опубликованный PostМетоды request_review и approve принимают владение self, тем самым
поглощая экземпляры DraftPost и PendingReviewPost и превращая их
соответственно в PendingReviewPost и опубликованный Post. Так у нас не
останется никаких прежних экземпляров DraftPost после того, как мы вызвали у
них request_review, и так далее. У структуры PendingReviewPost не
определен метод content, поэтому попытка прочитать ее содержимое приводит к
ошибке компилятора, как и с DraftPost. Поскольку единственный способ
получить опубликованный экземпляр Post, у которого определен метод
content, — вызвать метод approve у PendingReviewPost, а единственный
способ получить PendingReviewPost — вызвать метод request_review у
DraftPost, теперь мы закодировали рабочий процесс записи блога в системе
типов.
Но нам также нужно внести небольшие изменения в main. Методы
request_review и approve возвращают новые экземпляры, а не изменяют
структуру, у которой они вызваны, поэтому нужно добавить больше затеняющих
привязок let post =, чтобы сохранить возвращенные экземпляры. Также мы
больше не можем иметь утверждения о том, что содержимое черновиков и записей
на проверке является пустой строкой, и они нам не нужны: мы больше не можем
скомпилировать код, который пытается использовать содержимое записей в этих
состояниях. Обновленный код в main показан в листинге 18-21.
use blog::Post;
fn main() {
let mut post = Post::new();
post.add_text("I ate a salad for lunch today");
let post = post.request_review();
let post = post.approve();
assert_eq!("I ate a salad for lunch today", post.content());
}main для использования новой реализации рабочего процесса записи блогаИзменения, которые нам пришлось внести в main, чтобы переназначать post,
означают, что эта реализация уже не совсем следует объектно-ориентированному
шаблону «Состояние»: преобразования между состояниями больше не инкапсулированы
полностью внутри реализации Post. Однако наше преимущество в том, что
недопустимые состояния теперь невозможны благодаря системе типов и проверке
типов во время компиляции! Это гарантирует, что некоторые ошибки, например
отображение содержимого неопубликованной записи, будут обнаружены до того, как
попадут в рабочую версию.
Попробуйте выполнить задачи, предложенные в начале этого раздела, для крейта
blog в состоянии после листинга 18-21, чтобы понять, что вы думаете о
дизайне этой версии кода. Обратите внимание, что некоторые задачи в этом
дизайне уже могут быть выполнены.
Мы увидели, что хотя Rust способен реализовывать объектно-ориентированные шаблоны проектирования, в Rust также доступны другие шаблоны, такие как кодирование состояния в системе типов. У этих шаблонов разные компромиссы. Хотя вы можете быть очень хорошо знакомы с объектно-ориентированными шаблонами, переосмысление задачи с учетом возможностей Rust может дать преимущества, например предотвращение некоторых ошибок во время компиляции. Объектно-ориентированные шаблоны не всегда будут лучшим решением в Rust из-за некоторых возможностей, таких как владение, которых нет в объектно-ориентированных языках.
Итоги
Независимо от того, считаете ли вы Rust объектно-ориентированным языком после прочтения этой главы, теперь вы знаете, что можете использовать трейт-объекты, чтобы получить некоторые объектно-ориентированные возможности в Rust. Динамическая диспетчеризация может дать вашему коду некоторую гибкость в обмен на небольшую потерю производительности во время выполнения. Эту гибкость можно использовать для реализации объектно-ориентированных шаблонов, которые могут упростить сопровождение вашего кода. В Rust также есть другие возможности, такие как владение, которых нет в объектно-ориентированных языках. Объектно-ориентированный шаблон не всегда будет лучшим способом использовать сильные стороны Rust, но это доступный вариант.
Далее мы рассмотрим шаблоны, еще одну возможность Rust, которая дает большую гибкость. Мы кратко встречались с ними на протяжении книги, но еще не видели их полную мощь. Поехали!
Шаблоны и сопоставление
Шаблоны — это специальный синтаксис Rust для сопоставления со структурой типов,
как сложных, так и простых. Использование шаблонов вместе с выражениями
match и другими конструкциями дает вам больше контроля над потоком
управления программы. Шаблон состоит из некоторой комбинации следующих
элементов:
- литералы
- деструктурированные массивы, перечисления, структуры или кортежи
- переменные
- групповые символы
- заполнители
Некоторые примеры шаблонов: x, (a, 3) и Some(Color::Red). В контекстах,
где шаблоны допустимы, эти компоненты описывают форму данных. Затем наша
программа сопоставляет значения с шаблонами, чтобы определить, имеют ли данные
правильную форму для продолжения выполнения определенного участка кода.
Чтобы использовать шаблон, мы сравниваем его с некоторым значением. Если
шаблон соответствует значению, мы используем части значения в нашем коде.
Вспомните выражения match из главы 6, которые использовали шаблоны,
например пример с машиной для сортировки монет. Если значение подходит под
форму шаблона, мы можем использовать именованные части. Если не подходит, код,
связанный с шаблоном, не будет выполнен.
Эта глава является справочником по всему, что связано с шаблонами. Мы рассмотрим допустимые места использования шаблонов, различие между опровержимыми и неопровержимыми шаблонами, а также разные виды синтаксиса шаблонов, которые вы можете встретить. К концу главы вы будете знать, как использовать шаблоны, чтобы ясно выражать многие концепции.
Все места, где могут использоваться шаблоны
Все места, где можно использовать шаблоны
Шаблоны появляются в Rust во многих местах, и вы уже часто использовали их, не осознавая этого! В этом разделе обсуждаются все места, где шаблоны допустимы.
Ветви match
Как обсуждалось в главе 6, мы используем шаблоны в ветвях выражений match.
Формально выражения match определяются как ключевое слово match, значение,
с которым выполняется сопоставление, и одна или несколько ветвей match,
состоящих из шаблона и выражения, которое нужно выполнить, если значение
соответствует шаблону этой ветви, например так:
match VALUE {
PATTERN => EXPRESSION,
PATTERN => EXPRESSION,
PATTERN => EXPRESSION,
}Например, вот выражение match из листинга 6-5, которое сопоставляет значение
Option<i32> в переменной x:
match x {
None => None,
Some(i) => Some(i + 1),
}Шаблоны в этом выражении match — это None и Some(i) слева от каждой
стрелки.
Одно требование к выражениям match состоит в том, что они должны быть
исчерпывающими: все возможности для значения в выражении match должны быть
учтены. Один способ убедиться, что вы покрыли каждую возможность, — иметь
универсальный шаблон для последней ветви. Например, имя
переменной, соответствующее любому значению, никогда не может дать сбой и
поэтому покрывает все оставшиеся случаи.
Конкретный шаблон _ соответствует чему угодно, но никогда не привязывается к
переменной, поэтому его часто используют в последней ветви match. Шаблон _
может быть полезен, когда вы хотите проигнорировать любое неуказанное
значение, например. Мы подробнее рассмотрим шаблон _ в разделе
«Игнорирование значений в шаблоне» позже в этой главе.
Операторы let
До этой главы мы явно обсуждали использование шаблонов только с match и
if let, но на самом деле мы уже использовали шаблоны и в других местах, в
том числе в операторах let. Например, рассмотрим это простое присваивание
переменной с помощью let:
#![allow(unused)]
fn main() {
let x = 5;
}Каждый раз, когда вы использовали такой оператор let, вы использовали
шаблоны, хотя могли этого не осознавать! Более формально оператор let
выглядит так:
let PATTERN = EXPRESSION;
В операторах вроде let x = 5;, где в месте PATTERN стоит имя переменной, имя
переменной — это просто особенно простая форма шаблона. Rust сравнивает
выражение с шаблоном и привязывает все найденные имена. Поэтому в примере
let x = 5; x — это шаблон, означающий «привязать то, что здесь
соответствует, к переменной x». Поскольку имя x является всем шаблоном,
этот шаблон фактически означает «привязать все к переменной x, каким бы ни
было значение».
Чтобы яснее увидеть аспект сопоставления с шаблоном в let, рассмотрим
листинг 19-1, где шаблон используется с let для деструктурирования кортежа.
fn main() {
let (x, y, z) = (1, 2, 3);
}Здесь мы сопоставляем кортеж с шаблоном. Rust сравнивает значение (1, 2, 3)
с шаблоном (x, y, z) и видит, что значение соответствует шаблону, то есть
что число элементов одинаково в обоих. Поэтому Rust привязывает 1 к x, 2
к y и 3 к z. Этот шаблон кортежа можно воспринимать как вложение трех
отдельных шаблонов переменных внутрь него.
Если число элементов в шаблоне не совпадает с числом элементов в кортеже, общий тип не совпадет, и мы получим ошибку компилятора. Например, листинг 19-2 показывает попытку деструктурировать кортеж из трех элементов в две переменные; это не сработает.
fn main() {
let (x, y) = (1, 2, 3);
}Попытка скомпилировать этот код приводит к такой ошибке типа:
$ cargo run
Compiling patterns v0.1.0 (file:///projects/patterns)
error[E0308]: mismatched types
--> src/main.rs:2:9
|
2 | let (x, y) = (1, 2, 3);
| ^^^^^^ --------- this expression has type `({integer}, {integer}, {integer})`
| |
| expected a tuple with 3 elements, found one with 2 elements
|
= note: expected tuple `({integer}, {integer}, {integer})`
found tuple `(_, _)`
For more information about this error, try `rustc --explain E0308`.
error: could not compile `patterns` (bin "patterns") due to 1 previous error
Чтобы исправить ошибку, мы могли бы проигнорировать одно или несколько
значений в кортеже с помощью _ или .., как вы увидите в разделе
«Игнорирование значений в шаблоне». Если проблема в том, что у нас слишком много переменных в шаблоне,
решение состоит в том, чтобы привести типы в соответствие, удалив переменные
так, чтобы число переменных равнялось числу элементов в кортеже.
Условные выражения if let
В главе 6 мы обсуждали, как использовать выражения if let в основном как
более короткий способ записать эквивалент match, который сопоставляет только
один случай. При желании у if let может быть соответствующий else,
содержащий код для выполнения, если шаблон в if let не совпадет.
Листинг 19-3 показывает, что также можно сочетать выражения if let,
else if и else if let. Это дает нам больше гибкости, чем выражение
match, в котором мы можем выразить только одно значение для сравнения с
шаблонами. Кроме того, Rust не требует, чтобы условия в последовательности
ветвей if let, else if и else if let были связаны друг с другом.
Код в листинге 19-3 определяет, какой цвет сделать фоном, на основе серии проверок нескольких условий. Для этого примера мы создали переменные с жестко заданными значениями, которые реальная программа могла бы получить из пользовательского ввода.
fn main() {
let favorite_color: Option<&str> = None;
let is_tuesday = false;
let age: Result<u8, _> = "34".parse();
if let Some(color) = favorite_color {
println!("Using your favorite color, {color}, as the background");
} else if is_tuesday {
println!("Tuesday is green day!");
} else if let Ok(age) = age {
if age > 30 {
println!("Using purple as the background color");
} else {
println!("Using orange as the background color");
}
} else {
println!("Using blue as the background color");
}
}if let, else if, else if let и elseЕсли пользователь укажет любимый цвет, этот цвет используется как фон. Если любимый цвет не указан и сегодня вторник, цвет фона будет зеленым. В противном случае, если пользователь укажет свой возраст как строку и мы можем успешно разобрать ее как число, цвет будет либо фиолетовым, либо оранжевым в зависимости от значения числа. Если ни одно из этих условий не применяется, цвет фона будет синим.
Эта условная структура позволяет нам поддерживать сложные требования. С
жестко заданными значениями, которые есть здесь, этот пример напечатает
Using purple as the background color.
Вы можете видеть, что if let также может вводить новые переменные, которые
затеняют существующие переменные так же, как это могут делать ветви match:
строка if let Ok(age) = age вводит новую переменную age, содержащую
значение внутри варианта Ok, затеняя существующую переменную age. Это
означает, что нам нужно поместить условие if age > 30 внутри этого блока: мы
не можем объединить эти два условия в if let Ok(age) = age && age > 30.
Новая переменная age, которую мы хотим сравнить с 30, недействительна до
начала новой области видимости с фигурной скобкой.
Недостаток использования выражений if let в том, что компилятор не проверяет
исчерпываемость, тогда как с выражениями match он это делает. Если бы мы
пропустили последний блок else и тем самым не обработали некоторые случаи,
компилятор не предупредил бы нас о возможной логической ошибке.
Условные циклы while let
Похожий по конструкции на if let, условный цикл while let позволяет циклу
while выполняться до тех пор, пока шаблон продолжает совпадать. В листинге
19-4 мы показываем цикл while let, который ожидает сообщения, отправленные
между потоками, но в этом случае проверяет Result вместо Option.
fn main() {
let (tx, rx) = std::sync::mpsc::channel();
std::thread::spawn(move || {
for val in [1, 2, 3] {
tx.send(val).unwrap();
}
});
while let Ok(value) = rx.recv() {
println!("{value}");
}
}while let для печати значений до тех пор, пока rx.recv() возвращает OkЭтот пример печатает 1, 2, а затем 3. Метод recv берет первое
сообщение из принимающей стороны канала и возвращает Ok(value). Когда мы
впервые увидели recv в главе 16, мы напрямую разворачивали ошибку или
взаимодействовали с ним как с итератором с помощью цикла for. Однако, как
показывает листинг 19-4, мы также можем использовать while let, потому что
метод recv возвращает Ok каждый раз, когда приходит сообщение, пока
отправитель существует, а затем возвращает Err, когда отправляющая сторона
отсоединяется.
Циклы for
В цикле for значение, которое непосредственно следует за ключевым словом
for, является шаблоном. Например, в for x in y x — это шаблон. Листинг
19-5 демонстрирует, как использовать шаблон в цикле for, чтобы
деструктурировать, или разобрать на части, кортеж как часть цикла for.
fn main() {
let v = vec!['a', 'b', 'c'];
for (index, value) in v.iter().enumerate() {
println!("{value} is at index {index}");
}
}for для деструктурирования кортежаКод в листинге 19-5 напечатает следующее:
$ cargo run
Compiling patterns v0.1.0 (file:///projects/patterns)
Finished `dev` profile [unoptimized + debuginfo] target(s) in 0.52s
Running `target/debug/patterns`
a is at index 0
b is at index 1
c is at index 2
Мы адаптируем итератор с помощью метода enumerate, чтобы он создавал
значение и индекс для этого значения, помещенные в кортеж. Первое созданное
значение — это кортеж (0, 'a'). Когда это значение сопоставляется с шаблоном
(index, value), index будет 0, а value будет 'a', что напечатает
первую строку вывода.
Параметры функций
Параметры функций также могут быть шаблонами. Код в листинге 19-6, который
объявляет функцию с именем foo, принимающую один параметр с именем x типа
i32, к этому моменту должен выглядеть знакомо.
fn foo(x: i32) {
// code goes here
}
fn main() {}Часть x — это шаблон! Как мы делали с let, мы могли бы сопоставить кортеж
в аргументах функции с шаблоном. Листинг 19-7 разделяет значения в кортеже,
когда мы передаем его в функцию.
fn print_coordinates(&(x, y): &(i32, i32)) {
println!("Current location: ({x}, {y})");
}
fn main() {
let point = (3, 5);
print_coordinates(&point);
}Этот код печатает Current location: (3, 5). Значения &(3, 5) соответствуют
шаблону &(x, y), поэтому x получает значение 3, а y — значение 5.
Мы также можем использовать шаблоны в списках параметров замыканий так же, как в списках параметров функций, потому что замыкания похожи на функции, как обсуждалось в главе 13.
К этому моменту вы увидели несколько способов использования шаблонов, но шаблоны работают не одинаково во всех местах, где мы можем их использовать. В некоторых местах шаблоны должны быть неопровержимыми; в других обстоятельствах они могут быть опровержимыми. Далее мы обсудим эти две концепции.
Опровержимость: может ли шаблон не совпасть
Опровержимость: может ли шаблон не совпасть
Шаблоны бывают двух форм: опровержимые и неопровержимые. Шаблоны, которые
совпадут с любым возможным переданным значением, являются неопровержимыми.
Примером может быть x в операторе let x = 5;, потому что x соответствует
чему угодно и поэтому не может не совпасть. Шаблоны, которые могут не совпасть
с некоторым возможным значением, являются опровержимыми. Примером может быть
Some(x) в выражении if let Some(x) = a_value, потому что если значение в
переменной a_value будет None, а не Some, шаблон Some(x) не совпадет.
Параметры функций, операторы let и циклы for могут принимать только
неопровержимые шаблоны, потому что программа не может сделать ничего
осмысленного, когда значения не совпадают. Выражения if let и while let, а
также оператор let...else принимают и опровержимые, и неопровержимые
шаблоны, но компилятор предупреждает о неопровержимых шаблонах, потому что по
определению эти конструкции предназначены для обработки возможной неудачи:
функциональность условной конструкции состоит в ее способности вести себя
по-разному в зависимости от успеха или неудачи.
В целом вам не придется часто беспокоиться о различии между опровержимыми и неопровержимыми шаблонами; однако нужно быть знакомым с концепцией опровержимости, чтобы понимать, как реагировать, когда она встречается в сообщении об ошибке. В таких случаях вам нужно будет изменить либо шаблон, либо конструкцию, с которой вы используете шаблон, в зависимости от желаемого поведения кода.
Давайте посмотрим, что происходит, когда мы пытаемся использовать опровержимый
шаблон там, где Rust требует неопровержимый шаблон, и наоборот. Листинг 19-8
показывает оператор let, но в качестве шаблона мы указали Some(x),
опровержимый шаблон. Как можно ожидать, этот код не скомпилируется.
fn main() {
let some_option_value: Option<i32> = None;
let Some(x) = some_option_value;
}letЕсли бы some_option_value было значением None, оно не совпало бы с
шаблоном Some(x), а значит, шаблон является опровержимым. Однако оператор
let может принимать только неопровержимый шаблон, потому что с значением
None код не может сделать ничего допустимого. Во время компиляции Rust
пожалуется, что мы попытались использовать опровержимый шаблон там, где
требуется неопровержимый:
$ cargo run
Compiling patterns v0.1.0 (file:///projects/patterns)
error[E0005]: refutable pattern in local binding
--> src/main.rs:3:9
|
3 | let Some(x) = some_option_value;
| ^^^^^^^ pattern `None` not covered
|
= note: `let` bindings require an "irrefutable pattern", like a `struct` or an `enum` with only one variant
= note: for more information, visit https://doc.rust-lang.org/book/ch19-02-refutability.html
= note: the matched value is of type `Option<i32>`
help: you might want to use `let else` to handle the variant that isn't matched
|
3 | let Some(x) = some_option_value else { todo!() };
| ++++++++++++++++
For more information about this error, try `rustc --explain E0005`.
error: could not compile `patterns` (bin "patterns") due to 1 previous error
Поскольку мы не покрыли (и не могли покрыть!) каждое допустимое значение
шаблоном Some(x), Rust справедливо выдает ошибку компилятора.
Если у нас есть опровержимый шаблон там, где нужен неопровержимый, мы можем
исправить это, изменив код, использующий шаблон: вместо let можно
использовать let...else. Тогда, если шаблон не совпадет, код в фигурных
скобках обработает значение. Листинг 19-9 показывает, как исправить код из
листинга 19-8.
fn main() {
let some_option_value: Option<i32> = None;
let Some(x) = some_option_value else {
return;
};
}let...else и блока с опровержимыми шаблонами вместо letМы дали коду выход! Этот код полностью допустим, хотя это означает, что мы не
можем использовать неопровержимый шаблон без предупреждения. Если мы передадим
let...else шаблон, который всегда будет совпадать, например x, как
показано в листинге 19-10, компилятор выдаст предупреждение.
fn main() {
let x = 5 else {
return;
};
}let...elseRust сообщает, что использовать let...else с неопровержимым шаблоном не
имеет смысла:
$ cargo run
Compiling patterns v0.1.0 (file:///projects/patterns)
warning: irrefutable `let...else` pattern
--> src/main.rs:2:5
|
2 | let x = 5 else {
| ^^^^^^^^^
|
= note: this pattern will always match, so the `else` clause is useless
= help: consider removing the `else` clause
= note: `#[warn(irrefutable_let_patterns)]` on by default
warning: `patterns` (bin "patterns") generated 1 warning
Finished `dev` profile [unoptimized + debuginfo] target(s) in 0.39s
Running `target/debug/patterns`
По этой причине ветви match должны использовать опровержимые шаблоны, за
исключением последней ветви, которая должна сопоставлять все оставшиеся
значения с неопровержимым шаблоном. Rust позволяет использовать
неопровержимый шаблон в match всего с одной ветвью, но такой синтаксис не
особенно полезен и может быть заменен более простым оператором let.
Теперь, когда вы знаете, где использовать шаблоны, и понимаете разницу между опровержимыми и неопровержимыми шаблонами, давайте рассмотрим весь синтаксис, который можно использовать для создания шаблонов.
Синтаксис шаблонов
Синтаксис шаблонов
В этом разделе мы соберем весь синтаксис, допустимый в шаблонах, и обсудим, почему и когда может понадобиться использовать каждый из его вариантов.
Сопоставление литералов
Как вы видели в главе 6, шаблоны можно напрямую сопоставлять с литералами. Следующий код дает несколько примеров:
fn main() {
let x = 1;
match x {
1 => println!("one"),
2 => println!("two"),
3 => println!("three"),
_ => println!("anything"),
}
}Этот код печатает one, потому что значение в x равно 1. Такой синтаксис
полезен, когда вы хотите, чтобы код выполнял действие при получении
определенного конкретного значения.
Сопоставление именованных переменных
Именованные переменные являются неопровержимыми шаблонами, которые
соответствуют любому значению, и мы много раз использовали их в этой книге.
Однако при использовании именованных переменных в выражениях match, if let
или while let есть одна сложность. Поскольку каждое из этих выражений
начинает новую область видимости, переменные, объявленные как часть шаблона
внутри этих выражений, затеняют переменные с тем же именем вне этих
конструкций, как это происходит со всеми переменными. В листинге 19-11 мы
объявляем переменную x со значением Some(5) и переменную y со значением
10. Затем мы создаем выражение match для значения x. Посмотрите на
шаблоны в ветвях match и на println! в конце и попробуйте понять, что
напечатает код, прежде чем запускать его или читать дальше.
fn main() {
let x = Some(5);
let y = 10;
match x {
Some(50) => println!("Got 50"),
Some(y) => println!("Matched, y = {y}"),
_ => println!("Default case, x = {x:?}"),
}
println!("at the end: x = {x:?}, y = {y}");
}match с ветвью, которая вводит новую переменную, затеняющую существующую переменную yРазберем, что происходит при выполнении выражения match. Шаблон в первой
ветви match не соответствует определенному значению x, поэтому код
продолжает выполнение.
Шаблон во второй ветви match вводит новую переменную с именем y, которая
будет соответствовать любому значению внутри значения Some. Поскольку мы
находимся в новой области видимости внутри выражения match, это новая
переменная y, а не та y, которую мы объявили в начале со значением 10.
Эта новая привязка y совпадет с любым значением внутри Some, а именно это
и есть в x. Поэтому новая y привязывается к внутреннему значению Some в
x. Это значение равно 5, поэтому выражение для этой ветви выполняется и
печатает Matched, y = 5.
Если бы x было значением None, а не Some(5), шаблоны в первых двух
ветвях не совпали бы, поэтому значение совпало бы с подчеркиванием. Мы не
вводили переменную x в шаблоне ветви с подчеркиванием, поэтому x в
выражении все еще остается внешней x, которая не была затенена. В этом
гипотетическом случае match напечатал бы Default case, x = None.
Когда выражение match завершается, его область видимости заканчивается, как
и область видимости внутренней y. Последний println! выводит
at the end: x = Some(5), y = 10.
Чтобы создать выражение match, которое сравнивает значения внешних x и
y, а не вводит новую переменную, затеняющую существующую переменную y, нам
нужно использовать охранное условие match. Мы поговорим об охранных условиях
match позже в разделе «Добавление условий с помощью охранных условий
match».
Сопоставление нескольких шаблонов
В выражениях match можно сопоставлять несколько шаблонов с помощью синтаксиса
|, который является оператором или для шаблонов. Например, в следующем
коде мы сопоставляем значение x с ветвями match, первая из которых имеет
вариант или: если значение x соответствует любому из значений в этой
ветви, код этой ветви будет выполнен.
fn main() {
let x = 1;
match x {
1 | 2 => println!("one or two"),
3 => println!("three"),
_ => println!("anything"),
}
}Этот код печатает one or two.
Сопоставление диапазонов значений с помощью ..=
Синтаксис ..= позволяет сопоставлять включительный диапазон значений. В
следующем коде, когда шаблон совпадает с любым из значений внутри заданного
диапазона, выполняется эта ветвь:
fn main() {
let x = 5;
match x {
1..=5 => println!("one through five"),
_ => println!("something else"),
}
}Если x равно 1, 2, 3, 4 или 5, совпадет первая ветвь. Такой
синтаксис удобнее для нескольких значений match, чем использование оператора
| для выражения той же идеи; если бы мы использовали |, пришлось бы
указать 1 | 2 | 3 | 4 | 5. Задать диапазон намного короче, особенно если мы
хотим сопоставить, скажем, любое число между 1 и 1 000!
Компилятор проверяет во время компиляции, что диапазон не пуст, и поскольку
единственные типы, для которых Rust может определить, пуст диапазон или нет,
это char и числовые значения, диапазоны разрешены только с числовыми
значениями или значениями char.
Вот пример с использованием диапазонов значений char:
fn main() {
let x = 'c';
match x {
'a'..='j' => println!("early ASCII letter"),
'k'..='z' => println!("late ASCII letter"),
_ => println!("something else"),
}
}Rust может определить, что 'c' находится в диапазоне первого шаблона, и
печатает early ASCII letter.
Деструктурирование для разбиения значений
Мы также можем использовать шаблоны, чтобы деструктурировать структуры, перечисления и кортежи и использовать разные части этих значений. Разберем каждый вид значения.
Структуры
Листинг 19-12 показывает структуру Point с двумя полями, x и y, которую
мы можем разобрать на части с помощью шаблона в операторе let.
struct Point {
x: i32,
y: i32,
}
fn main() {
let p = Point { x: 0, y: 7 };
let Point { x: a, y: b } = p;
assert_eq!(0, a);
assert_eq!(7, b);
}Этот код создает переменные a и b, которые соответствуют значениям полей
x и y структуры p. Этот пример показывает, что имена переменных в
шаблоне не обязаны совпадать с именами полей структуры. Однако обычно имена
переменных сопоставляют с именами полей, чтобы было проще помнить, какие
переменные из каких полей получены. Из-за такого распространенного
использования, а также потому что запись let Point { x: x, y: y } = p;
содержит много повторений, в Rust есть сокращение для шаблонов, сопоставляющих
поля структуры: нужно перечислить только имена полей структуры, а переменные,
созданные из шаблона, получат те же имена. Листинг 19-13 ведет себя так же,
как код в листинге 19-12, но переменные, созданные в шаблоне let, называются
x и y, а не a и b.
struct Point {
x: i32,
y: i32,
}
fn main() {
let p = Point { x: 0, y: 7 };
let Point { x, y } = p;
assert_eq!(0, x);
assert_eq!(7, y);
}Этот код создает переменные x и y, которые соответствуют полям x и y
переменной p. В результате переменные x и y содержат значения из
структуры p.
Мы также можем выполнять деструктурирование с литеральными значениями как частью шаблона структуры, а не создавать переменные для всех полей. Это позволяет проверять некоторые поля на конкретные значения и одновременно создавать переменные для деструктурирования других полей.
В листинге 19-14 у нас есть выражение match, которое разделяет значения
Point на три случая: точки, лежащие прямо на оси x (это верно, когда
y = 0), на оси y (x = 0) или ни на одной из осей.
struct Point {
x: i32,
y: i32,
}
fn main() {
let p = Point { x: 0, y: 7 };
match p {
Point { x, y: 0 } => println!("On the x axis at {x}"),
Point { x: 0, y } => println!("On the y axis at {y}"),
Point { x, y } => {
println!("On neither axis: ({x}, {y})");
}
}
}Первая ветвь совпадет с любой точкой, лежащей на оси x, указывая, что поле
y совпадает, если его значение соответствует литералу 0. Шаблон при этом
создает переменную x, которую мы можем использовать в коде этой ветви.
Аналогично, вторая ветвь совпадает с любой точкой на оси y, указывая, что
поле x совпадает, если его значение равно 0, и создает переменную y для
значения поля y. Третья ветвь не указывает никаких литералов, поэтому она
совпадает с любым другим Point и создает переменные для обоих полей, x и
y.
В этом примере значение p совпадает со второй ветвью благодаря тому, что x
содержит 0, поэтому этот код напечатает On the y axis at 7.
Помните, что выражение match прекращает проверять ветви, как только находит
первый совпавший шаблон, поэтому даже если Point { x: 0, y: 0 } находится и
на оси x, и на оси y, этот код напечатал бы только On the x axis at 0.
Перечисления
Мы уже деструктурировали перечисления в этой книге (например, в листинге 6-5
главы 6), но еще не обсуждали явно, что шаблон для деструктурирования
перечисления соответствует тому, как определены данные, хранящиеся внутри
перечисления. В качестве примера в листинге 19-15 мы используем перечисление
Message из листинга 6-2 и пишем match с шаблонами, которые
деструктурируют каждое внутреннее значение.
enum Message {
Quit,
Move { x: i32, y: i32 },
Write(String),
ChangeColor(i32, i32, i32),
}
fn main() {
let msg = Message::ChangeColor(0, 160, 255);
match msg {
Message::Quit => {
println!("The Quit variant has no data to destructure.");
}
Message::Move { x, y } => {
println!("Move in the x direction {x} and in the y direction {y}");
}
Message::Write(text) => {
println!("Text message: {text}");
}
Message::ChangeColor(r, g, b) => {
println!("Change color to red {r}, green {g}, and blue {b}");
}
}
}Этот код напечатает Change color to red 0, green 160, and blue 255.
Попробуйте изменить значение msg, чтобы увидеть выполнение кода из других
ветвей.
Для вариантов перечисления без данных, таких как Message::Quit, мы не можем
деструктурировать значение дальше. Мы можем только сопоставить его с
литеральным значением Message::Quit, и в этом шаблоне нет переменных.
Для вариантов перечисления, похожих на структуры, таких как Message::Move,
можно использовать шаблон, похожий на тот, который мы задаем для сопоставления
структур. После имени варианта мы ставим фигурные скобки и затем перечисляем
поля с переменными, чтобы разобрать части и использовать их в коде этой ветви.
Здесь мы используем сокращенную форму, как в листинге 19-13.
Для вариантов перечисления, похожих на кортежи, например Message::Write,
который хранит кортеж с одним элементом, и Message::ChangeColor, который
хранит кортеж с тремя элементами, шаблон похож на тот, который мы задаем для
сопоставления кортежей. Число переменных в шаблоне должно совпадать с числом
элементов в варианте, который мы сопоставляем.
Вложенные структуры и перечисления
До сих пор все наши примеры сопоставляли структуры или перечисления глубиной в
один уровень, но сопоставление может работать и с вложенными элементами!
Например, мы можем переработать код из листинга 19-15, чтобы поддержать цвета
RGB и HSV в сообщении ChangeColor, как показано в листинге 19-16.
enum Color {
Rgb(i32, i32, i32),
Hsv(i32, i32, i32),
}
enum Message {
Quit,
Move { x: i32, y: i32 },
Write(String),
ChangeColor(Color),
}
fn main() {
let msg = Message::ChangeColor(Color::Hsv(0, 160, 255));
match msg {
Message::ChangeColor(Color::Rgb(r, g, b)) => {
println!("Change color to red {r}, green {g}, and blue {b}");
}
Message::ChangeColor(Color::Hsv(h, s, v)) => {
println!("Change color to hue {h}, saturation {s}, value {v}");
}
_ => (),
}
}Шаблон первой ветви в выражении match совпадает с вариантом перечисления
Message::ChangeColor, который содержит вариант Color::Rgb; затем шаблон
привязывается к трем внутренним значениям i32. Шаблон второй ветви также
совпадает с вариантом перечисления Message::ChangeColor, но внутреннее
перечисление вместо этого совпадает с Color::Hsv. Мы можем задавать такие
сложные условия в одном выражении match, даже если задействованы два
перечисления.
Структуры и кортежи
Мы можем смешивать, сопоставлять и вкладывать шаблоны деструктурирования еще более сложными способами. Следующий пример показывает сложное деструктурирование, где мы вкладываем структуры и кортежи внутрь кортежа и извлекаем наружу все примитивные значения:
fn main() {
struct Point {
x: i32,
y: i32,
}
let ((feet, inches), Point { x, y }) = ((3, 10), Point { x: 3, y: -10 });
}Этот код позволяет разбить сложные типы на составные части, чтобы мы могли использовать интересующие нас значения отдельно.
Деструктурирование с помощью шаблонов — удобный способ использовать части значений, например значение из каждого поля структуры, отдельно друг от друга.
Игнорирование значений в шаблоне
Вы уже видели, что иногда полезно игнорировать значения в шаблоне, например в
последней ветви match, чтобы получить универсальный случай, который на самом
деле ничего не делает, но учитывает все оставшиеся возможные значения. Есть
несколько способов игнорировать целые значения или части значений в шаблоне:
использовать шаблон _ (который вы уже видели), использовать шаблон _
внутри другого шаблона, использовать имя, начинающееся с подчеркивания, или
использовать .., чтобы игнорировать оставшиеся части значения. Рассмотрим,
как и почему использовать каждый из этих шаблонов.
Целое значение с помощью _
Мы использовали подчеркивание как подстановочный шаблон, который совпадает с
любым значением, но не привязывается к значению. Это особенно полезно как
последняя ветвь в выражении match, но его можно использовать и в любом
шаблоне, включая параметры функций, как показано в листинге 19-17.
fn foo(_: i32, y: i32) {
println!("This code only uses the y parameter: {y}");
}
fn main() {
foo(3, 4);
}_ в сигнатуре функцииЭтот код полностью проигнорирует значение 3, переданное первым аргументом, и
напечатает This code only uses the y parameter: 4.
В большинстве случаев, когда вам больше не нужен определенный параметр функции, вы изменили бы сигнатуру так, чтобы она не включала неиспользуемый параметр. Игнорирование параметра функции может быть особенно полезно в случаях, когда, например, вы реализуете трейт и должны иметь определенную сигнатуру типа, но тело функции в вашей реализации не нуждается в одном из параметров. Тогда вы избегаете предупреждения компилятора о неиспользуемых параметрах функции, которое получили бы при использовании имени.
Части значения с вложенным _
Мы также можем использовать _ внутри другого шаблона, чтобы игнорировать
только часть значения, например когда хотим проверить только часть значения, но
не собираемся использовать остальные части в соответствующем коде, который
должен выполниться. Листинг 19-18 показывает код, отвечающий за управление
значением настройки. Бизнес-требования таковы: пользователю не должно быть
разрешено перезаписывать уже существующую пользовательскую настройку, но он
может снять настройку и задать ей значение, если она сейчас не задана.
fn main() {
let mut setting_value = Some(5);
let new_setting_value = Some(10);
match (setting_value, new_setting_value) {
(Some(_), Some(_)) => {
println!("Can't overwrite an existing customized value");
}
_ => {
setting_value = new_setting_value;
}
}
println!("setting is {setting_value:?}");
}Some, когда нам не нужно использовать значение внутри SomeЭтот код напечатает Can't overwrite an existing customized value, а затем
setting is Some(5). В первой ветви match нам не нужно сопоставлять или
использовать значения внутри любого из вариантов Some, но нам нужно
проверить случай, когда setting_value и new_setting_value являются
вариантом Some. В этом случае мы печатаем причину, по которой не меняем
setting_value, и оно не изменяется.
Во всех остальных случаях (если либо setting_value, либо new_setting_value
является None), выраженных шаблоном _ во второй ветви, мы хотим разрешить
new_setting_value стать setting_value.
Мы также можем использовать подчеркивания в нескольких местах внутри одного шаблона, чтобы игнорировать конкретные значения. Листинг 19-19 показывает пример игнорирования второго и четвертого значений в кортеже из пяти элементов.
fn main() {
let numbers = (2, 4, 8, 16, 32);
match numbers {
(first, _, third, _, fifth) => {
println!("Some numbers: {first}, {third}, {fifth}");
}
}
}Этот код напечатает Some numbers: 2, 8, 32, а значения 4 и 16 будут
проигнорированы.
Неиспользуемая переменная, имя которой начинается с _
Если вы создаете переменную, но нигде ее не используете, Rust обычно выдает предупреждение, потому что неиспользуемая переменная может быть ошибкой. Однако иногда полезно иметь возможность создать переменную, которую вы пока не будете использовать, например при прототипировании или в самом начале проекта. В такой ситуации можно сказать Rust не предупреждать о неиспользуемой переменной, начав имя переменной с подчеркивания. В листинге 19-20 мы создаем две неиспользуемые переменные, но при компиляции этого кода должны получить предупреждение только об одной из них.
fn main() {
let _x = 5;
let y = 10;
}Здесь мы получаем предупреждение о том, что переменная y не используется, но
не получаем предупреждение о неиспользовании _x.
Обратите внимание, что есть тонкое различие между использованием только _ и
использованием имени, начинающегося с подчеркивания. Синтаксис _x все еще
привязывает значение к переменной, тогда как _ вообще не привязывает. Чтобы
показать случай, где это различие важно, листинг 19-21 даст нам ошибку.
fn main() {
let s = Some(String::from("Hello!"));
if let Some(_s) = s {
println!("found a string");
}
println!("{s:?}");
}Мы получим ошибку, потому что значение s все равно будет перемещено в _s,
что не даст нам снова использовать s. Однако использование одного
подчеркивания никогда не привязывается к значению. Листинг 19-22
скомпилируется без ошибок, потому что s не перемещается в _.
fn main() {
let s = Some(String::from("Hello!"));
if let Some(_) = s {
println!("found a string");
}
println!("{s:?}");
}Этот код работает нормально, потому что мы нигде не привязываем s; оно не
перемещается.
Оставшиеся части значения с помощью ..
Для значений, состоящих из многих частей, мы можем использовать синтаксис
.., чтобы использовать конкретные части и игнорировать остальные, избегая
необходимости перечислять подчеркивания для каждого игнорируемого значения.
Шаблон .. игнорирует любые части значения, которые мы явно не сопоставили в
остальной части шаблона. В листинге 19-23 у нас есть структура Point,
хранящая координату в трехмерном пространстве. В выражении match мы хотим
работать только с координатой x и игнорировать значения в полях y и z.
fn main() {
struct Point {
x: i32,
y: i32,
z: i32,
}
let origin = Point { x: 0, y: 0, z: 0 };
match origin {
Point { x, .. } => println!("x is {x}"),
}
}Point, кроме x, с помощью ..Мы перечисляем значение x, а затем просто включаем шаблон ... Это быстрее,
чем перечислять y: _ и z: _, особенно когда мы работаем со структурами с
большим числом полей в ситуациях, где важны только одно или два поля.
Синтаксис .. расширится до такого количества значений, какое потребуется.
Листинг 19-24 показывает, как использовать .. с кортежем.
fn main() {
let numbers = (2, 4, 8, 16, 32);
match numbers {
(first, .., last) => {
println!("Some numbers: {first}, {last}");
}
}
}В этом коде первое и последнее значения сопоставляются с first и last.
.. сопоставит и проигнорирует все, что находится посередине.
Однако использование .. должно быть однозначным. Если неясно, какие значения
предназначены для сопоставления, а какие должны быть проигнорированы, Rust
выдаст ошибку. Листинг 19-25 показывает пример неоднозначного использования
.., поэтому он не скомпилируется.
fn main() {
let numbers = (2, 4, 8, 16, 32);
match numbers {
(.., second, ..) => {
println!("Some numbers: {second}")
},
}
}.. неоднозначным способомКогда мы компилируем этот пример, получаем такую ошибку:
$ cargo run
Compiling patterns v0.1.0 (file:///projects/patterns)
error: `..` can only be used once per tuple pattern
--> src/main.rs:5:22
|
5 | (.., second, ..) => {
| -- ^^ can only be used once per tuple pattern
| |
| previously used here
error: could not compile `patterns` (bin "patterns") due to 1 previous error
Rust невозможно определить, сколько значений в кортеже нужно проигнорировать
перед сопоставлением значения с second, а затем сколько дальнейших значений
игнорировать после этого. Этот код мог бы означать, что мы хотим
проигнорировать 2, привязать second к 4, а затем проигнорировать 8,
16 и 32; или что мы хотим проигнорировать 2 и 4, привязать second к
8, а затем проигнорировать 16 и 32; и так далее. Имя переменной second
не имеет для Rust никакого специального значения, поэтому мы получаем ошибку
компилятора, потому что использование .. в двух местах таким образом
неоднозначно.
Добавление условий с помощью охранных условий match
Охранное условие match — это дополнительное условие if, указанное после
шаблона в ветви match, которое также должно выполниться, чтобы эта ветвь
была выбрана. Охранные условия match полезны для выражения более сложных идей,
чем позволяет один только шаблон. Однако обратите внимание, что они доступны
только в выражениях match, а не в выражениях if let или while let.
Условие может использовать переменные, созданные в шаблоне. Листинг 19-26
показывает match, где первая ветвь имеет шаблон Some(x) и также имеет
охранное условие match if x % 2 == 0 (которое будет true, если число
четное).
fn main() {
let num = Some(4);
match num {
Some(x) if x % 2 == 0 => println!("The number {x} is even"),
Some(x) => println!("The number {x} is odd"),
None => (),
}
}match к шаблонуЭтот пример напечатает The number 4 is even. Когда num сравнивается с
шаблоном в первой ветви, он совпадает, потому что Some(4) соответствует
Some(x). Затем охранное условие match проверяет, равен ли остаток от деления
x на 2 нулю, и поскольку это так, выбирается первая ветвь.
Если бы num вместо этого было Some(5), охранное условие match в первой
ветви было бы false, потому что остаток от деления 5 на 2 равен 1, а это не
0. Затем Rust перешел бы ко второй ветви, которая совпала бы, потому что у
второй ветви нет охранного условия match и поэтому она совпадает с любым
вариантом Some.
Невозможно выразить условие if x % 2 == 0 внутри шаблона, поэтому охранное
условие match дает нам возможность выразить эту логику. Недостаток этой
дополнительной выразительности в том, что компилятор не пытается проверять
исчерпываемость, когда задействованы выражения охранных условий match.
При обсуждении листинга 19-11 мы упоминали, что можем использовать охранные
условия match, чтобы решить проблему затенения в шаблоне. Вспомните, что мы
создали новую переменную внутри шаблона в выражении match вместо
использования переменной вне match. Эта новая переменная означала, что мы не
могли проверить значение внешней переменной. Листинг 19-27 показывает, как
использовать охранное условие match, чтобы исправить эту проблему.
fn main() {
let x = Some(5);
let y = 10;
match x {
Some(50) => println!("Got 50"),
Some(n) if n == y => println!("Matched, n = {n}"),
_ => println!("Default case, x = {x:?}"),
}
println!("at the end: x = {x:?}, y = {y}");
}match для проверки равенства с внешней переменнойТеперь этот код напечатает Default case, x = Some(5). Шаблон во второй ветви
match не вводит новую переменную y, которая затенила бы внешнюю y, а
значит, мы можем использовать внешнюю y в охранном условии match. Вместо
того чтобы указать шаблон как Some(y), что затенило бы внешнюю y, мы
указываем Some(n). Это создает новую переменную n, которая ничего не
затеняет, потому что вне match нет переменной n.
Охранное условие match if n == y не является шаблоном и поэтому не вводит
новых переменных. Эта y является внешней y, а не новой y, затеняющей
ее, и мы можем искать значение, которое равно внешней y, сравнивая n с
y.
Вы также можете использовать оператор или | в охранном условии match, чтобы
указать несколько шаблонов; условие охранного условия match будет применяться
ко всем шаблонам. Листинг 19-28 показывает приоритет при сочетании шаблона,
использующего |, с охранным условием match. Важная часть этого примера в
том, что охранное условие match if y применяется к 4, 5 и 6, хотя
может выглядеть так, будто if y применяется только к 6.
fn main() {
let x = 4;
let y = false;
match x {
4 | 5 | 6 if y => println!("yes"),
_ => println!("no"),
}
}matchУсловие match утверждает, что ветвь совпадает только если значение x равно
4, 5 или 6 и если y равно true. Когда этот код выполняется, шаблон
первой ветви совпадает, потому что x равно 4, но охранное условие match
if y равно false, поэтому первая ветвь не выбирается. Код переходит ко
второй ветви, которая совпадает, и эта программа печатает no. Причина в том,
что условие if применяется ко всему шаблону 4 | 5 | 6, а не только к
последнему значению 6. Другими словами, приоритет охранного условия match по
отношению к шаблону ведет себя так:
(4 | 5 | 6) if y => ...
а не так:
4 | 5 | (6 if y) => ...
После выполнения кода поведение приоритета становится очевидным: если бы
охранное условие match применялось только к последнему значению в списке
значений, указанных с помощью оператора |, ветвь совпала бы, и программа
напечатала бы yes.
Использование привязок @
Оператор at @ позволяет создать переменную, которая хранит значение, и
одновременно проверять это значение на соответствие шаблону. В листинге 19-29
мы хотим проверить, что поле id у Message::Hello находится в диапазоне
3..=7. Мы также хотим привязать значение к переменной id, чтобы
использовать его в коде, связанном с этой ветвью.
fn main() {
enum Message {
Hello { id: i32 },
}
let msg = Message::Hello { id: 5 };
match msg {
Message::Hello { id: id @ 3..=7 } => {
println!("Found an id in range: {id}")
}
Message::Hello { id: 10..=12 } => {
println!("Found an id in another range")
}
Message::Hello { id } => println!("Found some other id: {id}"),
}
}@ для привязки к значению в шаблоне с одновременной его проверкойЭтот пример напечатает Found an id in range: 5. Указав id @ перед
диапазоном 3..=7, мы захватываем любое значение, совпавшее с диапазоном, в
переменную с именем id и одновременно проверяем, что значение совпало с
шаблоном диапазона.
Во второй ветви, где в шаблоне указан только диапазон, код, связанный с ветвью,
не имеет переменной, содержащей фактическое значение поля id. Значение поля
id могло быть 10, 11 или 12, но код, связанный с этим шаблоном, не знает,
каким именно. Код шаблона не может использовать значение из поля id, потому
что мы не сохранили значение id в переменной.
В последней ветви, где мы указали переменную без диапазона, у нас есть
значение, доступное для использования в коде ветви, в переменной с именем
id. Причина в том, что мы использовали сокращенный синтаксис полей
структуры. Но в этой ветви мы не применили к значению поля id никакой
проверки, как сделали в первых двух ветвях: этому шаблону подошло бы любое
значение.
Использование @ позволяет проверять значение и сохранять его в переменной в
одном шаблоне.
Итоги
Шаблоны Rust очень полезны для различения разных видов данных. При
использовании в выражениях match Rust гарантирует, что ваши шаблоны
покрывают каждое возможное значение, иначе программа не скомпилируется.
Шаблоны в операторах let и параметрах функций делают эти конструкции более
полезными, позволяя деструктурировать значения на меньшие части и присваивать
эти части переменным. Мы можем создавать простые или сложные шаблоны под свои
нужды.
Далее, в предпоследней главе книги, мы рассмотрим некоторые расширенные аспекты разных возможностей Rust.
Расширенные возможности
К этому моменту вы уже изучили наиболее часто используемые части языка программирования Rust. Прежде чем в главе 21 выполнить еще один проект, мы рассмотрим несколько аспектов языка, с которыми вы можете время от времени сталкиваться, но, возможно, не будете использовать каждый день. Эту главу можно использовать как справочник, когда вы столкнетесь с чем-то незнакомым. Возможности, рассматриваемые здесь, полезны в очень конкретных ситуациях. Хотя вы, возможно, не будете часто к ним обращаться, мы хотим убедиться, что у вас есть представление обо всех возможностях, которые Rust предлагает.
В этой главе мы рассмотрим:
- Unsafe Rust: как отказаться от некоторых гарантий Rust и взять на себя ответственность за ручное поддержание этих гарантий
- Расширенные трейты: связанные типы, параметры типов по умолчанию, полностью квалифицированный синтаксис, супертрейты и шаблон newtype применительно к трейтам
- Расширенные типы: больше о шаблоне newtype, псевдонимы типов, never type и динамически размерные типы
- Расширенные функции и замыкания: указатели на функции и возврат замыканий
- Макросы: способы определять код, который во время компиляции определяет еще больше кода
Это широкий набор возможностей Rust, где найдется что-то для каждого! Давайте погрузимся!
Unsafe Rust
Unsafe Rust
Весь код, который мы обсуждали до сих пор, имел гарантии безопасности памяти Rust, проверяемые во время компиляции. Однако внутри Rust скрыт второй язык, который не обеспечивает эти гарантии безопасности памяти: он называется unsafe Rust и работает так же, как обычный Rust, но дает нам дополнительные сверхспособности.
Unsafe Rust существует потому, что статический анализ по своей природе консервативен. Когда компилятор пытается определить, соблюдает ли код гарантии, для него лучше отклонить некоторые допустимые программы, чем принять некоторые недопустимые. Хотя код может быть в порядке, если у компилятора Rust недостаточно информации для уверенности, он отклонит этот код. В таких случаях можно использовать unsafe-код, чтобы сказать компилятору: «Доверься мне, я знаю, что делаю». Однако предупреждаем: вы используете unsafe Rust на свой риск. Если использовать unsafe-код неправильно, могут возникнуть проблемы из-за небезопасности памяти, например разыменование нулевого указателя.
Еще одна причина, по которой у Rust есть unsafe-альтер эго, состоит в том, что лежащая в основе компьютерная аппаратура по своей сути небезопасна. Если бы Rust не позволял выполнять небезопасные операции, вы не смогли бы решать некоторые задачи. Rust должен позволять низкоуровневое системное программирование, например прямое взаимодействие с операционной системой или даже написание собственной операционной системы. Работа с низкоуровневым системным программированием — одна из целей языка. Давайте рассмотрим, что можно делать с unsafe Rust и как это делать.
Использование unsafe-сверхспособностей
Чтобы переключиться на unsafe Rust, используйте ключевое слово unsafe, а
затем начните новый блок, содержащий unsafe-код. В unsafe Rust можно выполнять
пять действий, которые нельзя выполнять в safe Rust; мы называем их
unsafe-сверхспособностями. Эти сверхспособности включают возможность:
- Разыменовывать сырой указатель.
- Вызывать unsafe-функцию или unsafe-метод.
- Получать доступ к изменяемой статической переменной или изменять ее.
- Реализовывать unsafe-трейт.
- Получать доступ к полям
union.
Важно понимать, что unsafe не отключает проверщик заимствований и не
отключает никакие другие проверки безопасности Rust: если вы используете
ссылку в unsafe-коде, она все равно будет проверяться. Ключевое слово unsafe
только дает доступ к этим пяти возможностям, которые затем не проверяются
компилятором на безопасность памяти. Внутри unsafe-блока вы все равно
получаете некоторую степень безопасности.
Кроме того, unsafe не означает, что код внутри блока обязательно опасен или
что он точно будет иметь проблемы с безопасностью памяти. Замысел в том, что
вы как программист обеспечите, чтобы код внутри блока unsafe обращался к
памяти допустимым образом.
Люди ошибаются, и ошибки будут случаться, но требуя, чтобы эти пять
небезопасных операций находились внутри блоков, помеченных unsafe, вы будете
знать, что любые ошибки, связанные с безопасностью памяти, должны быть внутри
блока unsafe. Держите блоки unsafe маленькими; позже вы будете благодарны
себе, когда станете искать ошибки памяти.
Чтобы максимально изолировать unsafe-код, лучше заключать такой код в
безопасную абстракцию и предоставлять безопасный API; мы обсудим это позже в
главе, когда будем рассматривать unsafe-функции и методы. Части стандартной
библиотеки реализованы как безопасные абстракции поверх проверенного
unsafe-кода. Оборачивание unsafe-кода в безопасную абстракцию не дает
использованию unsafe просочиться во все места, где вы или ваши пользователи
могли бы захотеть применить функциональность, реализованную с помощью
unsafe-кода, потому что использовать безопасную абстракцию безопасно.
Рассмотрим каждую из пяти unsafe-сверхспособностей по очереди. Мы также посмотрим на некоторые абстракции, предоставляющие безопасный интерфейс к unsafe-коду.
Разыменование сырого указателя
В главе 4, в разделе «Висячие ссылки»,
мы упоминали, что компилятор гарантирует постоянную допустимость ссылок.
Unsafe Rust имеет два новых типа, называемых сырыми указателями, которые
похожи на ссылки. Как и ссылки, сырые указатели могут быть неизменяемыми или
изменяемыми и записываются как *const T и *mut T соответственно. Звездочка
здесь не является оператором разыменования; это часть имени типа. В контексте
сырых указателей неизменяемый означает, что указателю нельзя напрямую
присвоить значение после разыменования.
В отличие от ссылок и умных указателей, сырые указатели:
- могут игнорировать правила заимствования, позволяя иметь и неизменяемые, и изменяемые указатели или несколько изменяемых указателей на одно и то же место;
- не гарантированно указывают на допустимую память;
- могут быть нулевыми;
- не выполняют никакой автоматической очистки.
Отказавшись от того, чтобы Rust обеспечивал эти гарантии, можно отказаться от гарантированной безопасности в обмен на большую производительность или возможность взаимодействовать с другим языком или аппаратурой, где гарантии Rust неприменимы.
Листинг 20-1 показывает, как создать неизменяемый и изменяемый сырой указатель.
fn main() {
let mut num = 5;
let r1 = &raw const num;
let r2 = &raw mut num;
}Обратите внимание, что в этом коде мы не включаем ключевое слово unsafe. Мы
можем создавать сырые указатели в безопасном коде; мы просто не можем
разыменовывать сырые указатели вне unsafe-блока, как вы скоро увидите.
Мы создали сырые указатели с помощью операторов сырого заимствования:
&raw const num создает неизменяемый сырой указатель *const i32, а
&raw mut num создает изменяемый сырой указатель *mut i32. Поскольку мы
создали их напрямую из локальной переменной, мы знаем, что эти конкретные
сырые указатели допустимы, но такое предположение нельзя делать о любом сыром
указателе.
Чтобы продемонстрировать это, дальше мы создадим сырой указатель, в
допустимости которого не можем быть так уверены, используя ключевое слово as
для приведения значения вместо оператора сырого заимствования. Листинг 20-2
показывает, как создать сырой указатель на произвольное место в памяти.
Попытка использовать произвольную память является неопределенным поведением:
по этому адресу могут быть данные, а могут и не быть; компилятор может
оптимизировать код так, что обращения к памяти не будет; или программа может
завершиться с ошибкой сегментации. Обычно нет веской причины писать такой код,
особенно в случаях, где можно использовать оператор сырого заимствования, но
это возможно.
fn main() {
let address = 0x012345usize;
let r = address as *const i32;
}Вспомните, что мы можем создавать сырые указатели в безопасном коде, но не
можем разыменовывать сырые указатели и читать данные, на которые они указывают.
В листинге 20-3 мы используем оператор разыменования * для сырого указателя,
что требует блока unsafe.
fn main() {
let mut num = 5;
let r1 = &raw const num;
let r2 = &raw mut num;
unsafe {
println!("r1 is: {}", *r1);
println!("r2 is: {}", *r2);
}
}unsafeСоздание указателя само по себе не причиняет вреда; только когда мы пытаемся получить доступ к значению, на которое он указывает, мы можем столкнуться с недопустимым значением.
Также обратите внимание, что в листингах 20-1 и 20-3 мы создали сырые
указатели *const i32 и *mut i32, которые оба указывают на одно и то же
место в памяти, где хранится num. Если бы вместо этого мы попытались создать
неизменяемую и изменяемую ссылки на num, код не скомпилировался бы, потому
что правила владения Rust не разрешают изменяемую ссылку одновременно с любыми
неизменяемыми ссылками. С сырыми указателями мы можем создать изменяемый
указатель и неизменяемый указатель на одно и то же место и изменить данные
через изменяемый указатель, потенциально создав гонку данных. Будьте
осторожны!
При всех этих опасностях зачем вообще использовать сырые указатели? Один важный сценарий — взаимодействие с кодом C, как вы увидите в следующем разделе. Другой случай — построение безопасных абстракций, которые проверщик заимствований не понимает. Мы введем unsafe-функции, а затем рассмотрим пример безопасной абстракции, использующей unsafe-код.
Вызов unsafe-функции или метода
Второй тип операций, которые можно выполнять в unsafe-блоке, — вызов
unsafe-функций. Unsafe-функции и методы выглядят точно так же, как обычные
функции и методы, но перед остальной частью определения у них есть
дополнительное unsafe. Ключевое слово unsafe в этом контексте указывает,
что у функции есть требования, которые мы должны соблюдать при ее вызове,
потому что Rust не может гарантировать, что мы выполнили эти требования.
Вызывая unsafe-функцию внутри блока unsafe, мы говорим, что прочитали
документацию этой функции и берем на себя ответственность за соблюдение ее
контрактов.
Вот unsafe-функция с именем dangerous, которая ничего не делает в своем теле:
fn main() {
unsafe fn dangerous() {}
unsafe {
dangerous();
}
}Мы должны вызывать функцию dangerous внутри отдельного блока unsafe. Если
попытаться вызвать dangerous без блока unsafe, мы получим ошибку:
$ cargo run
Compiling unsafe-example v0.1.0 (file:///projects/unsafe-example)
error[E0133]: call to unsafe function `dangerous` is unsafe and requires unsafe block
--> src/main.rs:4:5
|
4 | dangerous();
| ^^^^^^^^^^^ call to unsafe function
|
= note: consult the function's documentation for information on how to avoid undefined behavior
For more information about this error, try `rustc --explain E0133`.
error: could not compile `unsafe-example` (bin "unsafe-example") due to 1 previous error
Блоком unsafe мы утверждаем Rust, что прочитали документацию функции,
понимаем, как правильно ее использовать, и проверили, что выполняем контракт
функции.
Чтобы выполнять unsafe-операции в теле unsafe-функции, все равно нужно
использовать блок unsafe, как и внутри обычной функции, и компилятор
предупредит вас, если вы забудете это сделать. Это помогает держать блоки
unsafe как можно меньшими, потому что unsafe-операции могут быть нужны не во
всем теле функции.
Создание безопасной абстракции поверх unsafe-кода
То, что функция содержит unsafe-код, не означает, что всю функцию нужно
помечать как unsafe. На самом деле оборачивание unsafe-кода в безопасную
функцию — распространенная абстракция. В качестве примера изучим функцию
split_at_mut из стандартной библиотеки, которой требуется немного
unsafe-кода. Мы рассмотрим, как могли бы ее реализовать. Этот безопасный метод
определен для изменяемых срезов: он берет один срез и делает из него два,
разделяя срез по индексу, переданному как аргумент. Листинг 20-4 показывает,
как использовать split_at_mut.
fn main() {
let mut v = vec![1, 2, 3, 4, 5, 6];
let r = &mut v[..];
let (a, b) = r.split_at_mut(3);
assert_eq!(a, &mut [1, 2, 3]);
assert_eq!(b, &mut [4, 5, 6]);
}split_at_mutМы не можем реализовать эту функцию, используя только безопасный Rust. Попытка
могла бы выглядеть как в листинге 20-5, который не скомпилируется. Для
простоты мы реализуем split_at_mut как функцию, а не метод, и только для
срезов значений i32, а не для обобщенного типа T.
fn split_at_mut(values: &mut [i32], mid: usize) -> (&mut [i32], &mut [i32]) {
let len = values.len();
assert!(mid <= len);
(&mut values[..mid], &mut values[mid..])
}
fn main() {
let mut vector = vec![1, 2, 3, 4, 5, 6];
let (left, right) = split_at_mut(&mut vector, 3);
}split_at_mut только с помощью безопасного RustЭта функция сначала получает общую длину среза. Затем она утверждает, что индекс, переданный как параметр, находится внутри среза, проверяя, что он меньше или равен длине. Утверждение означает, что если мы передадим индекс, который больше длины, чтобы разделить срез по нему, функция вызовет панику до попытки использовать этот индекс.
Затем мы возвращаем два изменяемых среза в кортеже: один от начала исходного
среза до индекса mid, а другой от mid до конца среза.
Когда мы пытаемся скомпилировать код из листинга 20-5, получаем ошибку:
$ cargo run
Compiling unsafe-example v0.1.0 (file:///projects/unsafe-example)
error[E0499]: cannot borrow `*values` as mutable more than once at a time
--> src/main.rs:6:31
|
1 | fn split_at_mut(values: &mut [i32], mid: usize) -> (&mut [i32], &mut [i32]) {
| - let's call the lifetime of this reference `'1`
...
6 | (&mut values[..mid], &mut values[mid..])
| --------------------------^^^^^^--------
| | | |
| | | second mutable borrow occurs here
| | first mutable borrow occurs here
| returning this value requires that `*values` is borrowed for `'1`
|
= help: use `.split_at_mut(position)` to obtain two mutable non-overlapping sub-slices
For more information about this error, try `rustc --explain E0499`.
error: could not compile `unsafe-example` (bin "unsafe-example") due to 1 previous error
Проверщик заимствований Rust не может понять, что мы заимствуем разные части среза; он знает только, что мы дважды заимствуем из одного и того же среза. Заимствовать разные части среза в принципе нормально, потому что эти два среза не пересекаются, но Rust недостаточно умен, чтобы это знать. Когда мы знаем, что код корректен, а Rust — нет, пора обратиться к unsafe-коду.
Листинг 20-6 показывает, как использовать блок unsafe, сырой указатель и
несколько вызовов unsafe-функций, чтобы реализация split_at_mut заработала.
use std::slice;
fn split_at_mut(values: &mut [i32], mid: usize) -> (&mut [i32], &mut [i32]) {
let len = values.len();
let ptr = values.as_mut_ptr();
assert!(mid <= len);
unsafe {
(
slice::from_raw_parts_mut(ptr, mid),
slice::from_raw_parts_mut(ptr.add(mid), len - mid),
)
}
}
fn main() {
let mut vector = vec![1, 2, 3, 4, 5, 6];
let (left, right) = split_at_mut(&mut vector, 3);
}split_at_mutВспомните из раздела «Тип среза» главы 4, что
срез — это указатель на некоторые данные и длина среза. Мы используем метод
len, чтобы получить длину среза, и метод as_mut_ptr, чтобы получить доступ
к сырому указателю среза. В этом случае, поскольку у нас есть изменяемый срез
значений i32, as_mut_ptr возвращает сырой указатель типа *mut i32,
который мы сохранили в переменной ptr.
Мы сохраняем утверждение, что индекс mid находится внутри среза. Затем
переходим к unsafe-коду: функция slice::from_raw_parts_mut принимает сырой
указатель и длину и создает срез. Мы используем эту функцию, чтобы создать
срез, который начинается с ptr и имеет длину mid элементов. Затем мы
вызываем метод add у ptr с mid как аргументом, чтобы получить сырой
указатель, начинающийся с mid, и создаем срез, используя этот указатель и
оставшееся число элементов после mid как длину.
Функция slice::from_raw_parts_mut небезопасна, потому что она принимает сырой
указатель и должна доверять тому, что этот указатель допустим. Метод add у
сырых указателей также небезопасен, потому что он должен доверять, что место
по смещению также является допустимым указателем. Поэтому нам пришлось
поместить блок unsafe вокруг вызовов slice::from_raw_parts_mut и add,
чтобы мы могли их вызвать. Глядя на код и добавляя утверждение, что mid
должен быть меньше или равен len, мы можем сказать, что все сырые указатели,
используемые внутри блока unsafe, будут допустимыми указателями на данные
внутри среза. Это приемлемое и уместное использование unsafe.
Обратите внимание, что нам не нужно помечать итоговую функцию split_at_mut
как unsafe, и мы можем вызывать эту функцию из безопасного Rust. Мы создали
безопасную абстракцию unsafe-кода с реализацией функции, которая использует
unsafe-код безопасным способом, потому что создает только допустимые указатели
из данных, к которым эта функция имеет доступ.
В противоположность этому использование slice::from_raw_parts_mut в листинге
20-7, скорее всего, приведет к аварийному завершению при использовании среза.
Этот код берет произвольное место в памяти и создает срез длиной 10 000
элементов.
fn main() {
use std::slice;
let address = 0x01234usize;
let r = address as *mut i32;
let values: &[i32] = unsafe { slice::from_raw_parts_mut(r, 10000) };
}Мы не владеем памятью в этом произвольном месте, и нет гарантии, что срез,
созданный этим кодом, содержит допустимые значения i32. Попытка использовать
values как допустимый срез приводит к неопределенному поведению.
Использование функций extern для вызова внешнего кода
Иногда вашему Rust-коду может понадобиться взаимодействовать с кодом,
написанным на другом языке. Для этого в Rust есть ключевое слово extern,
которое помогает создавать и использовать интерфейс внешних функций (Foreign
Function Interface, FFI): способ для языка программирования определить
функции и дать другому, внешнему, языку программирования возможность вызывать
эти функции.
Листинг 20-8 демонстрирует, как настроить интеграцию с функцией abs из
стандартной библиотеки C. Функции, объявленные внутри блоков extern, обычно
небезопасно вызывать из Rust-кода, поэтому блоки extern также должны быть
помечены unsafe. Причина в том, что другие языки не обеспечивают правила и
гарантии Rust, а Rust не может их проверить, поэтому ответственность за
обеспечение безопасности ложится на программиста.
unsafe extern "C" {
fn abs(input: i32) -> i32;
}
fn main() {
unsafe {
println!("Absolute value of -3 according to C: {}", abs(-3));
}
}extern, определенной в другом языкеВнутри блока unsafe extern "C" мы перечисляем имена и сигнатуры внешних
функций из другого языка, которые хотим вызвать. Часть "C" определяет,
какой двоичный интерфейс приложения (application binary interface, ABI)
использует внешняя функция: ABI определяет, как вызывать функцию на уровне
ассемблера. ABI "C" является самым распространенным и следует ABI языка
программирования C. Информация обо всех ABI, которые поддерживает Rust,
доступна в Rust Reference.
Каждый элемент, объявленный внутри блока unsafe extern, неявно является
unsafe. Однако некоторые FFI-функции безопасны для вызова. Например, функция
abs из стандартной библиотеки C не имеет соображений безопасности памяти, и
мы знаем, что ее можно вызвать с любым i32. В таких случаях можно
использовать ключевое слово safe, чтобы сказать, что эта конкретная функция
безопасна для вызова, хотя находится в блоке unsafe extern. После такого
изменения ее вызов больше не требует блока unsafe, как показано в листинге
20-9.
unsafe extern "C" {
safe fn abs(input: i32) -> i32;
}
fn main() {
println!("Absolute value of -3 according to C: {}", abs(-3));
}safe внутри блока unsafe extern и ее безопасный вызовПометка функции как safe сама по себе не делает ее безопасной! Вместо этого
это похоже на обещание, которое вы даете Rust, что она безопасна. Вы все еще
отвечаете за то, чтобы это обещание было выполнено.
Вызов функций Rust из других языков
Мы также можем использовать extern, чтобы создать интерфейс, позволяющий
другим языкам вызывать функции Rust. Вместо создания целого блока extern мы
добавляем ключевое слово extern и указываем ABI перед ключевым словом fn
для соответствующей функции. Нам также нужно добавить аннотацию
#[unsafe(no_mangle)], чтобы сказать компилятору Rust не искажать имя этой
функции. Искажение имен (mangling) — это когда компилятор меняет имя,
которое мы дали функции, на другое имя, содержащее больше информации для
других частей процесса компиляции, но менее читаемое для человека. Компилятор
каждого языка программирования искажает имена немного по-разному, поэтому,
чтобы функция Rust могла быть названа из других языков, нужно отключить
искажение имен компилятором Rust. Это небезопасно, потому что без встроенного
искажения имен между библиотеками могут быть конфликты имен, поэтому наша
ответственность — убедиться, что выбранное имя безопасно экспортировать без
искажения.
В следующем примере мы делаем функцию call_from_c доступной из кода C после
того, как она будет скомпилирована в разделяемую библиотеку и слинкована из C:
#[unsafe(no_mangle)]
pub extern "C" fn call_from_c() {
println!("Just called a Rust function from C!");
}
Такое использование extern требует unsafe только в атрибуте, а не в блоке
extern.
Доступ к изменяемой статической переменной или ее изменение
В этой книге мы еще не говорили о глобальных переменных, которые Rust поддерживает, но которые могут быть проблематичны с правилами владения Rust. Если два потока обращаются к одной и той же изменяемой глобальной переменной, это может вызвать гонку данных.
В Rust глобальные переменные называются статическими переменными. Листинг 20-10 показывает пример объявления и использования статической переменной со строковым срезом в качестве значения.
static HELLO_WORLD: &str = "Hello, world!";
fn main() {
println!("value is: {HELLO_WORLD}");
}Статические переменные похожи на константы, которые мы обсуждали в разделе
«Объявление констант» главы 3. Имена статических
переменных по соглашению записываются в SCREAMING_SNAKE_CASE. Статические
переменные могут хранить только ссылки со временем жизни 'static, что
означает, что компилятор Rust может определить время жизни, и нам не требуется
указывать его явно. Доступ к неизменяемой статической переменной безопасен.
Тонкое различие между константами и неизменяемыми статическими переменными
состоит в том, что значения в статической переменной имеют фиксированный адрес
в памяти. Использование значения всегда будет обращаться к одним и тем же
данным. Константам, с другой стороны, разрешено дублировать свои данные при
каждом использовании. Еще одно различие в том, что статические переменные
могут быть изменяемыми. Доступ к изменяемым статическим переменным и их
изменение являются unsafe. Листинг 20-11 показывает, как объявить, прочитать
и изменить изменяемую статическую переменную с именем COUNTER.
static mut COUNTER: u32 = 0;
/// SAFETY: Calling this from more than a single thread at a time is undefined
/// behavior, so you *must* guarantee you only call it from a single thread at
/// a time.
unsafe fn add_to_count(inc: u32) {
unsafe {
COUNTER += inc;
}
}
fn main() {
unsafe {
// SAFETY: This is only called from a single thread in `main`.
add_to_count(3);
println!("COUNTER: {}", *(&raw const COUNTER));
}
}Как и с обычными переменными, мы указываем изменяемость с помощью ключевого
слова mut. Любой код, читающий из COUNTER или записывающий в COUNTER,
должен находиться внутри блока unsafe. Код в листинге 20-11 компилируется и
печатает COUNTER: 3, как мы и ожидали, потому что он однопоточный. Если бы к
COUNTER обращались несколько потоков, это, скорее всего, привело бы к гонкам
данных, а значит, к неопределенному поведению. Поэтому нужно пометить всю
функцию как unsafe и документировать ограничение безопасности, чтобы любой,
кто вызывает функцию, знал, что ему разрешено и не разрешено безопасно делать.
Каждый раз, когда мы пишем unsafe-функцию, идиоматично писать комментарий,
начинающийся с SAFETY, и объяснять, что вызывающая сторона должна сделать,
чтобы безопасно вызвать функцию. Аналогично, каждый раз, когда мы выполняем
unsafe-операцию, идиоматично писать комментарий, начинающийся с SAFETY,
чтобы объяснить, как соблюдаются правила безопасности.
Кроме того, компилятор по умолчанию запретит любую попытку создать ссылки на
изменяемую статическую переменную с помощью lint-проверки компилятора. Нужно
либо явно отказаться от защиты этой lint-проверки, добавив аннотацию
#[allow(static_mut_refs)], либо обращаться к изменяемой статической
переменной через сырой указатель, созданный одним из операторов сырого
заимствования. Это включает случаи, где ссылка создается невидимо, как при
использовании в println! в этом листинге. Требование создавать ссылки на
статические изменяемые переменные через сырые указатели помогает сделать
требования безопасности при их использовании более очевидными.
С изменяемыми данными, доступными глобально, трудно гарантировать отсутствие гонок данных, поэтому Rust считает изменяемые статические переменные небезопасными. Где возможно, предпочтительнее использовать приемы конкурентности и потокобезопасные умные указатели, которые мы обсуждали в главе 16, чтобы компилятор проверял безопасное обращение к данным из разных потоков.
Реализация unsafe-трейта
Мы можем использовать unsafe, чтобы реализовать unsafe-трейт. Трейт является
unsafe, когда хотя бы один из его методов имеет некоторый инвариант, который
компилятор не может проверить. Мы объявляем трейт как unsafe, добавляя
ключевое слово unsafe перед trait, и также помечаем реализацию трейта как
unsafe, как показано в листинге 20-12.
unsafe trait Foo {
// methods go here
}
unsafe impl Foo for i32 {
// method implementations go here
}
fn main() {}Используя unsafe impl, мы обещаем, что будем поддерживать инварианты, которые
компилятор не может проверить.
В качестве примера вспомните маркерные трейты Send и Sync, которые мы
обсуждали в разделе «Расширяемая конкурентность с Send и
Sync» главы 16: компилятор реализует эти
трейты автоматически, если наши типы полностью состоят из других типов,
реализующих Send и Sync. Если мы реализуем тип, содержащий тип, который не
реализует Send или Sync, например сырые указатели, и хотим пометить этот
тип как Send или Sync, мы должны использовать unsafe. Rust не может
проверить, что наш тип поддерживает гарантии, позволяющие безопасно отправлять
его между потоками или обращаться к нему из нескольких потоков; поэтому нам
нужно выполнить эти проверки вручную и обозначить это с помощью unsafe.
Доступ к полям union
Последнее действие, которое работает только с unsafe, — доступ к полям
union. Union похож на struct, но в конкретном экземпляре в один момент
времени используется только одно объявленное поле. Конструкции union в
основном используются для взаимодействия с union в коде C. Доступ к полям union
небезопасен, потому что Rust не может гарантировать тип данных, которые сейчас
хранятся в экземпляре union. Подробнее о union можно узнать в Rust
Reference.
Использование Miri для проверки unsafe-кода
Когда вы пишете unsafe-код, может понадобиться проверить, что написанное действительно безопасно и корректно. Один из лучших способов сделать это — использовать Miri, официальный инструмент Rust для обнаружения неопределенного поведения. В то время как проверщик заимствований является статическим инструментом, работающим во время компиляции, Miri — динамический инструмент, работающий во время выполнения. Он проверяет ваш код, запуская программу или ее набор тестов и обнаруживая нарушения известных ему правил о том, как должен работать Rust.
Для использования Miri нужна nightly-сборка Rust (о ней мы подробнее говорим в
приложении G: Как создается Rust и “Nightly Rust”).
Вы можете установить и nightly-версию Rust, и инструмент Miri, набрав
rustup +nightly component add miri. Это не меняет версию Rust, которую
использует ваш проект; это только добавляет инструмент в систему, чтобы вы
могли использовать его, когда захотите. Запустить Miri в проекте можно,
набрав cargo +nightly miri run или cargo +nightly miri test.
Чтобы увидеть, насколько это может быть полезно, рассмотрим, что происходит при запуске Miri для листинга 20-7.
$ cargo +nightly miri run
Compiling unsafe-example v0.1.0 (file:///projects/unsafe-example)
Finished `dev` profile [unoptimized + debuginfo] target(s) in 0.01s
Running `file:///home/.rustup/toolchains/nightly/bin/cargo-miri runner target/miri/debug/unsafe-example`
warning: integer-to-pointer cast
--> src/main.rs:5:13
|
5 | let r = address as *mut i32;
| ^^^^^^^^^^^^^^^^^^^ integer-to-pointer cast
|
= help: this program is using integer-to-pointer casts or (equivalently) `ptr::with_exposed_provenance`, which means that Miri might miss pointer bugs in this program
= help: see https://doc.rust-lang.org/nightly/std/ptr/fn.with_exposed_provenance.html for more details on that operation
= help: to ensure that Miri does not miss bugs in your program, use Strict Provenance APIs (https://doc.rust-lang.org/nightly/std/ptr/index.html#strict-provenance, https://crates.io/crates/sptr) instead
= help: you can then set `MIRIFLAGS=-Zmiri-strict-provenance` to ensure you are not relying on `with_exposed_provenance` semantics
= help: alternatively, `MIRIFLAGS=-Zmiri-permissive-provenance` disables this warning
= note: BACKTRACE:
= note: inside `main` at src/main.rs:5:13: 5:32
error: Undefined Behavior: pointer not dereferenceable: pointer must be dereferenceable for 40000 bytes, but got 0x1234[noalloc] which is a dangling pointer (it has no provenance)
--> src/main.rs:7:35
|
7 | let values: &[i32] = unsafe { slice::from_raw_parts_mut(r, 10000) };
| ^^^^^^^^^^^^^^^^^^^^^^^^^^^^^^^^^^^ Undefined Behavior occurred here
|
= help: this indicates a bug in the program: it performed an invalid operation, and caused Undefined Behavior
= help: see https://doc.rust-lang.org/nightly/reference/behavior-considered-undefined.html for further information
= note: BACKTRACE:
= note: inside `main` at src/main.rs:7:35: 7:70
note: some details are omitted, run with `MIRIFLAGS=-Zmiri-backtrace=full` for a verbose backtrace
error: aborting due to 1 previous error; 1 warning emitted
Miri корректно предупреждает нас, что мы приводим целое число к указателю, что может быть проблемой, но Miri не может определить, существует ли проблема, потому что не знает, как появился указатель. Затем Miri возвращает ошибку там, где в листинге 20-7 есть неопределенное поведение из-за висячего указателя. Благодаря Miri теперь мы знаем, что существует риск неопределенного поведения, и можем подумать, как сделать код безопасным. В некоторых случаях Miri даже может давать рекомендации по исправлению ошибок.
Miri не ловит все, в чем можно ошибиться при написании unsafe-кода. Miri — это инструмент динамического анализа, поэтому он ловит только проблемы с кодом, который действительно выполняется. Это означает, что нужно использовать его вместе с хорошими приемами тестирования, чтобы повысить уверенность в написанном unsafe-коде. Miri также не покрывает все возможные способы, которыми код может быть несостоятельным с точки зрения безопасности.
Иначе говоря: если Miri нашел проблему, вы знаете, что есть ошибка, но если Miri не нашел ошибку, это не означает, что проблемы нет. Тем не менее он может поймать многое. Попробуйте запустить его на других примерах unsafe-кода в этой главе и посмотрите, что он скажет!
Подробнее о Miri можно узнать в его репозитории GitHub.
Правильное использование unsafe-кода
Использовать unsafe для применения одной из пяти только что обсужденных
сверхспособностей не является неправильным и даже не считается чем-то
предосудительным, но сделать unsafe-код корректным сложнее, потому что
компилятор не может помогать поддерживать безопасность памяти. Когда у вас
есть причина использовать unsafe-код, вы можете это делать, а явная
аннотация unsafe упрощает поиск источника проблем, когда они возникают.
Каждый раз, когда вы пишете unsafe-код, можно использовать Miri, чтобы
получить больше уверенности, что написанный код соблюдает правила Rust.
Для гораздо более глубокого изучения того, как эффективно работать с unsafe
Rust, прочитайте официальное руководство Rust по unsafe,
The Rustonomicon.
Продвинутые трейты
Расширенные возможности трейтов
Впервые мы рассматривали трейты в разделе «Определение общего поведения с помощью трейтов» в главе 10, но тогда не обсуждали более продвинутые детали. Теперь, когда вы знаете о Rust больше, мы можем перейти к тонкостям.
Определение трейтов со связанными типами
Связанные типы соединяют заполнитель типа с трейтом так, что определения методов трейта могут использовать эти типы-заполнители в своих сигнатурах. Тот, кто реализует трейт, указывает конкретный тип, который будет использоваться вместо типа-заполнителя для данной конкретной реализации. Благодаря этому мы можем определить трейт, который использует некоторые типы, не зная точно, что это за типы, пока трейт не будет реализован.
Большинство расширенных возможностей в этой главе мы описывали как редко необходимые. Связанные типы находятся где-то посередине: они используются реже, чем возможности, объясненные в остальной части книги, но чаще, чем многие другие возможности, обсуждаемые в этой главе.
Один пример трейта со связанным типом — трейт Iterator, который предоставляет
стандартная библиотека. Связанный тип называется Item и обозначает тип
значений, по которым выполняет итерацию тип, реализующий трейт Iterator.
Определение трейта Iterator показано в листинге 20-13.
pub trait Iterator {
type Item;
fn next(&mut self) -> Option<Self::Item>;
}Iterator, у которого есть связанный тип ItemТип Item является заполнителем, а определение метода next показывает, что
он будет возвращать значения типа Option<Self::Item>. Реализующие трейт
Iterator укажут конкретный тип для Item, и метод next будет возвращать
Option, содержащий значение этого конкретного типа.
Связанные типы могут показаться похожими на обобщения, поскольку последние
позволяют нам определить функцию, не указывая, с какими типами она может
работать. Чтобы рассмотреть различие между этими двумя понятиями, мы посмотрим
на реализацию трейта Iterator для типа с именем Counter, где указано, что
тип Item — это u32:
struct Counter {
count: u32,
}
impl Counter {
fn new() -> Counter {
Counter { count: 0 }
}
}
impl Iterator for Counter {
type Item = u32;
fn next(&mut self) -> Option<Self::Item> {
// --snip--
if self.count < 5 {
self.count += 1;
Some(self.count)
} else {
None
}
}
}Этот синтаксис кажется сопоставимым с синтаксисом обобщений. Так почему бы
просто не определить трейт Iterator с обобщениями, как показано в листинге
20-14?
pub trait Iterator<T> {
fn next(&mut self) -> Option<T>;
}Iterator с использованием обобщенийРазличие в том, что при использовании обобщений, как в листинге 20-14, мы
должны указывать типы в каждой реализации; поскольку мы также могли бы
реализовать Iterator<String> for Counter или любой другой тип, у нас могло бы
быть несколько реализаций Iterator для Counter. Другими словами, когда у
трейта есть обобщенный параметр, его можно реализовать для одного типа несколько
раз, каждый раз меняя конкретные типы обобщенных параметров типа. Когда мы
использовали бы метод next для Counter, нам пришлось бы предоставлять
аннотации типов, чтобы указать, какую реализацию Iterator мы хотим
использовать.
Со связанными типами нам не нужно указывать типы, потому что мы не можем
реализовать трейт для одного типа несколько раз. В листинге 20-13, где
определение использует связанные типы, мы можем выбрать, каким будет тип
Item, только один раз, потому что может существовать только один impl Iterator for Counter. Нам не нужно указывать, что мы хотим итератор значений
u32, везде, где мы вызываем next для Counter.
Связанные типы также становятся частью контракта трейта: реализующие трейт должны предоставить тип, который будет стоять на месте заполнителя связанного типа. Связанные типы часто имеют имя, описывающее, как этот тип будет использоваться, и документировать связанный тип в документации API — хорошая практика.
Использование обобщенных параметров типа по умолчанию и перегрузки операторов
Когда мы используем обобщенные параметры типа, мы можем указать конкретный тип
по умолчанию для обобщенного типа. Это избавляет реализующих трейт от
необходимости указывать конкретный тип, если подходит тип по умолчанию. Тип по
умолчанию указывается при объявлении обобщенного типа с помощью синтаксиса
<PlaceholderType=ConcreteType>.
Отличный пример ситуации, где эта техника полезна, — перегрузка операторов,
при которой вы настраиваете поведение оператора (например, +) в отдельных
ситуациях.
Rust не позволяет создавать собственные операторы или перегружать произвольные
операторы. Но вы можете перегружать операции и соответствующие им трейты,
перечисленные в std::ops, реализуя трейты, связанные с оператором. Например,
в листинге 20-15 мы перегружаем оператор +, чтобы складывать два экземпляра
Point. Мы делаем это, реализуя трейт Add для структуры Point.
use std::ops::Add;
#[derive(Debug, Copy, Clone, PartialEq)]
struct Point {
x: i32,
y: i32,
}
impl Add for Point {
type Output = Point;
fn add(self, other: Point) -> Point {
Point {
x: self.x + other.x,
y: self.y + other.y,
}
}
}
fn main() {
assert_eq!(
Point { x: 1, y: 0 } + Point { x: 2, y: 3 },
Point { x: 3, y: 3 }
);
}Add для перегрузки оператора + для экземпляров PointМетод add складывает значения x двух экземпляров Point и значения y
двух экземпляров Point, чтобы создать новый Point. У трейта Add есть
связанный тип с именем Output, который определяет тип, возвращаемый методом
add.
Обобщенный тип по умолчанию в этом коде находится внутри трейта Add. Вот его
определение:
#![allow(unused)]
fn main() {
trait Add<Rhs=Self> {
type Output;
fn add(self, rhs: Rhs) -> Self::Output;
}
}В целом этот код должен выглядеть знакомо: трейт с одним методом и связанным
типом. Новая часть — Rhs=Self: этот синтаксис называется параметрами типа по
умолчанию. Обобщенный параметр типа Rhs (сокращение от “right-hand side”,
«правая сторона») определяет тип параметра rhs в методе add. Если при
реализации трейта Add мы не укажем конкретный тип для Rhs, типом Rhs по
умолчанию станет Self, то есть тип, для которого мы реализуем Add.
Когда мы реализовали Add для Point, мы использовали значение по умолчанию
для Rhs, потому что хотели складывать два экземпляра Point. Давайте
посмотрим на пример реализации трейта Add, где мы хотим настроить тип Rhs,
а не использовать значение по умолчанию.
У нас есть две структуры, Millimeters и Meters, которые хранят значения в
разных единицах измерения. Такое тонкое оборачивание существующего типа в
другую структуру известно как шаблон newtype; подробнее мы описываем его в
разделе «Реализация внешних трейтов с помощью шаблона
newtype». Мы хотим складывать значения в миллиметрах
со значениями в метрах и сделать так, чтобы реализация Add выполняла
преобразование корректно. Мы можем реализовать Add для Millimeters, указав
Meters в качестве Rhs, как показано в листинге 20-16.
use std::ops::Add;
struct Millimeters(u32);
struct Meters(u32);
impl Add<Meters> for Millimeters {
type Output = Millimeters;
fn add(self, other: Meters) -> Millimeters {
Millimeters(self.0 + (other.0 * 1000))
}
}Add для Millimeters, чтобы складывать Millimeters и MetersЧтобы сложить Millimeters и Meters, мы указываем impl Add<Meters>, чтобы
задать значение параметра типа Rhs вместо использования значения по умолчанию
Self.
Вы будете использовать параметры типа по умолчанию двумя основными способами:
- Чтобы расширить тип, не ломая существующий код
- Чтобы разрешить настройку в особых случаях, которые большинству пользователей не понадобятся
Трейт Add из стандартной библиотеки — пример второй цели: обычно вы будете
складывать два однотипных значения, но трейт Add предоставляет возможность
настроить поведение шире этого случая. Использование параметра типа по
умолчанию в определении трейта Add означает, что большую часть времени вам не
нужно указывать дополнительный параметр. Другими словами, часть шаблонного кода
реализации становится ненужной, что упрощает использование трейта.
Первая цель похожа на вторую, но в обратную сторону: если вы хотите добавить параметр типа к существующему трейту, вы можете дать ему значение по умолчанию, чтобы расширить функциональность трейта, не ломая существующий код реализаций.
Устранение неоднозначности между методами с одинаковыми именами
Ничто в Rust не запрещает трейту иметь метод с тем же именем, что и метод другого трейта, и Rust также не запрещает реализовать оба трейта для одного типа. Также возможно реализовать метод с тем же именем, что и методы из трейтов, непосредственно для типа.
При вызове методов с одинаковыми именами вам нужно сообщить Rust, какой именно
метод вы хотите использовать. Рассмотрим код в листинге 20-17, где мы
определили два трейта, Pilot и Wizard, и у обоих есть метод с именем fly.
Затем мы реализуем оба трейта для типа Human, у которого уже есть метод с
именем fly, реализованный непосредственно для него. Каждый метод fly
делает что-то свое.
trait Pilot {
fn fly(&self);
}
trait Wizard {
fn fly(&self);
}
struct Human;
impl Pilot for Human {
fn fly(&self) {
println!("This is your captain speaking.");
}
}
impl Wizard for Human {
fn fly(&self) {
println!("Up!");
}
}
impl Human {
fn fly(&self) {
println!("*waving arms furiously*");
}
}
fn main() {}fly, и реализованы для типа Human; метод fly также реализован непосредственно для Human.Когда мы вызываем fly для экземпляра Human, компилятор по умолчанию
вызывает метод, реализованный непосредственно для типа, как показано в листинге
20-18.
trait Pilot {
fn fly(&self);
}
trait Wizard {
fn fly(&self);
}
struct Human;
impl Pilot for Human {
fn fly(&self) {
println!("This is your captain speaking.");
}
}
impl Wizard for Human {
fn fly(&self) {
println!("Up!");
}
}
impl Human {
fn fly(&self) {
println!("*waving arms furiously*");
}
}
fn main() {
let person = Human;
person.fly();
}fly для экземпляра HumanЗапуск этого кода напечатает *waving arms furiously*, показывая, что Rust
вызвал метод fly, реализованный непосредственно для Human.
Чтобы вызвать методы fly либо из трейта Pilot, либо из трейта Wizard, нам
нужно использовать более явный синтаксис, указывающий, какой именно метод fly
мы имеем в виду. Листинг 20-19 демонстрирует этот синтаксис.
trait Pilot {
fn fly(&self);
}
trait Wizard {
fn fly(&self);
}
struct Human;
impl Pilot for Human {
fn fly(&self) {
println!("This is your captain speaking.");
}
}
impl Wizard for Human {
fn fly(&self) {
println!("Up!");
}
}
impl Human {
fn fly(&self) {
println!("*waving arms furiously*");
}
}
fn main() {
let person = Human;
Pilot::fly(&person);
Wizard::fly(&person);
person.fly();
}fly какого трейта мы хотим вызватьУказание имени трейта перед именем метода проясняет для Rust, какую реализацию
fly мы хотим вызвать. Мы также могли бы написать Human::fly(&person), что
эквивалентно person.fly(), использованному в листинге 20-19, но это немного
длиннее, если нам не нужно устранять неоднозначность.
Запуск этого кода напечатает следующее:
$ cargo run
Compiling traits-example v0.1.0 (file:///projects/traits-example)
Finished `dev` profile [unoptimized + debuginfo] target(s) in 0.46s
Running `target/debug/traits-example`
This is your captain speaking.
Up!
*waving arms furiously*
Поскольку метод fly принимает параметр self, если бы у нас было два типа,
которые оба реализуют один трейт, Rust смог бы понять, какую реализацию
трейта использовать, исходя из типа self.
Однако связанные функции, которые не являются методами, не имеют параметра
self. Когда есть несколько типов или трейтов, определяющих связанные функции
с одним и тем же именем, Rust не всегда знает, какой тип вы имеете в виду, если
вы не используете полностью квалифицированный синтаксис. Например, в листинге
20-20 мы создаем трейт для приюта животных, который хочет называть всех
щенков Spot. Мы создаем трейт Animal со связанной функцией baby_name,
которая не является методом. Трейт Animal реализован для структуры Dog, для
которой мы также напрямую предоставляем связанную функцию baby_name, не
являющуюся методом.
trait Animal {
fn baby_name() -> String;
}
struct Dog;
impl Dog {
fn baby_name() -> String {
String::from("Spot")
}
}
impl Animal for Dog {
fn baby_name() -> String {
String::from("puppy")
}
}
fn main() {
println!("A baby dog is called a {}", Dog::baby_name());
}Мы реализуем код для именования всех щенков Spot в связанной функции
baby_name, определенной для Dog. Тип Dog также реализует трейт Animal,
который описывает характеристики, общие для всех животных. Детеныши собак
называются щенками, и это выражено в реализации трейта Animal для Dog в
функции baby_name, связанной с трейтом Animal.
В main мы вызываем функцию Dog::baby_name, которая вызывает связанную
функцию, определенную непосредственно для Dog. Этот код напечатает следующее:
$ cargo run
Compiling traits-example v0.1.0 (file:///projects/traits-example)
Finished `dev` profile [unoptimized + debuginfo] target(s) in 0.54s
Running `target/debug/traits-example`
A baby dog is called a Spot
Этот вывод не тот, который мы хотели. Мы хотим вызвать функцию baby_name,
являющуюся частью трейта Animal, который мы реализовали для Dog, чтобы код
напечатал A baby dog is called a puppy. Техника указания имени трейта,
которую мы использовали в листинге 20-19, здесь не помогает; если мы изменим
main на код из листинга 20-21, то получим ошибку компиляции.
trait Animal {
fn baby_name() -> String;
}
struct Dog;
impl Dog {
fn baby_name() -> String {
String::from("Spot")
}
}
impl Animal for Dog {
fn baby_name() -> String {
String::from("puppy")
}
}
fn main() {
println!("A baby dog is called a {}", Animal::baby_name());
}baby_name из трейта Animal, когда Rust не знает, какую реализацию использоватьПоскольку у Animal::baby_name нет параметра self, а трейт Animal могли бы
реализовывать и другие типы, Rust не может понять, какую реализацию
Animal::baby_name мы хотим использовать. Мы получим такую ошибку компилятора:
$ cargo run
Compiling traits-example v0.1.0 (file:///projects/traits-example)
error[E0790]: cannot call associated function on trait without specifying the corresponding `impl` type
--> src/main.rs:20:43
|
2 | fn baby_name() -> String;
| ------------------------- `Animal::baby_name` defined here
...
20 | println!("A baby dog is called a {}", Animal::baby_name());
| ^^^^^^^^^^^^^^^^^^^ cannot call associated function of trait
|
help: use the fully-qualified path to the only available implementation
|
20 | println!("A baby dog is called a {}", <Dog as Animal>::baby_name());
| +++++++ +
For more information about this error, try `rustc --explain E0790`.
error: could not compile `traits-example` (bin "traits-example") due to 1 previous error
Чтобы устранить неоднозначность и сообщить Rust, что мы хотим использовать
реализацию Animal для Dog, а не реализацию Animal для какого-то другого
типа, нам нужно использовать полностью квалифицированный синтаксис. Листинг
20-22 демонстрирует, как использовать полностью квалифицированный синтаксис.
trait Animal {
fn baby_name() -> String;
}
struct Dog;
impl Dog {
fn baby_name() -> String {
String::from("Spot")
}
}
impl Animal for Dog {
fn baby_name() -> String {
String::from("puppy")
}
}
fn main() {
println!("A baby dog is called a {}", <Dog as Animal>::baby_name());
}baby_name из трейта Animal в реализации для DogВ угловых скобках мы предоставляем Rust аннотацию типа, которая показывает, что
мы хотим вызвать метод baby_name из трейта Animal в реализации для Dog,
говоря тем самым, что для этого вызова функции мы хотим рассматривать тип Dog
как Animal. Теперь этот код напечатает то, что мы хотим:
$ cargo run
Compiling traits-example v0.1.0 (file:///projects/traits-example)
Finished `dev` profile [unoptimized + debuginfo] target(s) in 0.48s
Running `target/debug/traits-example`
A baby dog is called a puppy
В общем виде полностью квалифицированный синтаксис определяется так:
<Type as Trait>::function(receiver_if_method, next_arg, ...);Для связанных функций, которые не являются методами, receiver отсутствует:
есть только список других аргументов. Вы могли бы использовать полностью
квалифицированный синтаксис везде, где вызываете функции или методы. Однако
разрешается опускать любую часть этого синтаксиса, которую Rust может вывести
из другой информации в программе. Использовать этот более подробный синтаксис
нужно только в случаях, когда существует несколько реализаций с одним и тем же
именем и Rust нужна помощь, чтобы определить, какую реализацию вы хотите
вызвать.
Использование супертрейтов
Иногда вы можете написать определение трейта, которое зависит от другого трейта: чтобы тип мог реализовать первый трейт, вы хотите потребовать, чтобы этот тип также реализовывал второй трейт. Вы делаете это для того, чтобы определение вашего трейта могло использовать связанные элементы второго трейта. Трейт, на который опирается определение вашего трейта, называется супертрейтом вашего трейта.
Например, предположим, что мы хотим создать трейт OutlinePrint с методом
outline_print, который будет печатать переданное значение в таком формате,
чтобы оно было обрамлено звездочками. То есть для структуры Point, которая
реализует трейт стандартной библиотеки Display так, что результатом является
(x, y), при вызове outline_print для экземпляра Point, у которого x
равен 1, а y равен 3, должно быть напечатано следующее:
**********
* *
* (1, 3) *
* *
**********
В реализации метода outline_print мы хотим использовать функциональность
трейта Display. Поэтому нам нужно указать, что трейт OutlinePrint будет
работать только для типов, которые также реализуют Display и предоставляют
функциональность, необходимую OutlinePrint. Мы можем сделать это в
определении трейта, указав OutlinePrint: Display. Эта техника похожа на
добавление ограничения трейта к трейту. Листинг 20-23 показывает реализацию
трейта OutlinePrint.
use std::fmt;
trait OutlinePrint: fmt::Display {
fn outline_print(&self) {
let output = self.to_string();
let len = output.len();
println!("{}", "*".repeat(len + 4));
println!("*{}*", " ".repeat(len + 2));
println!("* {output} *");
println!("*{}*", " ".repeat(len + 2));
println!("{}", "*".repeat(len + 4));
}
}
fn main() {}OutlinePrint, которому требуется функциональность из DisplayПоскольку мы указали, что OutlinePrint требует трейт Display, мы можем
использовать функцию to_string, которая автоматически реализована для любого
типа, реализующего Display. Если бы мы попытались использовать to_string,
не добавив двоеточие и не указав трейт Display после имени трейта, мы
получили бы ошибку о том, что метод с именем to_string не найден для типа
&Self в текущей области видимости.
Посмотрим, что произойдет, когда мы попытаемся реализовать OutlinePrint для
типа, который не реализует Display, например для структуры Point:
use std::fmt;
trait OutlinePrint: fmt::Display {
fn outline_print(&self) {
let output = self.to_string();
let len = output.len();
println!("{}", "*".repeat(len + 4));
println!("*{}*", " ".repeat(len + 2));
println!("* {output} *");
println!("*{}*", " ".repeat(len + 2));
println!("{}", "*".repeat(len + 4));
}
}
struct Point {
x: i32,
y: i32,
}
impl OutlinePrint for Point {}
fn main() {
let p = Point { x: 1, y: 3 };
p.outline_print();
}Мы получим ошибку, сообщающую, что Display требуется, но не реализован:
$ cargo run
Compiling traits-example v0.1.0 (file:///projects/traits-example)
error[E0277]: `Point` doesn't implement `std::fmt::Display`
--> src/main.rs:20:23
|
20 | impl OutlinePrint for Point {}
| ^^^^^ the trait `std::fmt::Display` is not implemented for `Point`
|
note: required by a bound in `OutlinePrint`
--> src/main.rs:3:21
|
3 | trait OutlinePrint: fmt::Display {
| ^^^^^^^^^^^^ required by this bound in `OutlinePrint`
error[E0277]: `Point` doesn't implement `std::fmt::Display`
--> src/main.rs:24:7
|
24 | p.outline_print();
| ^^^^^^^^^^^^^ the trait `std::fmt::Display` is not implemented for `Point`
|
note: required by a bound in `OutlinePrint::outline_print`
--> src/main.rs:3:21
|
3 | trait OutlinePrint: fmt::Display {
| ^^^^^^^^^^^^ required by this bound in `OutlinePrint::outline_print`
4 | fn outline_print(&self) {
| ------------- required by a bound in this associated function
For more information about this error, try `rustc --explain E0277`.
error: could not compile `traits-example` (bin "traits-example") due to 2 previous errors
Чтобы это исправить, мы реализуем Display для Point и тем самым
удовлетворим ограничение, которое требует OutlinePrint, вот так:
trait OutlinePrint: fmt::Display {
fn outline_print(&self) {
let output = self.to_string();
let len = output.len();
println!("{}", "*".repeat(len + 4));
println!("*{}*", " ".repeat(len + 2));
println!("* {output} *");
println!("*{}*", " ".repeat(len + 2));
println!("{}", "*".repeat(len + 4));
}
}
struct Point {
x: i32,
y: i32,
}
impl OutlinePrint for Point {}
use std::fmt;
impl fmt::Display for Point {
fn fmt(&self, f: &mut fmt::Formatter) -> fmt::Result {
write!(f, "({}, {})", self.x, self.y)
}
}
fn main() {
let p = Point { x: 1, y: 3 };
p.outline_print();
}После этого реализация трейта OutlinePrint для Point успешно
скомпилируется, и мы сможем вызвать outline_print для экземпляра Point,
чтобы отобразить его внутри рамки из звездочек.
Реализация внешних трейтов с помощью шаблона newtype
В разделе «Реализация трейта для типа» главы 10 мы упоминали сиротское правило, согласно которому нам разрешено реализовывать трейт для типа только в том случае, если трейт или тип, или оба сразу, являются локальными для нашего крейта. Это ограничение можно обойти с помощью шаблона newtype, который предполагает создание нового типа в кортежной структуре. (Мы рассматривали кортежные структуры в разделе «Создание разных типов с помощью кортежных структур» главы 5.) У кортежной структуры будет одно поле, и она будет тонкой оберткой вокруг типа, для которого мы хотим реализовать трейт. Тогда тип-обертка будет локальным для нашего крейта, и мы сможем реализовать трейт для этой обертки. Newtype — это термин, который происходит из языка программирования Haskell. Использование этого шаблона не создает накладных расходов во время выполнения, а тип-обертка исключается на этапе компиляции.
В качестве примера предположим, что мы хотим реализовать Display для
Vec<T>, чего сиротское правило не позволяет нам сделать напрямую, потому что
трейт Display и тип Vec<T> определены вне нашего крейта. Мы можем создать
структуру Wrapper, которая хранит экземпляр Vec<T>; затем мы можем
реализовать Display для Wrapper и использовать значение Vec<T>, как
показано в листинге 20-24.
use std::fmt;
struct Wrapper(Vec<String>);
impl fmt::Display for Wrapper {
fn fmt(&self, f: &mut fmt::Formatter) -> fmt::Result {
write!(f, "[{}]", self.0.join(", "))
}
}
fn main() {
let w = Wrapper(vec![String::from("hello"), String::from("world")]);
println!("w = {w}");
}Wrapper вокруг Vec<String> для реализации DisplayРеализация Display использует self.0 для доступа к внутреннему Vec<T>,
потому что Wrapper — кортежная структура, а Vec<T> является элементом с
индексом 0 в кортеже. После этого мы можем использовать функциональность
трейта Display для Wrapper.
Недостаток этой техники в том, что Wrapper — новый тип, поэтому у него нет
методов значения, которое он хранит. Нам пришлось бы реализовать все методы
Vec<T> непосредственно для Wrapper так, чтобы эти методы делегировали
вызовы self.0; это позволило бы нам обращаться с Wrapper точно так же, как
с Vec<T>. Если бы мы хотели, чтобы новый тип имел все методы, которые есть у
внутреннего типа, решением была бы реализация трейта Deref для Wrapper,
возвращающая внутренний тип (мы обсуждали реализацию трейта Deref в разделе
«Использование умных указателей как обычных ссылок» главы 15). Если бы мы не хотели, чтобы тип Wrapper имел все методы
внутреннего типа — например, чтобы ограничить поведение типа Wrapper, — нам
пришлось бы вручную реализовать только те методы, которые нам нужны.
Этот шаблон newtype также полезен даже тогда, когда трейты не участвуют. Давайте сменим фокус и рассмотрим несколько расширенных способов взаимодействия с системой типов Rust.
Продвинутые типы
Расширенные типы
В системе типов Rust есть некоторые возможности, которые мы уже упоминали, но
еще не обсуждали. Мы начнем с общего обсуждения шаблона newtype, рассматривая,
почему такие типы полезны. Затем перейдем к псевдонимам типов — возможности,
похожей на newtype, но с немного другой семантикой. Мы также обсудим тип ! и
типы с динамическим размером.
Безопасность типов и абстракция с помощью шаблона newtype
В этом разделе предполагается, что вы прочитали предыдущий раздел
«Реализация внешних трейтов с помощью шаблона
newtype». Шаблон newtype полезен и для задач помимо
тех, которые мы уже обсудили, включая статическое обеспечение того, что
значения никогда не будут перепутаны, и указание единиц измерения значения. Вы
видели пример использования newtype для указания единиц измерения в листинге
20-16: вспомните, что структуры Millimeters и Meters оборачивали значения
u32 в newtype. Если бы мы написали функцию с параметром типа Millimeters,
мы не смогли бы скомпилировать программу, которая случайно попыталась бы
вызвать эту функцию со значением типа Meters или с обычным u32.
Мы также можем использовать шаблон newtype, чтобы абстрагировать некоторые детали реализации типа: новый тип может предоставлять публичный API, отличный от API приватного внутреннего типа.
Newtype-типы также могут скрывать внутреннюю реализацию. Например, мы могли бы
предоставить тип People, который оборачивает HashMap<i32, String>,
хранящий идентификатор человека, связанный с его именем. Код, использующий
People, взаимодействовал бы только с предоставленным нами публичным API,
например с методом для добавления строки имени в коллекцию People; этому
коду не нужно было бы знать, что внутри мы назначаем именам идентификаторы
i32. Шаблон newtype — это легковесный способ добиться инкапсуляции, чтобы
скрыть детали реализации; мы обсуждали это в разделе «Инкапсуляция, которая
скрывает детали
реализации»
главы 18.
Синонимы типов и псевдонимы типов
Rust предоставляет возможность объявить псевдоним типа, чтобы дать
существующему типу другое имя. Для этого мы используем ключевое слово type.
Например, мы можем создать псевдоним Kilometers для i32 так:
fn main() {
type Kilometers = i32;
let x: i32 = 5;
let y: Kilometers = 5;
println!("x + y = {}", x + y);
}Теперь псевдоним Kilometers является синонимом для i32; в отличие от
типов Millimeters и Meters, которые мы создали в листинге 20-16,
Kilometers не является отдельным новым типом. Значения, имеющие тип
Kilometers, будут обрабатываться так же, как значения типа i32:
fn main() {
type Kilometers = i32;
let x: i32 = 5;
let y: Kilometers = 5;
println!("x + y = {}", x + y);
}Поскольку Kilometers и i32 — один и тот же тип, мы можем складывать
значения обоих типов и передавать значения Kilometers в функции, которые
принимают параметры i32. Однако при использовании этого подхода мы не
получаем преимуществ проверки типов, которые дает шаблон newtype, обсужденный
ранее. Другими словами, если мы где-то перепутаем значения Kilometers и
i32, компилятор не выдаст ошибку.
Основной вариант использования синонимов типов — уменьшение повторений. Например, у нас может быть длинный тип вроде такого:
Box<dyn Fn() + Send + 'static>Записывать этот длинный тип в сигнатурах функций и в аннотациях типов по всему коду может быть утомительно и чревато ошибками. Представьте проект, полный кода, подобного показанному в листинге 20-25.
fn main() {
let f: Box<dyn Fn() + Send + 'static> = Box::new(|| println!("hi"));
fn takes_long_type(f: Box<dyn Fn() + Send + 'static>) {
// --snip--
}
fn returns_long_type() -> Box<dyn Fn() + Send + 'static> {
// --snip--
Box::new(|| ())
}
}Псевдоним типа делает этот код более удобным для сопровождения, уменьшая
повторение. В листинге 20-26 мы ввели псевдоним с именем Thunk для
многословного типа и можем заменить все использования этого типа более
коротким псевдонимом Thunk.
fn main() {
type Thunk = Box<dyn Fn() + Send + 'static>;
let f: Thunk = Box::new(|| println!("hi"));
fn takes_long_type(f: Thunk) {
// --snip--
}
fn returns_long_type() -> Thunk {
// --snip--
Box::new(|| ())
}
}Thunk для уменьшения повторенийЭтот код гораздо легче читать и писать! Выбор осмысленного имени для псевдонима типа также помогает передать ваше намерение (thunk — слово для кода, который должен быть вычислен позже, поэтому это подходящее имя для замыкания, которое сохраняется).
Псевдонимы типов также часто используются с типом Result<T, E> для
уменьшения повторений. Рассмотрим модуль std::io в стандартной библиотеке.
Операции ввода-вывода часто возвращают Result<T, E>, чтобы обрабатывать
ситуации, когда операции не удается выполнить. В этой библиотеке есть
структура std::io::Error, представляющая все возможные ошибки ввода-вывода.
Многие функции в std::io будут возвращать Result<T, E>, где E — это
std::io::Error, например эти функции в трейте Write:
use std::fmt;
use std::io::Error;
pub trait Write {
fn write(&mut self, buf: &[u8]) -> Result<usize, Error>;
fn flush(&mut self) -> Result<(), Error>;
fn write_all(&mut self, buf: &[u8]) -> Result<(), Error>;
fn write_fmt(&mut self, fmt: fmt::Arguments) -> Result<(), Error>;
}Result<..., Error> повторяется много раз. Поэтому в std::io есть такое
объявление псевдонима типа:
use std::fmt;
type Result<T> = std::result::Result<T, std::io::Error>;
pub trait Write {
fn write(&mut self, buf: &[u8]) -> Result<usize>;
fn flush(&mut self) -> Result<()>;
fn write_all(&mut self, buf: &[u8]) -> Result<()>;
fn write_fmt(&mut self, fmt: fmt::Arguments) -> Result<()>;
}Поскольку это объявление находится в модуле std::io, мы можем использовать
полностью квалифицированный псевдоним std::io::Result<T>; то есть
Result<T, E>, где E заполнен как std::io::Error. В итоге сигнатуры
функций трейта Write выглядят так:
use std::fmt;
type Result<T> = std::result::Result<T, std::io::Error>;
pub trait Write {
fn write(&mut self, buf: &[u8]) -> Result<usize>;
fn flush(&mut self) -> Result<()>;
fn write_all(&mut self, buf: &[u8]) -> Result<()>;
fn write_fmt(&mut self, fmt: fmt::Arguments) -> Result<()>;
}Псевдоним типа помогает двумя способами: он делает код проще для написания и
дает нам согласованный интерфейс во всем std::io. Поскольку это псевдоним,
он остается просто еще одним Result<T, E>, а значит, мы можем использовать с
ним любые методы, работающие с Result<T, E>, а также специальный синтаксис
вроде оператора ?.
Never type, который никогда не возвращает управление
В Rust есть специальный тип с именем !, известный в терминологии теории типов
как пустой тип, потому что у него нет значений. Мы предпочитаем называть его
never type, потому что он стоит на месте возвращаемого типа, когда функция
никогда не возвращает управление. Вот пример:
fn bar() -> ! {
// --snip--
panic!();
}Этот код читается как «функция bar возвращает never». Функции, которые
никогда не возвращают управление, называются расходящимися функциями
(diverging functions). Мы не можем создавать значения типа !, поэтому
bar никак не может вернуть управление.
Но какая польза от типа, для которого вы никогда не можете создать значения? Вспомните код из листинга 2-5, часть игры «Угадай число»; мы воспроизвели его фрагмент здесь, в листинге 20-27.
use std::cmp::Ordering;
use std::io;
use rand::Rng;
fn main() {
println!("Guess the number!");
let secret_number = rand::thread_rng().gen_range(1..=100);
println!("The secret number is: {secret_number}");
loop {
println!("Please input your guess.");
let mut guess = String::new();
// --snip--
io::stdin()
.read_line(&mut guess)
.expect("Failed to read line");
let guess: u32 = match guess.trim().parse() {
Ok(num) => num,
Err(_) => continue,
};
println!("You guessed: {guess}");
// --snip--
match guess.cmp(&secret_number) {
Ordering::Less => println!("Too small!"),
Ordering::Greater => println!("Too big!"),
Ordering::Equal => {
println!("You win!");
break;
}
}
}
}match с ветвью, которая заканчивается continueВ то время мы пропустили некоторые детали в этом коде. В разделе «Конструкция
управления потоком match»
главы 6 мы обсуждали, что все ветви match должны возвращать один и тот же
тип. Поэтому, например, следующий код не работает:
fn main() {
let guess = "3";
let guess = match guess.trim().parse() {
Ok(_) => 5,
Err(_) => "hello",
};
}Тип guess в этом коде должен был бы быть и целым числом, и строкой, а Rust
требует, чтобы у guess был только один тип. Итак, что возвращает continue?
Как нам было разрешено возвращать u32 из одной ветви и иметь другую ветвь,
которая заканчивается continue, в листинге 20-27?
Как вы, возможно, догадались, continue имеет тип !. То есть, когда Rust
вычисляет тип guess, он смотрит на обе ветви match: первую со значением
u32 и вторую с типом !. Поскольку у ! никогда не может быть значения,
Rust решает, что тип guess — u32.
Формальный способ описать это поведение состоит в том, что выражения типа !
могут быть приведены к любому другому типу. Нам разрешено завершить эту ветвь
match с помощью continue, потому что continue не возвращает значение;
вместо этого он передает управление обратно к началу цикла, поэтому в случае
Err мы никогда не присваиваем значение guess.
Never type также полезен с макросом panic!. Вспомните функцию unwrap,
которую мы вызываем для значений Option<T>, чтобы получить значение или
вызвать панику, с таким определением:
enum Option<T> {
Some(T),
None,
}
use crate::Option::*;
impl<T> Option<T> {
pub fn unwrap(self) -> T {
match self {
Some(val) => val,
None => panic!("called `Option::unwrap()` on a `None` value"),
}
}
}В этом коде происходит то же самое, что и в match в листинге 20-27: Rust
видит, что val имеет тип T, а panic! имеет тип !, поэтому результат
всего выражения match — T. Этот код работает, потому что panic! не
создает значение; он завершает программу. В случае None мы не будем
возвращать значение из unwrap, поэтому этот код корректен.
Еще одно последнее выражение, которое имеет тип !, — это цикл:
fn main() {
print!("forever ");
loop {
print!("and ever ");
}
}Здесь цикл никогда не заканчивается, поэтому типом выражения является !.
Однако это было бы неверно, если бы мы включили break, потому что цикл
завершился бы, когда дошел бы до break.
Типы с динамическим размером и трейт Sized
Rust должен знать некоторые детали о своих типах, например сколько места выделять для значения конкретного типа. Из-за этого одна часть его системы типов сначала может сбивать с толку: понятие типов с динамическим размером. Иногда их называют DST или типами без известного размера; эти типы позволяют нам писать код, использующий значения, размер которых можно узнать только во время выполнения.
Давайте углубимся в детали типа с динамическим размером str, который мы
использовали на протяжении всей книги. Именно так: не &str, а str сам по
себе является DST. Во многих случаях, например при хранении текста, введенного
пользователем, мы не можем знать длину строки до времени выполнения. Это
означает, что мы не можем создать переменную типа str и не можем принять
аргумент типа str. Рассмотрим следующий код, который не работает:
fn main() {
let s1: str = "Hello there!";
let s2: str = "How's it going?";
}Rust должен знать, сколько памяти выделить для любого значения конкретного
типа, и все значения одного типа должны использовать одинаковый объем памяти.
Если бы Rust позволил нам написать этот код, этим двум значениям str
потребовалось бы занимать одинаковый объем места. Но у них разная длина: s1
нужно 12 байт хранилища, а s2 — 15. Именно поэтому невозможно создать
переменную, содержащую тип с динамическим размером.
Так что же делать? В этом случае вы уже знаете ответ: мы делаем тип s1 и
s2 строковым срезом (&str), а не str. Вспомните из раздела «Строковые
срезы» главы 4, что структура данных среза
хранит только начальную позицию и длину среза. Поэтому, хотя &T — это одно
значение, хранящее адрес памяти, где находится T, строковый срез — это два
значения: адрес str и его длина. Следовательно, мы можем знать размер
значения строкового среза во время компиляции: он вдвое больше размера usize.
То есть мы всегда знаем размер строкового среза независимо от того, насколько
длинна строка, на которую он ссылается. В общем случае именно так типы с
динамическим размером используются в Rust: у них есть дополнительная часть
метаданных, которая хранит размер динамической информации. Золотое правило
типов с динамическим размером состоит в том, что мы всегда должны помещать
значения типов с динамическим размером за указателем какого-либо вида.
Мы можем комбинировать str со всевозможными указателями: например,
Box<str> или Rc<str>. На самом деле вы уже видели это раньше, но с другим
типом с динамическим размером: трейтами. Каждый трейт — это тип с динамическим
размером, на который мы можем ссылаться, используя имя трейта. В разделе
«Использование трейт-объектов для абстрагирования над общим
поведением» главы 18 мы упоминали, что, чтобы использовать трейты как трейт-объекты,
мы должны помещать их за указателем, например &dyn Trait или Box<dyn Trait> (Rc<dyn Trait> тоже сработал бы).
Для работы с DST Rust предоставляет трейт Sized, чтобы определять, известен
ли размер типа во время компиляции. Этот трейт автоматически реализуется для
всего, чей размер известен во время компиляции. Кроме того, Rust неявно
добавляет ограничение Sized к каждой обобщенной функции. То есть определение
обобщенной функции вроде такого:
fn generic<T>(t: T) {
// --snip--
}на самом деле обрабатывается так, как если бы мы написали это:
fn generic<T: Sized>(t: T) {
// --snip--
}По умолчанию обобщенные функции будут работать только с типами, размер которых известен во время компиляции. Однако можно использовать следующий специальный синтаксис, чтобы ослабить это ограничение:
fn generic<T: ?Sized>(t: &T) {
// --snip--
}Ограничение трейта ?Sized означает «T может быть или не быть Sized», и
эта запись переопределяет значение по умолчанию, согласно которому обобщенные
типы должны иметь известный размер во время компиляции. Синтаксис ?Trait с
таким смыслом доступен только для Sized, но не для других трейтов.
Также обратите внимание, что мы изменили тип параметра t с T на &T.
Поскольку тип может не быть Sized, нам нужно использовать его за указателем
какого-либо вида. В этом случае мы выбрали ссылку.
Далее мы поговорим о функциях и замыканиях!
Продвинутые функции и замыкания
Расширенные возможности функций и замыканий
В этом разделе рассматриваются некоторые расширенные возможности, связанные с функциями и замыканиями, включая указатели на функции и возврат замыканий.
Указатели на функции
Мы говорили о том, как передавать замыкания в функции; вы также можете
передавать обычные функции в функции! Эта техника полезна, когда вы хотите
передать уже определенную функцию, а не определять новое замыкание. Функции
приводятся к типу fn (со строчной f), который не следует путать с трейтом
замыкания Fn. Тип fn называется указателем на функцию. Передача функций
с помощью указателей на функции позволит вам использовать функции как
аргументы для других функций.
Синтаксис указания того, что параметр является указателем на функцию, похож на
синтаксис замыканий, как показано в листинге 20-28, где мы определили функцию
add_one, которая добавляет 1 к своему параметру. Функция do_twice принимает
два параметра: указатель на любую функцию, которая принимает параметр i32 и
возвращает i32, и одно значение i32. Функция do_twice дважды вызывает
функцию f, передавая ей значение arg, а затем складывает результаты двух
вызовов функции. Функция main вызывает do_twice с аргументами add_one и
5.
fn add_one(x: i32) -> i32 {
x + 1
}
fn do_twice(f: fn(i32) -> i32, arg: i32) -> i32 {
f(arg) + f(arg)
}
fn main() {
let answer = do_twice(add_one, 5);
println!("The answer is: {answer}");
}fn, чтобы принять указатель на функцию как аргументЭтот код печатает The answer is: 12. Мы указываем, что параметр f в
do_twice — это fn, который принимает один параметр типа i32 и возвращает
i32. Затем мы можем вызвать f в теле do_twice. В main мы можем передать
имя функции add_one как первый аргумент для do_twice.
В отличие от замыканий, fn — это тип, а не трейт, поэтому мы указываем fn
непосредственно как тип параметра, а не объявляем обобщенный параметр типа с
одним из трейтов Fn в качестве ограничения трейта.
Указатели на функции реализуют все три трейта замыканий (Fn, FnMut и
FnOnce), а значит, вы всегда можете передать указатель на функцию как
аргумент для функции, ожидающей замыкание. Лучше всего писать функции с
использованием обобщенного типа и одного из трейтов замыканий, чтобы ваши
функции могли принимать как функции, так и замыкания.
Тем не менее один пример случая, когда вы хотели бы принимать только fn, а
не замыкания, — взаимодействие с внешним кодом, в котором нет замыканий:
функции C могут принимать функции как аргументы, но в C нет замыканий.
В качестве примера места, где можно использовать либо замыкание, определенное
на месте, либо именованную функцию, посмотрим на использование метода map,
предоставляемого трейтом Iterator из стандартной библиотеки. Чтобы с помощью
метода map превратить вектор чисел в вектор строк, мы могли бы использовать
замыкание, как в листинге 20-29.
fn main() {
let list_of_numbers = vec![1, 2, 3];
let list_of_strings: Vec<String> =
list_of_numbers.iter().map(|i| i.to_string()).collect();
}map для преобразования чисел в строкиИли вместо замыкания мы могли бы указать функцию как аргумент для map.
Листинг 20-30 показывает, как это выглядело бы.
fn main() {
let list_of_numbers = vec![1, 2, 3];
let list_of_strings: Vec<String> =
list_of_numbers.iter().map(ToString::to_string).collect();
}String::to_string с методом map для преобразования чисел в строкиОбратите внимание, что мы должны использовать полностью квалифицированный
синтаксис, о котором говорили в разделе «Расширенные возможности
трейтов», потому что доступно несколько
функций с именем to_string.
Здесь мы используем функцию to_string, определенную в трейте ToString,
который стандартная библиотека реализовала для любого типа, реализующего
Display.
Вспомните из раздела «Значения перечислений» в главе 6, что имя каждого варианта перечисления, который мы определяем, также становится функцией-инициализатором. Мы можем использовать эти функции инициализации как указатели на функции, реализующие трейты замыканий, а это означает, что мы можем указывать функции инициализации как аргументы для методов, принимающих замыкания, как показано в листинге 20-31.
fn main() {
enum Status {
Value(u32),
Stop,
}
let list_of_statuses: Vec<Status> = (0u32..20).map(Status::Value).collect();
}map для создания экземпляра Status из чиселЗдесь мы создаем экземпляры Status::Value, используя каждое значение u32 в
диапазоне, для которого вызывается map, с помощью функции-инициализатора
Status::Value. Некоторым людям нравится этот стиль, а некоторые предпочитают
использовать замыкания. Они компилируются в один и тот же код, поэтому
используйте тот стиль, который понятнее вам.
Возврат замыканий
Замыкания представлены трейтами, а значит, вы не можете возвращать замыкания
напрямую. В большинстве случаев, когда вы можете захотеть вернуть трейт, вместо
этого можно использовать в качестве возвращаемого значения функции конкретный
тип, реализующий этот трейт. Однако обычно с замыканиями так сделать нельзя,
потому что у них нет конкретного типа, который можно вернуть; например, вам не
разрешено использовать указатель на функцию fn как возвращаемый тип, если
замыкание захватывает какие-либо значения из своей области видимости.
Вместо этого вы обычно будете использовать синтаксис impl Trait, о котором мы
узнали в главе 10. Вы можете возвращать любой тип функции, используя Fn,
FnOnce и FnMut. Например, код в листинге 20-32 скомпилируется без проблем.
#![allow(unused)]
fn main() {
fn returns_closure() -> impl Fn(i32) -> i32 {
|x| x + 1
}
}impl TraitОднако, как мы отмечали в разделе «Выведение и аннотирование типов замыканий» главы 13, каждое замыкание также имеет свой собственный отдельный тип. Если вам нужно работать с несколькими функциями, которые имеют одинаковую сигнатуру, но разные реализации, вам нужно будет использовать для них трейт-объект. Рассмотрим, что произойдет, если вы напишете код, подобный показанному в листинге 20-33.
fn main() {
let handlers = vec![returns_closure(), returns_initialized_closure(123)];
for handler in handlers {
let output = handler(5);
println!("{output}");
}
}
fn returns_closure() -> impl Fn(i32) -> i32 {
|x| x + 1
}
fn returns_initialized_closure(init: i32) -> impl Fn(i32) -> i32 {
move |x| x + init
}Vec<T> из замыканий, определенных функциями, которые возвращают типы impl FnЗдесь у нас есть две функции, returns_closure и
returns_initialized_closure, обе возвращают impl Fn(i32) -> i32. Обратите
внимание, что возвращаемые ими замыкания различаются, хотя и реализуют один и
тот же трейт. Если мы попытаемся это скомпилировать, Rust сообщит, что это не
сработает:
$ cargo build
Compiling functions-example v0.1.0 (file:///projects/functions-example)
error[E0308]: mismatched types
--> src/main.rs:2:44
|
2 | let handlers = vec![returns_closure(), returns_initialized_closure(123)];
| ^^^^^^^^^^^^^^^^^^^^^^^^^^^^^^^^ expected opaque type, found a different opaque type
...
9 | fn returns_closure() -> impl Fn(i32) -> i32 {
| ------------------- the expected opaque type
...
13 | fn returns_initialized_closure(init: i32) -> impl Fn(i32) -> i32 {
| ------------------- the found opaque type
|
= note: expected opaque type `impl Fn(i32) -> i32`
found opaque type `impl Fn(i32) -> i32`
= note: distinct uses of `impl Trait` result in different opaque types
For more information about this error, try `rustc --explain E0308`.
error: could not compile `functions-example` (bin "functions-example") due to 1 previous error
Сообщение об ошибке говорит нам, что всякий раз, когда мы возвращаем impl Trait, Rust создает уникальный непрозрачный тип — тип, в детали которого мы
не можем заглянуть, и мы не можем угадать тип, который Rust сгенерирует для
нас, чтобы записать его самостоятельно. Поэтому, хотя эти функции возвращают
замыкания, реализующие один и тот же трейт, Fn(i32) -> i32, непрозрачные типы,
которые Rust генерирует для каждой из них, различны. (Это похоже на то, как
Rust создает разные конкретные типы для разных async-блоков, даже когда у них
один и тот же выходной тип, как мы видели в разделе «Тип Pin и трейт
Unpin» в главе 17.) Мы уже несколько раз
видели решение этой проблемы: можно использовать трейт-объект, как в листинге
20-34.
fn main() {
let handlers = vec![returns_closure(), returns_initialized_closure(123)];
for handler in handlers {
let output = handler(5);
println!("{output}");
}
}
fn returns_closure() -> Box<dyn Fn(i32) -> i32> {
Box::new(|x| x + 1)
}
fn returns_initialized_closure(init: i32) -> Box<dyn Fn(i32) -> i32> {
Box::new(move |x| x + init)
}Vec<T> из замыканий, определенных функциями, которые возвращают Box<dyn Fn>, чтобы они имели один и тот же типЭтот код скомпилируется без проблем. Подробнее о трейт-объектах см. раздел «Использование трейт-объектов для абстрагирования над общим поведением» в главе 18.
Далее давайте посмотрим на макросы!
Макросы
Макросы
Мы использовали макросы вроде println! на протяжении всей книги, но еще не
рассматривали полностью, что такое макрос и как он работает. Термин макрос
относится к семейству возможностей в Rust: декларативным макросам с
macro_rules! и трем видам процедурных макросов:
- Пользовательские макросы
#[derive], которые указывают код, добавляемый с помощью атрибутаderive, используемого для структур и перечислений - Атрибутоподобные макросы, которые определяют пользовательские атрибуты, пригодные для любого элемента
- Макросы, похожие на функции, которые выглядят как вызовы функций, но работают с токенами, указанными в качестве их аргумента
Мы поговорим о каждом из них по очереди, но сначала посмотрим, зачем вообще нужны макросы, если у нас уже есть функции.
Различие между макросами и функциями
По сути, макросы — это способ писать код, который пишет другой код; это
известно как метапрограммирование. В приложении C мы обсуждаем атрибут
derive, который генерирует для вас реализации различных трейтов. Мы также
использовали макросы println! и vec! на протяжении всей книги. Все эти
макросы разворачиваются, создавая больше кода, чем вы написали вручную.
Метапрограммирование полезно для уменьшения объема кода, который вам нужно писать и сопровождать, и это также одна из ролей функций. Однако у макросов есть некоторые дополнительные возможности, которых у функций нет.
Сигнатура функции должна объявлять количество и тип параметров, которые есть у
функции. Макросы, с другой стороны, могут принимать переменное число
параметров: мы можем вызвать println!("hello") с одним аргументом или
println!("hello {}", name) с двумя аргументами. Кроме того, макросы
разворачиваются до того, как компилятор интерпретирует смысл кода, поэтому
макрос может, например, реализовать трейт для заданного типа. Функция этого
сделать не может, потому что она вызывается во время выполнения, а трейт должен
быть реализован во время компиляции.
Недостаток реализации макроса вместо функции в том, что определения макросов сложнее определений функций, потому что вы пишете код Rust, который пишет код Rust. Из-за этой косвенности определения макросов обычно труднее читать, понимать и сопровождать, чем определения функций.
Еще одно важное различие между макросами и функциями состоит в том, что вы должны определить макросы или ввести их в область видимости до того, как вызовете их в файле, в отличие от функций, которые можно определить где угодно и вызвать где угодно.
Декларативные макросы для общего метапрограммирования
Наиболее широко используемая форма макросов в Rust — декларативный макрос.
Их также иногда называют «макросами по примеру», «макросами macro_rules!»
или просто «макросами». В своей основе декларативные макросы позволяют писать
что-то похожее на выражение Rust match. Как обсуждалось в главе 6, выражения
match — это управляющие конструкции, которые принимают выражение, сравнивают
полученное значение выражения с шаблонами, а затем выполняют код, связанный с
подходящим шаблоном. Макросы также сравнивают значение с шаблонами, связанными
с определенным кодом: в этой ситуации значением является буквальный исходный
код Rust, переданный макросу; шаблоны сравниваются со структурой этого
исходного кода; а код, связанный с каждым шаблоном, при совпадении заменяет
код, переданный макросу. Все это происходит во время компиляции.
Чтобы определить макрос, вы используете конструкцию macro_rules!. Давайте
исследуем, как использовать macro_rules!, посмотрев, как определен макрос
vec!. В главе 8 рассказывалось, как с помощью макроса vec! создать новый
вектор с определенными значениями. Например, следующий макрос создает новый
вектор, содержащий три целых числа:
#![allow(unused)]
fn main() {
let v: Vec<u32> = vec![1, 2, 3];
}Мы также могли бы использовать макрос vec!, чтобы создать вектор из двух
целых чисел или вектор из пяти строковых срезов. Мы не смогли бы использовать
функцию для того же самого, потому что заранее не знали бы количество или тип
значений.
Листинг 20-35 показывает слегка упрощенное определение макроса vec!.
#[macro_export]
macro_rules! vec {
( $( $x:expr ),* ) => {
{
let mut temp_vec = Vec::new();
$(
temp_vec.push($x);
)*
temp_vec
}
};
}vec!Примечание: фактическое определение макроса
vec!в стандартной библиотеке включает код для предварительного выделения правильного объема памяти заранее. Этот код является оптимизацией, которую мы здесь не включаем, чтобы сделать пример проще.
Аннотация #[macro_export] указывает, что этот макрос должен становиться
доступным всякий раз, когда крейт, в котором определен макрос, вводится в
область видимости. Без этой аннотации макрос нельзя ввести в область видимости.
Затем мы начинаем определение макроса с macro_rules! и имени макроса, который
определяем, без восклицательного знака. За именем, в данном случае vec,
следуют фигурные скобки, обозначающие тело определения макроса.
Структура в теле vec! похожа на структуру выражения match. Здесь у нас есть
одна ветвь с шаблоном ( $( $x:expr ),* ), за которым следует => и блок
кода, связанный с этим шаблоном. Если шаблон совпадает, связанный блок кода
будет сгенерирован. Учитывая, что это единственный шаблон в этом макросе, существует
только один допустимый способ сопоставления; любой другой шаблон приведет к
ошибке. У более сложных макросов будет больше одной ветви.
Допустимый синтаксис шаблонов в определениях макросов отличается от синтаксиса шаблонов, рассмотренного в главе 19, потому что шаблоны макросов сопоставляются со структурой кода Rust, а не со значениями. Давайте разберем, что означают части шаблона в листинге 20-35; полный синтаксис шаблонов макросов см. в Rust Reference.
Сначала мы используем набор круглых скобок, чтобы охватить весь шаблон. Мы
используем знак доллара ($), чтобы объявить переменную в системе макросов,
которая будет содержать код Rust, соответствующий шаблону. Знак доллара ясно
показывает, что это переменная макроса, а не обычная переменная Rust. Затем
идет набор круглых скобок, который захватывает значения, соответствующие
шаблону внутри скобок, для использования в коде замены. Внутри $() находится
$x:expr, что соответствует любому выражению Rust и дает этому выражению имя
$x.
Запятая после $() указывает, что буквальный символ-разделитель запятая
должен появляться между каждым экземпляром кода, который соответствует коду в
$(). * указывает, что шаблон соответствует нулю или большему количеству
того, что предшествует *.
Когда мы вызываем этот макрос как vec![1, 2, 3];, шаблон $x совпадает три
раза с тремя выражениями 1, 2 и 3.
Теперь посмотрим на шаблон в теле кода, связанного с этой ветвью: temp_vec.push()
внутри $()* генерируется для каждой части, которая соответствует $() в
шаблоне ноль или больше раз, в зависимости от того, сколько раз совпадает
шаблон. $x заменяется каждым сопоставленным выражением. Когда мы вызываем
этот макрос как vec![1, 2, 3];, сгенерированный код, который заменяет этот
вызов макроса, будет следующим:
{
let mut temp_vec = Vec::new();
temp_vec.push(1);
temp_vec.push(2);
temp_vec.push(3);
temp_vec
}Мы определили макрос, который может принимать любое количество аргументов любого типа и генерировать код для создания вектора, содержащего указанные элементы.
Чтобы узнать больше о написании макросов, обратитесь к онлайн-документации или другим ресурсам, таким как “The Little Book of Rust Macros”, который начал Daniel Keep и продолжил Lukas Wirth.
Процедурные макросы для генерации кода из атрибутов
Вторая форма макросов — процедурный макрос, который действует больше как
функция (и является разновидностью процедуры). Процедурные макросы принимают
некоторый код на входе, работают с этим кодом и производят некоторый код на
выходе, вместо того чтобы сопоставлять его с шаблонами и заменять код другим
кодом, как это делают декларативные макросы. Три вида процедурных макросов —
пользовательские derive, атрибутоподобные и похожие на функции; все они
работают похожим образом.
При создании процедурных макросов определения должны находиться в собственном
крейте со специальным типом крейта. Это требуется по сложным техническим
причинам, которые, как мы надеемся, удастся устранить в будущем. В листинге
20-36 мы показываем, как определить процедурный макрос, где some_attribute
является заполнителем для использования конкретной разновидности макроса.
use proc_macro::TokenStream;
#[some_attribute]
pub fn some_name(input: TokenStream) -> TokenStream {
}Функция, определяющая процедурный макрос, принимает TokenStream на входе и
производит TokenStream на выходе. Тип TokenStream определен крейтом
proc_macro, который включен в Rust, и представляет последовательность
токенов. Это ядро макроса: исходный код, над которым работает макрос,
составляет входной TokenStream, а код, который производит макрос, является
выходным TokenStream. К функции также прикреплен атрибут, который указывает,
какой вид процедурного макроса мы создаем. В одном и том же крейте у нас может
быть несколько видов процедурных макросов.
Посмотрим на разные виды процедурных макросов. Начнем с пользовательского
макроса derive, а затем объясним небольшие различия, которые отличают другие
формы.
Пользовательские макросы derive
Давайте создадим крейт с именем hello_macro, который определяет трейт с
именем HelloMacro и одной связанной функцией с именем hello_macro. Вместо
того чтобы заставлять пользователей реализовывать трейт HelloMacro для
каждого из их типов, мы предоставим процедурный макрос, чтобы пользователи
могли аннотировать свой тип с помощью #[derive(HelloMacro)] и получить
реализацию функции hello_macro по умолчанию. Реализация по умолчанию будет
печатать Hello, Macro! My name is TypeName!, где TypeName — имя типа, для
которого был определен этот трейт. Другими словами, мы напишем крейт, который
позволяет другому программисту написать код, как в листинге 20-37, используя
наш крейт.
use hello_macro::HelloMacro;
use hello_macro_derive::HelloMacro;
#[derive(HelloMacro)]
struct Pancakes;
fn main() {
Pancakes::hello_macro();
}Этот код напечатает Hello, Macro! My name is Pancakes!, когда мы закончим.
Первый шаг — создать новый библиотечный крейт, вот так:
$ cargo new hello_macro --lib
Далее, в листинге 20-38, мы определим трейт HelloMacro и связанную с ним
функцию.
pub trait HelloMacro {
fn hello_macro();
}deriveУ нас есть трейт и его функция. На этом этапе пользователь нашего крейта мог бы реализовать трейт, чтобы получить желаемую функциональность, как в листинге 20-39.
use hello_macro::HelloMacro;
struct Pancakes;
impl HelloMacro for Pancakes {
fn hello_macro() {
println!("Hello, Macro! My name is Pancakes!");
}
}
fn main() {
Pancakes::hello_macro();
}HelloMacroОднако им пришлось бы писать блок реализации для каждого типа, который они
хотели бы использовать с hello_macro; мы хотим избавить их от необходимости
выполнять эту работу.
Кроме того, мы пока не можем предоставить функцию hello_macro с реализацией
по умолчанию, которая напечатает имя типа, для которого реализован трейт: в
Rust нет возможностей рефлексии, поэтому он не может узнать имя типа во время
выполнения. Нам нужен макрос, чтобы сгенерировать код во время компиляции.
Следующий шаг — определить процедурный макрос. На момент написания этого текста
процедурные макросы должны находиться в собственном крейте. Со временем это
ограничение может быть снято. Соглашение о структурировании крейтов и крейтов
макросов таково: для крейта с именем foo крейт пользовательского процедурного
макроса derive называется foo_derive. Давайте начнем новый крейт
hello_macro_derive внутри нашего проекта hello_macro:
$ cargo new hello_macro_derive --lib
Наши два крейта тесно связаны, поэтому мы создаем крейт процедурного макроса
внутри директории нашего крейта hello_macro. Если мы изменим определение
трейта в hello_macro, нам также придется изменить реализацию процедурного
макроса в hello_macro_derive. Эти два крейта нужно будет публиковать
отдельно, а программистам, использующим эти крейты, нужно будет добавить оба в
зависимости и ввести оба в область видимости. Вместо этого мы могли бы сделать
так, чтобы крейт hello_macro использовал hello_macro_derive как зависимость
и повторно экспортировал код процедурного макроса. Однако выбранная нами
структура проекта позволяет программистам использовать hello_macro, даже если
им не нужна функциональность derive.
Нам нужно объявить крейт hello_macro_derive как крейт процедурного макроса.
Как вы скоро увидите, нам также понадобится функциональность из крейтов syn и
quote, поэтому нужно добавить их как зависимости. Добавьте следующее в файл
Cargo.toml для hello_macro_derive:
[lib]
proc-macro = true
[dependencies]
syn = "2.0"
quote = "1.0"
Чтобы начать определять процедурный макрос, поместите код из листинга 20-40 в
файл src/lib.rs крейта hello_macro_derive. Обратите внимание, что этот код
не скомпилируется, пока мы не добавим определение функции impl_hello_macro.
use proc_macro::TokenStream;
use quote::quote;
#[proc_macro_derive(HelloMacro)]
pub fn hello_macro_derive(input: TokenStream) -> TokenStream {
// Construct a representation of Rust code as a syntax tree
// that we can manipulate.
let ast = syn::parse(input).unwrap();
// Build the trait implementation.
impl_hello_macro(&ast)
}Обратите внимание, что мы разделили код на функцию hello_macro_derive,
которая отвечает за разбор TokenStream, и функцию impl_hello_macro, которая
отвечает за преобразование синтаксического дерева: это делает написание
процедурного макроса более удобным. Код во внешней функции
(hello_macro_derive в этом случае) будет одинаковым почти для каждого крейта
процедурного макроса, который вы увидите или создадите. Код, который вы
укажете в теле внутренней функции (impl_hello_macro в этом случае), будет
отличаться в зависимости от назначения вашего процедурного макроса.
Мы представили три новых крейта: proc_macro, syn и
quote. Крейт proc_macro поставляется вместе с
Rust, поэтому нам не нужно было добавлять его в зависимости в Cargo.toml.
Крейт proc_macro — это API компилятора, который позволяет нам читать код Rust
из нашего кода и манипулировать им.
Крейт syn разбирает код Rust из строки в структуру данных, над которой мы
можем выполнять операции. Крейт quote превращает структуры данных syn
обратно в код Rust. Эти крейты значительно упрощают разбор любого вида кода
Rust, который нам может понадобиться обработать: написать полный парсер для
кода Rust — непростая задача.
Функция hello_macro_derive будет вызвана, когда пользователь нашей библиотеки
укажет #[derive(HelloMacro)] для типа. Это возможно, потому что мы
аннотировали здесь функцию hello_macro_derive с помощью proc_macro_derive и
указали имя HelloMacro, которое соответствует имени нашего трейта; это
соглашение, которому следует большинство процедурных макросов.
Функция hello_macro_derive сначала преобразует input из TokenStream в
структуру данных, которую затем можно интерпретировать и над которой можно
выполнять операции. Именно здесь вступает в дело syn. Функция parse в
syn принимает TokenStream и возвращает структуру DeriveInput,
представляющую разобранный код Rust. Листинг 20-41 показывает соответствующие
части структуры DeriveInput, которую мы получаем при разборе строки struct Pancakes;.
DeriveInput {
// --snip--
ident: Ident {
ident: "Pancakes",
span: #0 bytes(95..103)
},
data: Struct(
DataStruct {
struct_token: Struct,
fields: Unit,
semi_token: Some(
Semi
)
}
)
}DeriveInput, который мы получаем при разборе кода с атрибутом макроса из листинга 20-37Поля этой структуры показывают, что разобранный нами код Rust — это единичная
структура с ident (identifier, то есть именем) Pancakes. В этой структуре
есть и другие поля для описания всевозможного кода Rust; подробности см. в
документации syn для DeriveInput.
Скоро мы определим функцию impl_hello_macro, где построим новый код Rust,
который хотим включить. Но прежде чем сделать это, обратите внимание, что
вывод нашего макроса derive также является TokenStream. Возвращаемый
TokenStream добавляется к коду, который пишут пользователи нашего крейта,
поэтому при компиляции их крейта они получат дополнительную функциональность,
которую мы предоставляем в измененном TokenStream.
Возможно, вы заметили, что мы вызываем unwrap, чтобы функция
hello_macro_derive вызвала панику, если вызов функции syn::parse здесь
завершится неудачно. Нашему процедурному макросу необходимо вызывать панику
при ошибках, потому что функции proc_macro_derive должны возвращать
TokenStream, а не Result, чтобы соответствовать API процедурных макросов.
Мы упростили этот пример, используя unwrap; в производственном коде следует
предоставлять более конкретные сообщения об ошибках о том, что пошло не так,
используя panic! или expect.
Теперь, когда у нас есть код для преобразования аннотированного кода Rust из
TokenStream в экземпляр DeriveInput, давайте сгенерируем код, который
реализует трейт HelloMacro для аннотированного типа, как показано в листинге
20-42.
use proc_macro::TokenStream;
use quote::quote;
#[proc_macro_derive(HelloMacro)]
pub fn hello_macro_derive(input: TokenStream) -> TokenStream {
// Construct a representation of Rust code as a syntax tree
// that we can manipulate
let ast = syn::parse(input).unwrap();
// Build the trait implementation
impl_hello_macro(&ast)
}
fn impl_hello_macro(ast: &syn::DeriveInput) -> TokenStream {
let name = &ast.ident;
let generated = quote! {
impl HelloMacro for #name {
fn hello_macro() {
println!("Hello, Macro! My name is {}!", stringify!(#name));
}
}
};
generated.into()
}HelloMacro с использованием разобранного кода RustМы получаем экземпляр структуры Ident, содержащий имя (идентификатор)
аннотированного типа, с помощью ast.ident. Структура в листинге 20-41
показывает, что когда мы запускаем функцию impl_hello_macro для кода из
листинга 20-37, полученный ident будет иметь поле ident со значением
"Pancakes". Таким образом, переменная name в листинге 20-42 будет содержать
экземпляр структуры Ident, который при печати будет строкой "Pancakes",
именем структуры из листинга 20-37.
Макрос quote! позволяет нам определить код Rust, который мы хотим вернуть.
Компилятор ожидает нечто отличное от непосредственного результата выполнения
макроса quote!, поэтому нам нужно преобразовать его в TokenStream. Мы
делаем это, вызывая метод into, который потребляет это промежуточное
представление и возвращает значение требуемого типа TokenStream.
Макрос quote! также предоставляет очень удобную механику шаблонов: мы можем
ввести #name, и quote! заменит это значением переменной name. Можно даже
выполнять повторение, похожее на то, как работают обычные макросы. Подробное
введение см. в документации крейта quote.
Мы хотим, чтобы наш процедурный макрос сгенерировал реализацию нашего трейта
HelloMacro для типа, который аннотировал пользователь; этот тип мы можем
получить с помощью #name. В реализации трейта есть одна функция
hello_macro, тело которой содержит функциональность, которую мы хотим
предоставить: печать Hello, Macro! My name is, а затем имени аннотированного
типа.
Используемый здесь макрос stringify! встроен в Rust. Он принимает выражение
Rust, например 1 + 2, и во время компиляции превращает выражение в строковый
литерал, например "1 + 2". Это отличается от format! или println!, то
есть макросов, которые вычисляют выражение, а затем превращают результат в
String. Существует вероятность, что входные данные #name могут быть
выражением, которое нужно напечатать буквально, поэтому мы используем
stringify!. Использование stringify! также экономит выделение памяти,
преобразуя #name в строковый литерал во время компиляции.
На этом этапе cargo build должен успешно завершаться и в hello_macro, и в
hello_macro_derive. Давайте подключим эти крейты к коду из листинга 20-37,
чтобы увидеть процедурный макрос в действии! Создайте новый бинарный проект в
директории projects с помощью cargo new pancakes. Нам нужно добавить
hello_macro и hello_macro_derive как зависимости в Cargo.toml крейта
pancakes. Если вы публикуете свои версии hello_macro и
hello_macro_derive на crates.io, они
будут обычными зависимостями; если нет, можно указать их как зависимости
path следующим образом:
[dependencies]
hello_macro = { path = "../hello_macro" }
hello_macro_derive = { path = "../hello_macro/hello_macro_derive" }
Поместите код из листинга 20-37 в src/main.rs и выполните cargo run: он
должен напечатать Hello, Macro! My name is Pancakes!. Реализация трейта
HelloMacro из процедурного макроса была включена без необходимости для крейта
pancakes реализовывать ее; #[derive(HelloMacro)] добавил реализацию трейта.
Далее посмотрим, чем другие виды процедурных макросов отличаются от
пользовательских макросов derive.
Атрибутоподобные макросы
Атрибутоподобные макросы похожи на пользовательские макросы derive, но
вместо генерации кода для атрибута derive они позволяют создавать новые
атрибуты. Они также более гибкие: derive работает только для структур и
перечислений; атрибуты можно применять и к другим элементам, например к
функциям. Вот пример использования атрибутоподобного макроса. Предположим, у
вас есть атрибут с именем route, который аннотирует функции при использовании
фреймворка веб-приложения:
#[route(GET, "/")]
fn index() {Этот атрибут #[route] был бы определен фреймворком как процедурный макрос.
Сигнатура функции определения макроса выглядела бы так:
#[proc_macro_attribute]
pub fn route(attr: TokenStream, item: TokenStream) -> TokenStream {Здесь у нас есть два параметра типа TokenStream. Первый предназначен для
содержимого атрибута: части GET, "/". Второй — для тела элемента, к которому
прикреплен атрибут: в данном случае fn index() {} и остальная часть тела
функции.
Кроме этого, атрибутоподобные макросы работают так же, как пользовательские
макросы derive: вы создаете крейт с типом крейта proc-macro и реализуете
функцию, которая генерирует нужный вам код!
Макросы, похожие на функции
Макросы, похожие на функции, определяют макросы, которые выглядят как вызовы
функций. Подобно макросам macro_rules!, они более гибкие, чем функции;
например, они могут принимать неизвестное количество аргументов. Однако макросы
macro_rules! можно определять только с помощью синтаксиса, похожего на
match, который мы обсуждали ранее в разделе «Декларативные макросы для
общего метапрограммирования». Макросы, похожие на
функции, принимают параметр TokenStream, а их определение манипулирует этим
TokenStream с помощью кода Rust, как это делают другие два типа процедурных
макросов. Пример макроса, похожего на функцию, — макрос sql!, который можно
было бы вызвать так:
let sql = sql!(SELECT * FROM posts WHERE id=1);Этот макрос разобрал бы SQL-инструкцию внутри себя и проверил бы ее
синтаксическую корректность, что является гораздо более сложной обработкой,
чем может выполнить макрос macro_rules!. Макрос sql! был бы определен так:
#[proc_macro]
pub fn sql(input: TokenStream) -> TokenStream {Это определение похоже на сигнатуру пользовательского макроса derive: мы
получаем токены, находящиеся внутри круглых скобок, и возвращаем код, который
хотели сгенерировать.
Итоги
Ух! Теперь в вашем наборе инструментов есть некоторые возможности Rust, которые вы, вероятно, не будете использовать часто, но будете знать, что они доступны в очень конкретных обстоятельствах. Мы представили несколько сложных тем, чтобы, когда вы встретите их в предложениях из сообщений об ошибках или в коде других людей, вы могли распознать эти понятия и синтаксис. Используйте эту главу как справочник, который поможет вам найти решения.
Далее мы применим на практике все, что обсуждали на протяжении книги, и сделаем еще один проект!
Финальный проект: создание многопоточного веб-сервера
Путь был долгим, но мы добрались до конца книги. В этой главе мы вместе создадим еще один проект, чтобы продемонстрировать некоторые понятия, которые рассматривали в последних главах, а также повторить некоторые более ранние уроки.
В качестве финального проекта мы сделаем веб-сервер, который говорит “Hello!” и выглядит в веб-браузере так, как показано на рисунке 21-1.
Вот наш план создания веб-сервера:
- Немного узнать о TCP и HTTP.
- Слушать TCP-соединения на сокете.
- Разбирать небольшое количество HTTP-запросов.
- Создать правильный HTTP-ответ.
- Улучшить пропускную способность нашего сервера с помощью пула потоков.
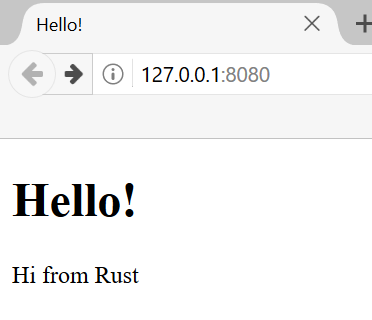
Рисунок 21-1: наш последний совместный проект
Прежде чем начать, нужно упомянуть две детали. Во-первых, метод, который мы будем использовать, не является лучшим способом создать веб-сервер на Rust. Участники сообщества опубликовали ряд готовых к промышленному использованию крейтов на crates.io с более полными реализациями веб-сервера и пула потоков, чем та, которую мы создадим. Однако наша цель в этой главе — помочь вам учиться, а не идти самым легким путем. Поскольку Rust — язык системного программирования, мы можем выбирать уровень абстракции, с которым хотим работать, и можем спускаться на более низкий уровень, чем это возможно или практично в других языках.
Во-вторых, здесь мы не будем использовать async и await. Создание пула потоков само по себе достаточно сложная задача, даже без добавления разработки async runtime! Однако мы отметим, как async и await могут быть применимы к некоторым из тех же проблем, которые мы увидим в этой главе. В конечном счете, как мы отмечали ранее в главе 17, многие async runtime используют пулы потоков для управления своей работой.
Поэтому мы вручную напишем базовый HTTP-сервер и пул потоков, чтобы вы могли изучить общие идеи и техники, лежащие в основе крейтов, которые, возможно, будете использовать в будущем.
Создание однопоточного веб-сервера
Создание однопоточного веб-сервера
Мы начнем с того, что заставим работать однопоточный веб-сервер. Прежде чем приступить, давайте быстро рассмотрим протоколы, участвующие в создании веб-серверов. Подробности этих протоколов выходят за рамки этой книги, но краткий обзор даст вам необходимую информацию.
Два основных протокола, участвующих в работе веб-серверов, — это Hypertext Transfer Protocol (HTTP) и Transmission Control Protocol (TCP). Оба протокола являются протоколами запрос-ответ: клиент инициирует запросы, а сервер слушает запросы и предоставляет клиенту ответ. Содержимое этих запросов и ответов определяется протоколами.
TCP — протокол более низкого уровня, который описывает детали того, как информация попадает с одного сервера на другой, но не уточняет, что именно представляет собой эта информация. HTTP строится поверх TCP, определяя содержимое запросов и ответов. Технически возможно использовать HTTP с другими протоколами, но в подавляющем большинстве случаев HTTP отправляет свои данные поверх TCP. Мы будем работать с сырыми байтами TCP и HTTP-запросов и ответов.
Прослушивание TCP-соединения
Нашему веб-серверу нужно слушать TCP-соединение, поэтому это первая часть, над
которой мы поработаем. Стандартная библиотека предоставляет модуль std::net,
который позволяет нам это сделать. Создадим новый проект обычным способом:
$ cargo new hello
Created binary (application) `hello` project
$ cd hello
Теперь введите код из листинга 21-1 в src/main.rs, чтобы начать. Этот код
будет слушать локальный адрес 127.0.0.1:7878 для входящих TCP-потоков. Когда
он получит входящий поток, то напечатает Connection established!.
use std::net::TcpListener;
fn main() {
let listener = TcpListener::bind("127.0.0.1:7878").unwrap();
for stream in listener.incoming() {
let stream = stream.unwrap();
println!("Connection established!");
}
}С помощью TcpListener мы можем слушать TCP-соединения по адресу
127.0.0.1:7878. В адресе часть перед двоеточием — это IP-адрес,
представляющий ваш компьютер (он одинаков на каждом компьютере и не
представляет конкретно компьютер авторов), а 7878 — это порт. Мы выбрали
этот порт по двум причинам: HTTP обычно не принимается на этом порту, поэтому
наш сервер вряд ли будет конфликтовать с каким-либо другим веб-сервером,
который может быть запущен на вашей машине, а 7878 — это rust, набранное на
телефоне.
Функция bind в этом сценарии работает как функция new: она возвращает
новый экземпляр TcpListener. Функция называется bind, потому что в сетевом
программировании подключение к порту для прослушивания известно как
«привязка к порту».
Функция bind возвращает Result<T, E>, что указывает на возможность
неудачной привязки: например, если бы мы запустили два экземпляра нашей
программы и, следовательно, имели бы две программы, слушающие один и тот же
порт. Поскольку мы пишем базовый сервер только в учебных целях, мы не будем
беспокоиться об обработке таких ошибок; вместо этого мы используем unwrap,
чтобы остановить программу, если ошибки произойдут.
Метод incoming у TcpListener возвращает итератор, который дает нам
последовательность потоков (точнее, потоков типа TcpStream). Один поток
представляет открытое соединение между клиентом и сервером. Соединение — это
название всего процесса запроса и ответа, в котором клиент подключается к
серверу, сервер создает ответ, а затем сервер закрывает соединение. Поэтому мы
будем читать из TcpStream, чтобы увидеть, что отправил клиент, а затем
записывать наш ответ в поток, чтобы отправить данные обратно клиенту. В целом
этот цикл for будет по очереди обрабатывать каждое соединение и создавать
для нас последовательность потоков, с которыми нужно работать.
Пока наша обработка потока состоит из вызова unwrap, чтобы завершить
программу, если в потоке есть какие-либо ошибки; если ошибок нет, программа
печатает сообщение. В следующем листинге мы добавим больше функциональности
для успешного случая. Причина, по которой мы можем получать ошибки от метода
incoming, когда клиент подключается к серверу, состоит в том, что на самом
деле мы итерируемся не по соединениям. Вместо этого мы итерируемся по
попыткам соединения. Соединение может не быть успешным по ряду причин, многие
из которых зависят от операционной системы. Например, во многих операционных
системах есть ограничение на количество одновременно открытых соединений,
которые они могут поддерживать; новые попытки соединения сверх этого числа
будут выдавать ошибку, пока некоторые из открытых соединений не будут закрыты.
Попробуем запустить этот код! Выполните cargo run в терминале, а затем
откройте 127.0.0.1:7878 в веб-браузере. Браузер должен показать сообщение об
ошибке вроде “Connection reset”, потому что сервер сейчас не отправляет обратно
никаких данных. Но если вы посмотрите в терминал, то увидите несколько
сообщений, напечатанных при подключении браузера к серверу!
Running `target/debug/hello`
Connection established!
Connection established!
Connection established!
Иногда для одного запроса браузера вы увидите несколько напечатанных сообщений; причина может быть в том, что браузер делает запрос страницы, а также запросы других ресурсов, например значка favicon.ico, который отображается на вкладке браузера.
Также возможно, что браузер пытается подключиться к серверу несколько раз,
потому что сервер не отвечает никакими данными. Когда stream выходит из
области видимости и сбрасывается в конце цикла, соединение закрывается как
часть реализации drop. Браузеры иногда реагируют на закрытые соединения
повторной попыткой, потому что проблема может быть временной.
Браузеры также иногда открывают несколько соединений с сервером, ничего по ним не отправляя, чтобы если позднее они все же отправят запросы, эти запросы могли произойти быстрее. Когда это случается, наш сервер увидит каждое соединение независимо от того, есть ли по этому соединению какие-либо запросы. Например, так делают многие версии браузеров на основе Chrome; эту оптимизацию можно отключить, используя режим приватного просмотра или другой браузер.
Важный момент в том, что мы успешно получили дескриптор TCP-соединения!
Не забудьте остановить программу, нажав ctrl-C, когда
закончите запускать конкретную версию кода. Затем перезапустите программу,
выполнив команду cargo run после каждого набора изменений кода, чтобы
убедиться, что вы запускаете самый новый код.
Чтение запроса
Давайте реализуем функциональность для чтения запроса из браузера! Чтобы
разделить ответственность за получение соединения и затем выполнение какого-то
действия с этим соединением, мы начнем новую функцию для обработки соединений.
В новой функции handle_connection мы прочитаем данные из TCP-потока и
напечатаем их, чтобы увидеть данные, отправляемые браузером. Измените код так,
как показано в листинге 21-2.
use std::{
io::{BufReader, prelude::*},
net::{TcpListener, TcpStream},
};
fn main() {
let listener = TcpListener::bind("127.0.0.1:7878").unwrap();
for stream in listener.incoming() {
let stream = stream.unwrap();
handle_connection(stream);
}
}
fn handle_connection(mut stream: TcpStream) {
let buf_reader = BufReader::new(&stream);
let http_request: Vec<_> = buf_reader
.lines()
.map(|result| result.unwrap())
.take_while(|line| !line.is_empty())
.collect();
println!("Request: {http_request:#?}");
}TcpStream и вывод данныхМы вводим std::io::BufReader и std::io::prelude в область видимости, чтобы
получить доступ к трейтам и типам, которые позволяют нам читать из потока и
записывать в него. В цикле for функции main вместо вывода сообщения о том,
что мы установили соединение, мы теперь вызываем новую функцию
handle_connection и передаем ей stream.
В функции handle_connection мы создаем новый экземпляр BufReader, который
оборачивает ссылку на stream. BufReader добавляет буферизацию, управляя
вызовами методов трейта std::io::Read за нас.
Мы создаем переменную с именем http_request, чтобы собрать строки запроса,
который браузер отправляет нашему серверу. Мы указываем, что хотим собрать эти
строки в вектор, добавляя аннотацию типа Vec<_>.
BufReader реализует трейт std::io::BufRead, который предоставляет метод
lines. Метод lines возвращает итератор Result<String, std::io::Error>,
разделяя поток данных всякий раз, когда видит байт новой строки. Чтобы получить
каждый String, мы применяем map и unwrap к каждому Result. Result
может быть ошибкой, если данные не являются допустимым UTF-8 или если возникла
проблема при чтении из потока. Опять же, производственная программа должна
обрабатывать эти ошибки более изящно, но для простоты мы выбираем остановку
программы в случае ошибки.
Браузер сигнализирует конец HTTP-запроса, отправляя два символа новой строки подряд, поэтому, чтобы получить один запрос из потока, мы берем строки до тех пор, пока не получим строку, являющуюся пустой строкой. После того как мы собрали строки в вектор, мы выводим их с помощью красивого отладочного форматирования, чтобы посмотреть на инструкции, которые веб-браузер отправляет нашему серверу.
Попробуем этот код! Запустите программу и снова сделайте запрос в веб-браузере. Обратите внимание, что в браузере мы все еще получим страницу ошибки, но вывод нашей программы в терминале теперь будет похож на следующий:
$ cargo run
Compiling hello v0.1.0 (file:///projects/hello)
Finished `dev` profile [unoptimized + debuginfo] target(s) in 0.42s
Running `target/debug/hello`
Request: [
"GET / HTTP/1.1",
"Host: 127.0.0.1:7878",
"User-Agent: Mozilla/5.0 (Macintosh; Intel Mac OS X 10.15; rv:99.0) Gecko/20100101 Firefox/99.0",
"Accept: text/html,application/xhtml+xml,application/xml;q=0.9,image/avif,image/webp,*/*;q=0.8",
"Accept-Language: en-US,en;q=0.5",
"Accept-Encoding: gzip, deflate, br",
"DNT: 1",
"Connection: keep-alive",
"Upgrade-Insecure-Requests: 1",
"Sec-Fetch-Dest: document",
"Sec-Fetch-Mode: navigate",
"Sec-Fetch-Site: none",
"Sec-Fetch-User: ?1",
"Cache-Control: max-age=0",
]
В зависимости от браузера вы можете получить немного другой вывод. Теперь, когда
мы выводим данные запроса, мы можем увидеть, почему получаем несколько
соединений от одного запроса браузера, посмотрев на путь после GET в первой
строке запроса. Если повторяющиеся соединения все запрашивают /, мы знаем,
что браузер пытается снова и снова получить /, потому что не получает ответа
от нашей программы.
Давайте разберем эти данные запроса, чтобы понять, что браузер просит у нашей программы.
Более внимательный взгляд на HTTP-запрос
HTTP — текстовый протокол, и запрос имеет такой формат:
Method Request-URI HTTP-Version CRLF
headers CRLF
message-body
Первая строка — это строка запроса, которая содержит информацию о том, что
запрашивает клиент. Первая часть строки запроса указывает используемый метод,
такой как GET или POST, который описывает, как клиент делает этот запрос.
Наш клиент использовал запрос GET, что означает, что он запрашивает
информацию.
Следующая часть строки запроса — /, что указывает на uniform resource identifier (URI), который запрашивает клиент: URI почти, но не совсем то же самое, что uniform resource locator (URL). Различие между URI и URL не важно для наших целей в этой главе, но спецификация HTTP использует термин URI, поэтому мы можем мысленно подставлять URL вместо URI здесь.
Последняя часть — версия HTTP, которую использует клиент, а затем строка
запроса заканчивается последовательностью CRLF. (CRLF означает carriage
return и line feed, термины из времен пишущих машинок!) Последовательность
CRLF также можно записать как \r\n, где \r — возврат каретки, а \n —
перевод строки. Последовательность CRLF отделяет строку запроса от остальных
данных запроса. Обратите внимание, что когда CRLF печатается, мы видим начало
новой строки, а не \r\n.
Глядя на данные строки запроса, которые мы получили от запуска нашей программы
к этому моменту, мы видим, что GET — это метод, / — URI запроса, а
HTTP/1.1 — версия.
После строки запроса оставшиеся строки, начиная с Host:, являются
заголовками. У запросов GET нет тела.
Попробуйте сделать запрос из другого браузера или запросить другой адрес, например 127.0.0.1:7878/test, чтобы увидеть, как изменятся данные запроса.
Теперь, когда мы знаем, что запрашивает браузер, отправим обратно какие-нибудь данные!
Запись ответа
Мы реализуем отправку данных в ответ на запрос клиента. Ответы имеют следующий формат:
HTTP-Version Status-Code Reason-Phrase CRLF
headers CRLF
message-body
Первая строка — это строка состояния, которая содержит версию HTTP, используемую в ответе, числовой код состояния, кратко описывающий результат запроса, и фразу причины, предоставляющую текстовое описание кода состояния. После последовательности CRLF идут любые заголовки, еще одна последовательность CRLF и тело ответа.
Вот пример ответа, который использует HTTP версии 1.1, имеет код состояния 200, фразу причины OK, не имеет заголовков и не имеет тела:
HTTP/1.1 200 OK\r\n\r\n
Код состояния 200 — стандартный успешный ответ. Этот текст — крошечный
успешный HTTP-ответ. Давайте запишем его в поток как наш ответ на успешный
запрос! Из функции handle_connection удалите println!, который выводил
данные запроса, и замените его кодом из листинга 21-3.
use std::{
io::{BufReader, prelude::*},
net::{TcpListener, TcpStream},
};
fn main() {
let listener = TcpListener::bind("127.0.0.1:7878").unwrap();
for stream in listener.incoming() {
let stream = stream.unwrap();
handle_connection(stream);
}
}
fn handle_connection(mut stream: TcpStream) {
let buf_reader = BufReader::new(&stream);
let http_request: Vec<_> = buf_reader
.lines()
.map(|result| result.unwrap())
.take_while(|line| !line.is_empty())
.collect();
let response = "HTTP/1.1 200 OK\r\n\r\n";
stream.write_all(response.as_bytes()).unwrap();
}Первая новая строка определяет переменную response, которая содержит данные
сообщения об успехе. Затем мы вызываем as_bytes для response, чтобы
преобразовать строковые данные в байты. Метод write_all у stream принимает
&[u8] и отправляет эти байты напрямую по соединению. Поскольку операция
write_all может завершиться неудачно, мы, как и раньше, используем unwrap
для любого ошибочного результата. Опять же, в настоящем приложении здесь
следовало бы добавить обработку ошибок.
С этими изменениями запустим наш код и сделаем запрос. Мы больше не выводим никаких данных в терминал, поэтому не увидим никакого вывода, кроме вывода от Cargo. Когда вы загрузите 127.0.0.1:7878 в веб-браузере, вместо ошибки вы должны получить пустую страницу. Вы только что вручную закодировали получение HTTP-запроса и отправку ответа!
Возврат настоящего HTML
Давайте реализуем функциональность для возврата чего-то большего, чем пустая страница. Создайте новый файл hello.html в корне директории вашего проекта, а не в директории src. Вы можете ввести любой HTML, какой захотите; листинг 21-4 показывает один возможный вариант.
<!DOCTYPE html>
<html lang="en">
<head>
<meta charset="utf-8">
<title>Hello!</title>
</head>
<body>
<h1>Hello!</h1>
<p>Hi from Rust</p>
</body>
</html>
Это минимальный документ HTML5 с заголовком и небольшим текстом. Чтобы вернуть
его с сервера при получении запроса, мы изменим handle_connection, как
показано в листинге 21-5: прочитаем HTML-файл, добавим его в ответ как тело и
отправим.
use std::{
fs,
io::{BufReader, prelude::*},
net::{TcpListener, TcpStream},
};
// --snip--
fn main() {
let listener = TcpListener::bind("127.0.0.1:7878").unwrap();
for stream in listener.incoming() {
let stream = stream.unwrap();
handle_connection(stream);
}
}
fn handle_connection(mut stream: TcpStream) {
let buf_reader = BufReader::new(&stream);
let http_request: Vec<_> = buf_reader
.lines()
.map(|result| result.unwrap())
.take_while(|line| !line.is_empty())
.collect();
let status_line = "HTTP/1.1 200 OK";
let contents = fs::read_to_string("hello.html").unwrap();
let length = contents.len();
let response =
format!("{status_line}\r\nContent-Length: {length}\r\n\r\n{contents}");
stream.write_all(response.as_bytes()).unwrap();
}Мы добавили fs в инструкцию use, чтобы ввести модуль файловой системы
стандартной библиотеки в область видимости. Код чтения содержимого файла в
строку должен выглядеть знакомо; мы использовали его, когда читали содержимое
файла для нашего проекта ввода-вывода в листинге 12-4.
Далее мы используем format!, чтобы добавить содержимое файла как тело
успешного ответа. Чтобы обеспечить корректный HTTP-ответ, мы добавляем
заголовок Content-Length, который устанавливается в размер тела нашего
ответа — в данном случае в размер hello.html.
Запустите этот код с помощью cargo run и загрузите 127.0.0.1:7878 в
браузере; вы должны увидеть отрисованный HTML!
Сейчас мы игнорируем данные запроса в http_request и просто безусловно
отправляем обратно содержимое HTML-файла. Это означает, что если вы попробуете
запросить 127.0.0.1:7878/something-else в браузере, то все равно получите
тот же HTML-ответ. В данный момент наш сервер очень ограничен и не делает того,
что делает большинство веб-серверов. Мы хотим настраивать наши ответы в
зависимости от запроса и отправлять HTML-файл обратно только для корректно
сформированного запроса к /.
Проверка запроса и выборочный ответ
Сейчас наш веб-сервер вернет HTML из файла независимо от того, что запросил
клиент. Давайте добавим функциональность для проверки, что браузер запрашивает
/, прежде чем возвращать HTML-файл, и будем возвращать ошибку, если браузер
запрашивает что-то другое. Для этого нужно изменить handle_connection, как
показано в листинге 21-6. Этот новый код проверяет содержимое полученного
запроса относительно того, как, насколько нам известно, выглядит запрос к /,
и добавляет блоки if и else, чтобы обрабатывать запросы по-разному.
use std::{
fs,
io::{BufReader, prelude::*},
net::{TcpListener, TcpStream},
};
fn main() {
let listener = TcpListener::bind("127.0.0.1:7878").unwrap();
for stream in listener.incoming() {
let stream = stream.unwrap();
handle_connection(stream);
}
}
// --snip--
fn handle_connection(mut stream: TcpStream) {
let buf_reader = BufReader::new(&stream);
let request_line = buf_reader.lines().next().unwrap().unwrap();
if request_line == "GET / HTTP/1.1" {
let status_line = "HTTP/1.1 200 OK";
let contents = fs::read_to_string("hello.html").unwrap();
let length = contents.len();
let response = format!(
"{status_line}\r\nContent-Length: {length}\r\n\r\n{contents}"
);
stream.write_all(response.as_bytes()).unwrap();
} else {
// some other request
}
}Мы будем смотреть только на первую строку HTTP-запроса, поэтому вместо чтения
всего запроса в вектор вызываем next, чтобы получить первый элемент из
итератора. Первый unwrap обрабатывает Option и останавливает программу,
если в итераторе нет элементов. Второй unwrap обрабатывает Result и имеет
тот же эффект, что и unwrap, который был в map, добавленном в листинге
21-2.
Далее мы проверяем request_line, чтобы увидеть, равна ли она строке запроса
GET к пути /. Если да, блок if возвращает содержимое нашего HTML-файла.
Если request_line не равна GET-запросу к пути /, это означает, что мы
получили какой-то другой запрос. Через минуту мы добавим код в блок else,
чтобы отвечать на все остальные запросы.
Запустите этот код сейчас и запросите 127.0.0.1:7878; вы должны получить HTML из hello.html. Если вы сделаете любой другой запрос, например 127.0.0.1:7878/something-else, то получите ошибку соединения, похожую на те, которые видели при запуске кода из листингов 21-1 и 21-2.
Теперь добавим код из листинга 21-7 в блок else, чтобы возвращать ответ с
кодом состояния 404, который сигнализирует, что содержимое для запроса не
найдено. Мы также вернем немного HTML для страницы, которая будет отрисована в
браузере и покажет конечному пользователю этот ответ.
use std::{
fs,
io::{BufReader, prelude::*},
net::{TcpListener, TcpStream},
};
fn main() {
let listener = TcpListener::bind("127.0.0.1:7878").unwrap();
for stream in listener.incoming() {
let stream = stream.unwrap();
handle_connection(stream);
}
}
fn handle_connection(mut stream: TcpStream) {
let buf_reader = BufReader::new(&stream);
let request_line = buf_reader.lines().next().unwrap().unwrap();
if request_line == "GET / HTTP/1.1" {
let status_line = "HTTP/1.1 200 OK";
let contents = fs::read_to_string("hello.html").unwrap();
let length = contents.len();
let response = format!(
"{status_line}\r\nContent-Length: {length}\r\n\r\n{contents}"
);
stream.write_all(response.as_bytes()).unwrap();
// --snip--
} else {
let status_line = "HTTP/1.1 404 NOT FOUND";
let contents = fs::read_to_string("404.html").unwrap();
let length = contents.len();
let response = format!(
"{status_line}\r\nContent-Length: {length}\r\n\r\n{contents}"
);
stream.write_all(response.as_bytes()).unwrap();
}
}Здесь у нашего ответа есть строка состояния с кодом состояния 404 и фразой
причины NOT FOUND. Телом ответа будет HTML из файла 404.html. Вам нужно
создать файл 404.html рядом с hello.html для страницы ошибки; снова можете
использовать любой HTML, какой захотите, или пример HTML из листинга 21-8.
<!DOCTYPE html>
<html lang="en">
<head>
<meta charset="utf-8">
<title>Hello!</title>
</head>
<body>
<h1>Oops!</h1>
<p>Sorry, I don't know what you're asking for.</p>
</body>
</html>
С этими изменениями снова запустите сервер. Запрос 127.0.0.1:7878 должен вернуть содержимое hello.html, а любой другой запрос, например 127.0.0.1:7878/foo, должен вернуть HTML ошибки из 404.html.
Рефакторинг
В данный момент в блоках if и else много повторений: оба читают файлы и
записывают содержимое файлов в поток. Единственные различия — строка состояния
и имя файла. Сделаем код более кратким, вынеся эти различия в отдельные строки
if и else, которые присвоят значения строки состояния и имени файла
переменным; затем мы сможем безусловно использовать эти переменные в коде для
чтения файла и записи ответа. Листинг 21-9 показывает итоговый код после
замены больших блоков if и else.
use std::{
fs,
io::{BufReader, prelude::*},
net::{TcpListener, TcpStream},
};
fn main() {
let listener = TcpListener::bind("127.0.0.1:7878").unwrap();
for stream in listener.incoming() {
let stream = stream.unwrap();
handle_connection(stream);
}
}
// --snip--
fn handle_connection(mut stream: TcpStream) {
// --snip--
let buf_reader = BufReader::new(&stream);
let request_line = buf_reader.lines().next().unwrap().unwrap();
let (status_line, filename) = if request_line == "GET / HTTP/1.1" {
("HTTP/1.1 200 OK", "hello.html")
} else {
("HTTP/1.1 404 NOT FOUND", "404.html")
};
let contents = fs::read_to_string(filename).unwrap();
let length = contents.len();
let response =
format!("{status_line}\r\nContent-Length: {length}\r\n\r\n{contents}");
stream.write_all(response.as_bytes()).unwrap();
}if и else, чтобы они содержали только код, различающий два случаяТеперь блоки if и else возвращают только соответствующие значения для
строки состояния и имени файла в кортеже; затем мы используем деструктуризацию,
чтобы присвоить эти два значения status_line и filename с помощью шаблона
в инструкции let, как обсуждалось в главе 19.
Ранее дублированный код теперь находится вне блоков if и else и использует
переменные status_line и filename. Благодаря этому легче увидеть различие
между двумя случаями, и это означает, что у нас есть только одно место, где
нужно обновить код, если мы захотим изменить то, как работает чтение файла и
запись ответа. Поведение кода из листинга 21-9 будет таким же, как в листинге
21-7.
Отлично! Теперь у нас есть простой веб-сервер примерно на 40 строках кода Rust, который отвечает на один запрос страницей с содержимым, а на все остальные запросы отвечает ответом 404.
Сейчас наш сервер работает в одном потоке, а значит, может обслуживать только один запрос за раз. Давайте рассмотрим, как это может стать проблемой, смоделировав несколько медленных запросов. Затем мы исправим это так, чтобы наш сервер мог обрабатывать несколько запросов одновременно.
Переход от однопоточного сервера к многопоточному
От однопоточного сервера к многопоточному
Сейчас сервер будет обрабатывать каждый запрос по очереди, то есть не начнет обрабатывать второе соединение, пока не закончит обработку первого. Если сервер будет получать все больше и больше запросов, такое последовательное выполнение будет становиться все менее оптимальным. Если сервер получит запрос, обработка которого занимает много времени, последующим запросам придется ждать, пока долгий запрос не завершится, даже если новые запросы можно обработать быстро. Нам нужно это исправить, но сначала посмотрим на проблему в действии.
Имитация медленного запроса
Мы посмотрим, как медленно обрабатываемый запрос может повлиять на другие запросы к текущей реализации нашего сервера. Листинг 21-10 реализует обработку запроса к /sleep с имитированным медленным ответом, из-за которого сервер заснет на пять секунд перед ответом.
use std::{
fs,
io::{BufReader, prelude::*},
net::{TcpListener, TcpStream},
thread,
time::Duration,
};
// --snip--
fn main() {
let listener = TcpListener::bind("127.0.0.1:7878").unwrap();
for stream in listener.incoming() {
let stream = stream.unwrap();
handle_connection(stream);
}
}
fn handle_connection(mut stream: TcpStream) {
// --snip--
let buf_reader = BufReader::new(&stream);
let request_line = buf_reader.lines().next().unwrap().unwrap();
let (status_line, filename) = match &request_line[..] {
"GET / HTTP/1.1" => ("HTTP/1.1 200 OK", "hello.html"),
"GET /sleep HTTP/1.1" => {
thread::sleep(Duration::from_secs(5));
("HTTP/1.1 200 OK", "hello.html")
}
_ => ("HTTP/1.1 404 NOT FOUND", "404.html"),
};
// --snip--
let contents = fs::read_to_string(filename).unwrap();
let length = contents.len();
let response =
format!("{status_line}\r\nContent-Length: {length}\r\n\r\n{contents}");
stream.write_all(response.as_bytes()).unwrap();
}Теперь мы перешли с if на match, потому что у нас есть три случая. Нам
нужно явно сопоставлять срез request_line со строковыми литералами; match
не выполняет автоматическое взятие ссылки и разыменование так, как это делает
метод проверки равенства.
Первая ветвь такая же, как блок if из листинга 21-9. Вторая ветвь
соответствует запросу к /sleep. Когда такой запрос получен, сервер засыпает
на пять секунд перед отрисовкой успешной HTML-страницы. Третья ветвь такая же,
как блок else из листинга 21-9.
Вы можете видеть, насколько примитивен наш сервер: настоящие библиотеки обрабатывали бы распознавание нескольких запросов гораздо менее многословно!
Запустите сервер с помощью cargo run. Затем откройте два окна браузера: одно
для http://127.0.0.1:7878, а другое для
http://127.0.0.1:7878/sleep. Если вы несколько раз введете URI /, как
раньше, вы увидите, что он отвечает быстро. Но если вы введете /sleep, а
затем загрузите /, то увидите, что / ждет, пока sleep полностью проспит
свои пять секунд, прежде чем загрузиться.
Есть несколько техник, которые мы могли бы использовать, чтобы избежать накопления запросов за медленным запросом, включая использование async, как мы делали в главе 17; та, которую мы реализуем, — это пул потоков.
Улучшение пропускной способности с помощью пула потоков
Пул потоков — это группа созданных потоков, которые готовы и ждут обработки задачи. Когда программа получает новую задачу, она назначает один из потоков в пуле этой задаче, и этот поток обрабатывает задачу. Остальные потоки в пуле доступны для обработки любых других задач, которые поступят, пока первый поток занят обработкой. Когда первый поток заканчивает обработку своей задачи, он возвращается в пул простаивающих потоков, готовый обработать новую задачу. Пул потоков позволяет обрабатывать соединения конкурентно, увеличивая пропускную способность вашего сервера.
Мы ограничим количество потоков в пуле небольшим числом, чтобы защититься от DoS-атак; если бы наша программа создавала новый поток для каждого входящего запроса, кто-то, отправивший 10 миллионов запросов к нашему серверу, мог бы устроить хаос, израсходовав все ресурсы сервера и полностью остановив обработку запросов.
Итак, вместо создания неограниченного числа потоков у нас будет фиксированное
число потоков, ожидающих в пуле. Входящие запросы отправляются в пул для
обработки. Пул будет поддерживать очередь входящих запросов. Каждый поток в
пуле будет извлекать запрос из этой очереди, обрабатывать запрос, а затем
просить у очереди другой запрос. С такой схемой мы можем обрабатывать до
N запросов конкурентно, где N — количество потоков. Если каждый поток
отвечает на долго выполняющийся запрос, последующие запросы все равно могут
накапливаться в очереди, но мы увеличили количество долгих запросов, которые
можем обработать до достижения этой точки.
Эта техника — лишь один из многих способов улучшить пропускную способность веб-сервера. Другие варианты, которые можно изучить, — модель fork/join, однопоточная модель асинхронного ввода-вывода и многопоточная модель асинхронного ввода-вывода. Если вам интересна эта тема, можно подробнее почитать о других решениях и попробовать реализовать их; с низкоуровневым языком вроде Rust возможны все эти варианты.
Прежде чем начать реализовывать пул потоков, поговорим о том, как должно выглядеть использование пула. Когда вы пытаетесь проектировать код, написание клиентского интерфейса первым может помочь направить дизайн. Напишите API кода так, чтобы он был структурирован так, как вы хотите его вызывать; затем реализуйте функциональность внутри этой структуры, а не реализуйте функциональность и только потом проектируйте публичный API.
Подобно тому как в проекте главы 12 мы использовали разработку через тестирование, здесь мы будем использовать разработку, направляемую компилятором. Мы напишем код, который вызывает нужные нам функции, а затем посмотрим на ошибки компилятора, чтобы определить, что нужно изменить дальше, чтобы код заработал. Однако прежде чем это сделать, мы изучим технику, которую не собираемся использовать как отправную точку.
Создание потока для каждого запроса
Сначала рассмотрим, как мог бы выглядеть наш код, если бы он создавал новый поток для каждого соединения. Как упоминалось ранее, это не наш окончательный план из-за проблем с потенциальным созданием неограниченного количества потоков, но это отправная точка, чтобы сначала получить работающий многопоточный сервер. Затем мы добавим пул потоков как улучшение, и сравнивать два решения будет проще.
Листинг 21-11 показывает изменения, которые нужно внести в main, чтобы
создавать новый поток для обработки каждого потока данных внутри цикла for.
use std::{
fs,
io::{BufReader, prelude::*},
net::{TcpListener, TcpStream},
thread,
time::Duration,
};
fn main() {
let listener = TcpListener::bind("127.0.0.1:7878").unwrap();
for stream in listener.incoming() {
let stream = stream.unwrap();
thread::spawn(|| {
handle_connection(stream);
});
}
}
fn handle_connection(mut stream: TcpStream) {
let buf_reader = BufReader::new(&stream);
let request_line = buf_reader.lines().next().unwrap().unwrap();
let (status_line, filename) = match &request_line[..] {
"GET / HTTP/1.1" => ("HTTP/1.1 200 OK", "hello.html"),
"GET /sleep HTTP/1.1" => {
thread::sleep(Duration::from_secs(5));
("HTTP/1.1 200 OK", "hello.html")
}
_ => ("HTTP/1.1 404 NOT FOUND", "404.html"),
};
let contents = fs::read_to_string(filename).unwrap();
let length = contents.len();
let response =
format!("{status_line}\r\nContent-Length: {length}\r\n\r\n{contents}");
stream.write_all(response.as_bytes()).unwrap();
}Как вы узнали в главе 16, thread::spawn создаст новый поток, а затем
запустит код в замыкании в новом потоке. Если вы запустите этот код и загрузите
/sleep в браузере, а затем / еще в двух вкладках браузера, вы действительно
увидите, что запросам к / не нужно ждать завершения /sleep. Однако, как мы
уже упоминали, со временем это перегрузит систему, потому что вы будете
создавать новые потоки без какого-либо ограничения.
Возможно, вы также помните из главы 17, что это именно такая ситуация, где async и await действительно сияют! Держите это в уме, пока мы строим пул потоков, и подумайте, как все выглядело бы иначе или так же с async.
Создание конечного числа потоков
Мы хотим, чтобы наш пул потоков работал похожим и привычным образом, чтобы
переход от потоков к пулу потоков не требовал больших изменений в коде,
который использует наш API. Листинг 21-12 показывает гипотетический интерфейс
для структуры ThreadPool, которую мы хотим использовать вместо
thread::spawn.
use std::{
fs,
io::{BufReader, prelude::*},
net::{TcpListener, TcpStream},
thread,
time::Duration,
};
fn main() {
let listener = TcpListener::bind("127.0.0.1:7878").unwrap();
let pool = ThreadPool::new(4);
for stream in listener.incoming() {
let stream = stream.unwrap();
pool.execute(|| {
handle_connection(stream);
});
}
}
fn handle_connection(mut stream: TcpStream) {
let buf_reader = BufReader::new(&stream);
let request_line = buf_reader.lines().next().unwrap().unwrap();
let (status_line, filename) = match &request_line[..] {
"GET / HTTP/1.1" => ("HTTP/1.1 200 OK", "hello.html"),
"GET /sleep HTTP/1.1" => {
thread::sleep(Duration::from_secs(5));
("HTTP/1.1 200 OK", "hello.html")
}
_ => ("HTTP/1.1 404 NOT FOUND", "404.html"),
};
let contents = fs::read_to_string(filename).unwrap();
let length = contents.len();
let response =
format!("{status_line}\r\nContent-Length: {length}\r\n\r\n{contents}");
stream.write_all(response.as_bytes()).unwrap();
}ThreadPoolМы используем ThreadPool::new, чтобы создать новый пул потоков с настраиваемым
количеством потоков, в данном случае четырьмя. Затем в цикле for
pool.execute имеет интерфейс, похожий на thread::spawn, поскольку принимает
замыкание, которое пул должен выполнить для каждого потока данных. Нам нужно
реализовать pool.execute так, чтобы он принимал замыкание и передавал его
потоку в пуле для выполнения. Этот код пока не скомпилируется, но мы попробуем,
чтобы компилятор мог подсказать, как это исправить.
Создание ThreadPool с помощью разработки, направляемой компилятором
Внесите изменения из листинга 21-12 в src/main.rs, а затем используем ошибки
компилятора из cargo check, чтобы направлять нашу разработку. Вот первая
ошибка, которую мы получим:
$ cargo check
Checking hello v0.1.0 (file:///projects/hello)
error[E0433]: failed to resolve: use of undeclared type `ThreadPool`
--> src/main.rs:11:16
|
11 | let pool = ThreadPool::new(4);
| ^^^^^^^^^^ use of undeclared type `ThreadPool`
For more information about this error, try `rustc --explain E0433`.
error: could not compile `hello` (bin "hello") due to 1 previous error
Отлично! Эта ошибка говорит нам, что нужен тип или модуль ThreadPool, поэтому
сейчас мы его создадим. Наша реализация ThreadPool будет независима от вида
работы, которую выполняет веб-сервер. Поэтому переключим крейт hello с
бинарного крейта на библиотечный крейт, чтобы хранить в нем реализацию
ThreadPool. После перехода к библиотечному крейту мы также могли бы
использовать отдельную библиотеку пула потоков для любой работы, которую хотим
выполнять с помощью пула потоков, а не только для обслуживания веб-запросов.
Создайте файл src/lib.rs, содержащий следующее, что пока является самым
простым определением структуры ThreadPool, какое у нас может быть:
pub struct ThreadPool;Затем отредактируйте файл main.rs, чтобы ввести ThreadPool из библиотечного
крейта в область видимости, добавив следующий код в начало src/main.rs:
use hello::ThreadPool;
use std::{
fs,
io::{BufReader, prelude::*},
net::{TcpListener, TcpStream},
thread,
time::Duration,
};
fn main() {
let listener = TcpListener::bind("127.0.0.1:7878").unwrap();
let pool = ThreadPool::new(4);
for stream in listener.incoming() {
let stream = stream.unwrap();
pool.execute(|| {
handle_connection(stream);
});
}
}
fn handle_connection(mut stream: TcpStream) {
let buf_reader = BufReader::new(&stream);
let request_line = buf_reader.lines().next().unwrap().unwrap();
let (status_line, filename) = match &request_line[..] {
"GET / HTTP/1.1" => ("HTTP/1.1 200 OK", "hello.html"),
"GET /sleep HTTP/1.1" => {
thread::sleep(Duration::from_secs(5));
("HTTP/1.1 200 OK", "hello.html")
}
_ => ("HTTP/1.1 404 NOT FOUND", "404.html"),
};
let contents = fs::read_to_string(filename).unwrap();
let length = contents.len();
let response =
format!("{status_line}\r\nContent-Length: {length}\r\n\r\n{contents}");
stream.write_all(response.as_bytes()).unwrap();
}Этот код все еще не будет работать, но проверим его снова, чтобы получить следующую ошибку, которую нужно исправить:
$ cargo check
Checking hello v0.1.0 (file:///projects/hello)
error[E0599]: no function or associated item named `new` found for struct `ThreadPool` in the current scope
--> src/main.rs:12:28
|
12 | let pool = ThreadPool::new(4);
| ^^^ function or associated item not found in `ThreadPool`
For more information about this error, try `rustc --explain E0599`.
error: could not compile `hello` (bin "hello") due to 1 previous error
Эта ошибка указывает, что дальше нам нужно создать связанную функцию с именем
new для ThreadPool. Мы также знаем, что new должна иметь один параметр,
который может принять 4 как аргумент, и должна возвращать экземпляр
ThreadPool. Реализуем самую простую функцию new, которая будет обладать
этими характеристиками:
pub struct ThreadPool;
impl ThreadPool {
pub fn new(size: usize) -> ThreadPool {
ThreadPool
}
}Мы выбрали usize как тип параметра size, потому что знаем, что отрицательное
число потоков не имеет смысла. Мы также знаем, что будем использовать это 4
как количество элементов в коллекции потоков, а именно для этого и предназначен
тип usize, как обсуждалось в разделе «Целочисленные
типы» главы 3.
Проверим код снова:
$ cargo check
Checking hello v0.1.0 (file:///projects/hello)
error[E0599]: no method named `execute` found for struct `ThreadPool` in the current scope
--> src/main.rs:17:14
|
17 | pool.execute(|| {
| -----^^^^^^^ method not found in `ThreadPool`
For more information about this error, try `rustc --explain E0599`.
error: could not compile `hello` (bin "hello") due to 1 previous error
Теперь ошибка возникает потому, что у нас нет метода execute у ThreadPool.
Вспомните из раздела «Создание конечного числа
потоков», что мы решили:
наш пул потоков должен иметь интерфейс, похожий на thread::spawn. Кроме
того, мы реализуем функцию execute так, чтобы она принимала переданное ей
замыкание и отдавала его свободному потоку в пуле для выполнения.
Мы определим метод execute у ThreadPool, который принимает замыкание как
параметр. Вспомните из раздела «Перемещение захваченных значений из
замыканий» главы 13, что мы можем
принимать замыкания как параметры с тремя разными трейтами: Fn, FnMut и
FnOnce. Нам нужно решить, какой вид замыкания использовать здесь. Мы знаем,
что в итоге будем делать что-то похожее на реализацию thread::spawn из
стандартной библиотеки, поэтому можем посмотреть, какие ограничения есть у
сигнатуры thread::spawn на ее параметр. Документация показывает следующее:
pub fn spawn<F, T>(f: F) -> JoinHandle<T>
where
F: FnOnce() -> T,
F: Send + 'static,
T: Send + 'static,Параметр типа F — тот, который нас здесь интересует; параметр типа T
связан с возвращаемым значением, и сейчас он нас не волнует. Мы видим, что
spawn использует FnOnce как ограничение трейта для F. Вероятно, это то,
что нужно и нам, потому что в итоге мы передадим аргумент, полученный в
execute, в spawn. Мы можем быть еще более уверены, что FnOnce — нужный
нам трейт, потому что поток для выполнения запроса выполнит замыкание этого
запроса только один раз, что соответствует Once в FnOnce.
У параметра типа F также есть ограничение трейта Send и ограничение времени
жизни 'static, которые полезны в нашей ситуации: Send нужен, чтобы
передать замыкание из одного потока в другой, а 'static — потому что мы не
знаем, сколько времени поток будет выполнять замыкание. Создадим метод
execute у ThreadPool, который будет принимать обобщенный параметр типа F
с этими ограничениями:
pub struct ThreadPool;
impl ThreadPool {
// --snip--
pub fn new(size: usize) -> ThreadPool {
ThreadPool
}
pub fn execute<F>(&self, f: F)
where
F: FnOnce() + Send + 'static,
{
}
}Мы все еще используем () после FnOnce, потому что этот FnOnce
представляет замыкание, которое не принимает параметров и возвращает unit-тип
(). Как и в определениях функций, возвращаемый тип можно опустить из
сигнатуры, но даже если параметров нет, круглые скобки все равно нужны.
Опять же, это самая простая реализация метода execute: она ничего не делает,
но мы только пытаемся добиться компиляции кода. Проверим его снова:
$ cargo check
Checking hello v0.1.0 (file:///projects/hello)
Finished `dev` profile [unoptimized + debuginfo] target(s) in 0.24s
Он компилируется! Но обратите внимание: если вы попробуете cargo run и
сделаете запрос в браузере, то увидите в браузере ошибки, которые мы видели в
начале главы. Наша библиотека пока на самом деле не вызывает замыкание,
переданное в execute!
Примечание: поговорка, которую можно услышать о языках со строгими компиляторами, таких как Haskell и Rust, звучит так: «Если код компилируется, он работает». Но эта поговорка не является универсально верной. Наш проект компилируется, но он не делает абсолютно ничего! Если бы мы строили настоящий, полный проект, сейчас было бы хорошее время начать писать модульные тесты, чтобы проверить, что код компилируется и ведет себя так, как мы хотим.
Подумайте: что было бы здесь иначе, если бы мы собирались выполнять future вместо замыкания?
Проверка количества потоков в new
Мы ничего не делаем с параметрами new и execute. Давайте реализуем тела
этих функций с нужным нам поведением. Для начала подумаем о new. Ранее мы
выбрали беззнаковый тип для параметра size, потому что пул с отрицательным
числом потоков не имеет смысла. Однако пул с нулем потоков тоже не имеет
смысла, но ноль является вполне допустимым значением usize. Мы добавим код,
проверяющий, что size больше нуля перед возвратом экземпляра ThreadPool, и
заставим программу паниковать, если она получит ноль, используя макрос
assert!, как показано в листинге 21-13.
pub struct ThreadPool;
impl ThreadPool {
/// Create a new ThreadPool.
///
/// The size is the number of threads in the pool.
///
/// # Panics
///
/// The `new` function will panic if the size is zero.
pub fn new(size: usize) -> ThreadPool {
assert!(size > 0);
ThreadPool
}
// --snip--
pub fn execute<F>(&self, f: F)
where
F: FnOnce() + Send + 'static,
{
}
}ThreadPool::new, вызывающая панику при нулевом sizeМы также добавили документацию для нашего ThreadPool с помощью doc-комментариев.
Обратите внимание, что мы следовали хорошим практикам документирования,
добавив раздел, в котором указаны ситуации, когда функция может паниковать,
как обсуждалось в главе 14. Попробуйте выполнить cargo doc --open и
щелкнуть структуру ThreadPool, чтобы увидеть, как выглядит сгенерированная
документация для new!
Вместо добавления макроса assert!, как мы сделали здесь, мы могли бы
изменить new на build и возвращать Result, как делали с Config::build
в проекте ввода-вывода в листинге 12-9. Но в этом случае мы решили, что
попытка создать пул потоков без потоков должна быть невосстановимой ошибкой.
Если вы чувствуете в себе силы, попробуйте написать функцию с именем build
со следующей сигнатурой, чтобы сравнить ее с функцией new:
pub fn build(size: usize) -> Result<ThreadPool, PoolCreationError> {Создание места для хранения потоков
Теперь, когда у нас есть способ убедиться, что у нас допустимое количество
потоков для хранения в пуле, мы можем создать эти потоки и сохранить их в
структуре ThreadPool перед возвратом структуры. Но как «хранить» поток?
Давайте еще раз посмотрим на сигнатуру thread::spawn:
pub fn spawn<F, T>(f: F) -> JoinHandle<T>
where
F: FnOnce() -> T,
F: Send + 'static,
T: Send + 'static,Функция spawn возвращает JoinHandle<T>, где T — тип, возвращаемый
замыканием. Попробуем тоже использовать JoinHandle и посмотрим, что
произойдет. В нашем случае замыкания, которые мы передаем пулу потоков, будут
обрабатывать соединение и ничего не возвращать, поэтому T будет unit-типом
().
Код в листинге 21-14 скомпилируется, но пока не создает никаких потоков. Мы
изменили определение ThreadPool, чтобы оно содержало вектор экземпляров
thread::JoinHandle<()>, инициализировали вектор с емкостью size, настроили
цикл for, который будет выполнять некоторый код для создания потоков, и
вернули экземпляр ThreadPool, содержащий их.
use std::thread;
pub struct ThreadPool {
threads: Vec<thread::JoinHandle<()>>,
}
impl ThreadPool {
// --snip--
/// Create a new ThreadPool.
///
/// The size is the number of threads in the pool.
///
/// # Panics
///
/// The `new` function will panic if the size is zero.
pub fn new(size: usize) -> ThreadPool {
assert!(size > 0);
let mut threads = Vec::with_capacity(size);
for _ in 0..size {
// create some threads and store them in the vector
}
ThreadPool { threads }
}
// --snip--
pub fn execute<F>(&self, f: F)
where
F: FnOnce() + Send + 'static,
{
}
}ThreadPoolМы ввели std::thread в область видимости в библиотечном крейте, потому что
используем thread::JoinHandle как тип элементов вектора в ThreadPool.
После получения допустимого размера наш ThreadPool создает новый вектор,
который может содержать size элементов. Функция with_capacity выполняет ту
же задачу, что и Vec::new, но с важным отличием: она заранее выделяет место в
векторе. Поскольку мы знаем, что нужно хранить size элементов в векторе,
такое выделение памяти заранее немного эффективнее, чем использование
Vec::new, который изменяет свой размер по мере вставки элементов.
Когда вы снова выполните cargo check, он должен завершиться успешно.
Отправка кода из ThreadPool в поток
В цикле for в листинге 21-14 мы оставили комментарий о создании потоков.
Здесь мы посмотрим, как на самом деле создавать потоки. Стандартная библиотека
предоставляет thread::spawn как способ создания потоков, и thread::spawn
ожидает получить код, который поток должен выполнить сразу после создания.
Однако в нашем случае мы хотим создать потоки и заставить их ждать код,
который мы отправим позже. Реализация потоков в стандартной библиотеке не
включает способ сделать это; нам придется реализовать его вручную.
Мы реализуем это поведение, введя новую структуру данных между ThreadPool и
потоками, которая будет управлять этим новым поведением. Мы назовем эту
структуру данных Worker, что является распространенным термином в реализациях
пулов. Worker забирает код, который нужно выполнить, и выполняет этот код в
своем потоке.
Представьте людей, работающих на кухне в ресторане: работники ждут, пока поступят заказы от клиентов, а затем отвечают за то, чтобы взять эти заказы и выполнить их.
Вместо хранения вектора экземпляров JoinHandle<()> в пуле потоков мы будем
хранить экземпляры структуры Worker. Каждый Worker будет хранить один
экземпляр JoinHandle<()>. Затем мы реализуем метод у Worker, который будет
принимать замыкание с кодом для выполнения и отправлять его уже запущенному
потоку для выполнения. Мы также дадим каждому Worker id, чтобы при
журналировании или отладке различать разные экземпляры Worker в пуле.
Вот новый процесс, который будет происходить при создании ThreadPool. Код,
отправляющий замыкание в поток, мы реализуем после того, как настроим Worker
таким образом:
- Определить структуру
Worker, которая хранитidиJoinHandle<()>. - Изменить
ThreadPool, чтобы он хранил вектор экземпляровWorker. - Определить функцию
Worker::new, которая принимает числоidи возвращает экземплярWorker, хранящийidи поток, созданный с пустым замыканием. - В
ThreadPool::newиспользовать счетчик циклаfor, чтобы сгенерироватьid, создать новыйWorkerс этимidи сохранитьWorkerв векторе.
Если вы готовы к испытанию, попробуйте реализовать эти изменения самостоятельно перед тем, как смотреть код в листинге 21-15.
Готовы? Вот листинг 21-15 с одним из способов внести предыдущие изменения.
use std::thread;
pub struct ThreadPool {
workers: Vec<Worker>,
}
impl ThreadPool {
// --snip--
/// Create a new ThreadPool.
///
/// The size is the number of threads in the pool.
///
/// # Panics
///
/// The `new` function will panic if the size is zero.
pub fn new(size: usize) -> ThreadPool {
assert!(size > 0);
let mut workers = Vec::with_capacity(size);
for id in 0..size {
workers.push(Worker::new(id));
}
ThreadPool { workers }
}
// --snip--
pub fn execute<F>(&self, f: F)
where
F: FnOnce() + Send + 'static,
{
}
}
struct Worker {
id: usize,
thread: thread::JoinHandle<()>,
}
impl Worker {
fn new(id: usize) -> Worker {
let thread = thread::spawn(|| {});
Worker { id, thread }
}
}ThreadPool для хранения экземпляров Worker вместо потоков напрямуюМы изменили имя поля в ThreadPool с threads на workers, потому что теперь
оно хранит экземпляры Worker, а не экземпляры JoinHandle<()>. Мы используем
счетчик в цикле for как аргумент для Worker::new и сохраняем каждый новый
Worker в векторе с именем workers.
Внешнему коду (например, нашему серверу в src/main.rs) не нужно знать детали
реализации, связанные с использованием структуры Worker внутри ThreadPool,
поэтому мы делаем структуру Worker и ее функцию new приватными. Функция
Worker::new использует переданный ей id и сохраняет экземпляр
JoinHandle<()>, созданный путем запуска нового потока с пустым замыканием.
Примечание: если операционная система не может создать поток из-за нехватки системных ресурсов,
thread::spawnвызовет панику. Это приведет к панике всего нашего сервера, даже если создание некоторых потоков могло успешно завершиться. Ради простоты такое поведение приемлемо, но в промышленной реализации пула потоков вы, скорее всего, захотели бы использоватьstd::thread::Builderи его методspawn, который возвращаетResult.
Этот код скомпилируется и сохранит то количество экземпляров Worker, которое
мы указали как аргумент для ThreadPool::new. Но мы все еще не обрабатываем
замыкание, которое получаем в execute. Далее посмотрим, как это сделать.
Отправка запросов потокам через каналы
Следующая проблема, которую мы решим, состоит в том, что замыкания, переданные
в thread::spawn, не делают абсолютно ничего. Сейчас мы получаем замыкание,
которое хотим выполнить, в методе execute. Но нам нужно передать
thread::spawn замыкание для запуска, когда мы создаем каждый Worker во
время создания ThreadPool.
Мы хотим, чтобы только что созданные структуры Worker получали код для
выполнения из очереди, хранящейся в ThreadPool, и отправляли этот код своему
потоку для выполнения.
Каналы, о которых мы узнали в главе 16, — простой способ взаимодействия между
двумя потоками — идеально подходят для этого случая. Мы будем использовать
канал как очередь заданий, а execute будет отправлять задание из ThreadPool
экземплярам Worker, которые отправят задание своему потоку. Вот план:
ThreadPoolсоздаст канал и сохранит отправителя.- Каждый
Workerсохранит получателя. - Мы создадим новую структуру
Job, которая будет хранить замыкания, которые мы хотим отправлять по каналу. - Метод
executeотправит задание, которое хочет выполнить, через отправителя. - В своем потоке
Workerбудет циклически получать данные от своего получателя и выполнять замыкания любых полученных заданий.
Начнем с создания канала в ThreadPool::new и хранения отправителя в
экземпляре ThreadPool, как показано в листинге 21-16. Структура Job пока
ничего не хранит, но будет типом элементов, которые мы отправляем по каналу.
use std::{sync::mpsc, thread};
pub struct ThreadPool {
workers: Vec<Worker>,
sender: mpsc::Sender<Job>,
}
struct Job;
impl ThreadPool {
// --snip--
/// Create a new ThreadPool.
///
/// The size is the number of threads in the pool.
///
/// # Panics
///
/// The `new` function will panic if the size is zero.
pub fn new(size: usize) -> ThreadPool {
assert!(size > 0);
let (sender, receiver) = mpsc::channel();
let mut workers = Vec::with_capacity(size);
for id in 0..size {
workers.push(Worker::new(id));
}
ThreadPool { workers, sender }
}
// --snip--
pub fn execute<F>(&self, f: F)
where
F: FnOnce() + Send + 'static,
{
}
}
struct Worker {
id: usize,
thread: thread::JoinHandle<()>,
}
impl Worker {
fn new(id: usize) -> Worker {
let thread = thread::spawn(|| {});
Worker { id, thread }
}
}ThreadPool отправителя канала для экземпляров JobВ ThreadPool::new мы создаем новый канал и заставляем пул хранить
отправителя. Это успешно скомпилируется.
Попробуем передать получателя канала каждому Worker во время создания канала
пулом потоков. Мы знаем, что хотим использовать получателя в потоке, который
запускают экземпляры Worker, поэтому сошлемся на параметр receiver в
замыкании. Код в листинге 21-17 пока не совсем скомпилируется.
use std::{sync::mpsc, thread};
pub struct ThreadPool {
workers: Vec<Worker>,
sender: mpsc::Sender<Job>,
}
struct Job;
impl ThreadPool {
// --snip--
/// Create a new ThreadPool.
///
/// The size is the number of threads in the pool.
///
/// # Panics
///
/// The `new` function will panic if the size is zero.
pub fn new(size: usize) -> ThreadPool {
assert!(size > 0);
let (sender, receiver) = mpsc::channel();
let mut workers = Vec::with_capacity(size);
for id in 0..size {
workers.push(Worker::new(id, receiver));
}
ThreadPool { workers, sender }
}
// --snip--
pub fn execute<F>(&self, f: F)
where
F: FnOnce() + Send + 'static,
{
}
}
// --snip--
struct Worker {
id: usize,
thread: thread::JoinHandle<()>,
}
impl Worker {
fn new(id: usize, receiver: mpsc::Receiver<Job>) -> Worker {
let thread = thread::spawn(|| {
receiver;
});
Worker { id, thread }
}
}WorkerМы внесли несколько небольших и прямолинейных изменений: передаем получателя в
Worker::new, а затем используем его внутри замыкания.
Когда мы пытаемся проверить этот код, получаем такую ошибку:
$ cargo check
Checking hello v0.1.0 (file:///projects/hello)
error[E0382]: use of moved value: `receiver`
--> src/lib.rs:26:42
|
21 | let (sender, receiver) = mpsc::channel();
| -------- move occurs because `receiver` has type `std::sync::mpsc::Receiver<Job>`, which does not implement the `Copy` trait
...
25 | for id in 0..size {
| ----------------- inside of this loop
26 | workers.push(Worker::new(id, receiver));
| ^^^^^^^^ value moved here, in previous iteration of loop
|
note: consider changing this parameter type in method `new` to borrow instead if owning the value isn't necessary
--> src/lib.rs:47:33
|
47 | fn new(id: usize, receiver: mpsc::Receiver<Job>) -> Worker {
| --- in this method ^^^^^^^^^^^^^^^^^^^ this parameter takes ownership of the value
help: consider moving the expression out of the loop so it is only moved once
|
25 ~ let mut value = Worker::new(id, receiver);
26 ~ for id in 0..size {
27 ~ workers.push(value);
|
For more information about this error, try `rustc --explain E0382`.
error: could not compile `hello` (lib) due to 1 previous error
Код пытается передать receiver нескольким экземплярам Worker. Это не
сработает, как вы помните из главы 16: реализация каналов, которую
предоставляет Rust, — это несколько производителей и один потребитель. Это
означает, что мы не можем просто клонировать принимающий конец канала, чтобы
исправить этот код. Мы также не хотим отправлять сообщение несколько раз
нескольким потребителям; мы хотим один список сообщений с несколькими
экземплярами Worker, так чтобы каждое сообщение обрабатывалось один раз.
Кроме того, снятие задания с очереди канала включает изменение receiver,
поэтому потокам нужен безопасный способ совместно использовать и изменять
receiver; иначе мы могли бы получить гонки данных (как обсуждалось в главе
16).
Вспомните потокобезопасные умные указатели, обсуждавшиеся в главе 16: чтобы
разделять владение между несколькими потоками и позволять потокам изменять
значение, нужно использовать Arc<Mutex<T>>. Тип Arc позволит нескольким
экземплярам Worker владеть получателем, а Mutex гарантирует, что только
один Worker за раз получает задание от получателя. Листинг 21-18 показывает
изменения, которые нужно внести.
use std::{
sync::{Arc, Mutex, mpsc},
thread,
};
// --snip--
pub struct ThreadPool {
workers: Vec<Worker>,
sender: mpsc::Sender<Job>,
}
struct Job;
impl ThreadPool {
// --snip--
/// Create a new ThreadPool.
///
/// The size is the number of threads in the pool.
///
/// # Panics
///
/// The `new` function will panic if the size is zero.
pub fn new(size: usize) -> ThreadPool {
assert!(size > 0);
let (sender, receiver) = mpsc::channel();
let receiver = Arc::new(Mutex::new(receiver));
let mut workers = Vec::with_capacity(size);
for id in 0..size {
workers.push(Worker::new(id, Arc::clone(&receiver)));
}
ThreadPool { workers, sender }
}
// --snip--
pub fn execute<F>(&self, f: F)
where
F: FnOnce() + Send + 'static,
{
}
}
// --snip--
struct Worker {
id: usize,
thread: thread::JoinHandle<()>,
}
impl Worker {
fn new(id: usize, receiver: Arc<Mutex<mpsc::Receiver<Job>>>) -> Worker {
// --snip--
let thread = thread::spawn(|| {
receiver;
});
Worker { id, thread }
}
}Arc и MutexВ ThreadPool::new мы помещаем получателя в Arc и Mutex. Для каждого
нового Worker мы клонируем Arc, чтобы увеличить счетчик ссылок, благодаря
чему экземпляры Worker могут совместно владеть получателем.
С этими изменениями код компилируется! Мы приближаемся!
Реализация метода execute
Наконец реализуем метод execute у ThreadPool. Мы также изменим Job со
структуры на псевдоним типа для трейт-объекта, который хранит тип замыкания,
получаемого execute. Как обсуждалось в разделе «Синонимы типов и
псевдонимы типов» главы 20, псевдонимы типов
позволяют нам сокращать длинные типы для удобства использования. Посмотрите на
листинг 21-19.
use std::{
sync::{Arc, Mutex, mpsc},
thread,
};
pub struct ThreadPool {
workers: Vec<Worker>,
sender: mpsc::Sender<Job>,
}
// --snip--
type Job = Box<dyn FnOnce() + Send + 'static>;
impl ThreadPool {
// --snip--
/// Create a new ThreadPool.
///
/// The size is the number of threads in the pool.
///
/// # Panics
///
/// The `new` function will panic if the size is zero.
pub fn new(size: usize) -> ThreadPool {
assert!(size > 0);
let (sender, receiver) = mpsc::channel();
let receiver = Arc::new(Mutex::new(receiver));
let mut workers = Vec::with_capacity(size);
for id in 0..size {
workers.push(Worker::new(id, Arc::clone(&receiver)));
}
ThreadPool { workers, sender }
}
pub fn execute<F>(&self, f: F)
where
F: FnOnce() + Send + 'static,
{
let job = Box::new(f);
self.sender.send(job).unwrap();
}
}
// --snip--
struct Worker {
id: usize,
thread: thread::JoinHandle<()>,
}
impl Worker {
fn new(id: usize, receiver: Arc<Mutex<mpsc::Receiver<Job>>>) -> Worker {
let thread = thread::spawn(|| {
receiver;
});
Worker { id, thread }
}
}Job для Box с замыканием и отправка задания по каналуПосле создания нового экземпляра Job с помощью замыкания, полученного в
execute, мы отправляем это задание через отправляющий конец канала. Мы
вызываем unwrap у send на случай, если отправка завершится неудачно. Это
может произойти, например, если мы остановим выполнение всех наших потоков, то
есть принимающий конец перестанет получать новые сообщения. Сейчас мы не можем
остановить выполнение потоков: наши потоки продолжают выполняться, пока
существует пул. Причина, по которой мы используем unwrap, в том, что мы
знаем: случай ошибки не произойдет, но компилятор этого не знает.
Но мы еще не совсем закончили! В Worker замыкание, передаваемое
thread::spawn, все еще только ссылается на принимающий конец канала.
Вместо этого нам нужно, чтобы замыкание выполняло бесконечный цикл, запрашивая
у принимающего конца канала задание и выполняя его, когда оно получено. Внесем
изменение в Worker::new, показанное в листинге 21-20.
use std::{
sync::{Arc, Mutex, mpsc},
thread,
};
pub struct ThreadPool {
workers: Vec<Worker>,
sender: mpsc::Sender<Job>,
}
type Job = Box<dyn FnOnce() + Send + 'static>;
impl ThreadPool {
/// Create a new ThreadPool.
///
/// The size is the number of threads in the pool.
///
/// # Panics
///
/// The `new` function will panic if the size is zero.
pub fn new(size: usize) -> ThreadPool {
assert!(size > 0);
let (sender, receiver) = mpsc::channel();
let receiver = Arc::new(Mutex::new(receiver));
let mut workers = Vec::with_capacity(size);
for id in 0..size {
workers.push(Worker::new(id, Arc::clone(&receiver)));
}
ThreadPool { workers, sender }
}
pub fn execute<F>(&self, f: F)
where
F: FnOnce() + Send + 'static,
{
let job = Box::new(f);
self.sender.send(job).unwrap();
}
}
struct Worker {
id: usize,
thread: thread::JoinHandle<()>,
}
// --snip--
impl Worker {
fn new(id: usize, receiver: Arc<Mutex<mpsc::Receiver<Job>>>) -> Worker {
let thread = thread::spawn(move || {
loop {
let job = receiver.lock().unwrap().recv().unwrap();
println!("Worker {id} got a job; executing.");
job();
}
});
Worker { id, thread }
}
}WorkerЗдесь мы сначала вызываем lock у receiver, чтобы получить мьютекс, а затем
вызываем unwrap, чтобы паниковать при любых ошибках. Получение блокировки
может завершиться неудачно, если мьютекс находится в отравленном состоянии,
что может случиться, если какой-то другой поток запаниковал, удерживая
блокировку, вместо того чтобы освободить ее. В такой ситуации вызов unwrap,
чтобы этот поток запаниковал, — правильное действие. Можете заменить этот
unwrap на expect с сообщением об ошибке, которое для вас осмысленно.
Если мы получаем блокировку мьютекса, то вызываем recv, чтобы получить Job
из канала. Последний unwrap также пропускает любые ошибки здесь; они могут
возникнуть, если поток, владеющий отправителем, завершил работу, подобно тому,
как метод send возвращает Err, если получатель завершил работу.
Вызов recv блокирует выполнение, поэтому, если задания пока нет, текущий
поток будет ждать, пока задание не станет доступным. Mutex<T> гарантирует,
что только один поток Worker за раз пытается запросить задание.
Наш пул потоков теперь находится в рабочем состоянии! Выполните cargo run и
сделайте несколько запросов:
$ cargo run
Compiling hello v0.1.0 (file:///projects/hello)
warning: field `workers` is never read
--> src/lib.rs:7:5
|
6 | pub struct ThreadPool {
| ---------- field in this struct
7 | workers: Vec<Worker>,
| ^^^^^^^
|
= note: `#[warn(dead_code)]` on by default
warning: fields `id` and `thread` are never read
--> src/lib.rs:48:5
|
47 | struct Worker {
| ------ fields in this struct
48 | id: usize,
| ^^
49 | thread: thread::JoinHandle<()>,
| ^^^^^^
warning: `hello` (lib) generated 2 warnings
Finished `dev` profile [unoptimized + debuginfo] target(s) in 4.91s
Running `target/debug/hello`
Worker 0 got a job; executing.
Worker 2 got a job; executing.
Worker 1 got a job; executing.
Worker 3 got a job; executing.
Worker 0 got a job; executing.
Worker 2 got a job; executing.
Worker 1 got a job; executing.
Worker 3 got a job; executing.
Worker 0 got a job; executing.
Worker 2 got a job; executing.
Успех! Теперь у нас есть пул потоков, который выполняет соединения асинхронно. Никогда не создается больше четырех потоков, поэтому наша система не будет перегружена, если сервер получит много запросов. Если мы сделаем запрос к /sleep, сервер сможет обслуживать другие запросы, выполняя их в другом потоке.
Примечание: если открыть /sleep одновременно в нескольких окнах браузера, они могут загружаться по одному с интервалом в пять секунд. Некоторые веб-браузеры выполняют несколько экземпляров одного и того же запроса последовательно из соображений кеширования. Это ограничение вызвано не нашим веб-сервером.
Сейчас хороший момент остановиться и подумать, чем отличался бы код в листингах 21-18, 21-19 и 21-20, если бы мы использовали futures вместо замыкания для работы, которую нужно выполнить. Какие типы изменились бы? Как изменились бы сигнатуры методов, если вообще изменились бы? Какие части кода остались бы такими же?
После изучения цикла while let в главах 17 и 19 вы, возможно, задаетесь
вопросом, почему мы не написали код потока Worker, как показано в листинге
21-21.
use std::{
sync::{Arc, Mutex, mpsc},
thread,
};
pub struct ThreadPool {
workers: Vec<Worker>,
sender: mpsc::Sender<Job>,
}
type Job = Box<dyn FnOnce() + Send + 'static>;
impl ThreadPool {
/// Create a new ThreadPool.
///
/// The size is the number of threads in the pool.
///
/// # Panics
///
/// The `new` function will panic if the size is zero.
pub fn new(size: usize) -> ThreadPool {
assert!(size > 0);
let (sender, receiver) = mpsc::channel();
let receiver = Arc::new(Mutex::new(receiver));
let mut workers = Vec::with_capacity(size);
for id in 0..size {
workers.push(Worker::new(id, Arc::clone(&receiver)));
}
ThreadPool { workers, sender }
}
pub fn execute<F>(&self, f: F)
where
F: FnOnce() + Send + 'static,
{
let job = Box::new(f);
self.sender.send(job).unwrap();
}
}
struct Worker {
id: usize,
thread: thread::JoinHandle<()>,
}
// --snip--
impl Worker {
fn new(id: usize, receiver: Arc<Mutex<mpsc::Receiver<Job>>>) -> Worker {
let thread = thread::spawn(move || {
while let Ok(job) = receiver.lock().unwrap().recv() {
println!("Worker {id} got a job; executing.");
job();
}
});
Worker { id, thread }
}
}Worker::new с использованием while letЭтот код компилируется и запускается, но не приводит к желаемому поведению
потоков: медленный запрос все равно заставит другие запросы ждать обработки.
Причина довольно тонкая: у структуры Mutex нет публичного метода unlock,
потому что владение блокировкой основано на времени жизни MutexGuard<T>
внутри LockResult<MutexGuard<T>>, который возвращает метод lock. Во время
компиляции проверяющий заимствования затем может обеспечить правило, что
ресурс, защищенный Mutex, нельзя использовать, если мы не удерживаем
блокировку. Однако эта реализация также может привести к тому, что блокировка
будет удерживаться дольше, чем предполагалось, если мы невнимательны к времени
жизни MutexGuard<T>.
Код в листинге 21-20, который использует let job = receiver.lock().unwrap().recv().unwrap();, работает потому, что с let любые
временные значения, использованные в выражении справа от знака равенства,
немедленно сбрасываются, когда инструкция let заканчивается. Однако while let (а также if let и match) не сбрасывает временные значения до конца
соответствующего блока. В листинге 21-21 блокировка остается удержанной на все
время вызова job(), а значит, другие экземпляры Worker не могут получать
задания.
Корректное завершение работы и очистка ресурсов
Корректное завершение и очистка
Код в листинге 21-20 отвечает на запросы асинхронно с помощью пула потоков, как
мы и планировали. Мы получаем несколько предупреждений о полях workers, id
и thread, которые не используем напрямую; они напоминают нам, что мы ничего
не очищаем. Когда мы используем менее изящный метод
ctrl-C, чтобы остановить основной поток, все остальные
потоки тоже останавливаются немедленно, даже если они находятся в середине
обслуживания запроса.
Далее мы реализуем трейт Drop, чтобы вызывать join для каждого потока в
пуле, позволяя им завершить запросы, над которыми они работают, прежде чем
закрыться. Затем мы реализуем способ сообщать потокам, что им нужно перестать
принимать новые запросы и завершить работу. Чтобы увидеть этот код в действии,
мы изменим сервер так, чтобы он принимал только два запроса перед корректным
завершением своего пула потоков.
Стоит заметить по ходу дела: ничто из этого не влияет на части кода, которые отвечают за выполнение замыканий, поэтому все здесь было бы таким же, если бы мы использовали пул потоков для async runtime.
Реализация трейта Drop для ThreadPool
Начнем с реализации Drop для нашего пула потоков. Когда пул сбрасывается, все
наши потоки должны присоединиться, чтобы гарантировать завершение своей работы.
Листинг 21-22 показывает первую попытку реализации Drop; этот код пока не
совсем будет работать.
use std::{
sync::{Arc, Mutex, mpsc},
thread,
};
pub struct ThreadPool {
workers: Vec<Worker>,
sender: mpsc::Sender<Job>,
}
type Job = Box<dyn FnOnce() + Send + 'static>;
impl ThreadPool {
/// Create a new ThreadPool.
///
/// The size is the number of threads in the pool.
///
/// # Panics
///
/// The `new` function will panic if the size is zero.
pub fn new(size: usize) -> ThreadPool {
assert!(size > 0);
let (sender, receiver) = mpsc::channel();
let receiver = Arc::new(Mutex::new(receiver));
let mut workers = Vec::with_capacity(size);
for id in 0..size {
workers.push(Worker::new(id, Arc::clone(&receiver)));
}
ThreadPool { workers, sender }
}
pub fn execute<F>(&self, f: F)
where
F: FnOnce() + Send + 'static,
{
let job = Box::new(f);
self.sender.send(job).unwrap();
}
}
impl Drop for ThreadPool {
fn drop(&mut self) {
for worker in &mut self.workers {
println!("Shutting down worker {}", worker.id);
worker.thread.join().unwrap();
}
}
}
struct Worker {
id: usize,
thread: thread::JoinHandle<()>,
}
impl Worker {
fn new(id: usize, receiver: Arc<Mutex<mpsc::Receiver<Job>>>) -> Worker {
let thread = thread::spawn(move || {
loop {
let job = receiver.lock().unwrap().recv().unwrap();
println!("Worker {id} got a job; executing.");
job();
}
});
Worker { id, thread }
}
}Сначала мы проходим циклом по всем workers пула потоков. Мы используем
&mut, потому что self является изменяемой ссылкой, и нам также нужно иметь
возможность изменять worker. Для каждого worker мы печатаем сообщение о
том, что конкретный экземпляр Worker завершает работу, а затем вызываем
join у потока этого экземпляра Worker. Если вызов join завершится
неудачно, мы используем unwrap, чтобы Rust запаниковал и перешел к
некорректному завершению.
Вот ошибка, которую мы получаем при компиляции этого кода:
$ cargo check
Checking hello v0.1.0 (file:///projects/hello)
error[E0507]: cannot move out of `worker.thread` which is behind a mutable reference
--> src/lib.rs:52:13
|
52 | worker.thread.join().unwrap();
| ^^^^^^^^^^^^^ ------ `worker.thread` moved due to this method call
| |
| move occurs because `worker.thread` has type `JoinHandle<()>`, which does not implement the `Copy` trait
|
note: `JoinHandle::<T>::join` takes ownership of the receiver `self`, which moves `worker.thread`
--> /rustc/1159e78c4747b02ef996e55082b704c09b970588/library/std/src/thread/mod.rs:1921:17
For more information about this error, try `rustc --explain E0507`.
error: could not compile `hello` (lib) due to 1 previous error
Ошибка говорит нам, что мы не можем вызвать join, потому что у нас есть
только изменяемое заимствование каждого worker, а join забирает владение
своим аргументом. Чтобы решить эту проблему, нужно переместить поток из
экземпляра Worker, владеющего thread, чтобы join мог потребить поток.
Один способ сделать это — использовать тот же подход, что и в листинге 18-15.
Если бы Worker хранил Option<thread::JoinHandle<()>>, мы могли бы вызвать
метод take у Option, чтобы переместить значение из варианта Some и
оставить на его месте вариант None. Другими словами, у работающего Worker
в thread был бы вариант Some, а когда мы захотели бы очистить Worker, мы
заменили бы Some на None, чтобы у Worker больше не было потока для
запуска.
Однако единственный момент, когда это понадобилось бы, — сброс Worker. В
обмен на это нам пришлось бы работать с Option<thread::JoinHandle<()>>
везде, где мы обращаемся к worker.thread. Идиоматичный Rust довольно часто
использует Option, но когда вы ловите себя на том, что оборачиваете в
Option что-то, о чем знаете, что оно всегда будет присутствовать, как обходной
путь вроде этого, стоит поискать альтернативные подходы, чтобы сделать код чище
и менее склонным к ошибкам.
В этом случае существует лучшая альтернатива: метод Vec::drain. Он принимает
параметр диапазона, чтобы указать, какие элементы удалить из вектора, и
возвращает итератор этих элементов. Передача синтаксиса диапазона .. удалит
каждое значение из вектора.
Поэтому нам нужно обновить реализацию drop для ThreadPool вот так:
#![allow(unused)]
fn main() {
use std::{
sync::{Arc, Mutex, mpsc},
thread,
};
pub struct ThreadPool {
workers: Vec<Worker>,
sender: mpsc::Sender<Job>,
}
type Job = Box<dyn FnOnce() + Send + 'static>;
impl ThreadPool {
/// Create a new ThreadPool.
///
/// The size is the number of threads in the pool.
///
/// # Panics
///
/// The `new` function will panic if the size is zero.
pub fn new(size: usize) -> ThreadPool {
assert!(size > 0);
let (sender, receiver) = mpsc::channel();
let receiver = Arc::new(Mutex::new(receiver));
let mut workers = Vec::with_capacity(size);
for id in 0..size {
workers.push(Worker::new(id, Arc::clone(&receiver)));
}
ThreadPool { workers, sender }
}
pub fn execute<F>(&self, f: F)
where
F: FnOnce() + Send + 'static,
{
let job = Box::new(f);
self.sender.send(job).unwrap();
}
}
impl Drop for ThreadPool {
fn drop(&mut self) {
for worker in self.workers.drain(..) {
println!("Shutting down worker {}", worker.id);
worker.thread.join().unwrap();
}
}
}
struct Worker {
id: usize,
thread: thread::JoinHandle<()>,
}
impl Worker {
fn new(id: usize, receiver: Arc<Mutex<mpsc::Receiver<Job>>>) -> Worker {
let thread = thread::spawn(move || {
loop {
let job = receiver.lock().unwrap().recv().unwrap();
println!("Worker {id} got a job; executing.");
job();
}
});
Worker { id, thread }
}
}
}Это устраняет ошибку компилятора и не требует никаких других изменений в нашем
коде. Обратите внимание: поскольку drop может быть вызван во время паники,
unwrap также может запаниковать и вызвать двойную панику, которая немедленно
аварийно завершит программу и остановит любую выполняющуюся очистку. Для
примерной программы это допустимо, но для производственного кода не
рекомендуется.
Сигнал потокам прекратить ожидание заданий
Со всеми внесенными изменениями наш код компилируется без предупреждений.
Однако плохая новость в том, что этот код пока работает не так, как мы хотим.
Ключ находится в логике замыканий, выполняемых потоками экземпляров Worker:
сейчас мы вызываем join, но это не завершит потоки, потому что они вечно
выполняют loop в поисках заданий. Если мы попробуем сбросить наш ThreadPool
с текущей реализацией drop, основной поток заблокируется навсегда, ожидая
завершения первого потока.
Чтобы исправить эту проблему, нам понадобится изменение в реализации drop для
ThreadPool, а затем изменение в цикле Worker.
Сначала мы изменим реализацию drop для ThreadPool, чтобы явно сбросить
sender перед ожиданием завершения потоков. Листинг 21-23 показывает изменения
в ThreadPool для явного сброса sender. В отличие от потока, здесь нам
действительно нужно использовать Option, чтобы иметь возможность
переместить sender из ThreadPool с помощью Option::take.
use std::{
sync::{Arc, Mutex, mpsc},
thread,
};
pub struct ThreadPool {
workers: Vec<Worker>,
sender: Option<mpsc::Sender<Job>>,
}
// --snip--
type Job = Box<dyn FnOnce() + Send + 'static>;
impl ThreadPool {
/// Create a new ThreadPool.
///
/// The size is the number of threads in the pool.
///
/// # Panics
///
/// The `new` function will panic if the size is zero.
pub fn new(size: usize) -> ThreadPool {
// --snip--
assert!(size > 0);
let (sender, receiver) = mpsc::channel();
let receiver = Arc::new(Mutex::new(receiver));
let mut workers = Vec::with_capacity(size);
for id in 0..size {
workers.push(Worker::new(id, Arc::clone(&receiver)));
}
ThreadPool {
workers,
sender: Some(sender),
}
}
pub fn execute<F>(&self, f: F)
where
F: FnOnce() + Send + 'static,
{
let job = Box::new(f);
self.sender.as_ref().unwrap().send(job).unwrap();
}
}
impl Drop for ThreadPool {
fn drop(&mut self) {
drop(self.sender.take());
for worker in self.workers.drain(..) {
println!("Shutting down worker {}", worker.id);
worker.thread.join().unwrap();
}
}
}
struct Worker {
id: usize,
thread: thread::JoinHandle<()>,
}
impl Worker {
fn new(id: usize, receiver: Arc<Mutex<mpsc::Receiver<Job>>>) -> Worker {
let thread = thread::spawn(move || {
loop {
let job = receiver.lock().unwrap().recv().unwrap();
println!("Worker {id} got a job; executing.");
job();
}
});
Worker { id, thread }
}
}sender перед присоединением потоков WorkerСброс sender закрывает канал, что указывает: больше сообщений отправляться не
будет. Когда это происходит, все вызовы recv, которые экземпляры Worker
делают в бесконечном цикле, вернут ошибку. В листинге 21-24 мы изменяем цикл
Worker, чтобы в этом случае корректно выйти из цикла; это означает, что
потоки завершатся, когда реализация drop для ThreadPool вызовет для них
join.
use std::{
sync::{Arc, Mutex, mpsc},
thread,
};
pub struct ThreadPool {
workers: Vec<Worker>,
sender: Option<mpsc::Sender<Job>>,
}
type Job = Box<dyn FnOnce() + Send + 'static>;
impl ThreadPool {
/// Create a new ThreadPool.
///
/// The size is the number of threads in the pool.
///
/// # Panics
///
/// The `new` function will panic if the size is zero.
pub fn new(size: usize) -> ThreadPool {
assert!(size > 0);
let (sender, receiver) = mpsc::channel();
let receiver = Arc::new(Mutex::new(receiver));
let mut workers = Vec::with_capacity(size);
for id in 0..size {
workers.push(Worker::new(id, Arc::clone(&receiver)));
}
ThreadPool {
workers,
sender: Some(sender),
}
}
pub fn execute<F>(&self, f: F)
where
F: FnOnce() + Send + 'static,
{
let job = Box::new(f);
self.sender.as_ref().unwrap().send(job).unwrap();
}
}
impl Drop for ThreadPool {
fn drop(&mut self) {
drop(self.sender.take());
for worker in self.workers.drain(..) {
println!("Shutting down worker {}", worker.id);
worker.thread.join().unwrap();
}
}
}
struct Worker {
id: usize,
thread: thread::JoinHandle<()>,
}
impl Worker {
fn new(id: usize, receiver: Arc<Mutex<mpsc::Receiver<Job>>>) -> Worker {
let thread = thread::spawn(move || {
loop {
let message = receiver.lock().unwrap().recv();
match message {
Ok(job) => {
println!("Worker {id} got a job; executing.");
job();
}
Err(_) => {
println!("Worker {id} disconnected; shutting down.");
break;
}
}
}
});
Worker { id, thread }
}
}recv возвращает ошибкуЧтобы увидеть этот код в действии, изменим main, чтобы он принимал только два
запроса перед корректным завершением сервера, как показано в листинге 21-25.
use hello::ThreadPool;
use std::{
fs,
io::{BufReader, prelude::*},
net::{TcpListener, TcpStream},
thread,
time::Duration,
};
fn main() {
let listener = TcpListener::bind("127.0.0.1:7878").unwrap();
let pool = ThreadPool::new(4);
for stream in listener.incoming().take(2) {
let stream = stream.unwrap();
pool.execute(|| {
handle_connection(stream);
});
}
println!("Shutting down.");
}
fn handle_connection(mut stream: TcpStream) {
let buf_reader = BufReader::new(&stream);
let request_line = buf_reader.lines().next().unwrap().unwrap();
let (status_line, filename) = match &request_line[..] {
"GET / HTTP/1.1" => ("HTTP/1.1 200 OK", "hello.html"),
"GET /sleep HTTP/1.1" => {
thread::sleep(Duration::from_secs(5));
("HTTP/1.1 200 OK", "hello.html")
}
_ => ("HTTP/1.1 404 NOT FOUND", "404.html"),
};
let contents = fs::read_to_string(filename).unwrap();
let length = contents.len();
let response =
format!("{status_line}\r\nContent-Length: {length}\r\n\r\n{contents}");
stream.write_all(response.as_bytes()).unwrap();
}Вы не хотели бы, чтобы настоящий веб-сервер завершал работу после обслуживания только двух запросов. Этот код лишь демонстрирует, что корректное завершение и очистка работают как положено.
Метод take определен в трейте Iterator и ограничивает итерацию максимум
первыми двумя элементами. ThreadPool выйдет из области видимости в конце
main, и реализация drop будет выполнена.
Запустите сервер с помощью cargo run и сделайте три запроса. Третий запрос
должен завершиться ошибкой, а в терминале вы должны увидеть вывод, похожий на
этот:
$ cargo run
Compiling hello v0.1.0 (file:///projects/hello)
Finished `dev` profile [unoptimized + debuginfo] target(s) in 0.41s
Running `target/debug/hello`
Worker 0 got a job; executing.
Shutting down.
Shutting down worker 0
Worker 3 got a job; executing.
Worker 1 disconnected; shutting down.
Worker 2 disconnected; shutting down.
Worker 3 disconnected; shutting down.
Worker 0 disconnected; shutting down.
Shutting down worker 1
Shutting down worker 2
Shutting down worker 3
Вы можете увидеть другой порядок идентификаторов Worker и напечатанных
сообщений. Из сообщений видно, как работает этот код: экземпляры Worker 0 и
3 получили первые два запроса. Сервер перестал принимать соединения после
второго соединения, и реализация Drop для ThreadPool начинает выполняться
еще до того, как Worker 3 начинает свое задание. Сброс sender отключает все
экземпляры Worker и сообщает им, что нужно завершить работу. Каждый
экземпляр Worker печатает сообщение при отключении, а затем пул потоков
вызывает join, чтобы дождаться завершения каждого потока Worker.
Обратите внимание на один интересный аспект именно этого выполнения:
ThreadPool сбросил sender, и до того как какой-либо Worker получил
ошибку, мы попытались присоединить Worker 0. Worker 0 еще не получил ошибку
от recv, поэтому основной поток заблокировался, ожидая завершения Worker 0.
Тем временем Worker 3 получил задание, а затем все потоки получили ошибку.
Когда Worker 0 завершился, основной поток дождался завершения остальных
экземпляров Worker. К этому моменту все они вышли из своих циклов и
остановились.
Поздравляем! Теперь мы завершили наш проект: у нас есть базовый веб-сервер, который использует пул потоков, чтобы отвечать асинхронно. Мы можем выполнять корректное завершение сервера, которое очищает все потоки в пуле.
Вот полный код для справки:
use hello::ThreadPool;
use std::{
fs,
io::{BufReader, prelude::*},
net::{TcpListener, TcpStream},
thread,
time::Duration,
};
fn main() {
let listener = TcpListener::bind("127.0.0.1:7878").unwrap();
let pool = ThreadPool::new(4);
for stream in listener.incoming().take(2) {
let stream = stream.unwrap();
pool.execute(|| {
handle_connection(stream);
});
}
println!("Shutting down.");
}
fn handle_connection(mut stream: TcpStream) {
let buf_reader = BufReader::new(&stream);
let request_line = buf_reader.lines().next().unwrap().unwrap();
let (status_line, filename) = match &request_line[..] {
"GET / HTTP/1.1" => ("HTTP/1.1 200 OK", "hello.html"),
"GET /sleep HTTP/1.1" => {
thread::sleep(Duration::from_secs(5));
("HTTP/1.1 200 OK", "hello.html")
}
_ => ("HTTP/1.1 404 NOT FOUND", "404.html"),
};
let contents = fs::read_to_string(filename).unwrap();
let length = contents.len();
let response =
format!("{status_line}\r\nContent-Length: {length}\r\n\r\n{contents}");
stream.write_all(response.as_bytes()).unwrap();
}use std::{
sync::{Arc, Mutex, mpsc},
thread,
};
pub struct ThreadPool {
workers: Vec<Worker>,
sender: Option<mpsc::Sender<Job>>,
}
type Job = Box<dyn FnOnce() + Send + 'static>;
impl ThreadPool {
/// Create a new ThreadPool.
///
/// The size is the number of threads in the pool.
///
/// # Panics
///
/// The `new` function will panic if the size is zero.
pub fn new(size: usize) -> ThreadPool {
assert!(size > 0);
let (sender, receiver) = mpsc::channel();
let receiver = Arc::new(Mutex::new(receiver));
let mut workers = Vec::with_capacity(size);
for id in 0..size {
workers.push(Worker::new(id, Arc::clone(&receiver)));
}
ThreadPool {
workers,
sender: Some(sender),
}
}
pub fn execute<F>(&self, f: F)
where
F: FnOnce() + Send + 'static,
{
let job = Box::new(f);
self.sender.as_ref().unwrap().send(job).unwrap();
}
}
impl Drop for ThreadPool {
fn drop(&mut self) {
drop(self.sender.take());
for worker in &mut self.workers {
println!("Shutting down worker {}", worker.id);
if let Some(thread) = worker.thread.take() {
thread.join().unwrap();
}
}
}
}
struct Worker {
id: usize,
thread: Option<thread::JoinHandle<()>>,
}
impl Worker {
fn new(id: usize, receiver: Arc<Mutex<mpsc::Receiver<Job>>>) -> Worker {
let thread = thread::spawn(move || {
loop {
let message = receiver.lock().unwrap().recv();
match message {
Ok(job) => {
println!("Worker {id} got a job; executing.");
job();
}
Err(_) => {
println!("Worker {id} disconnected; shutting down.");
break;
}
}
}
});
Worker {
id,
thread: Some(thread),
}
}
}Здесь можно сделать больше! Если вы хотите продолжить улучшать этот проект, вот несколько идей:
- Добавьте больше документации к
ThreadPoolи его публичным методам. - Добавьте тесты функциональности библиотеки.
- Замените вызовы
unwrapболее надежной обработкой ошибок. - Используйте
ThreadPoolдля выполнения какой-нибудь задачи, кроме обслуживания веб-запросов. - Найдите крейт пула потоков на crates.io и реализуйте похожий веб-сервер с использованием этого крейта. Затем сравните его API и надежность с пулом потоков, который реализовали мы.
Итоги
Отличная работа! Вы добрались до конца книги! Мы хотим поблагодарить вас за то, что присоединились к нам в этом путешествии по Rust. Теперь вы готовы реализовывать собственные проекты на Rust и помогать с проектами других людей. Помните, что существует дружелюбное сообщество других Rustaceans, которые будут рады помочь вам с любыми трудностями, с которыми вы столкнетесь на своем пути в Rust.
Приложение
Следующие разделы содержат справочный материал, который может оказаться полезным в вашем изучении Rust.
A — Ключевые слова
Приложение A: Ключевые слова
Следующие списки содержат ключевые слова, зарезервированные для текущего или будущего использования языком Rust. Поэтому они не могут использоваться в качестве идентификаторов (за исключением сырых идентификаторов (raw identifiers), о которых мы поговорим в разделе «Сырые идентификаторы»). Идентификаторы — это имена функций, переменных, параметров, полей структур, модулей, крейтов, констант, макросов, статических значений, атрибутов, типов, трейтов или времён жизни.
Ключевые слова, используемые в настоящее время
Ниже приведён список ключевых слов, которые сейчас используются, а также описание их назначения.
as: Выполняет примитивное приведение типов (casting), позволяет уточнить конкретный трейт, содержащий элемент, или переименовать элементы в выраженияхuse.async: ВозвращаетFutureвместо блокировки текущего потока.await: Приостанавливает выполнение до тех пор, пока результатFutureне станет готов.break: Немедленно завершает цикл.const: Определяет константные элементы или константные сырые указатели.continue: Переходит к следующей итерации цикла.crate: В пути модуля указывает на корень крейта.dyn: Выполняет динамическую диспетчеризацию для объекта трейта.else: Резервный вариант для конструкций управления потокомifиif let.enum: Определяет перечисление.extern: Связывает внешнюю функцию или переменную.false: Логический литерал ложного значения.fn: Определяет функцию или тип указателя на функцию.for: Выполняет перебор элементов итератора, реализует трейт или определяет время жизни более высокого ранга.if: Выполняет ветвление на основе результата условного выражения.impl: Реализует встроенную (inherent) или трейтовую функциональность.in: Часть синтаксиса циклаfor.let: Привязывает значение к переменной.loop: Создаёт безусловный цикл.match: Сопоставляет значение с шаблонами.mod: Определяет модуль.move: Заставляет замыкание получить владение всеми захваченными значениями.mut: Обозначает изменяемость для ссылок, сырых указателей или привязок шаблонов.pub: Обозначает публичную видимость для полей структур, блоковimplили модулей.ref: Выполняет привязку по ссылке.return: Возвращает значение из функции.Self: Псевдоним типа для типа, который мы определяем или реализуем.self: Текущий объект метода или текущий модуль.static: Глобальная переменная или время жизни, существующее в течение выполнения всей программы.struct: Определяет структуру.super: Родительский модуль текущего модуля.trait: Определяет трейт.true: Логический литерал истинного значения.type: Определяет псевдоним типа или связанный тип.union: Определяет union; является ключевым словом только при использовании в объявленииunion.unsafe: Обозначает небезопасный код, функции, трейты или реализации.use: Импортирует символы в область видимости.where: Определяет ограничения для типа.while: Выполняет цикл на основе результата выражения.
Ключевые слова, зарезервированные для будущего использования
Следующие ключевые слова пока ещё не имеют функционального назначения, однако Rust зарезервировал их для возможного использования в будущем:
abstractbecomeboxdofinalgenmacrooverrideprivtrytypeofunsizedvirtualyield
Сырые идентификаторы
Сырые идентификаторы (raw identifiers) — это синтаксис, позволяющий использовать ключевые слова там, где это обычно запрещено. Для использования сырого идентификатора перед ключевым словом добавляется префикс r#.
Например, match является ключевым словом. Если попытаться скомпилировать следующую функцию, использующую match в качестве имени:
Имя файла: src/main.rs
fn match(needle: &str, haystack: &str) -> bool {
haystack.contains(needle)
}вы получите следующую ошибку:
error: expected identifier, found keyword `match`
--> src/main.rs:4:4
|
4 | fn match(needle: &str, haystack: &str) -> bool {
| ^^^^^ expected identifier, found keyword
Ошибка показывает, что ключевое слово match нельзя использовать в качестве идентификатора функции. Чтобы использовать match как имя функции, необходимо применить синтаксис сырого идентификатора:
Имя файла: src/main.rs
fn r#match(needle: &str, haystack: &str) -> bool {
haystack.contains(needle)
}
fn main() {
assert!(r#match("foo", "foobar"));
}Этот код скомпилируется без ошибок. Обратите внимание на префикс r# у имени функции как при её определении, так и при вызове функции в main.
Сырые идентификаторы позволяют использовать любое слово в качестве идентификатора, даже если это слово является зарезервированным ключевым словом. Это предоставляет больше свободы при выборе имён, а также позволяет интегрироваться с программами, написанными на языках, где такие слова не являются ключевыми.
Кроме того, сырые идентификаторы позволяют использовать библиотеки, написанные для другой редакции Rust (edition), чем используется в вашем крейте. Например, try не является ключевым словом в редакции 2015, но становится таковым в редакциях 2018, 2021 и 2024. Если ваш проект зависит от библиотеки, написанной для редакции 2015 и содержащей функцию try, вам потребуется использовать синтаксис сырого идентификатора — в данном случае r#try — чтобы вызвать эту функцию из вашего кода в более новых редакциях.
См. Приложение E для получения дополнительной информации о редакциях Rust.
B — Операторы и символы
Приложение B: Операторы и символы
Это приложение содержит глоссарий синтаксиса Rust, включая операторы и другие символы, которые используются как самостоятельно, так и в контексте путей, дженериков (generics), ограничений трейтов (trait bounds), макросов, атрибутов, комментариев, кортежей и скобок.
Операторы
Таблица B-1 содержит операторы Rust, пример использования оператора в контексте, краткое описание и информацию о том, может ли данный оператор быть перегружен. Если оператор поддерживает перегрузку, указывается соответствующий трейт, используемый для его перегрузки.
Таблица B-1: Операторы
| Оператор | Пример | Объяснение | Перегружаемый? |
|---|---|---|---|
! | ident!(...), ident!{...}, ident![...] | Разворачивание макроса | |
! | !expr | Побитовое или логическое отрицание | Not |
!= | expr != expr | Проверка на неравенство | PartialEq |
% | expr % expr | Остаток от деления | Rem |
%= | var %= expr | Остаток от деления с присваиванием | RemAssign |
& | &expr, &mut expr | Заимствование | |
& | &type, &mut type, &'a type, &'a mut type | Тип заимствованного указателя | |
& | expr & expr | Побитовое И | BitAnd |
&= | var &= expr | Побитовое И с присваиванием | BitAndAssign |
&& | expr && expr | Логическое И с коротким замыканием | |
* | expr * expr | Арифметическое умножение | Mul |
*= | var *= expr | Арифметическое умножение с присваиванием | MulAssign |
* | *expr | Разыменование | Deref |
* | *const type, *mut type | Сырой указатель | |
+ | trait + trait, 'a + trait | Составное ограничение типа | |
+ | expr + expr | Арифметическое сложение | Add |
+= | var += expr | Арифметическое сложение с присваиванием | AddAssign |
, | expr, expr | Разделитель аргументов и элементов | |
- | - expr | Арифметическое отрицание | Neg |
- | expr - expr | Арифметическое вычитание | Sub |
-= | var -= expr | Арифметическое вычитание с присваиванием | SubAssign |
-> | fn(...) -> type, |…| -> type | Возвращаемый тип функции или замыкания | |
. | expr.ident | Доступ к полю | |
. | expr.ident(expr, ...) | Вызов метода | |
. | expr.0, expr.1, and so on | Индексация кортежа | |
.. | .., expr.., ..expr, expr..expr | Литерал диапазона без включения правой границы | PartialOrd |
..= | ..=expr, expr..=expr | Литерал диапазона с включением правой границы | PartialOrd |
.. | ..expr | Синтаксис обновления литерала структуры | |
.. | variant(x, ..), struct_type { x, .. } | Шаблон «и всё остальное» | |
... | expr...expr | (Устарело, используйте ..=) Шаблон диапазона с включением границы | |
/ | expr / expr | Арифметическое деление | Div |
/= | var /= expr | Арифметическое деление с присваиванием | DivAssign |
: | pat: type, ident: type | Ограничения | |
: | ident: expr | Инициализация поля структуры | |
: | 'a: loop {...} | Метка цикла | |
; | expr; | Завершение инструкции или элемента | |
; | [...; len] | Часть синтаксиса массива фиксированного размера | |
<< | expr << expr | Сдвиг влево | Shl |
<<= | var <<= expr | Сдвиг влево с присваиванием | ShlAssign |
< | expr < expr | Сравнение «меньше чем» | PartialOrd |
<= | expr <= expr | Сравнение «меньше либо равно» | PartialOrd |
= | var = expr, ident = type | Присваивание/эквивалентность | |
== | expr == expr | Проверка на равенство | PartialEq |
=> | pat => expr | Часть синтаксиса ветви match | |
> | expr > expr | Сравнение «больше чем» | PartialOrd |
>= | expr >= expr | Сравнение «больше либо равно» | PartialOrd |
>> | expr >> expr | Сдвиг вправо | Shr |
>>= | var >>= expr | Сдвиг вправо с присваиванием | ShrAssign |
@ | ident @ pat | Привязка шаблона | |
^ | expr ^ expr | Побитовое исключающее ИЛИ | BitXor |
^= | var ^= expr | Побитовое исключающее ИЛИ с присваиванием | BitXorAssign |
| | pat | pat | Альтернативы шаблона | |
| | expr | expr | Побитовое ИЛИ | BitOr |
|= | var |= expr | Побитовое ИЛИ с присваиванием | BitOrAssign |
|| | expr || expr | Логическое ИЛИ с коротким замыканием | |
? | expr? | Распространение ошибок |
Символы, не являющиеся операторами
Следующие таблицы содержат все символы, которые не функционируют как операторы; то есть они не ведут себя как вызов функции или метода.
Таблица B-2 показывает символы, которые используются самостоятельно и допустимы в различных местах.
Таблица B-2: Независимый синтаксис
| Символ | Объяснение |
|---|---|
'ident | Именованное время жизни или метка цикла |
Digits immediately followed by u8, i32, f64, usize, and so on | Числовой литерал конкретного типа |
"..." | Строковый литерал |
r"...", r#"..."#, r##"..."##, and so on | Сырой строковый литерал; escape-последовательности не обрабатываются |
b"..." | Байтовый строковый литерал; создаёт массив байтов вместо строки |
br"...", br#"..."#, br##"..."##, and so on | Сырой байтовый литерал; комбинация сырого и байтового литералов |
'...' | Символьный литерал |
b'...' | ASCII-байтовый литерал |
|…| expr | Замыкание |
! | Всегда пустой нижний тип для расходящихся функций |
_ | «Игнорируемая» привязка шаблона; также используется для читаемости чисел |
Таблица B-3 показывает символы, которые используются в контексте пути через иерархию модулей к элементу.
Таблица B-3: Синтаксис путей
| Символ | Объяснение |
|---|---|
ident::ident | Путь пространства имён |
::path | Путь относительно корня крейта (то есть явно абсолютный путь) |
self::path | Путь относительно текущего модуля (то есть явно относительный путь) |
super::path | Путь относительно родительского модуля текущего модуля |
type::ident, <type as trait>::ident | Связанные константы, функции и типы |
<type>::... | Связанный элемент типа, который невозможно назвать напрямую (например, <&T>::..., <[T]>::... и т.д.) |
trait::method(...) | Уточнение вызова метода через указание трейта, который его определяет |
type::method(...) | Уточнение вызова метода через указание типа, для которого он определён |
<type as trait>::method(...) | Уточнение вызова метода через указание трейта и типа |
Таблица B-4 показывает символы, которые используются в контексте параметров дженериков.
Таблица B-4: Дженерики
| Символ | Объяснение |
|---|---|
path<...> | Указывает параметры дженерик-типа (например, Vec<u8>) |
path::<...>, method::<...> | Указывает параметры дженерик-типа, функции или метода в выражении; часто называется turbofish (например, "42".parse::<i32>()) |
fn ident<...> ... | Определение дженерик-функции |
struct ident<...> ... | Определение дженерик-структуры |
enum ident<...> ... | Определение дженерик-перечисления |
impl<...> ... | Определение дженерик-реализации |
for<...> type | Ограничения времени жизни более высокого ранга |
type<ident=type> | Дженерик-тип, где один или несколько связанных типов имеют конкретные значения (например, Iterator<Item=T>) |
Таблица B-5 показывает символы, которые используются в контексте ограничения параметров дженерик-типов через ограничения трейтов (trait bounds).
Таблица B-5: Ограничения трейтов
| Символ | Объяснение |
|---|---|
T: U | Дженерик-параметр T ограничен типами, реализующими U |
T: 'a | Дженерик-тип T должен жить дольше времени жизни 'a (то есть тип не может транзитивно содержать ссылки со временем жизни короче 'a) |
T: 'static | Дженерик-тип T не содержит заимствованных ссылок, кроме 'static |
'b: 'a | Время жизни 'b должно жить дольше времени жизни 'a |
T: ?Sized | Разрешает параметру дженерик-типа быть типом динамического размера |
'a + trait, trait + trait | Составное ограничение типа |
Таблица B-6 показывает символы, используемые в контексте вызова или определения макросов и задания атрибутов для элемента.
Таблица B-6: Макросы и атрибуты
| Символ | Объяснение |
|---|---|
#[meta] | Внешний атрибут |
#![meta] | Внутренний атрибут |
$ident | Подстановка макроса |
$ident:kind | Метапеременная макроса |
$(...)... | Повторение макроса |
ident!(...), ident!{...}, ident![...] | Вызов макроса |
Таблица B-7 показывает символы, создающие комментарии.
Таблица B-7: Комментарии
| Символ | Объяснение |
|---|---|
// | Однострочный комментарий |
//! | Внутренний однострочный doc-комментарий |
/// | Внешний однострочный doc-комментарий |
/*...*/ | Блочный комментарий |
/*!...*/ | Внутренний блочный doc-комментарий |
/**...*/ | Внешний блочный doc-комментарий |
Таблица B-8 показывает контексты, в которых используются круглые скобки.
Таблица B-8: Круглые скобки
| Символ | Объяснение |
|---|---|
() | Пустой кортеж (также известный как unit), как литерал и как тип |
(expr) | Выражение в круглых скобках |
(expr,) | Выражение кортежа с одним элементом |
(type,) | Тип кортежа с одним элементом |
(expr, ...) | Выражение кортежа |
(type, ...) | Тип кортежа |
expr(expr, ...) | Выражение вызова функции; также используется для инициализации кортежных struct и вариантов enum |
Таблица B-9 показывает контексты, в которых используются фигурные скобки.
Таблица B-9: Фигурные скобки
| Контекст | Объяснение |
|---|---|
{...} | Блочное выражение |
Type {...} | Литерал структуры |
Таблица B-10 показывает контексты, в которых используются квадратные скобки.
Таблица B-10: Квадратные скобки
| Контекст | Объяснение |
|---|---|
[...] | Литерал массива |
[expr; len] | Литерал массива, содержащий len копий expr |
[type; len] | Тип массива, содержащий len экземпляров type |
expr[expr] | Индексация коллекции; поддерживает перегрузку (Index, IndexMut) |
expr[..], expr[a..], expr[..b], expr[a..b] | Индексация коллекции с имитацией среза коллекции через Range, RangeFrom, RangeTo или RangeFull в качестве «индекса» |
C — Автоматически выводимые трейты
Приложение C: выводимые трейты
В разных местах книги мы обсуждали атрибут derive, который можно применить к
определению структуры или перечисления. Атрибут derive генерирует код,
который реализует трейт с собственной реализацией по умолчанию для типа,
аннотированного синтаксисом derive.
В этом приложении мы приводим справочник по всем трейтам стандартной библиотеки,
которые можно использовать с derive. Каждый раздел охватывает:
- Какие операторы и методы станут доступны при выводе этого трейта
- Что делает реализация трейта, предоставляемая
derive - Что реализация трейта означает для типа
- Условия, при которых вам разрешено или не разрешено реализовывать трейт
- Примеры операций, которым требуется этот трейт
Если вам нужно поведение, отличное от предоставляемого атрибутом derive,
обратитесь к документации стандартной библиотеки для каждого трейта, чтобы узнать подробности ручной реализации.
Перечисленные здесь трейты — единственные трейты, определенные стандартной
библиотекой, которые можно реализовать для ваших типов с помощью derive.
Другие трейты, определенные в стандартной библиотеке, не имеют разумного
поведения по умолчанию, поэтому вам нужно реализовывать их так, как имеет смысл
для того, чего вы пытаетесь достичь.
Пример трейта, который нельзя вывести, — Display, отвечающий за форматирование
для конечных пользователей. Всегда следует обдумывать подходящий способ
отображения типа конечному пользователю. Какие части типа конечному
пользователю должно быть разрешено видеть? Какие части он сочтет значимыми?
Какой формат данных будет для него наиболее уместным? Компилятор Rust не
обладает таким пониманием, поэтому не может предоставить вам подходящее
поведение по умолчанию.
Список выводимых трейтов, приведенный в этом приложении, не является
исчерпывающим: библиотеки могут реализовывать derive для своих собственных
трейтов, поэтому список трейтов, с которыми можно использовать derive,
действительно открыт. Реализация derive включает использование процедурного
макроса, что рассматривается в разделе «Пользовательские макросы
derive» главы 20.
Debug для вывода программисту
Трейт Debug включает отладочное форматирование в строках формата, которое
указывается добавлением :? внутри заполнителей {}.
Трейт Debug позволяет печатать экземпляры типа для целей отладки, чтобы вы и
другие программисты, использующие ваш тип, могли проверять экземпляр в
определенный момент выполнения программы.
Трейт Debug требуется, например, при использовании макроса assert_eq!. Этот
макрос печатает значения экземпляров, переданных как аргументы, если
утверждение о равенстве не выполняется, чтобы программисты могли увидеть,
почему два экземпляра не были равны.
PartialEq и Eq для сравнений на равенство
Трейт PartialEq позволяет сравнивать экземпляры типа для проверки равенства и
включает использование операторов == и !=.
Вывод PartialEq реализует метод eq. Когда PartialEq выводится для
структур, два экземпляра равны только если все поля равны, и экземпляры не
равны, если какие-либо поля не равны. Когда он выводится для перечислений,
каждый вариант равен самому себе и не равен другим вариантам.
Трейт PartialEq требуется, например, при использовании макроса assert_eq!,
которому нужно иметь возможность сравнить два экземпляра типа на равенство.
У трейта Eq нет методов. Его назначение — сигнализировать, что для каждого
значения аннотированного типа значение равно самому себе. Трейт Eq можно
применять только к типам, которые также реализуют PartialEq, хотя не все
типы, реализующие PartialEq, могут реализовать Eq. Один пример — типы чисел
с плавающей точкой: реализация чисел с плавающей точкой утверждает, что два
экземпляра значения not-a-number (NaN) не равны друг другу.
Пример случая, когда требуется Eq, — ключи в HashMap<K, V>, чтобы
HashMap<K, V> мог определить, одинаковы ли два ключа.
PartialOrd и Ord для сравнений порядка
Трейт PartialOrd позволяет сравнивать экземпляры типа для целей сортировки.
Тип, реализующий PartialOrd, можно использовать с операторами <, >, <=
и >=. Трейт PartialOrd можно применять только к типам, которые также
реализуют PartialEq.
Вывод PartialOrd реализует метод partial_cmp, который возвращает
Option<Ordering>; он будет None, когда переданные значения не образуют
порядок. Пример значения, которое не образует порядок, хотя большинство
значений этого типа можно сравнивать, — значение с плавающей точкой NaN.
Вызов partial_cmp с любым числом с плавающей точкой и значением с плавающей
точкой NaN вернет None.
Когда PartialOrd выводится для структур, он сравнивает два экземпляра,
сравнивая значение каждого поля в порядке, в котором поля появляются в
определении структуры. Когда он выводится для перечислений, варианты
перечисления, объявленные раньше в определении перечисления, считаются меньше
вариантов, перечисленных позже.
Трейт PartialOrd требуется, например, для метода gen_range из крейта
rand, который генерирует случайное значение в диапазоне, указанном выражением
диапазона.
Трейт Ord позволяет знать, что для любых двух значений аннотированного типа
будет существовать корректный порядок. Трейт Ord реализует метод cmp,
который возвращает Ordering, а не Option<Ordering>, потому что корректный
порядок всегда будет возможен. Трейт Ord можно применять только к типам,
которые также реализуют PartialOrd и Eq (а Eq требует PartialEq). Когда
он выводится для структур и перечислений, cmp ведет себя так же, как
выведенная реализация partial_cmp для PartialOrd.
Пример случая, когда требуется Ord, — хранение значений в BTreeSet<T>,
структуре данных, которая хранит данные на основе порядка сортировки значений.
Clone и Copy для дублирования значений
Трейт Clone позволяет явно создать глубокую копию значения, и процесс
дублирования может включать выполнение произвольного кода и копирование данных
из кучи. Дополнительные сведения о Clone см. в разделе «Взаимодействие
переменных и данных с
Clone» главы 4.
Вывод Clone реализует метод clone, который, будучи реализованным для всего
типа, вызывает clone для каждой части типа. Это означает, что все поля или
значения в типе также должны реализовывать Clone, чтобы можно было вывести
Clone.
Пример случая, когда требуется Clone, — вызов метода to_vec для среза. Срез
не владеет экземплярами типа, которые содержит, но вектор, возвращаемый из
to_vec, должен будет владеть своими экземплярами, поэтому to_vec вызывает
clone для каждого элемента. Следовательно, тип, хранящийся в срезе, должен
реализовывать Clone.
Трейт Copy позволяет дублировать значение, только копируя биты, хранящиеся в
стеке; никакой произвольный код не требуется. Дополнительные сведения о Copy
см. в разделе «Данные только на стеке:
Copy» главы 4.
Трейт Copy не определяет никаких методов, чтобы не дать программистам
перегружать эти методы и нарушать предположение, что произвольный код не
выполняется. Благодаря этому все программисты могут предполагать, что
копирование значения будет очень быстрым.
Вы можете вывести Copy для любого типа, все части которого реализуют Copy.
Тип, реализующий Copy, должен также реализовывать Clone, потому что тип,
реализующий Copy, имеет тривиальную реализацию Clone, выполняющую ту же
задачу, что и Copy.
Трейт Copy требуется редко; типам, реализующим Copy, доступны оптимизации,
а значит, вам не нужно вызывать clone, что делает код более кратким.
Все, что возможно с Copy, можно также выполнить с Clone, но код может быть
медленнее или ему придется использовать clone в отдельных местах.
Hash для отображения значения в значение фиксированного размера
Трейт Hash позволяет взять экземпляр типа произвольного размера и отобразить
этот экземпляр в значение фиксированного размера с помощью хеш-функции. Вывод
Hash реализует метод hash. Выведенная реализация метода hash объединяет
результат вызова hash для каждой части типа, а значит, все поля или значения
также должны реализовывать Hash, чтобы можно было вывести Hash.
Пример случая, когда требуется Hash, — хранение ключей в HashMap<K, V> для
эффективного хранения данных.
Default для значений по умолчанию
Трейт Default позволяет создать значение по умолчанию для типа. Вывод
Default реализует функцию default. Выведенная реализация функции default
вызывает функцию default для каждой части типа, а значит, все поля или
значения в типе также должны реализовывать Default, чтобы можно было вывести
Default.
Функция Default::default обычно используется в сочетании с синтаксисом
обновления структуры, обсуждавшимся в разделе «Создание экземпляров из других
экземпляров с помощью синтаксиса обновления
структуры» главы 5. Вы можете настроить несколько полей структуры, а затем
установить и использовать значение по умолчанию для остальных полей с помощью
..Default::default().
Трейт Default требуется, например, когда вы используете метод
unwrap_or_default для экземпляров Option<T>. Если Option<T> равен None,
метод unwrap_or_default вернет результат Default::default для типа T,
хранящегося в Option<T>.
D — Полезные инструменты разработки
Приложение D: полезные инструменты разработки
В этом приложении мы поговорим о некоторых полезных инструментах разработки, которые предоставляет проект Rust. Мы рассмотрим автоматическое форматирование, быстрые способы применять исправления предупреждений, линтер и интеграцию с IDE.
Автоматическое форматирование с помощью rustfmt
Инструмент rustfmt переформатирует ваш код в соответствии со стилем кода
сообщества. Многие совместные проекты используют rustfmt, чтобы избежать
споров о том, какой стиль использовать при написании Rust: все форматируют свой
код с помощью этого инструмента.
Установки Rust по умолчанию включают rustfmt, поэтому программы rustfmt и
cargo-fmt уже должны быть в вашей системе. Эти две команды аналогичны rustc
и cargo в том смысле, что rustfmt позволяет более тонко управлять
форматированием, а cargo-fmt понимает соглашения проекта, использующего
Cargo. Чтобы отформатировать любой проект Cargo, введите следующее:
$ cargo fmt
Выполнение этой команды переформатирует весь код Rust в текущем крейте. Это
должно изменить только стиль кода, а не семантику кода. Дополнительные сведения
о rustfmt см. в его документации.
Исправление кода с помощью rustfix
Инструмент rustfix входит в установки Rust и может автоматически исправлять
предупреждения компилятора, для которых есть ясный способ исправить проблему,
и это, скорее всего, именно то, что вам нужно. Вероятно, вы уже видели
предупреждения компилятора. Например, рассмотрим этот код:
Имя файла: src/main.rs
fn main() {
let mut x = 42;
println!("{x}");
}Здесь мы определяем переменную x как изменяемую, но на самом деле никогда ее
не изменяем. Rust предупреждает нас об этом:
$ cargo build
Compiling myprogram v0.1.0 (file:///projects/myprogram)
warning: variable does not need to be mutable
--> src/main.rs:2:9
|
2 | let mut x = 0;
| ----^
| |
| help: remove this `mut`
|
= note: `#[warn(unused_mut)]` on by default
Предупреждение предлагает удалить ключевое слово mut. Мы можем автоматически
применить это предложение с помощью инструмента rustfix, выполнив команду
cargo fix:
$ cargo fix
Checking myprogram v0.1.0 (file:///projects/myprogram)
Fixing src/main.rs (1 fix)
Finished dev [unoptimized + debuginfo] target(s) in 0.59s
Когда мы снова посмотрим на src/main.rs, увидим, что cargo fix изменил код:
Имя файла: src/main.rs
fn main() {
let x = 42;
println!("{x}");
}Переменная x теперь неизменяемая, и предупреждение больше не появляется.
Команду cargo fix также можно использовать для перехода вашего кода между
разными редакциями Rust. Редакции рассматриваются в приложении E.
Больше линтов с Clippy
Инструмент Clippy — это набор линтов для анализа вашего кода, чтобы вы могли находить распространенные ошибки и улучшать свой код Rust. Clippy входит в стандартные установки Rust.
Чтобы запустить линты Clippy для любого проекта Cargo, введите следующее:
$ cargo clippy
Например, предположим, что вы пишете программу, использующую приближение математической константы, такой как pi, как делает эта программа:
fn main() {
let x = 3.1415;
let r = 8.0;
println!("the area of the circle is {}", x * r * r);
}Выполнение cargo clippy в этом проекте приводит к такой ошибке:
error: approximate value of `f{32, 64}::consts::PI` found
--> src/main.rs:2:13
|
2 | let x = 3.1415;
| ^^^^^^
|
= note: `#[deny(clippy::approx_constant)]` on by default
= help: consider using the constant directly
= help: for further information visit https://rust-lang.github.io/rust-clippy/master/index.html#approx_constant
Эта ошибка сообщает, что в Rust уже определена более точная константа PI, и
что ваша программа была бы корректнее, если бы вы использовали эту константу.
Затем вы изменили бы код, чтобы использовать константу PI.
Следующий код не вызывает у Clippy никаких ошибок или предупреждений:
fn main() {
let x = std::f64::consts::PI;
let r = 8.0;
println!("the area of the circle is {}", x * r * r);
}Дополнительные сведения о Clippy см. в его документации.
Интеграция с IDE с помощью rust-analyzer
Чтобы помочь с интеграцией IDE, сообщество Rust рекомендует использовать
rust-analyzer. Этот инструмент представляет
собой набор ориентированных на компилятор утилит, которые говорят на Language
Server Protocol — спецификации, позволяющей IDE и языкам
программирования взаимодействовать друг с другом. rust-analyzer могут
использовать разные клиенты, например плагин Rust analyzer для Visual Studio
Code.
Посетите домашнюю страницу проекта
rust-analyzer, чтобы получить инструкции по установке, затем установите
поддержку языкового сервера в вашей конкретной IDE. Ваша IDE получит такие
возможности, как автодополнение, переход к определению и встроенные ошибки.
E — Редакции Rust
Приложение E: редакции
В главе 1 вы видели, что cargo new добавляет в файл Cargo.toml немного
метаданных о редакции. В этом приложении рассказывается, что это означает!
У языка Rust и компилятора шестинедельный цикл выпусков, а значит, пользователи получают постоянный поток новых возможностей. Другие языки программирования выпускают более крупные изменения реже; Rust выпускает меньшие обновления чаще. Через некоторое время все эти небольшие изменения накапливаются. Но от выпуска к выпуску бывает трудно оглянуться назад и сказать: «Ого, между Rust 1.10 и Rust 1.31 Rust сильно изменился!»
Примерно раз в три года команда Rust выпускает новую редакцию Rust. Каждая редакция объединяет появившиеся возможности в понятный пакет с полностью обновленной документацией и инструментами. Новые редакции поставляются как часть обычного шестинедельного процесса выпусков.
Редакции служат разным целям для разных людей:
- Для активных пользователей Rust новая редакция объединяет постепенные изменения в удобный для понимания пакет.
- Для тех, кто еще не использует Rust, новая редакция сигнализирует, что появились значительные улучшения, из-за которых на Rust, возможно, стоит взглянуть еще раз.
- Для тех, кто разрабатывает Rust, новая редакция дает всему проекту общую точку сосредоточения.
На момент написания этого текста доступны четыре редакции Rust: Rust 2015, Rust 2018, Rust 2021 и Rust 2024. Эта книга написана с использованием идиом редакции Rust 2024.
Ключ edition в Cargo.toml указывает, какую редакцию компилятор должен
использовать для вашего кода. Если ключ отсутствует, Rust использует 2015 как
значение редакции по причинам обратной совместимости.
Каждый проект может явно выбрать редакцию, отличную от редакции 2015 по умолчанию. Редакции могут содержать несовместимые изменения, например включение нового ключевого слова, которое конфликтует с идентификаторами в коде. Однако, пока вы явно не выберете эти изменения, ваш код продолжит компилироваться даже при обновлении используемой версии компилятора Rust.
Все версии компилятора Rust поддерживают любую редакцию, существовавшую до выпуска этого компилятора, и могут связывать вместе крейты любых поддерживаемых редакций. Изменения редакции влияют только на то, как компилятор изначально разбирает код. Поэтому если вы используете Rust 2015, а одна из ваших зависимостей использует Rust 2018, ваш проект скомпилируется и сможет использовать эту зависимость. Обратная ситуация, когда ваш проект использует Rust 2018, а зависимость использует Rust 2015, также работает.
Чтобы было ясно: большинство возможностей будут доступны во всех редакциях. Разработчики, использующие любую редакцию Rust, продолжат видеть улучшения по мере выхода новых стабильных выпусков. Однако в некоторых случаях, главным образом при добавлении новых ключевых слов, некоторые новые возможности могут быть доступны только в более поздних редакциях. Вам нужно будет переключить редакцию, если вы захотите воспользоваться такими возможностями.
Дополнительные сведения см. в The Rust Edition Guide. Это
полная книга, которая перечисляет различия между редакциями и объясняет, как
автоматически обновить ваш код до новой редакции с помощью cargo fix.
F — Переводы книги
Приложение F: переводы книги
Ресурсы на языках, отличных от английского. Большинство переводов все еще в работе; см. метку Translations, чтобы помочь или сообщить нам о новом переводе!
- Português (BR)
- Português (PT)
- 简体中文: KaiserY/trpl-zh-cn, gnu4cn/rust-lang-Zh_CN
- 正體中文
- Українська
- Español, alternate, Español por RustLangES
- Русский
- Русский (альтернатива)
- 한국어
- 日本語
- Français
- Polski
- Cebuano
- Tagalog
- Esperanto
- ελληνική
- Svenska
- Farsi, Persian (FA)
- Deutsch
- हिंदी
- ไทย
- Danske
- O’zbek
- Tiếng Việt
- Italiano
- বাংলা
G — Как создаётся Rust и «Nightly Rust»
Приложение G - Как создается Rust и “Nightly Rust”
Это приложение о том, как создается Rust и как это влияет на вас как разработчика Rust.
Стабильность без застоя
Как язык, Rust очень заботится о стабильности вашего кода. Мы хотим, чтобы Rust был надежным фундаментом, на котором можно строить, а если бы все постоянно менялось, это было бы невозможно. В то же время, если мы не можем экспериментировать с новыми возможностями, мы можем не обнаружить важные недостатки до их выпуска, когда уже не сможем ничего изменить.
Наше решение этой проблемы — то, что мы называем «стабильностью без застоя», и наш руководящий принцип таков: вам никогда не должно быть страшно обновляться до новой версии стабильного Rust. Каждое обновление должно быть безболезненным, но также должно приносить новые возможности, меньше ошибок и более быстрое время компиляции.
Чух-чух! Каналы релизов и поездка на поездах
Разработка Rust работает по расписанию поездов. То есть вся разработка ведется в основной ветке репозитория Rust. Релизы следуют модели release train, которая использовалась в Cisco IOS и других программных проектах. У Rust есть три канала релизов:
- Nightly
- Beta
- Stable
Большинство разработчиков Rust в основном используют стабильный канал, но те, кто хочет попробовать новые экспериментальные возможности, могут использовать nightly или beta.
Вот пример того, как работает процесс разработки и выпуска: предположим, что команда Rust работает над релизом Rust 1.5. Этот релиз состоялся в декабре 2015 года, но он даст нам реалистичные номера версий. В Rust добавляется новая возможность: новый коммит попадает в основную ветку. Каждую ночь создается новая nightly-версия Rust. Каждый день — день релиза, и эти релизы создаются нашей релизной инфраструктурой автоматически. Поэтому с течением времени наши релизы выглядят так, раз за ночь:
nightly: * - - * - - *
Каждые шесть недель приходит время готовить новый релиз! Ветка beta
репозитория Rust отделяется от основной ветки, используемой nightly. Теперь
есть два релиза:
nightly: * - - * - - *
|
beta: *
Большинство пользователей Rust не используют beta-релизы активно, но проверяют свой код на beta в системе CI, чтобы помочь Rust обнаружить возможные регрессии. Тем временем nightly-релиз по-прежнему выходит каждую ночь:
nightly: * - - * - - * - - * - - *
|
beta: *
Допустим, найдена регрессия. Хорошо, что у нас было время протестировать
beta-релиз до того, как регрессия пробралась в стабильный релиз! Исправление
применяется к основной ветке, чтобы nightly был исправлен, затем исправление
переносится обратно в ветку beta, и выпускается новый beta-релиз:
nightly: * - - * - - * - - * - - * - - *
|
beta: * - - - - - - - - *
Через шесть недель после создания первой beta наступает время стабильного
релиза! Ветка stable создается из ветки beta:
nightly: * - - * - - * - - * - - * - - * - * - *
|
beta: * - - - - - - - - *
|
stable: *
Ура! Rust 1.5 готов! Однако мы забыли одну вещь: поскольку шесть недель прошли,
нам также нужна новая beta следующей версии Rust, 1.6. Поэтому после того как
stable отделяется от beta, следующая версия beta снова отделяется от
nightly:
nightly: * - - * - - * - - * - - * - - * - * - *
| |
beta: * - - - - - - - - * *
|
stable: *
Это называется «моделью поездов», потому что каждые шесть недель релиз «отправляется со станции», но ему все еще нужно пройти путь через канал beta, прежде чем он прибудет как стабильный релиз.
Rust выпускается каждые шесть недель, как часы. Если вы знаете дату одного релиза Rust, вы можете узнать дату следующего: она будет на шесть недель позже. Приятная сторона релизов, запланированных каждые шесть недель, в том, что следующий поезд скоро придет. Если какая-то возможность не попала в конкретный релиз, не нужно беспокоиться: скоро будет другой! Это помогает снизить давление и не протаскивать потенциально недоработанные возможности близко к крайнему сроку релиза.
Благодаря этому процессу вы всегда можете проверить следующую сборку Rust и
самостоятельно убедиться, что обновиться до нее легко: если beta-релиз работает
не так, как ожидалось, вы можете сообщить об этом команде и добиться
исправления до следующего стабильного релиза! Поломки в beta-релизе
относительно редки, но rustc все еще является программным обеспечением, и
ошибки существуют.
Время сопровождения
Проект Rust поддерживает самую свежую стабильную версию. Когда выпускается новая стабильная версия, старая версия достигает конца жизненного цикла (EOL). Это означает, что каждая версия поддерживается шесть недель.
Нестабильные возможности
У этой модели релизов есть еще одна особенность: нестабильные возможности. Rust использует технику под названием «флаги возможностей» (feature flags), чтобы определять, какие возможности включены в данном релизе. Если новая возможность активно разрабатывается, она попадает в основную ветку и, следовательно, в nightly, но за флагом возможности. Если вы как пользователь хотите попробовать возможность, находящуюся в процессе разработки, вы можете это сделать, но должны использовать nightly-релиз Rust и аннотировать исходный код соответствующим флагом, чтобы явно включить эту возможность.
Если вы используете beta- или stable-релиз Rust, вы не можете использовать никакие флаги возможностей. Это ключ, который позволяет нам получить практический опыт использования новых возможностей до того, как мы навсегда объявим их стабильными. Те, кто хочет использовать самый передний край, могут это сделать, а те, кто хочет максимально надежного опыта, могут оставаться на stable и знать, что их код не сломается. Стабильность без застоя.
Эта книга содержит информацию только о стабильных возможностях, поскольку возможности в разработке все еще меняются, и они наверняка будут отличаться между моментом написания этой книги и моментом, когда их включат в стабильные сборки. Документацию по возможностям только для nightly можно найти онлайн.
Rustup и роль Rust Nightly
Rustup позволяет легко переключаться между разными каналами релизов Rust глобально или для отдельного проекта. По умолчанию у вас будет установлен стабильный Rust. Например, чтобы установить nightly:
$ rustup toolchain install nightly
С помощью rustup также можно увидеть все установленные у вас toolchains
(релизы Rust и связанные компоненты). Вот пример на одном из компьютеров
авторов под Windows:
> rustup toolchain list
stable-x86_64-pc-windows-msvc (default)
beta-x86_64-pc-windows-msvc
nightly-x86_64-pc-windows-msvc
Как видите, стабильный toolchain используется по умолчанию. Большинство
пользователей Rust большую часть времени используют stable. Возможно, большую
часть времени вы захотите использовать stable, но применять nightly в
конкретном проекте, потому что вам важна передовая возможность. Для этого можно
использовать rustup override в директории этого проекта, чтобы установить
nightly toolchain как тот, который rustup должен использовать, когда вы
находитесь в этой директории:
$ cd ~/projects/needs-nightly
$ rustup override set nightly
Теперь каждый раз, когда вы вызываете rustc или cargo внутри
~/projects/needs-nightly, rustup будет следить за тем, чтобы вы
использовали nightly Rust, а не stable Rust по умолчанию. Это удобно, когда у
вас много проектов Rust!
Процесс RFC и команды
Так как же узнать об этих новых возможностях? Модель разработки Rust следует процессу Request For Comments (RFC). Если вы хотите улучшения в Rust, вы можете написать предложение, называемое RFC.
Любой может писать RFC для улучшения Rust, а предложения рассматриваются и обсуждаются командой Rust, состоящей из множества тематических подкоманд. Полный список команд есть на сайте Rust; он включает команды для каждой области проекта: дизайн языка, реализация компилятора, инфраструктура, документация и многое другое. Соответствующая команда читает предложение и комментарии, пишет собственные комментарии, и в конечном итоге достигается консенсус о принятии или отклонении возможности.
Если возможность принята, в репозитории Rust открывается issue, и кто-то может ее реализовать. Человек, который ее реализует, вполне может оказаться не тем, кто изначально предложил эту возможность! Когда реализация готова, она попадает в основную ветку за feature gate, как мы обсуждали в разделе «Нестабильные возможности».
Через некоторое время, когда разработчики Rust, использующие nightly-релизы, смогут попробовать новую возможность, участники команды обсудят возможность, то, как она показала себя в nightly, и решат, должна ли она попасть в stable Rust или нет. Если решение — двигаться дальше, feature gate удаляется, и возможность теперь считается стабильной! Она едет на поездах в новый стабильный релиз Rust.